Download PDF
Download page How to manage category scheme settings.
How to manage category scheme settings
Set image thumbnail size
You can choose the appropriate size of image thumbnails for each category scheme.
- Open the Jira administration console.
- Select the Manage apps tab.
- On the sidebar, locate Smart Attachments > Category Schemes.
- On the list with category schemes, locate the one you want to edit.
- Click the More button.
- Select Edit.
- Select the appropriate size of image thumbnails from the following ones:
- 50x35 px
- 50x50 px
- 75x50 px
- 75x75 px
- 100x70 px
- 100x100 px
- 150x110 px
- 150x150 px
- 200x145 px
- 200x200 px
- Click Save.
The default size of image thumbnails in Jira is 200x200 px.
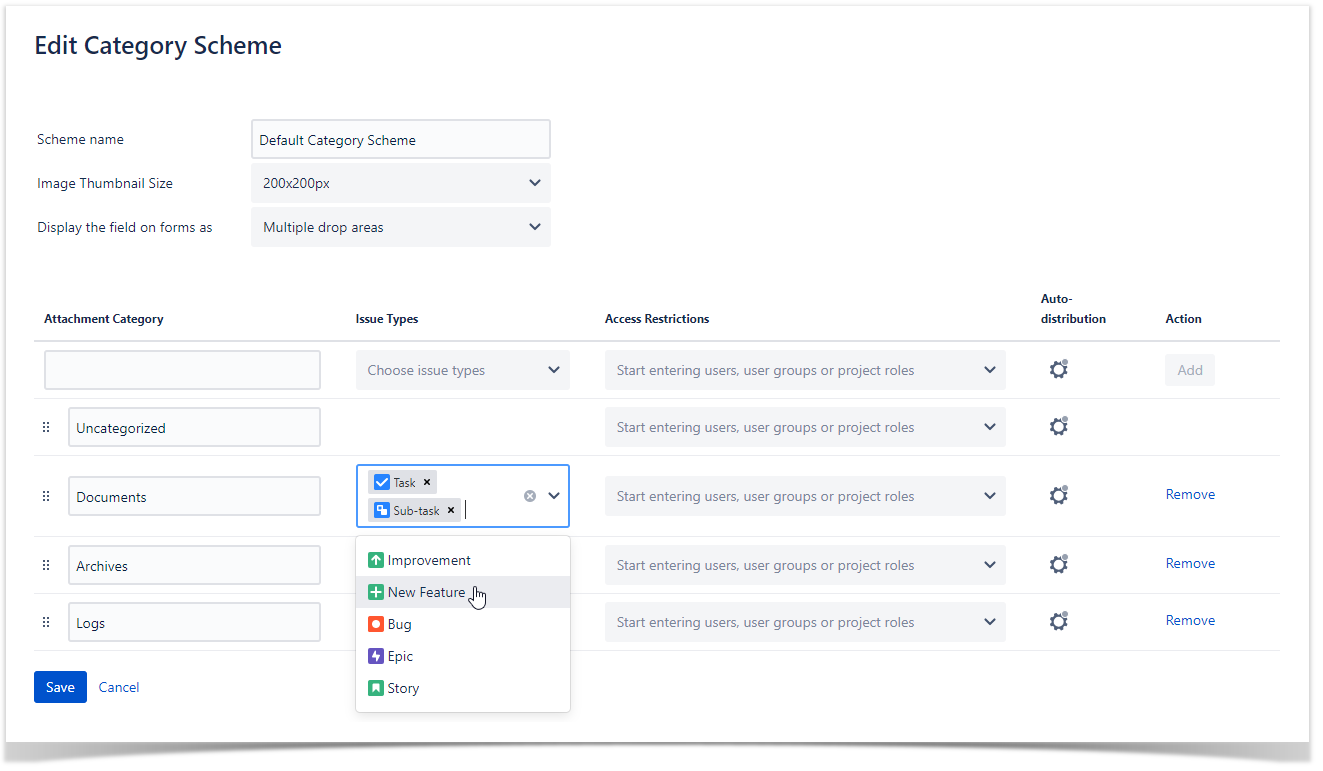
Configure the look of the Smart Attachment field
Since Smart Attachments 1.17.2, you can configure the look of the Attachment field on transition forms.
- Open the category scheme for editing.
- In the Display the filed on forms as option, select the look of the Attachment field, as follows:
- Multiple drop areas - allows you to upload files to multiple categories on transition forms
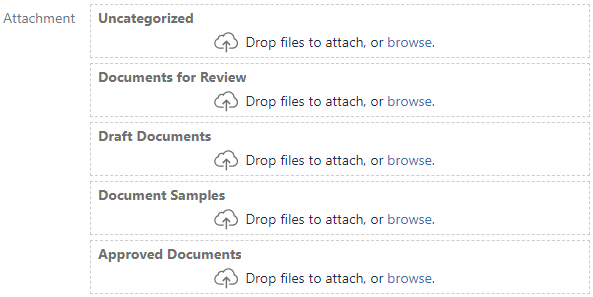
- Single drop area with the category selection box - allows you to upload files into one category only

3. Click Save.
Manage attachment categories of the scheme
You can manage categories within the category scheme when you create a new category scheme or later during its editing. Smart Attachments for Jira allows to:
- add scheme categories
- edit scheme categories
- delete scheme categories
Create a new category
- Above the list with categories, locate the Attachment Category box to enter a category name.
- Enter the category name.
- Click Add.
- Click Save.
You can create as many scheme categories as you need. By default, you have one category in each new scheme - Uncategorized. It will be presented in all issue types and will be visible even when empty. You cannot delete the default category. You can only rename it.
Edit the category name
- On the list with categories, locate the one you want to edit.
- Position the mouse pointer within the box with the category name.
- Update the category name.
- When complete, click Save.
Once you change the shared category scheme, all the modifications will be propagated to all projects associated with this scheme.
Delete the category
- On the list with categories, locate the one you want to delete.
- Click Remove.
- When complete, click Save.
When you delete the category, all the attachments stored within it will be moved to Uncategorized automatically. If you renamed the default category, they will still be put into it.
Manage category visibility per issue types
You can manage the visibility of categories in specific issue types. This way you can show a category in one issue type, and hide it in another issue type. You can use this to hide unnecessary categories and save a bit of screen space.
To set category visibility for issue types:
- Locate the category which visibility per issue type you want to configure.
- Select issue types in which you want to show the category.
- When complete, click Save.
To remove an issue type:
- Locate the issue type you want to remove in a specific category.
- Click the Remove icon within the issue type label
 .
. - When complete, click Save.
To remove all issue types and make the category visible in all issue types, click the ![]() icon. Click Save.
icon. Click Save.
By default, all categories within the scheme are shown in all issue types.
You cannot set visibility of the default category (Uncategorized) in different issue types.
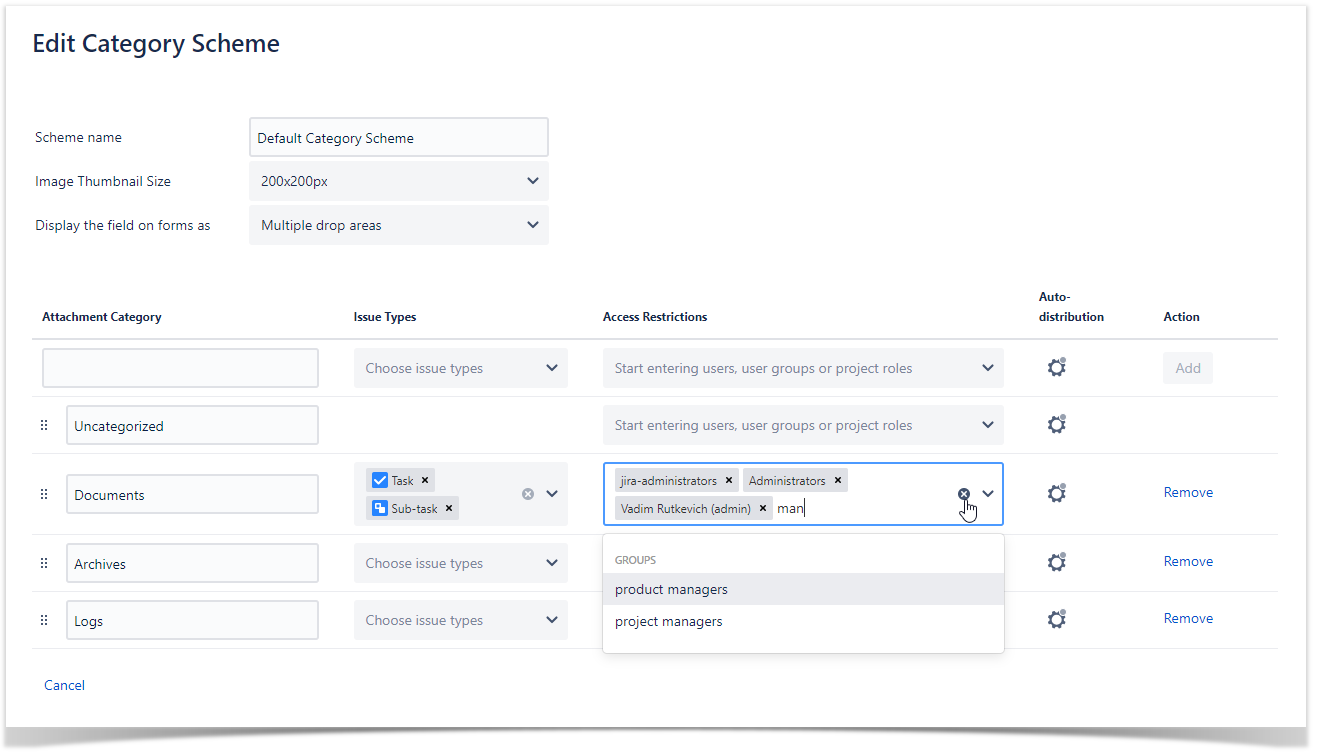
Manage access restrictions for categories
You can set up access restrictions for categories. While configuring access restrictions, you need to consider which type of category scheme you are using. For shared category schemes, you need to consider that the same user may have different roles. In this case, the user can get access to categories that should be hidden from this user.
Set access restrictions for a category
- Locate the category for which you want to set access restrictions.
- Start entering the name of a user, user group, or project role.
- Select the appropriate entry from the list of matches.
- When complete, click Save.
Remove a user/user group/project role from access restrictions
- Locate the user/user groups/project role you want to remove from access restrictions of a specific category.
- Click the Remove icon within the label
 .
. - When complete, click Save.
To clear all access restrictions for a specific category, click the ![]() icon. Click Save.
icon. Click Save.
Manage auto-distribution rules for categories
You can configure auto-distribution rules for categories. These rules will allow the app to automatically categorize uploaded files according to the pre-defined rules.
To set auto-distribution rules for a category:
- On the list with categories, locate the one for which you want to configure auto-distribution rules.
- Click the
 or
or  icon. The look of the icon may differ depending on the already configured auto-distribution rule.
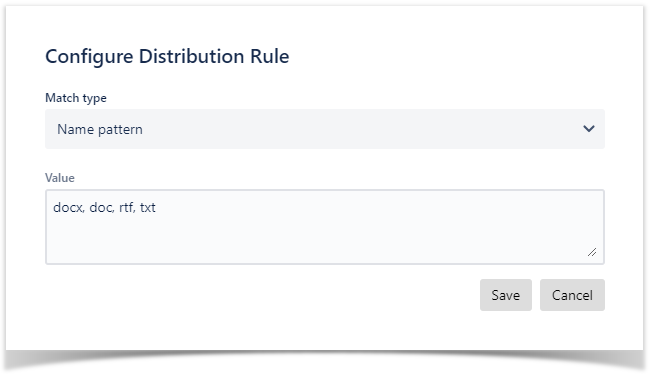
 - In the Configure Distribution Rule form, define the following parameters:
- Match type - select the way to match files for automatic distribution across categories:
- Name pattern - naming pattern for simple cases
- Regexp - regular expression for complex cases
- Value - enter the value for the selected match type.
- Match type - select the way to match files for automatic distribution across categories:
- When complete, click Save.
- Save the category scheme.
Regular expressions allow you to quickly enter the flexible query for matching specific attachments in categories. For example, if you want to proceed only with attachments of *.docx or *.pdf formats, you need to enter the following regular expression: '(.+?)(.docx|.pdf)$'.
Note that the app doesn't consider flags of regular expressions
It means that if you can't use any of the following flags when creating a regular expression for the app:
- g : matches the pattern multiple times
- i : makes the regex case insensitive
- m : enables multi-line mode
- u : enables support for unicode
- s : causes the . to also match new line characters
However, you can rewrite RegExp without flags to satisfy your needs.
Note that the app doesn't consider incoming mail attachments. The attachments received with an Email Handler don't go through auto-distribution