After installing Checklists for Jira (Templates & Automation), adding checklists to your Jira issues is simple and helps you manage tasks more efficiently.
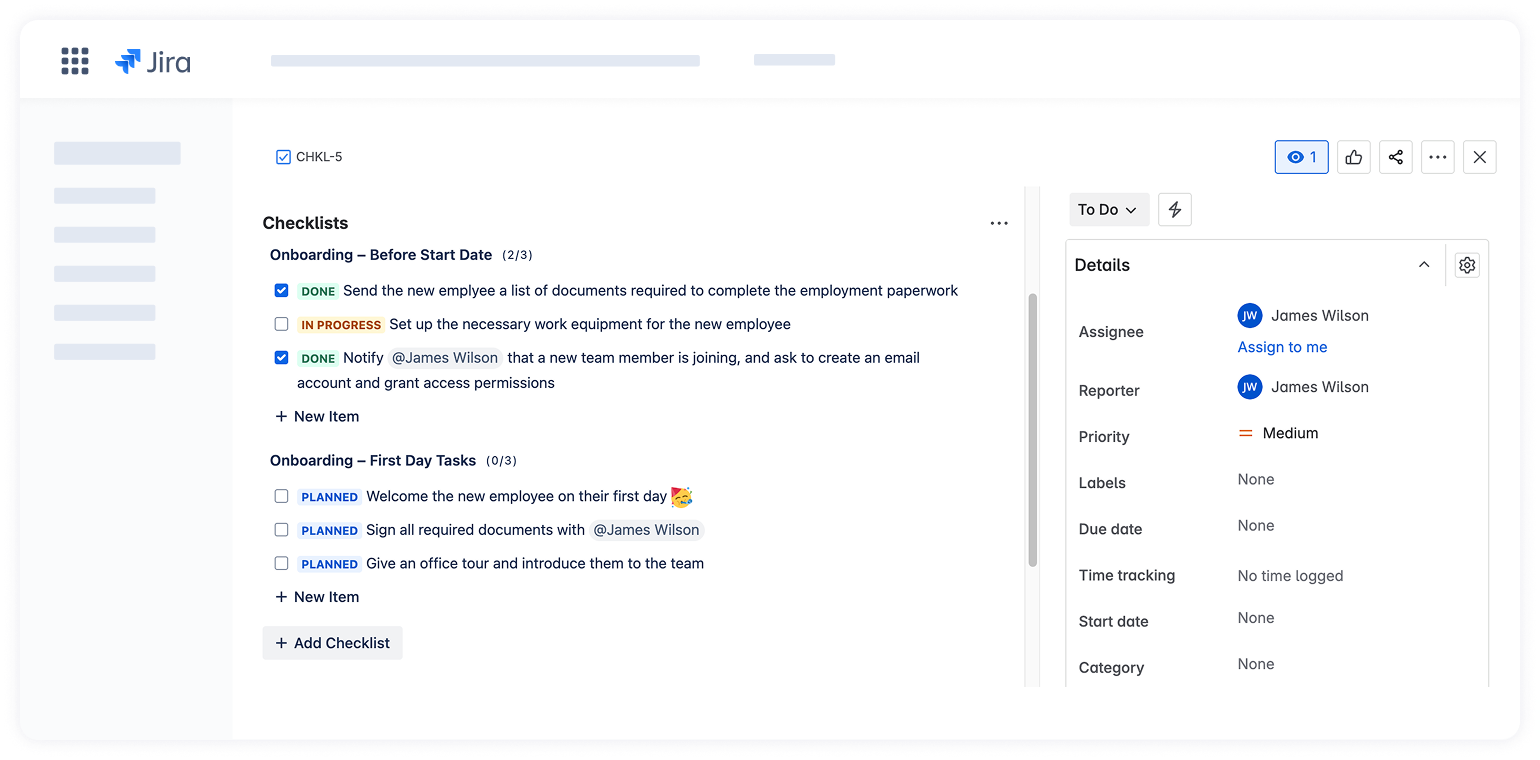
You can create multiple checklists in the same issue to separate different workflows or team responsibilities.
How to add Checklists to Jira work item
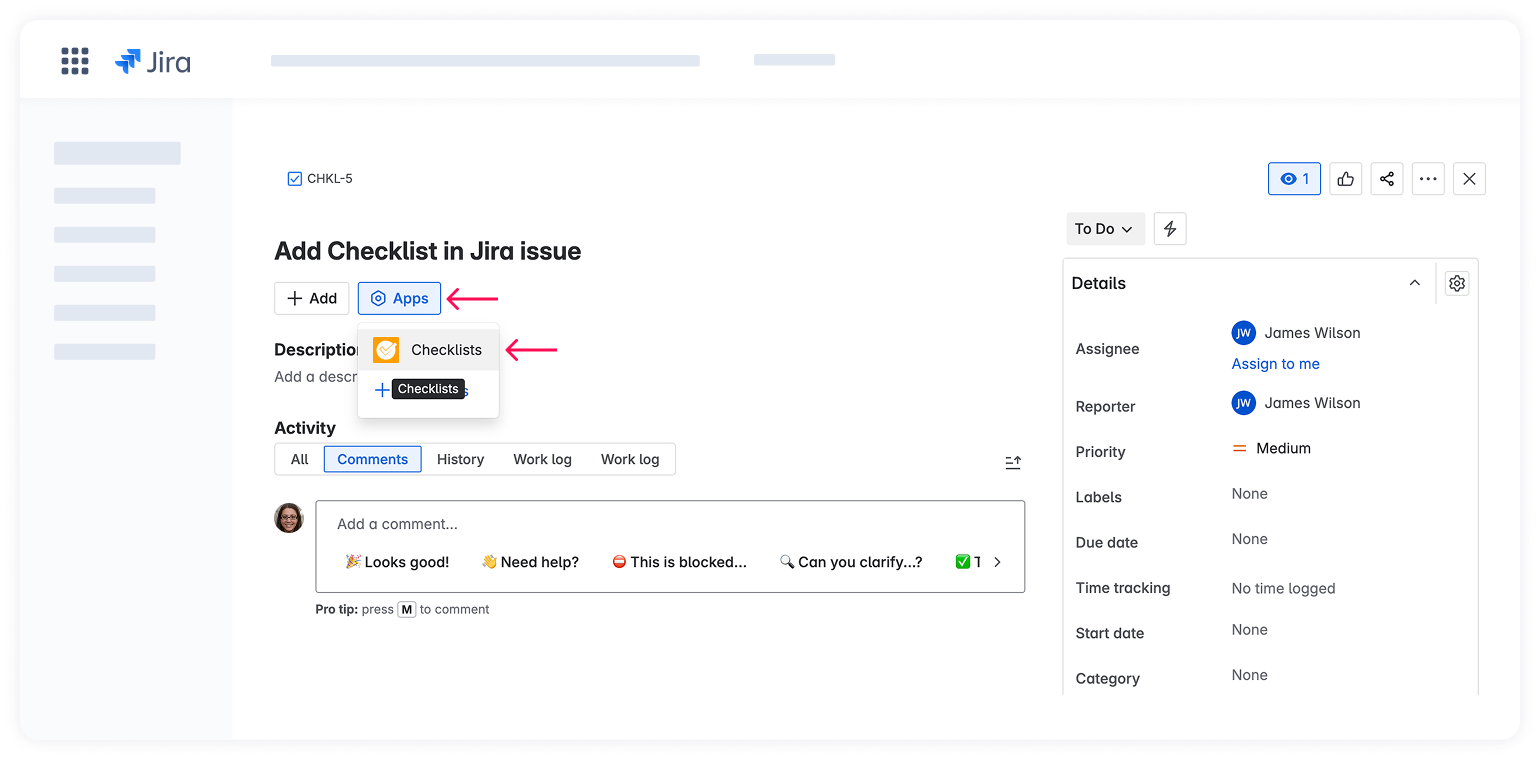
Open a Jira issue where you want to add a checklist
Click on the app menu and select Checklists
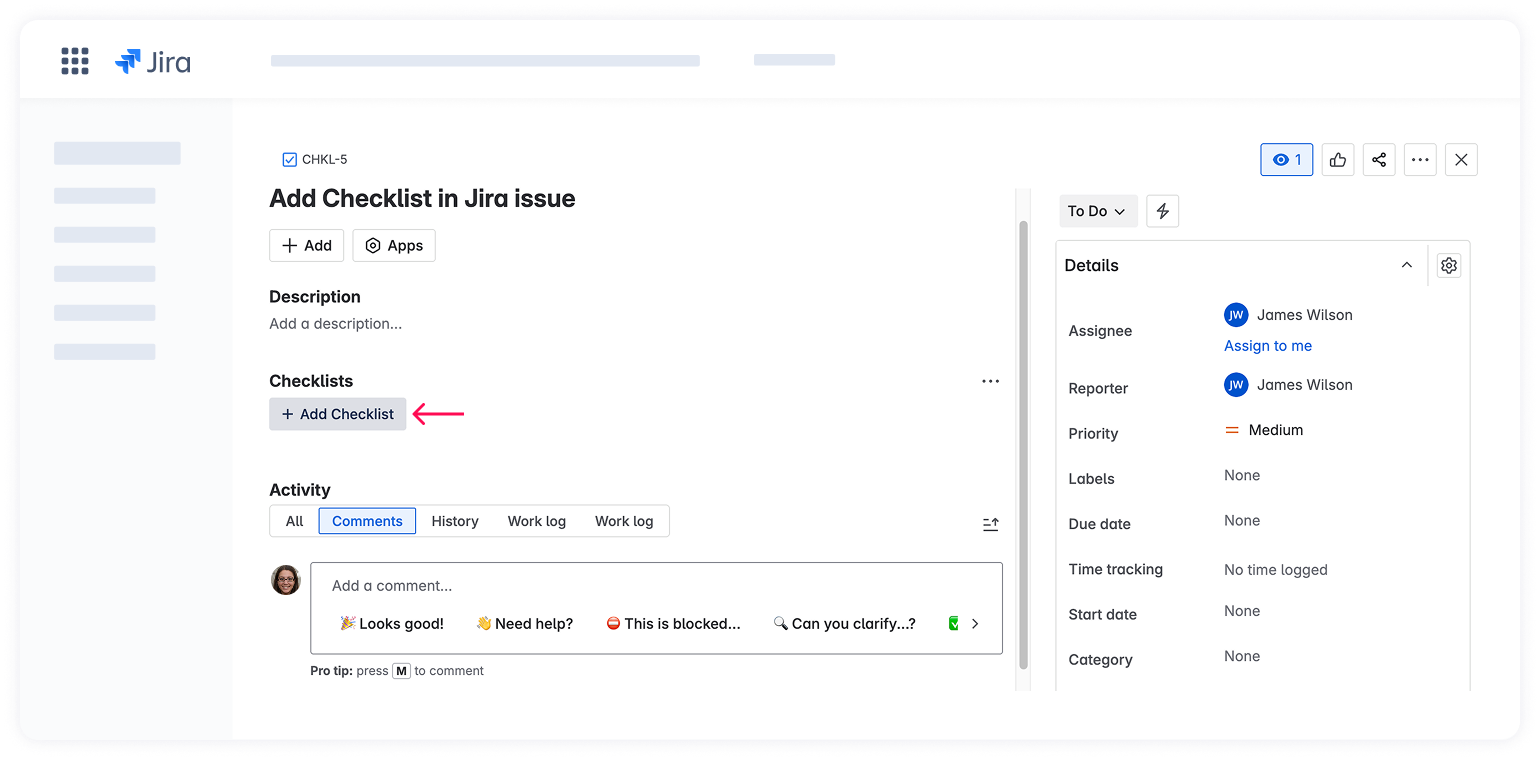
Once the checklist panel appears in the Jira issue, click the Add Сhecklist button to create a new checklist
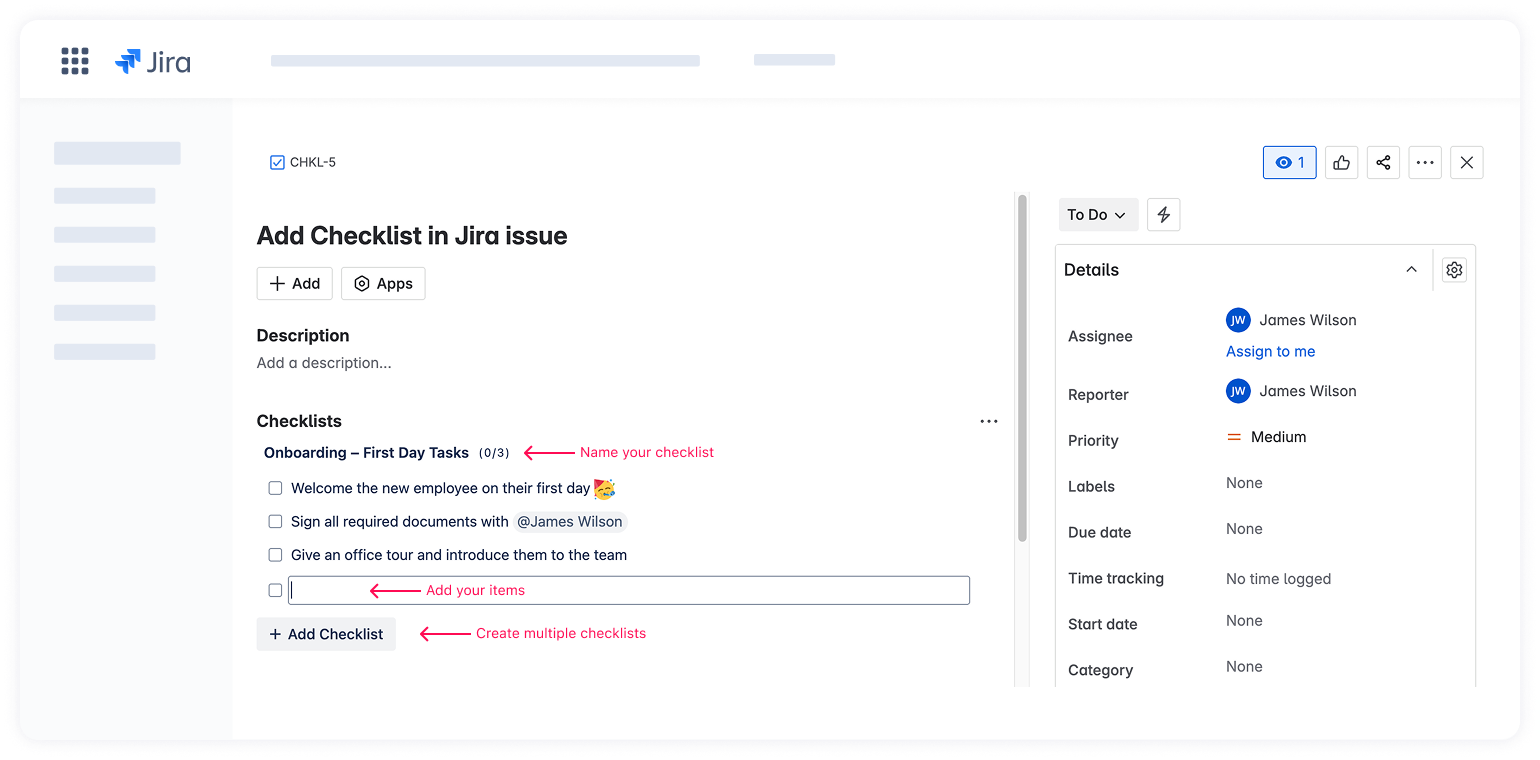
Type your first task and hit Enter to add the next one. Each line becomes a checklist item
(Optionally)Give your checklist a title (e.g. “QA Review”, “Release Steps”)