Download PDF
Download page How to use Table from JSON macro.
How to use Table from JSON macro
The Table from JSON macro allows you to output a table from JSON data source.
The macro supports outputting data from a URL or an attached file.
Using the Table from JSON macro
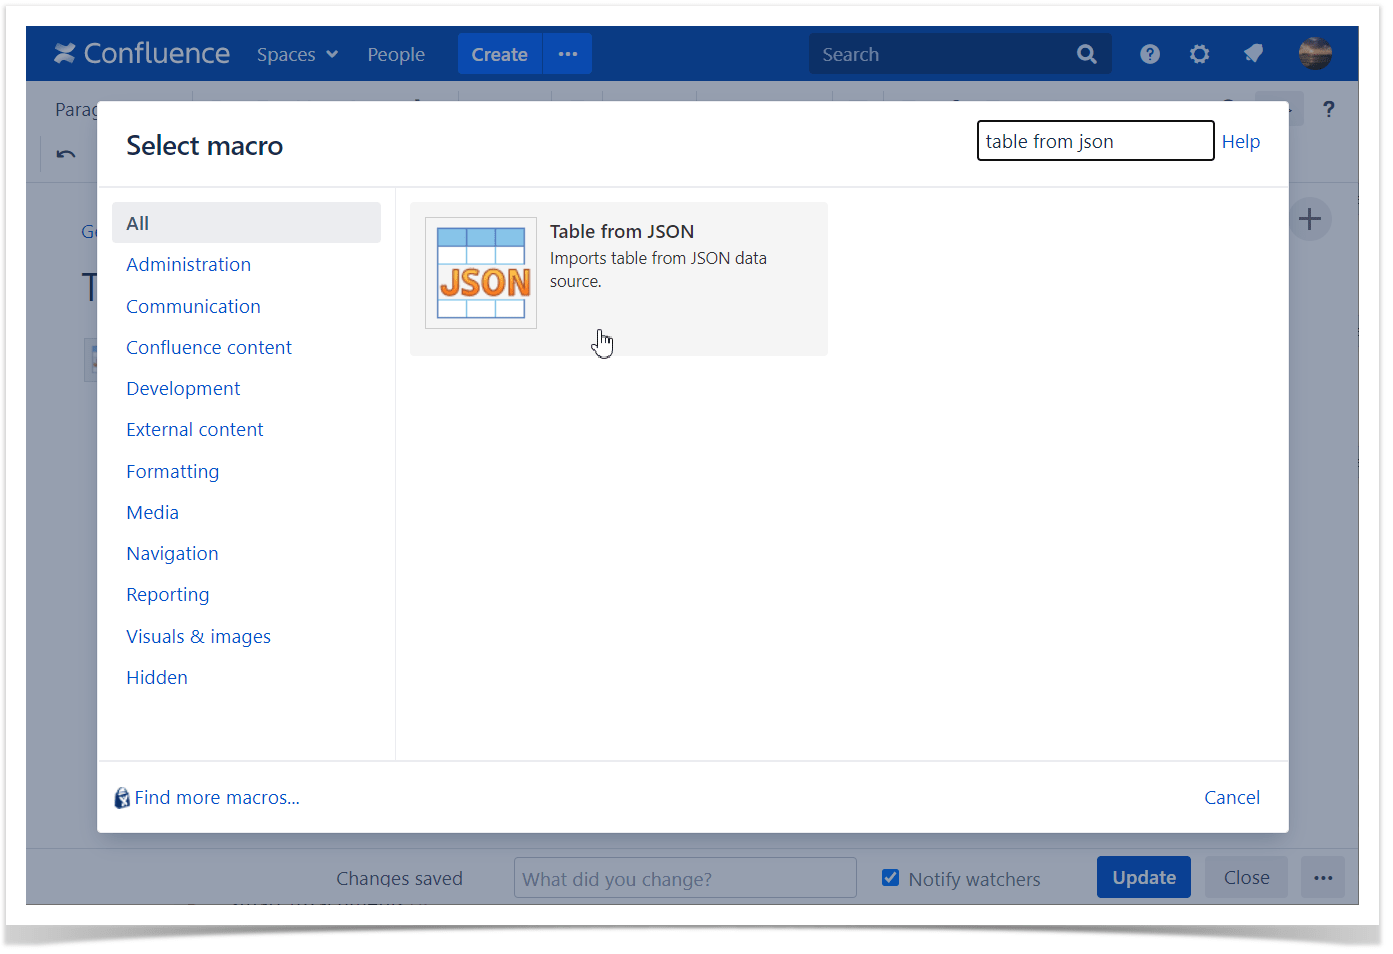
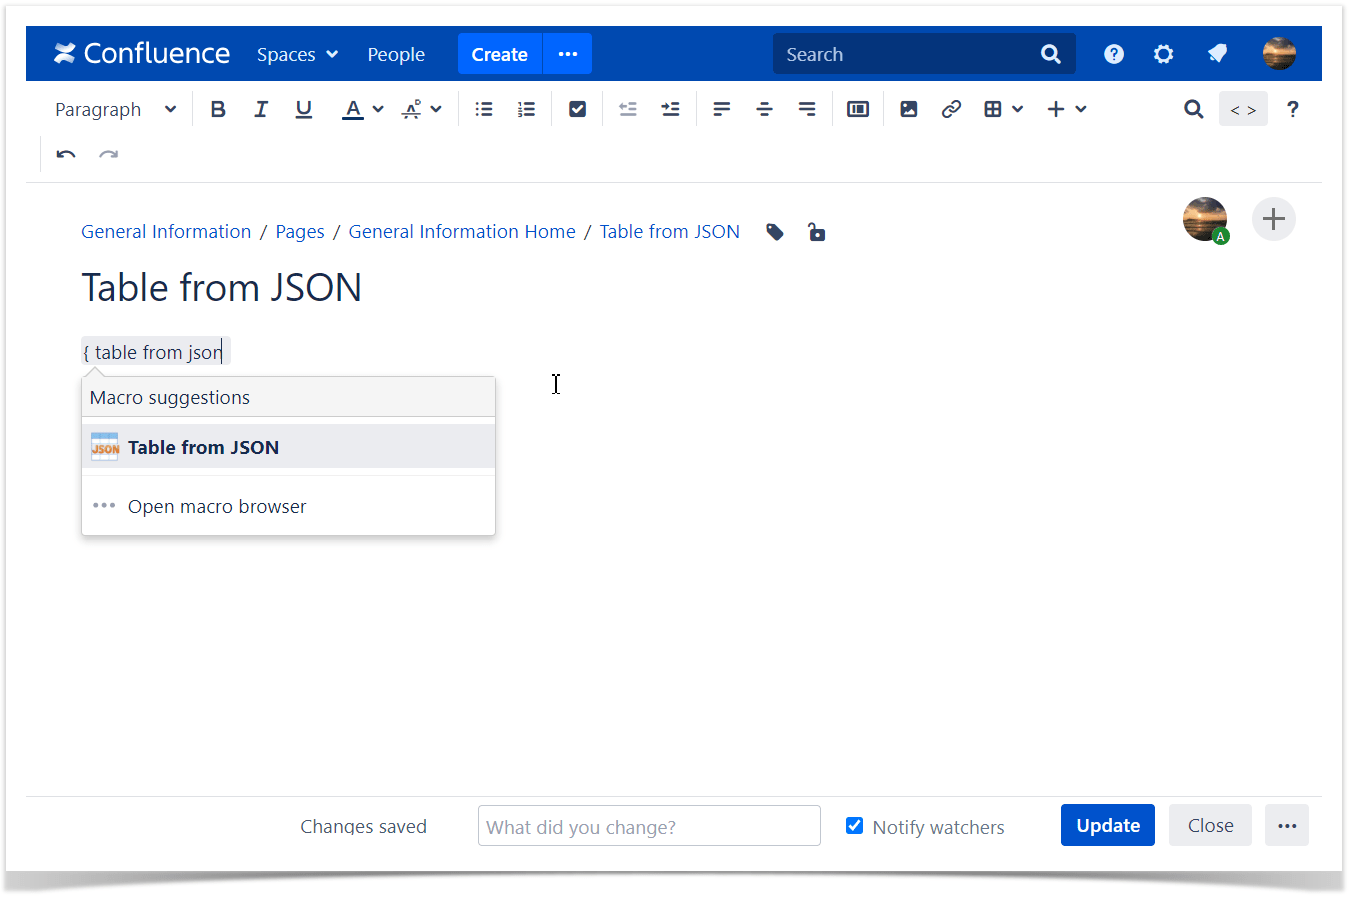
1. Insert the macro on a page:
- Start entering /Table from JSON (or {Table from JSON} in the legacy editor) and select the macro
- Or on the editor pane, click Insert more content -> Other macros, find the macro and insert it on the page
2. Specify the JSON source option:
- URL
- Attachment
You can use {pageId} variable in the URL, which means ID of the current page.
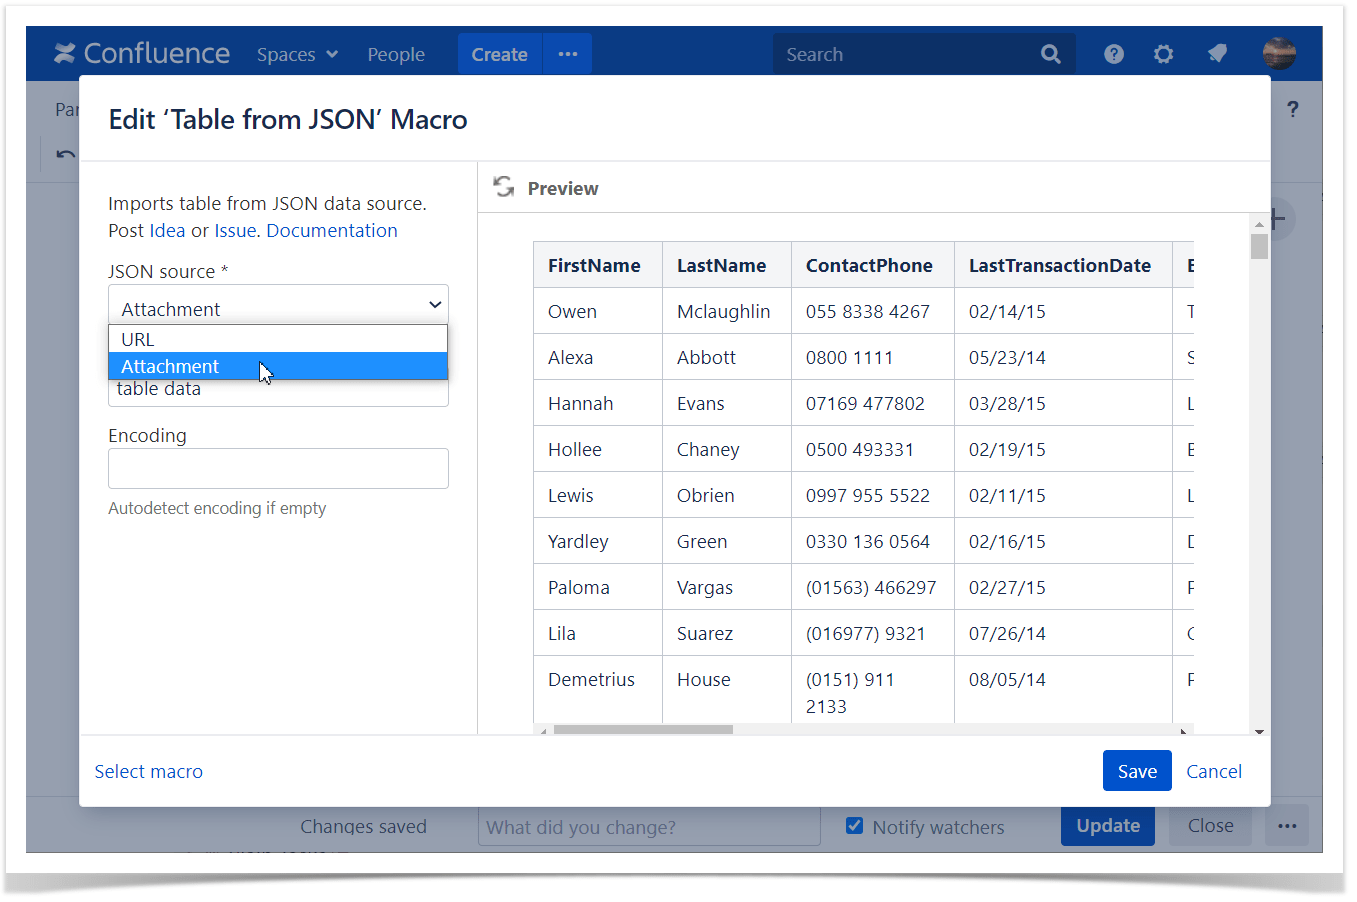
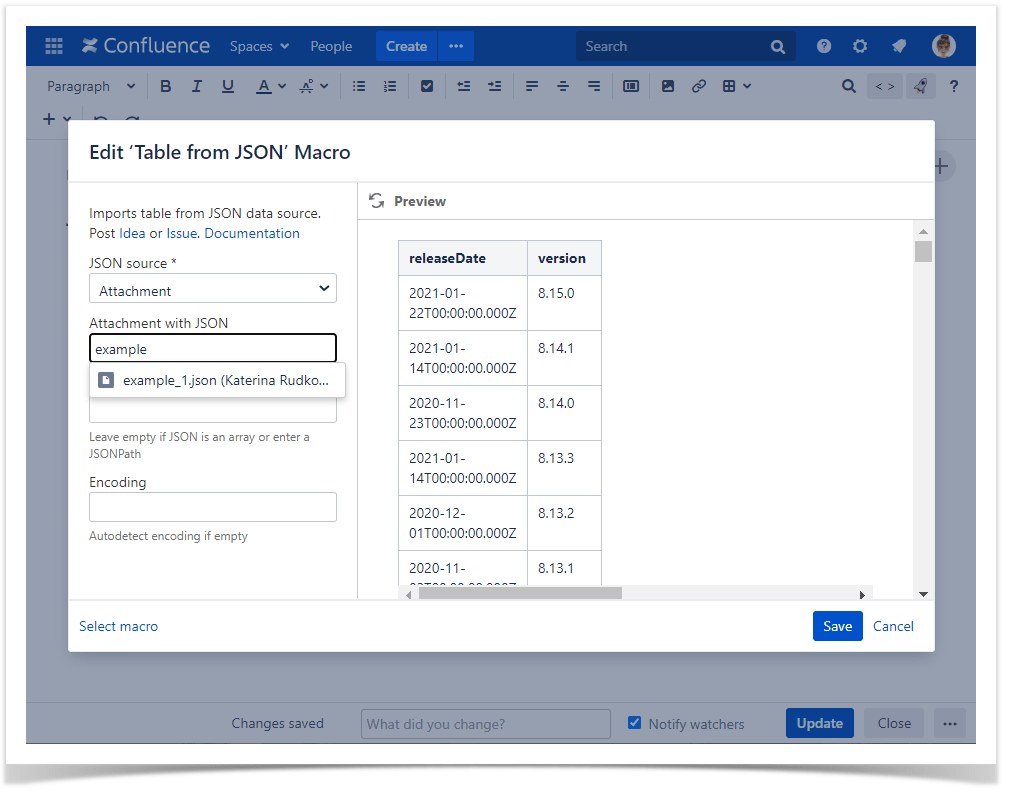
3. Find the attachment by typing the file name or add a URL to JSON
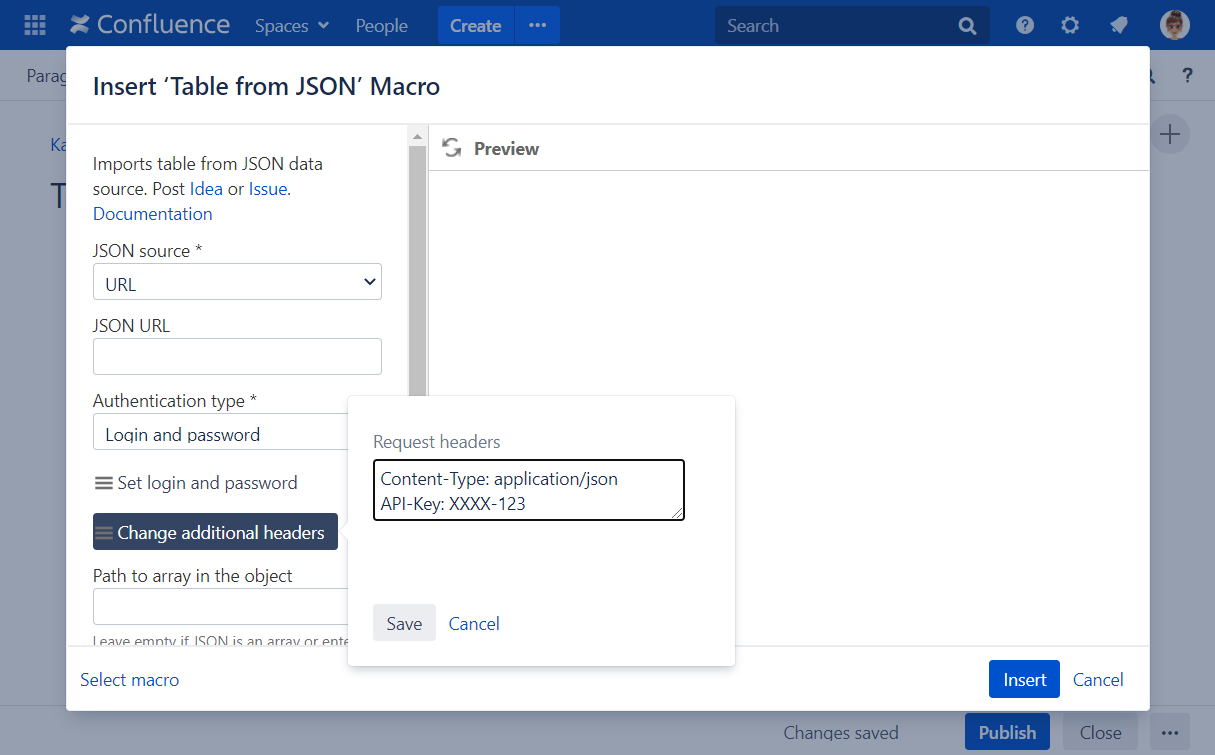
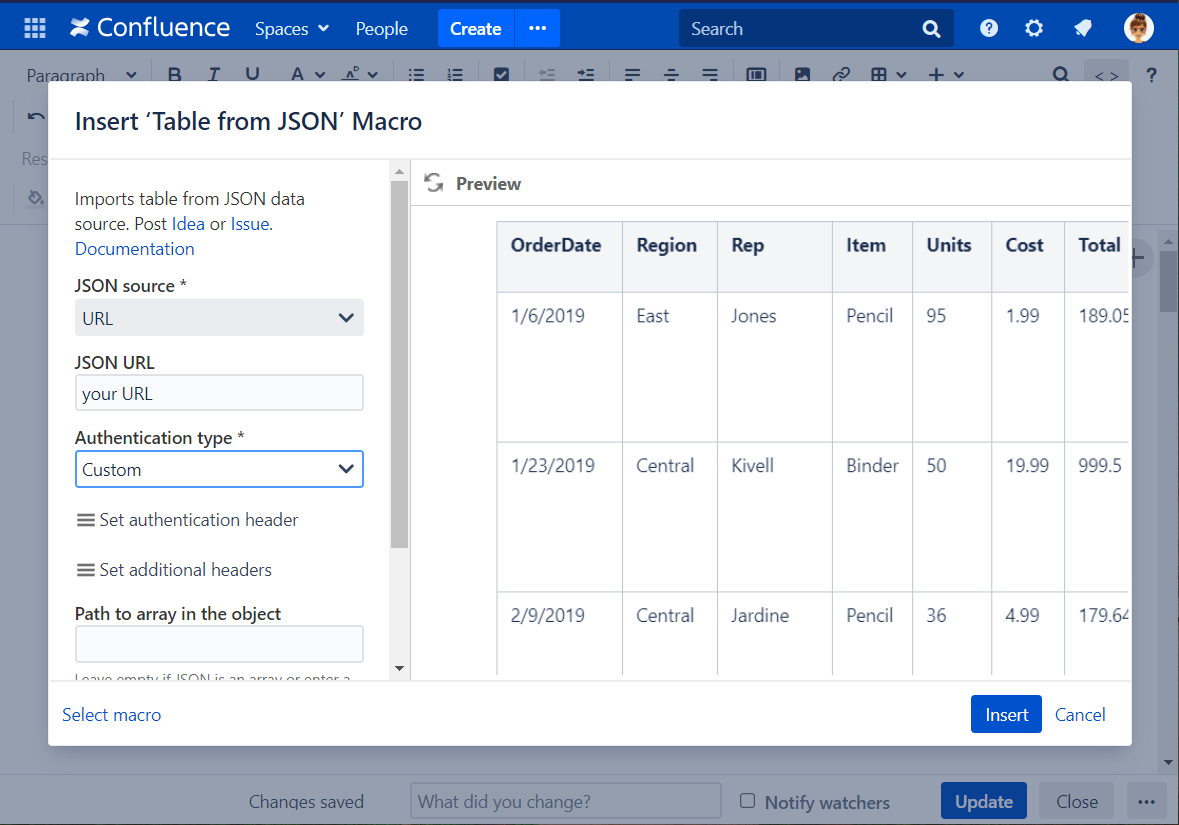
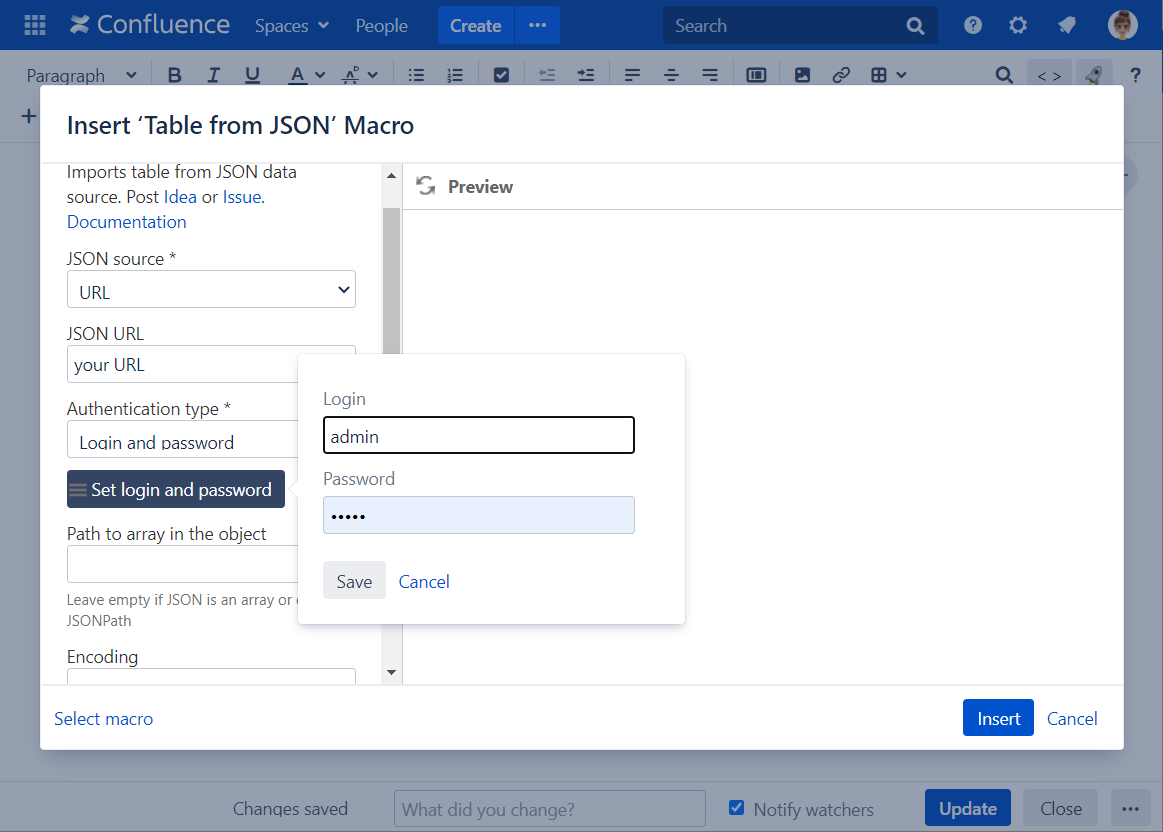
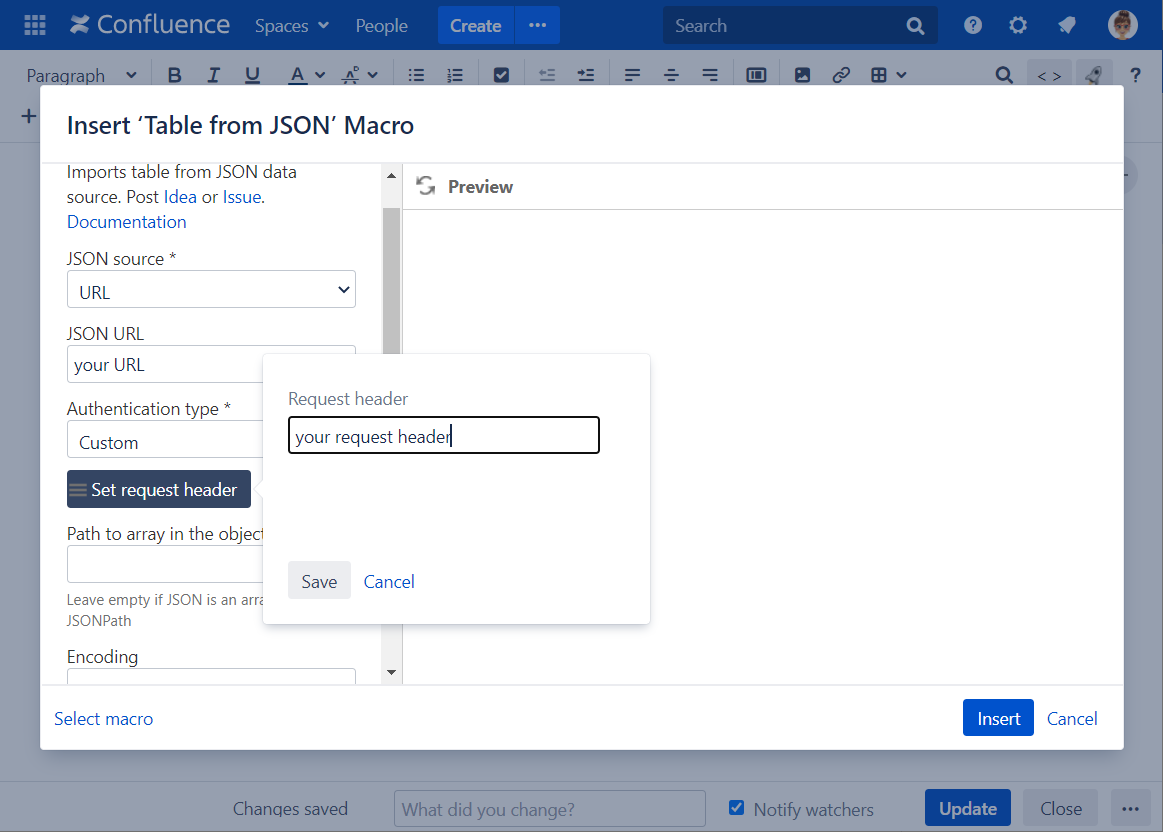
4.Configure a URL:
- Select the Authentication type
- Optionally set the login and password settings, the authentication header, additional headers.
The request headers format:
Header name: header value
Another header: another value
The header name and its value should be separated by a colon, headers by line breaks.
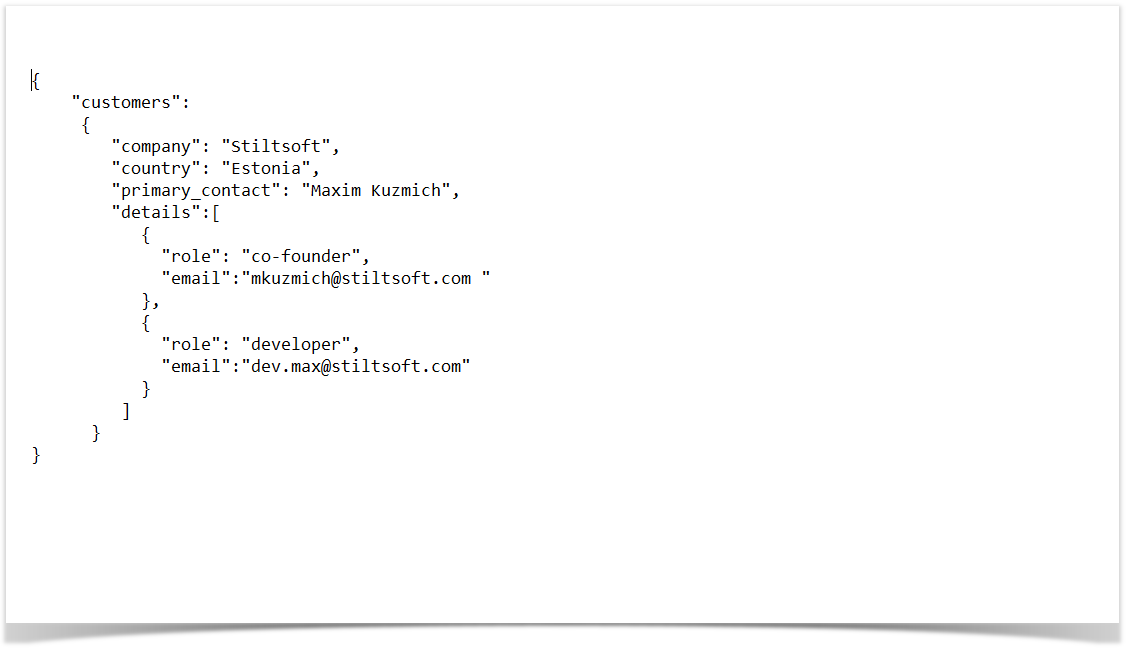
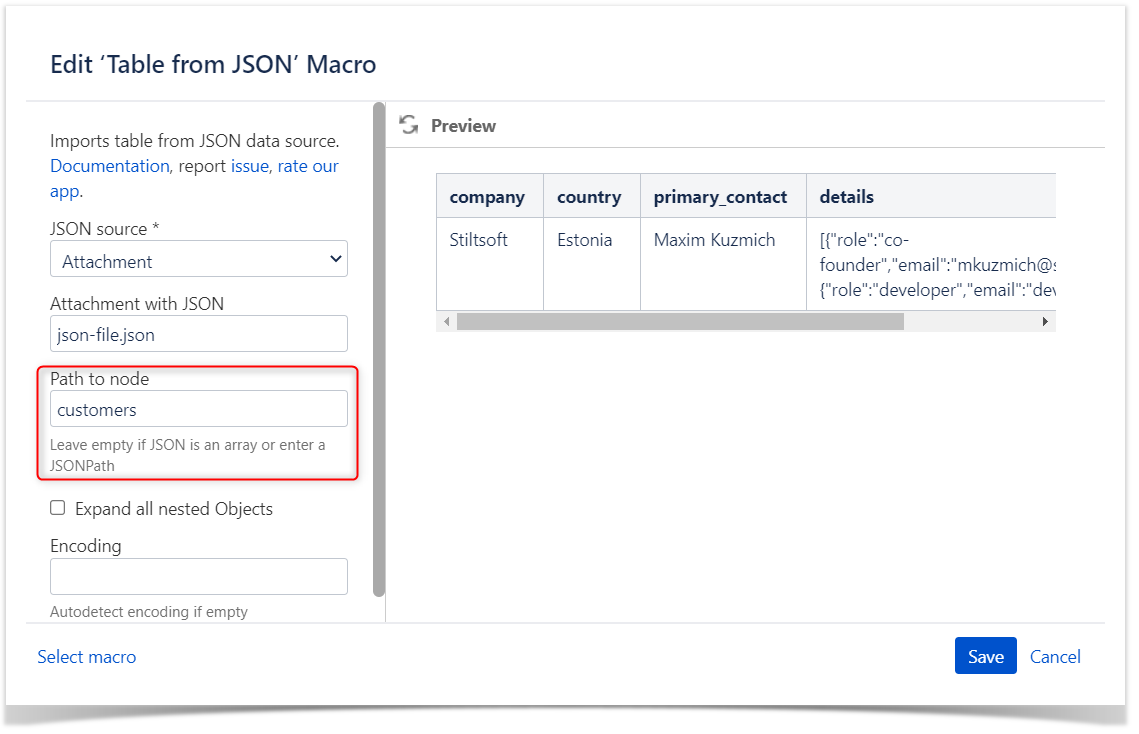
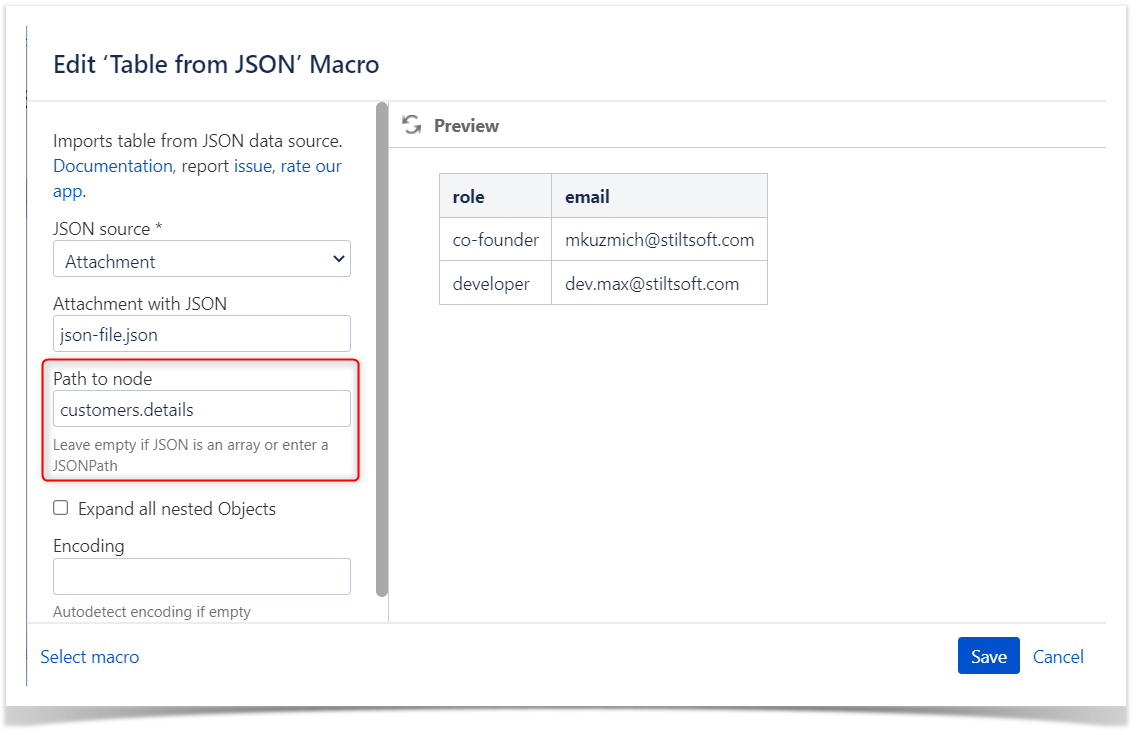
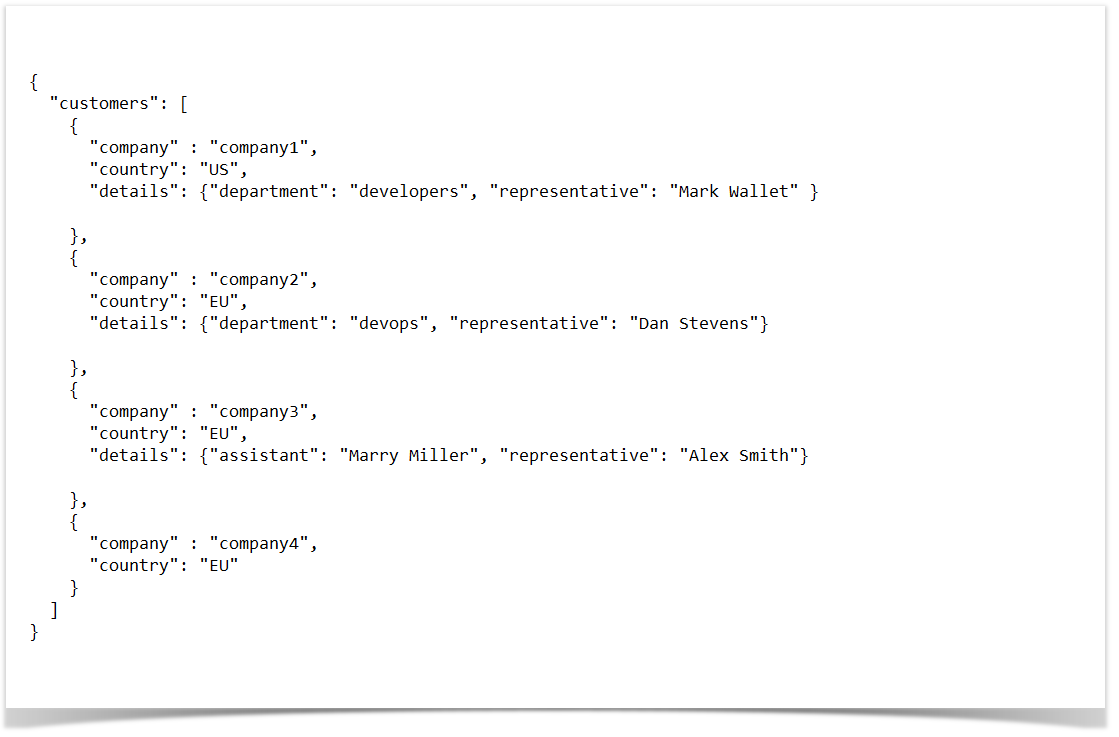
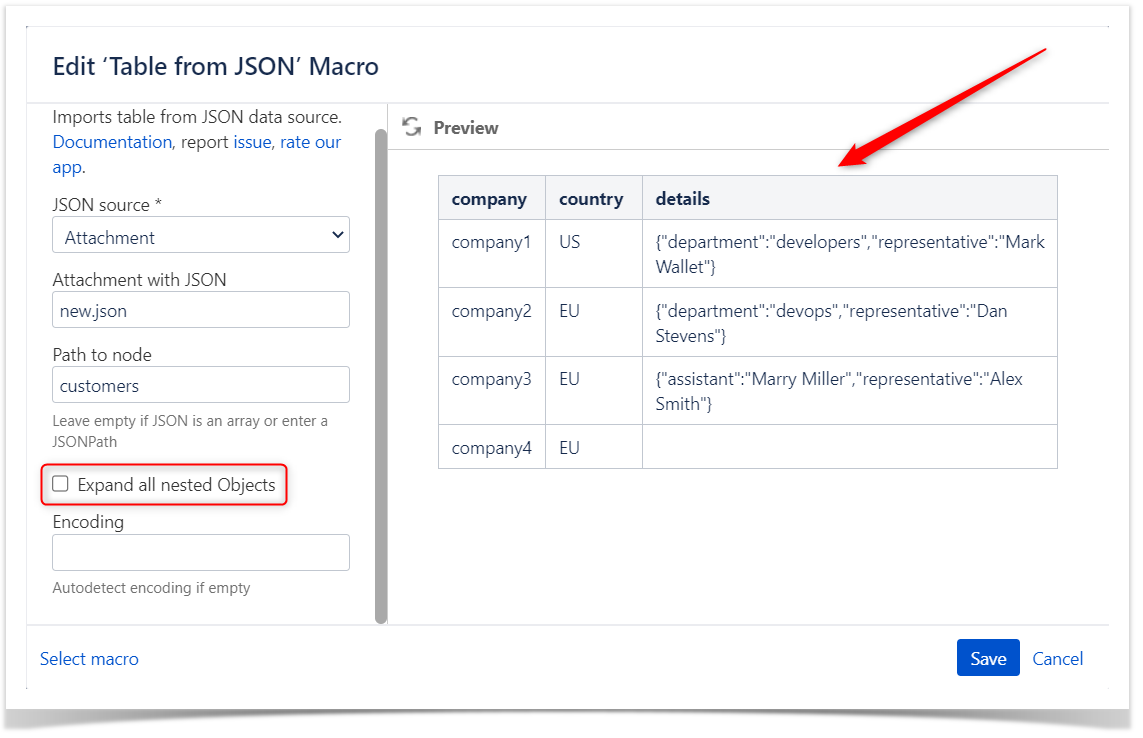
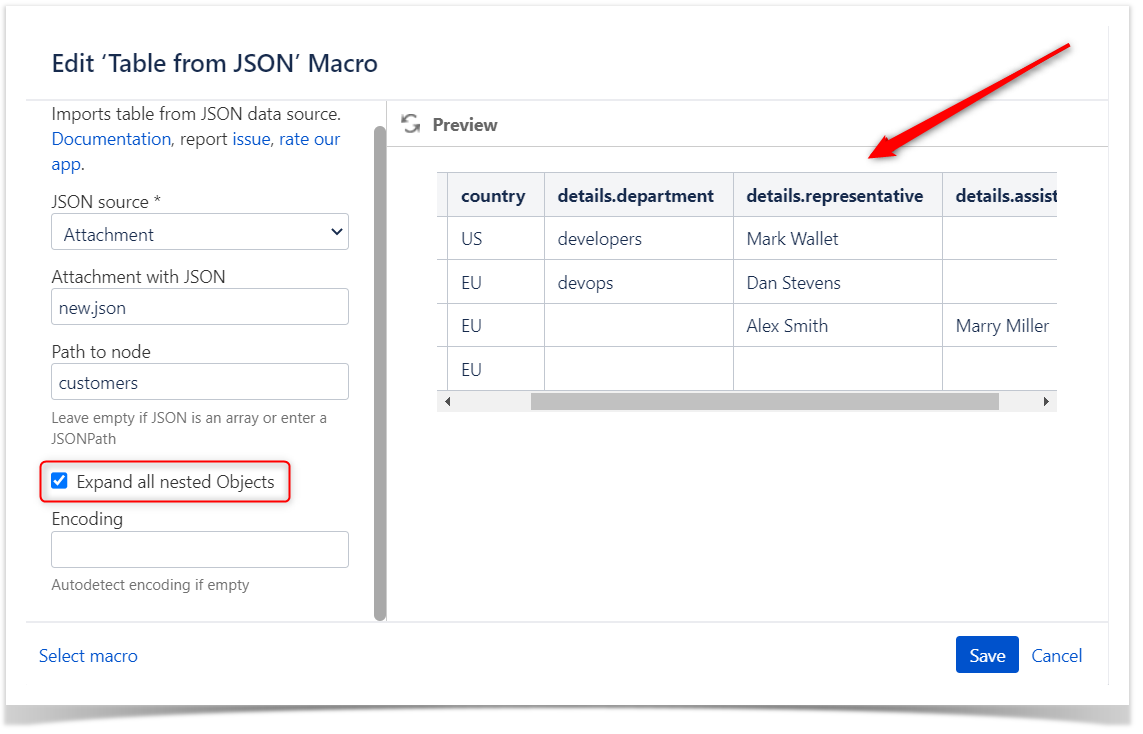
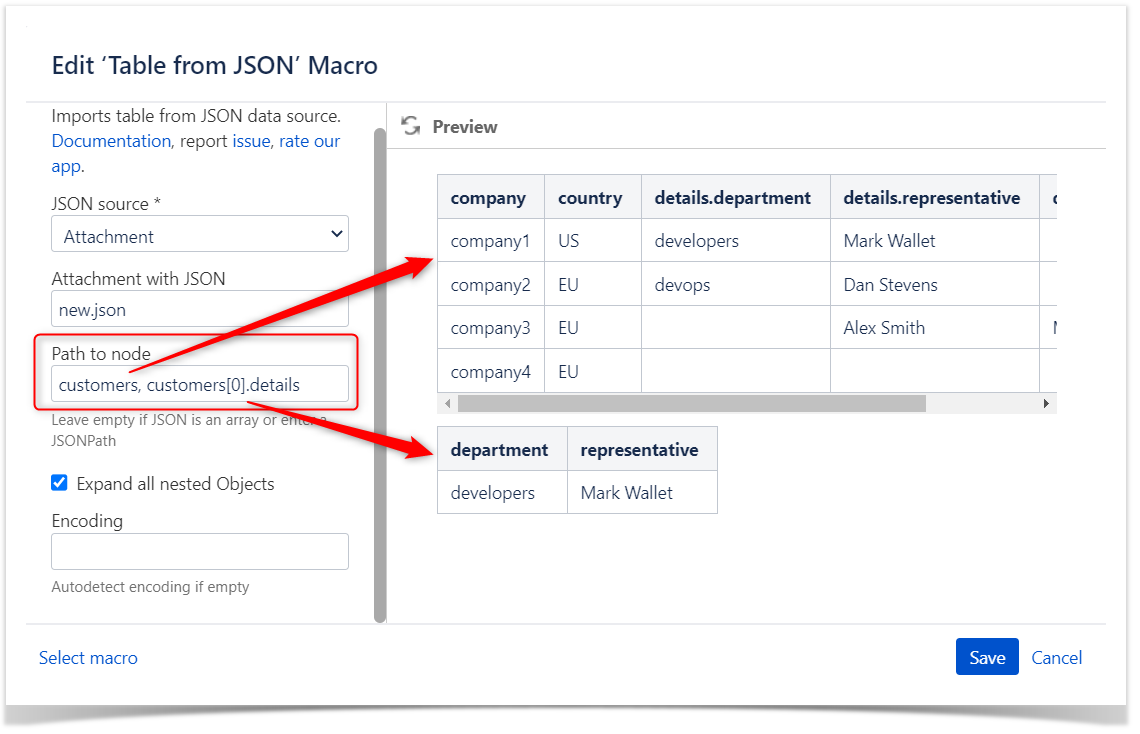
5. Enter a JSONPath into the Path to array in the object box or leave it empty if JSON is an array.
Open nested objects with the help of the Expand all nested Object option
You can enter several JSON paths, separated by commas
6. Select an appropriate data format from the list or add it manually.
7. Save the macro and update the page.
Combine the Table from JSON macro with other macros via the Table Toolbox macro to process table data.


Storing authentication data
Login and password or a custom authentication header are encrypted by the AES-256 algorithm using a secret key and are saved in the macro parameters.In Confluence Cloud, a secret key is stored in the encrypted AWS RDS In Confluence Server/Data Center a secret key is generated individually for each Confluence instance.
The encrypted authentication data can be used only in your Confluence instance and only for the URL you specified when configured the macro, so it is impossible to steal it and use somewhere else.
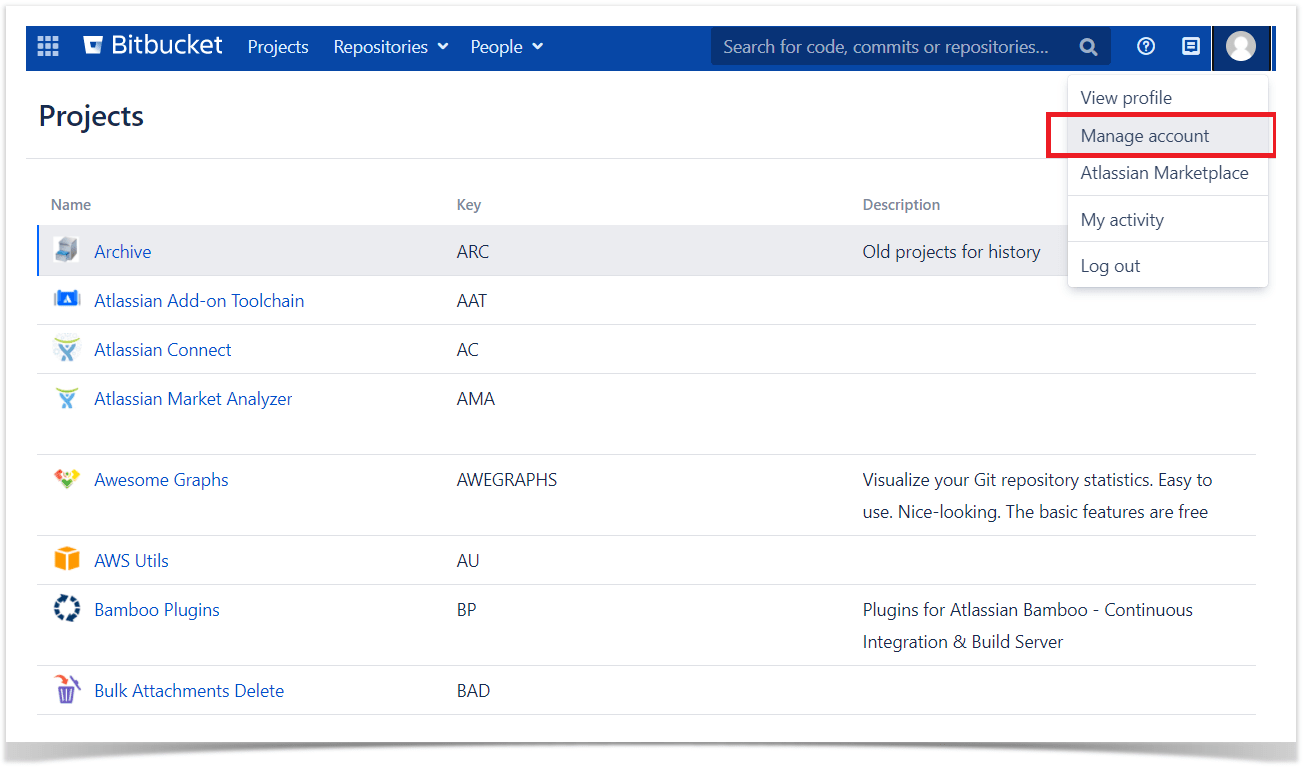
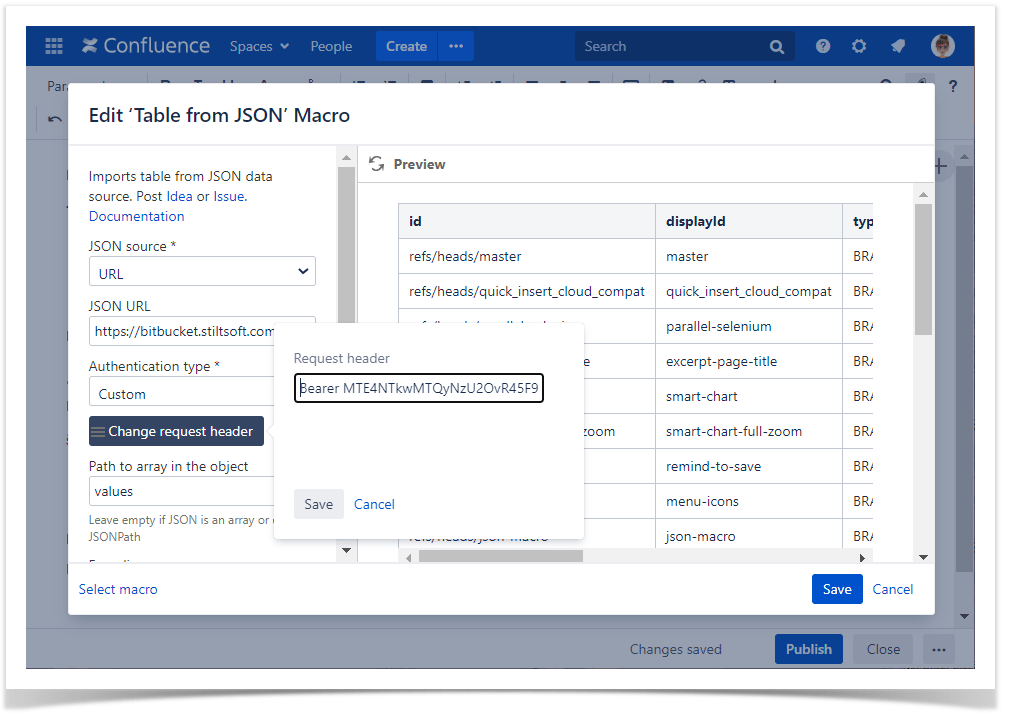
Custom Authentication with a Bitbucket access token
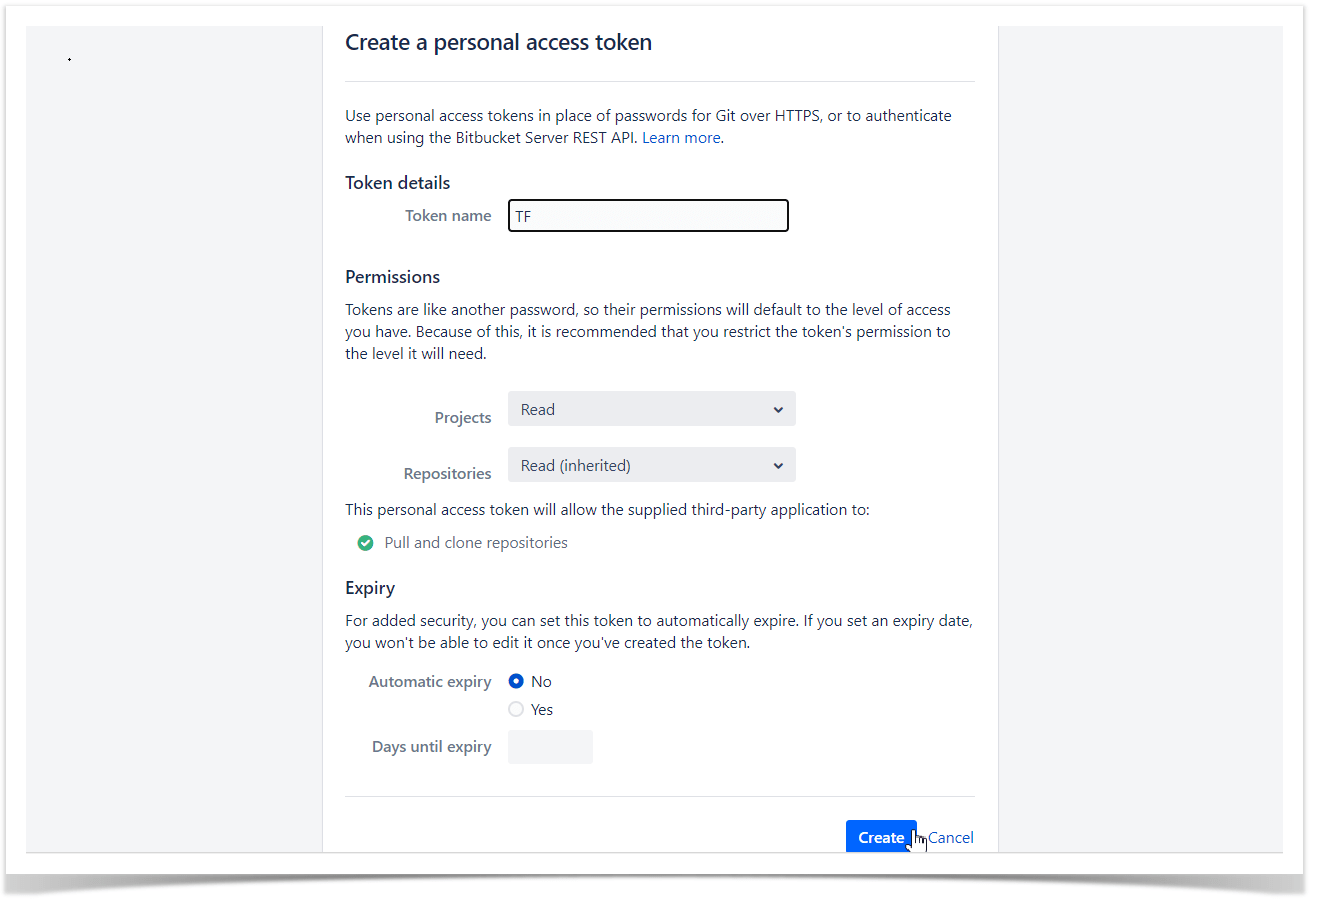
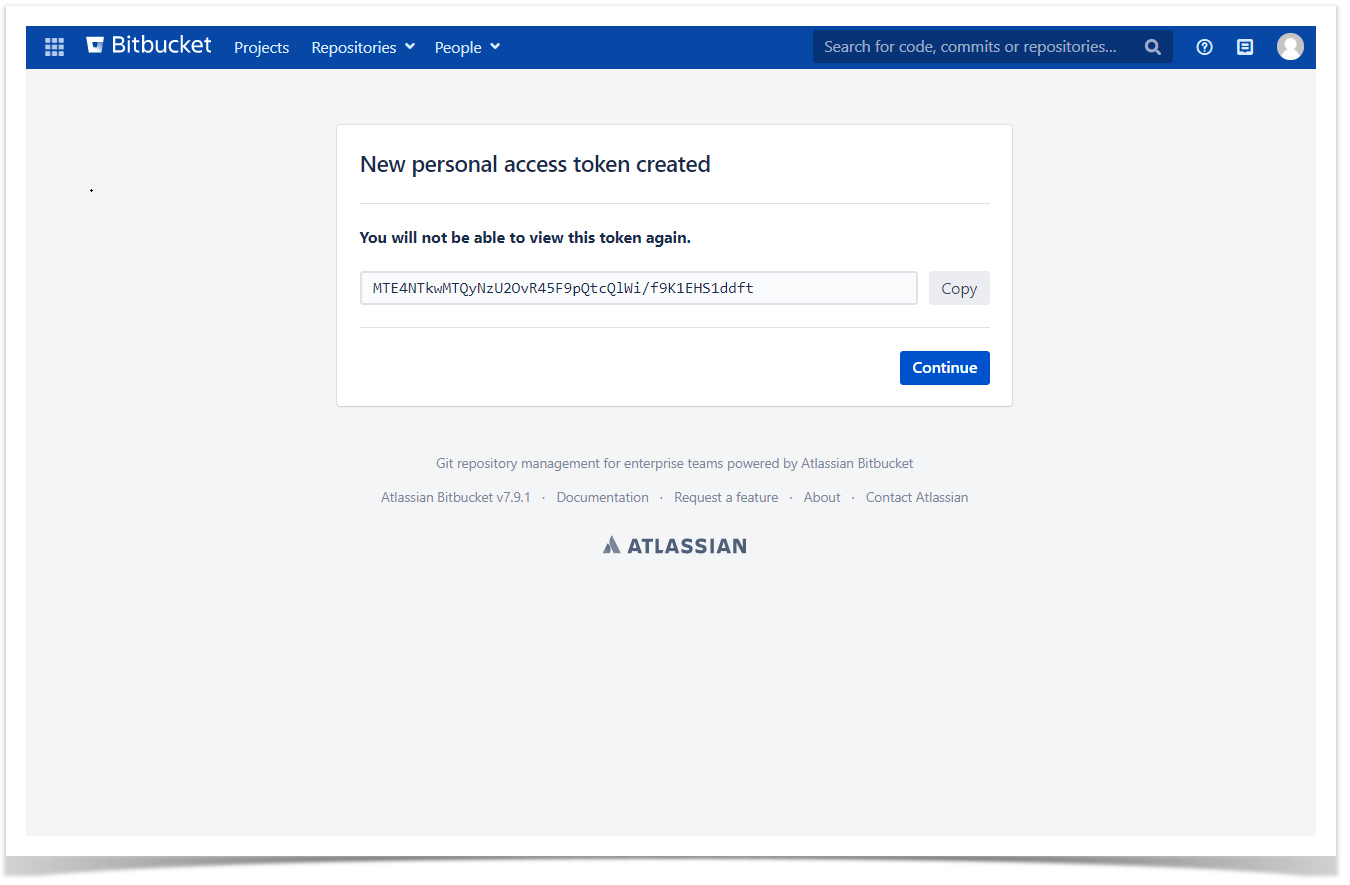
1. Create a personal access token in your Bitbucket account.
2. Insert the Table from JSON macro on the Confluence page.
3. Add a URL to JSON.
4. Select the Authentication type: Custom.
5. Use Bearer Auth without the username.
Change request header: Bearer Y our_Token
6. Save Request header