...
| Table of Contents | ||
|---|---|---|
|
...
Checking Environment
Before installing the plugin make sure that you're using:
...
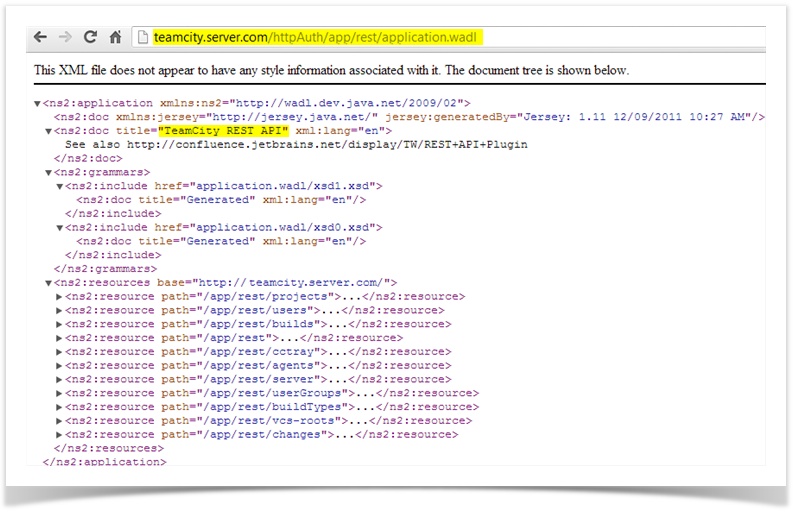
- Make sure that Rest API Plugin is enabled. To do that go to the following URL: <your-teamcity-server>/httpAuth/app/rest/application.wadl. You should see the output as shown below
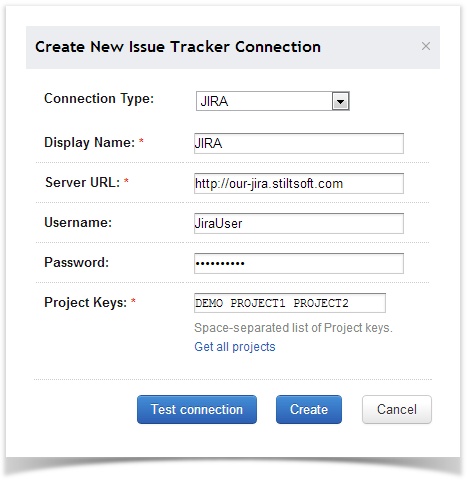
Configure integration with JIRA as described here.
Note title Note If you want to provide TeamCity with access to all JIRA projects, click the Get All Projects link in the window Create New Issue Tracker Connection. Otherwise, specify the projects you want to grant access to in the Project Keys field as shown below. The JIRA user specified in the Username field should have access to relevant JIRA projects.
- Assign the Project Viewer and Agent Manager roles to an existing TeamCity user
or
first create a new user and assign the roles.
Installing the Add-on
When you're finished with the steps above, switch to JIRA and do the following:
- Install the plugin with Universal Plugin Manager or manually.
- Install the plugin license:
Creating the Application Link (JIRA under 6.1)
Create the TeamCity Application Link as described here.
Note title Note You don't need to create a link for every project. One Application Link will be enough.
You will see your link in the Application Links list.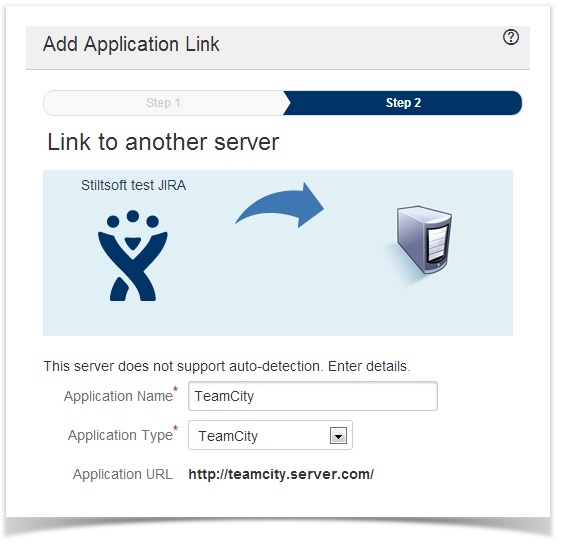

- Configure Basic HTTP Authentication for Outgoing Authentication as described here. Use the credentials of the TeamCity user you configured earlier. These credentials will be used by the Application Link.
- Give the View Issue Source Tab permission to eligible users.
Creating the Application Link (JIRA 6.1 and later)
1. Navigate to JIRA > Administration > Add-ons.
2. Open the Application Links section.

3. Enter address of TeamCity instance and click Create new link.
4. After verification of TeamCity instance, the Link Applications form is displayed.
5. In the Link Applications form, specify the following information:
- Application Name - enter name of the application for linking. In our case, enter 'TeamCity';
- Application Type - select 'TeamCity' from the list.
6. Leave all the other parameters without any changes.

7. Click Continue.
8. A new application link will appear on the list with available application links.

9. Click the Edit link to modify access parameters.
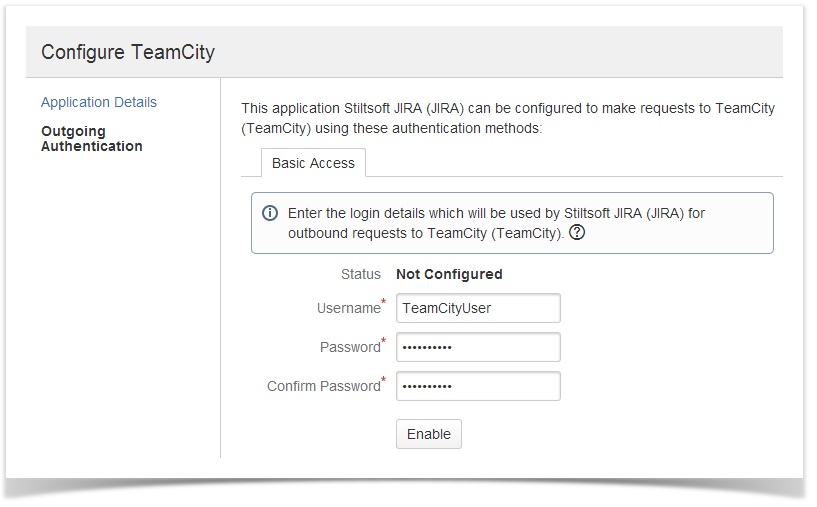
10. In the opened Configure Parameters form, switch to Outgoing Authentication.

11. Here enter credentials of TeamCity account with assigned Project Viewer and Agent Manager roles.

12. Click Enable.
13. Close the form.
How to See TeamCity Builds
...