...
- Install the plugin with Universal Plugin Manager or manually .
- Install the plugin license:
- Create the TeamCity Application Link as described here.
Note: You don't need to create a link for every project. One Application Link will be enough.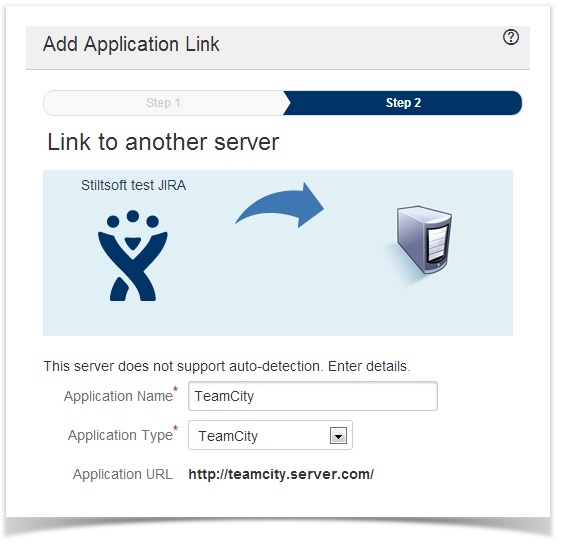
You will see your link in the Application Links list.
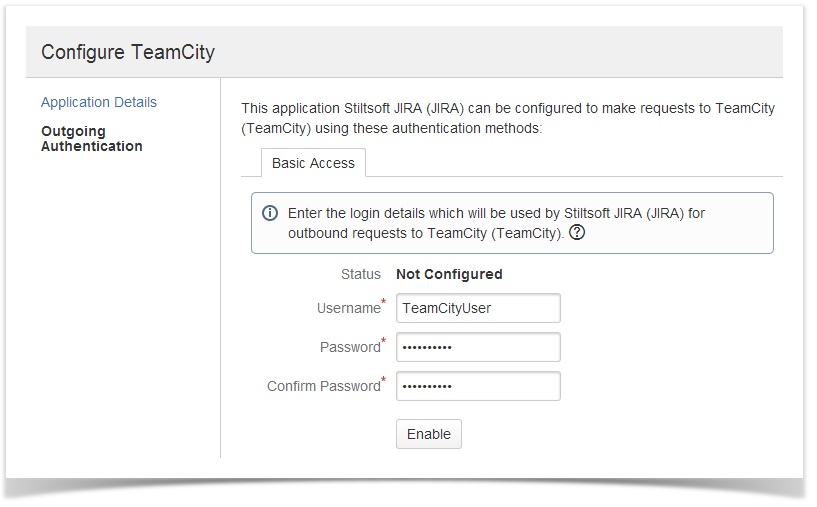
- Configure Basic HTTP Authentication for Outgoing Authentication as described here. Use the credentials of the TeamCity user you configured earlier. These credentials will be used by the Application Link.
How to Get Started
...
While the plugin is analyzing the builds, you will see the the following message on the TeamCity tab.
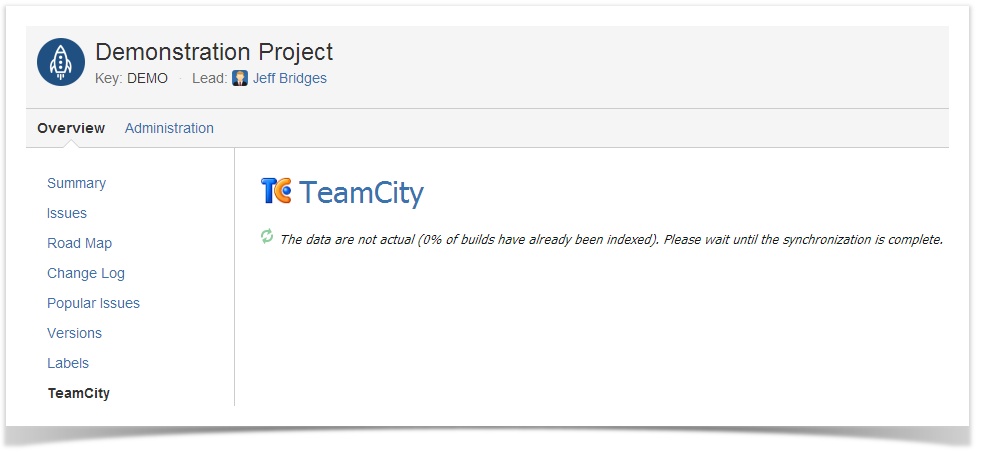
Note: This process may take a while on large instances.
When the inital indexing is over, you will see all found builds on the TeamCity tab on the Project, Version and Issue pages.


If no relevant builds are found, you will see the message No associated builds are found. From now on, the plugin will update the build list in JIRA every 2 minutes.
...
The TeamCity tab looks the same for issues, projects and versions. It contains the main build parameters, such as a start date, build duration, commit log, etc., and allows you to switch to TeamCity for detailed information.

How to Add a TeamCity Agents Gadget
...