| Panel | ||||||||||
|---|---|---|---|---|---|---|---|---|---|---|
| ||||||||||
Join our Slack workspace to get the latest updates on the app development, provide feedback, and vote on features in the backlog.
|
Smart Attachments for Confluence allows you to manage documents and store them in the appropriate folders in Atlassian Confluence depending on their contents, objective or format.
| Table of Contents |
|---|
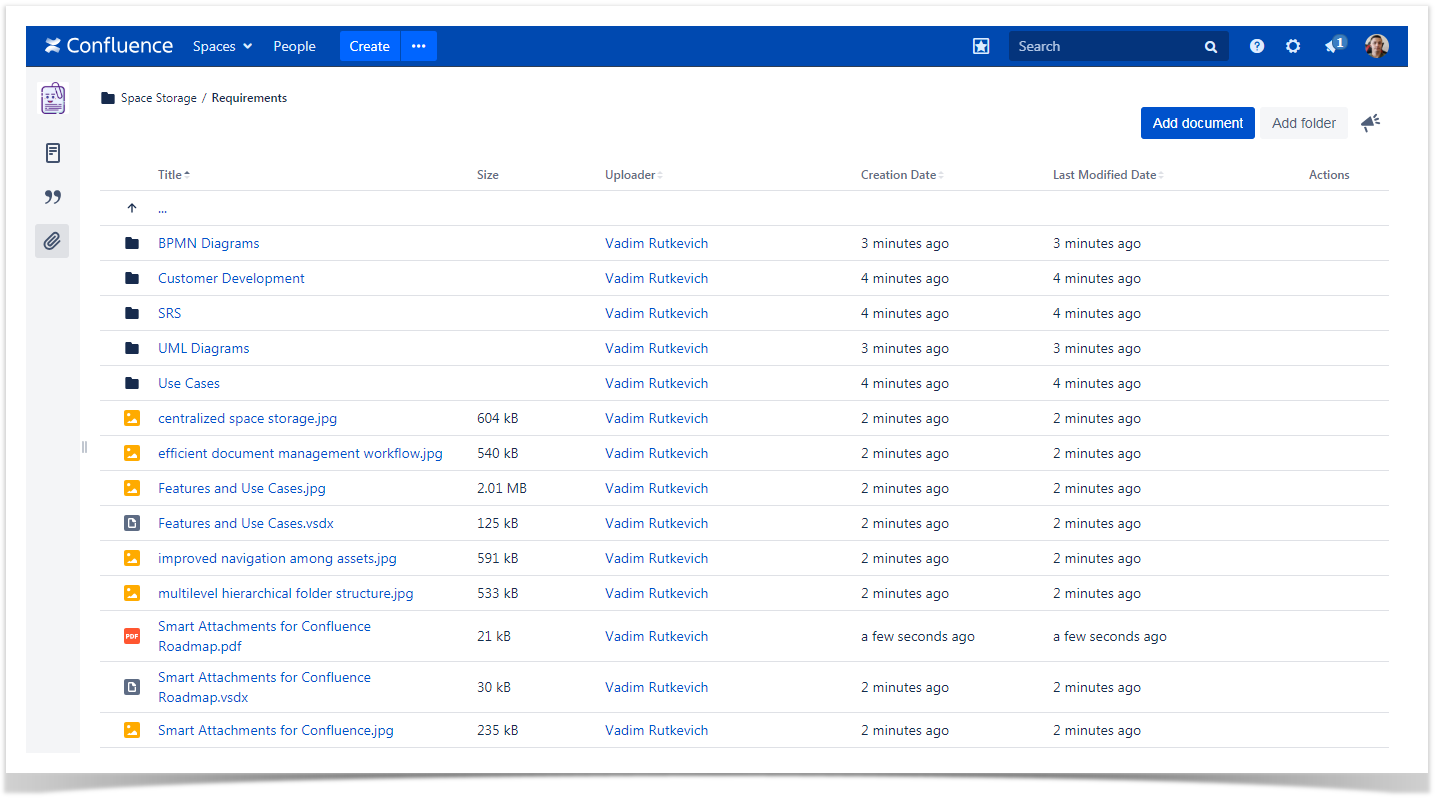
Viewing documents
- Open the space storage.
- Open the document where the documents are stored.
- For each document, the following information is displayed:
- Name - name of the document.
- Size - size of the document
- Uploader - last uploader of the document / creator of the folder.
- Creation Date - date when the document was uploaded into the folder or the folder was created.
- Last Modified Date - date when the document or folder was modified (title updated).
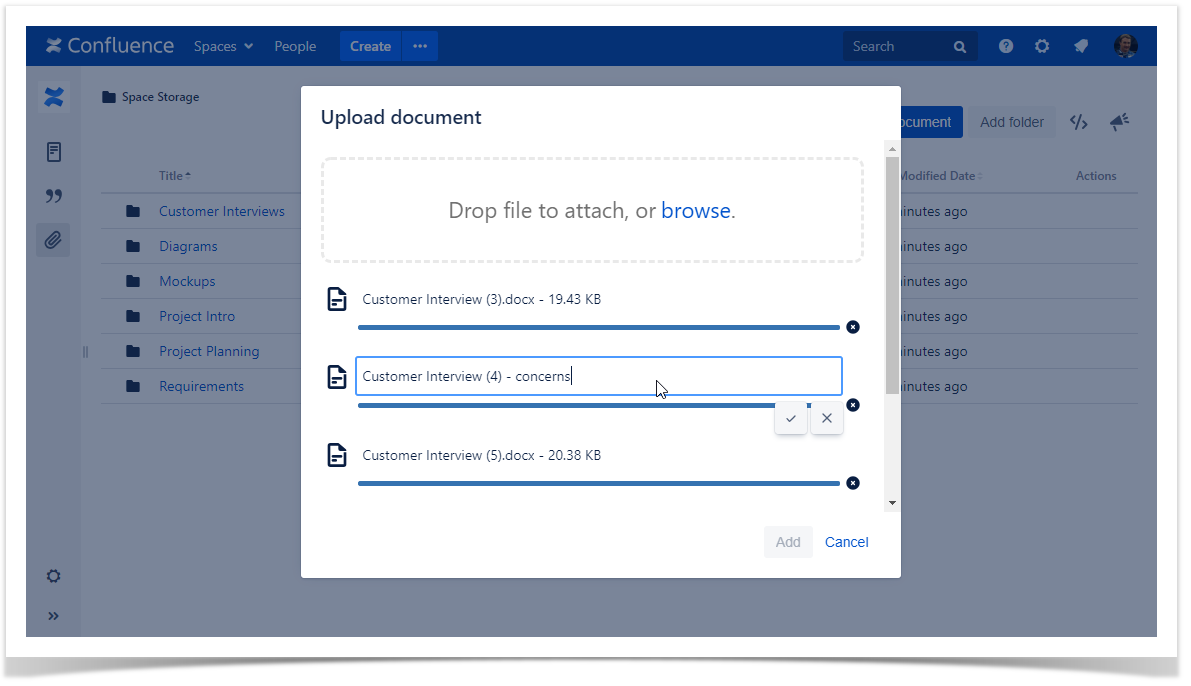
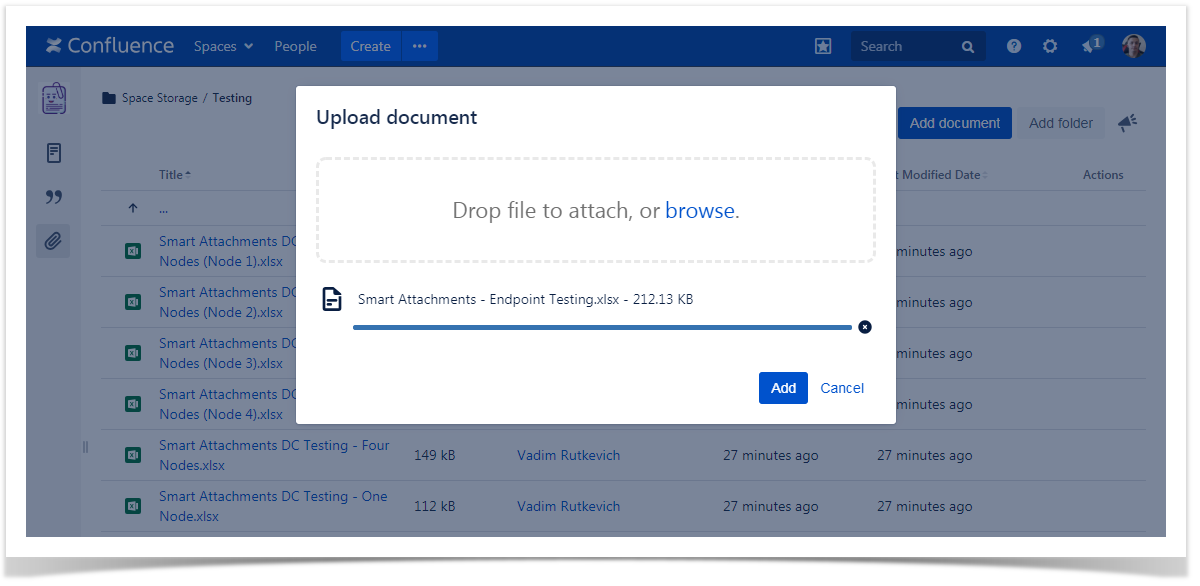
Uploading new documents
- Open the folder which you want to upload a new document to.
- Click Upload Add document.
- In the Upload document form, click Browse and select the file files on your local computer. You can also directly drop the file files to the form.Update the document name (if needed) before saving.
- Click Add.
- .
To delete the currently attached document on the form:
Click the ![]() icon.
icon.
| Info |
|---|
You can modify the name of the document, by hovering over the document name it and clicking it. Confirm the modified name by clicking |
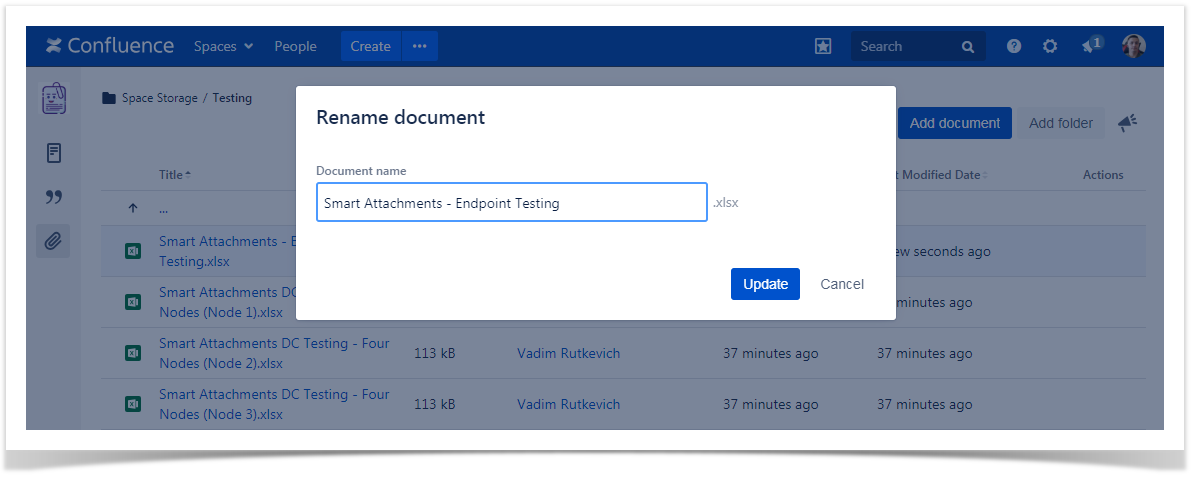
Renaming the document
- On the list with folders, locate the document you want to rename.
- Hover over the document.
- Click the [...] button.
- Select Rename.
- In the Edit document form, update the document name.
- Click Update.
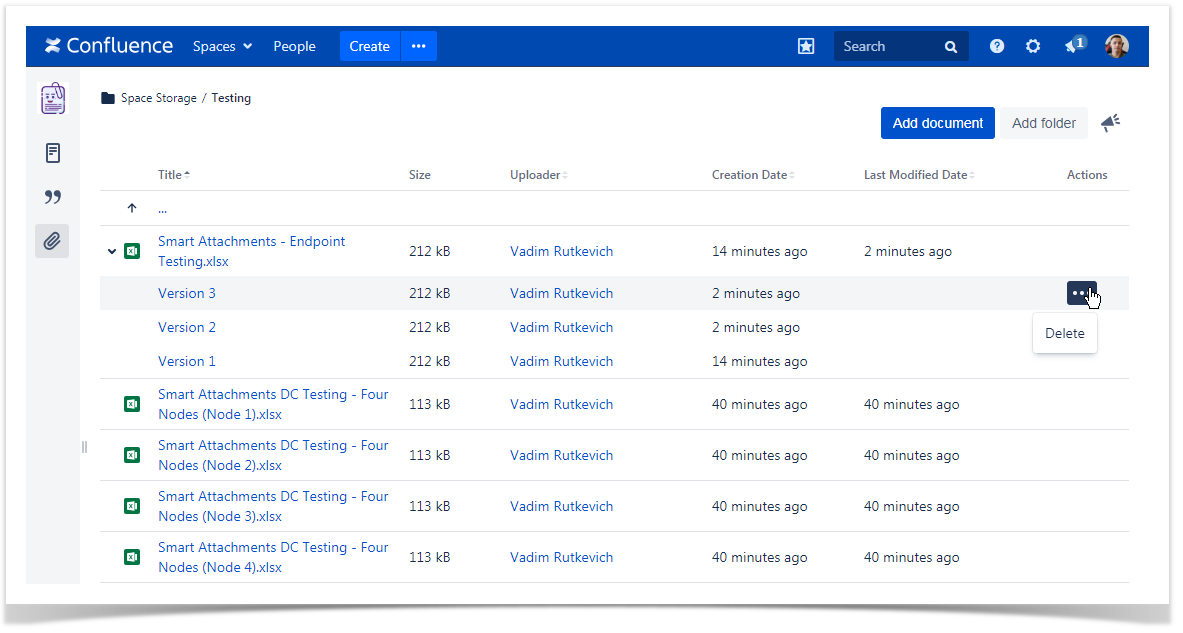
Managing document revisions
Smart Attachments for Confluence groups files having identical names into document revisions automatically.
- Drop files into the folder.
- Click the Expand revisions > icon.
- Locate the appropriate document revision.
To delete the document revision:
- Hover over the document revision.
- Click the [...] button.
- Select Delete.
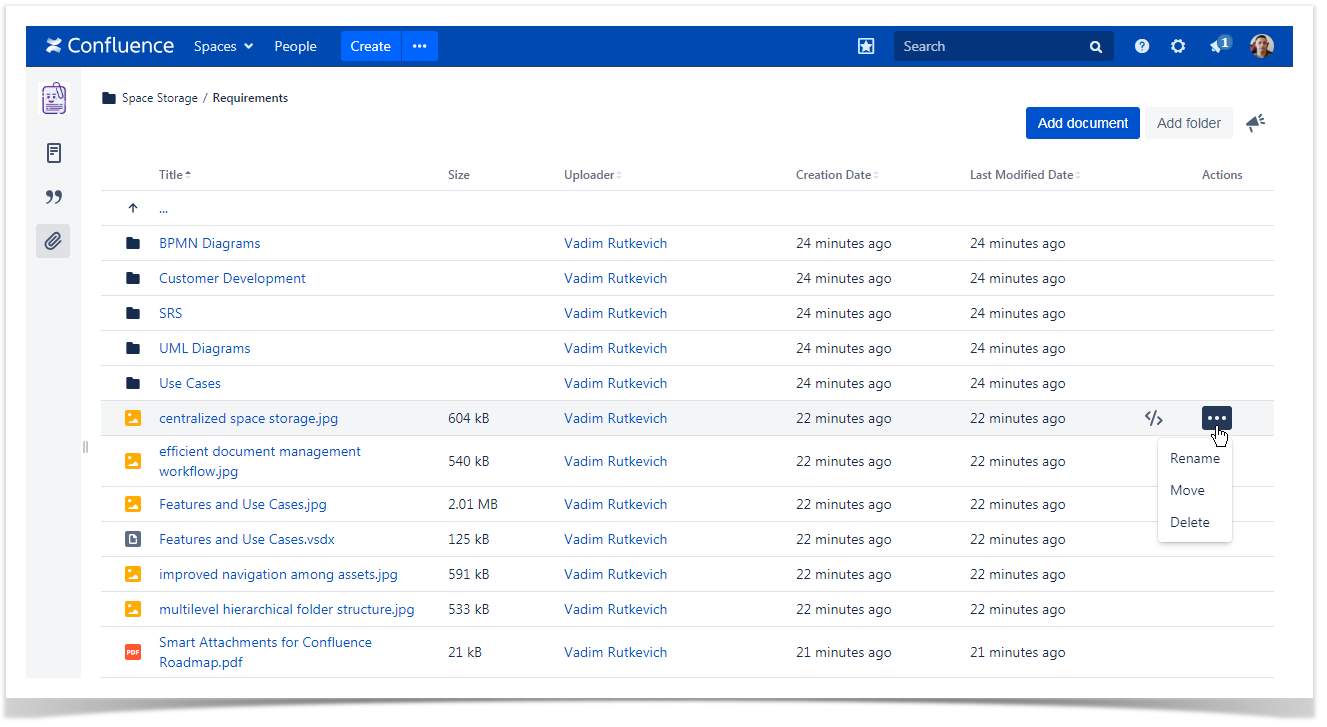
Deleting the document
On the list with documents, locate the document you want to delete.
- Hover over the document.
- Click the [...] button.
- Select Delete.
- Confirm the removal of the document.
| Info |
|---|
The document will be deleted with all its revisions. If you have the permission to delete only your |
Embedding documents into Confluence pages
- On the list with documents, locate the document you want to embed.
- Hover over the document.
- Click the Copy link to embed
 icon.
icon. - Open the page which you want to embed the document into.
- Press Ctrl + V (for Windows/Linux) or Cmd + V (for MacOS).
The link will be converted into the embedded document.

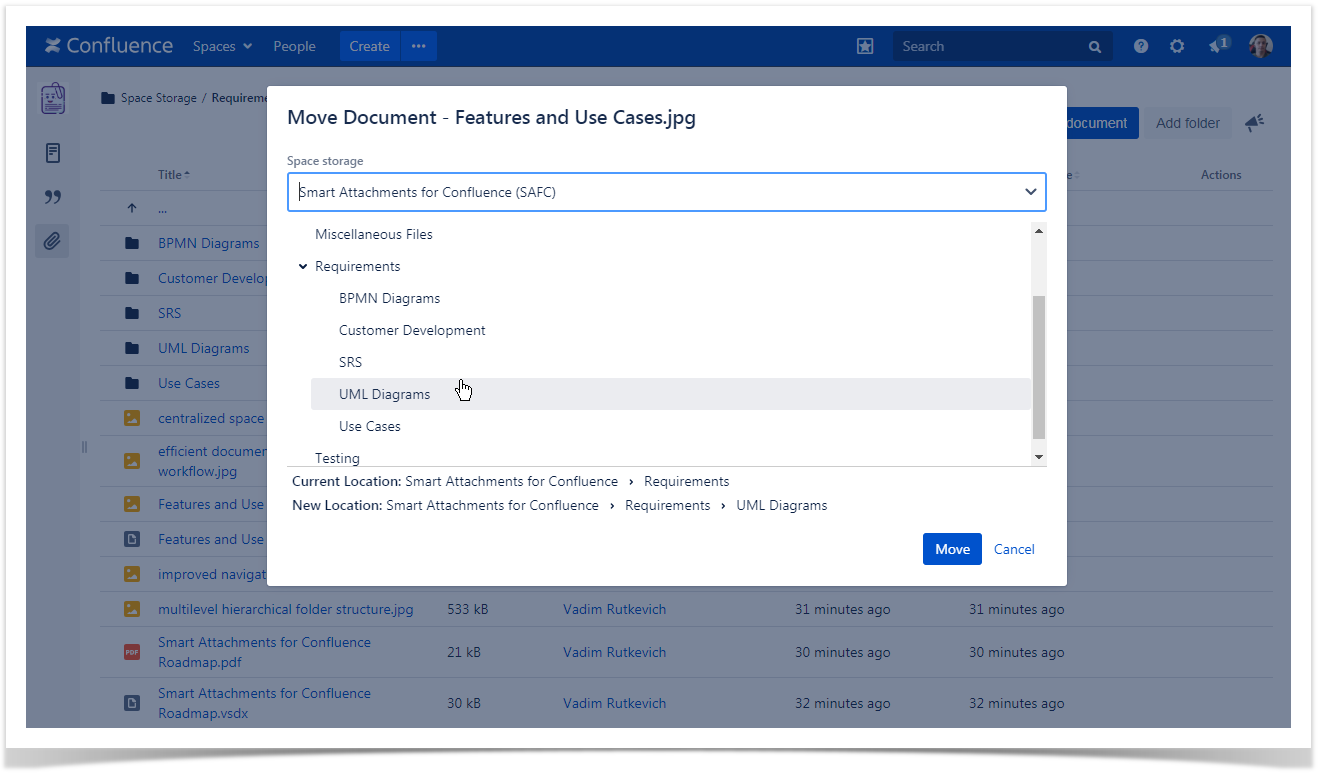
Moving documents to folders
- On the list with documents, locate the document you want to move.
- Hover over the document.
- Click the [...] button.
- Select Move.
- In the Move Document form, select the space storage and folder which you want to move the document to.
- Click Move.
You will automatically transition to the new location of the document.