Download PDF
Download page Table filtration.
Table filtration
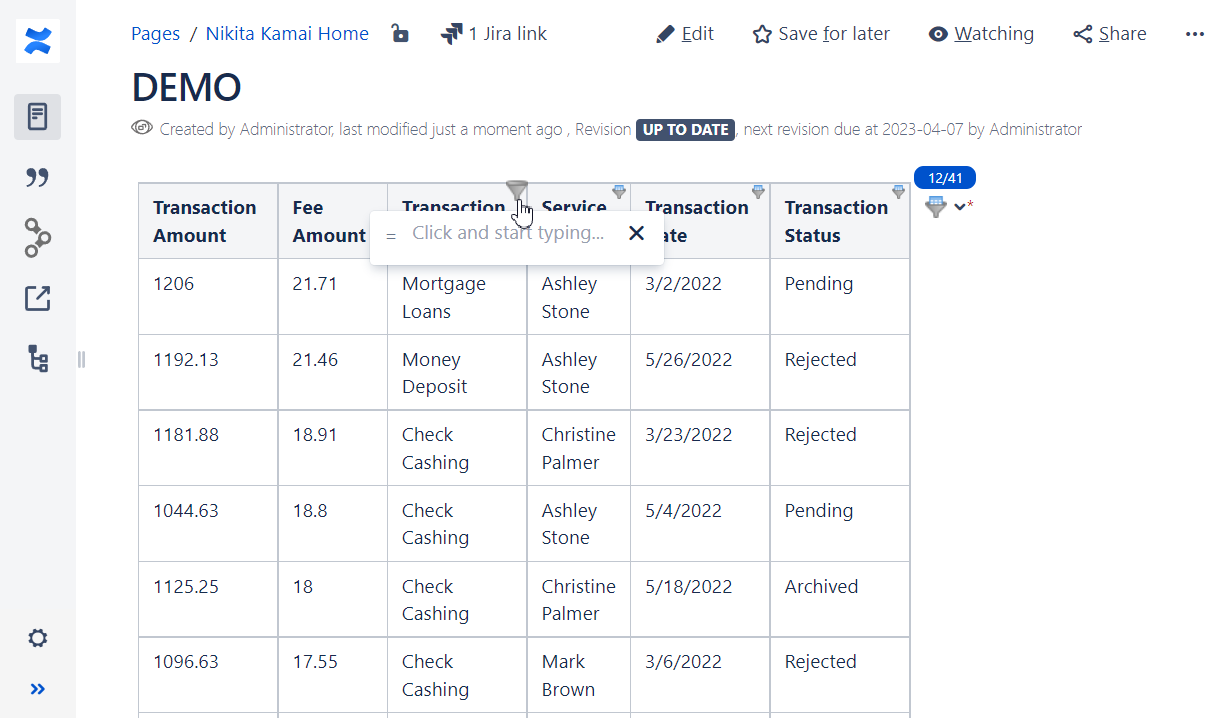
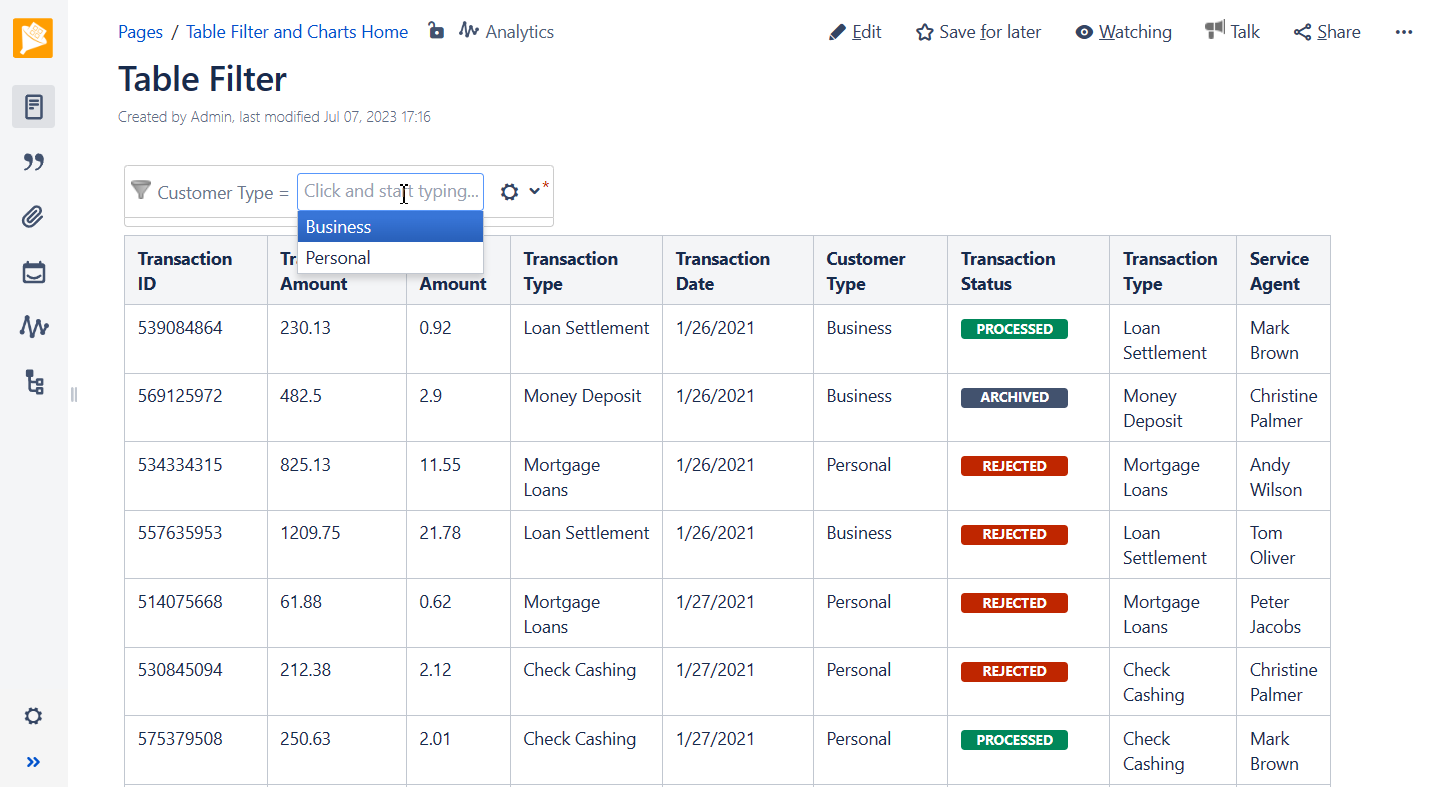
Quick inline filtration in the page view mode
- Hover over a column header.
- Click the Funnel icon.
- Select or type values to filter table data.
- Add multiple filters to table columns.
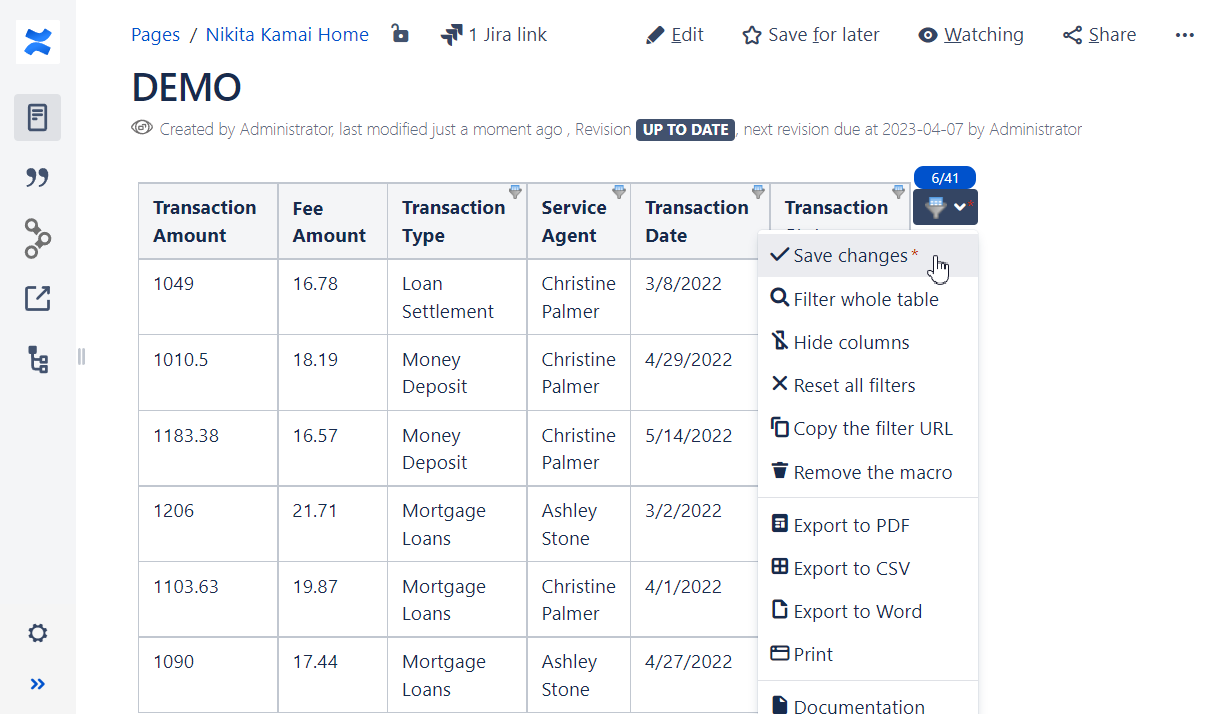
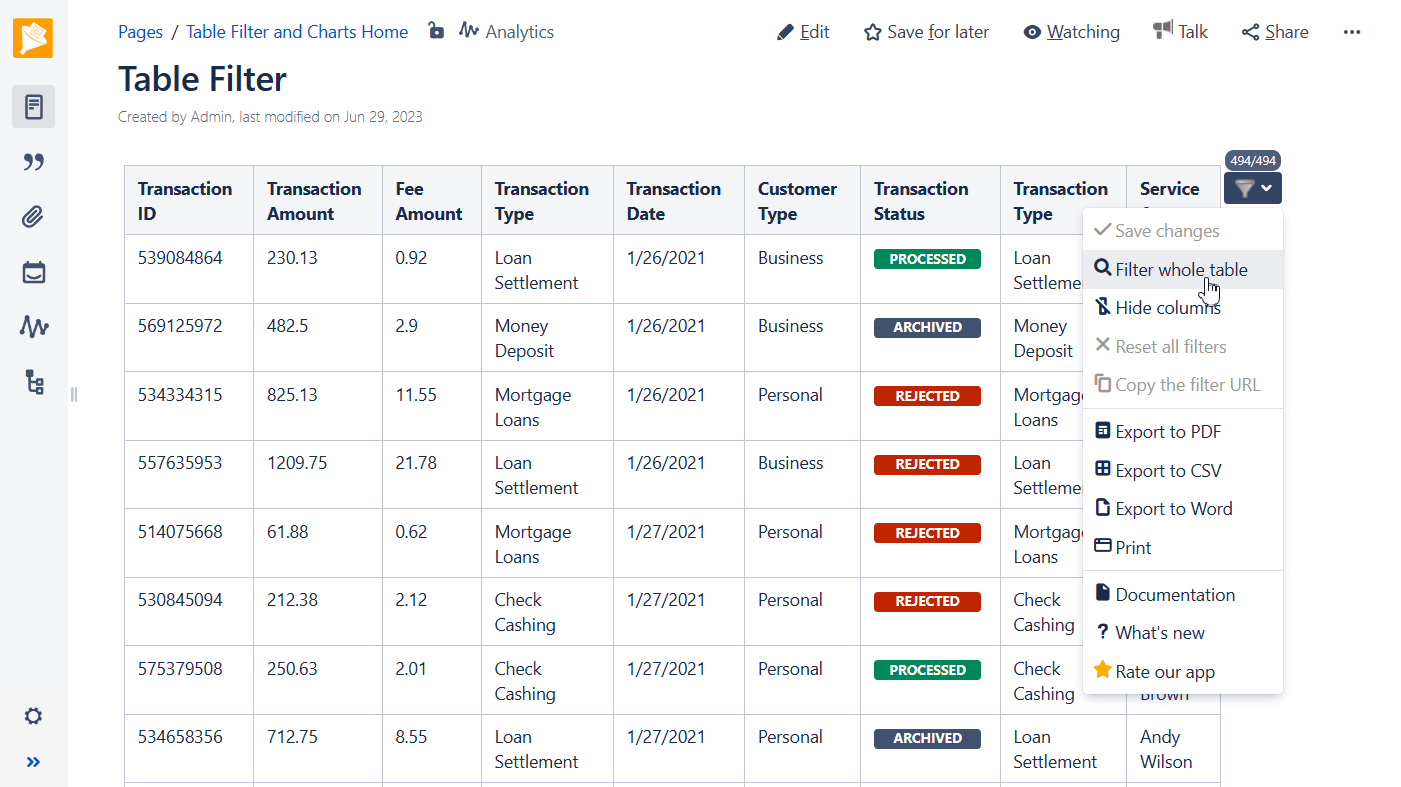
- Use all the options available in the classic filtration panel: filtering the whole table, hiding columns, filtering not equal values, exporting table data.
- To save the changes and insert the Table Filter macro click the funnel icon in the top right corner and select Save changes.
In Cloud you need to enable table filtration on a page first.
Adding filters to table columns
Adding filters in the page view mode
- Insert the Table Filter macro.
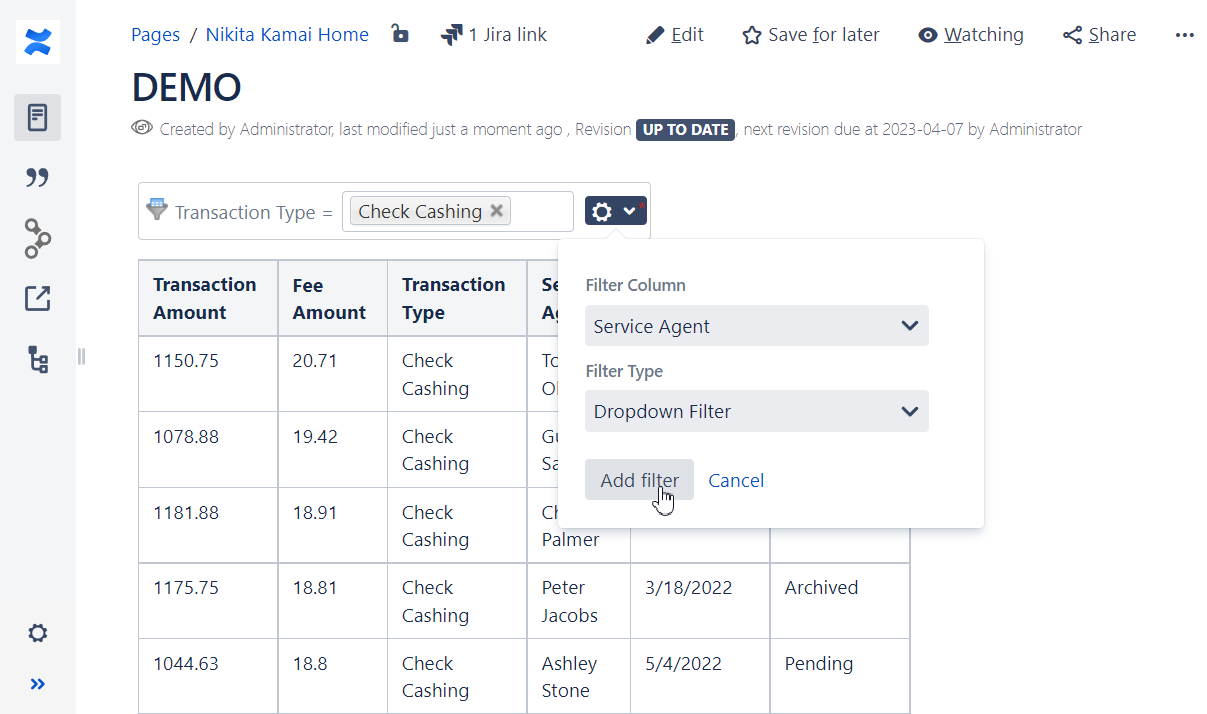
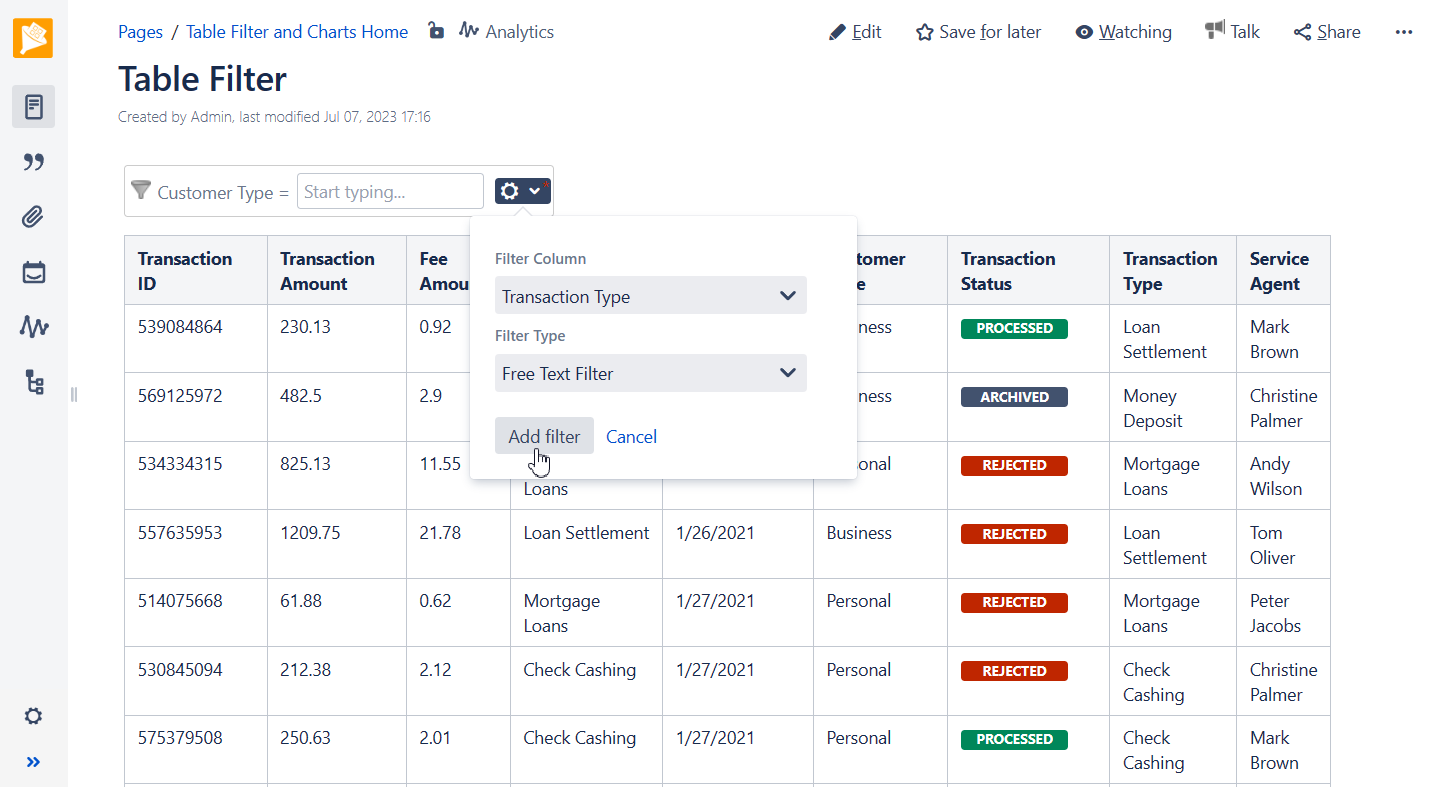
- On the filtration pane in the page view mode, locate the cogwheel icon and click it.
- Select Add filter.
- Select the appropriate column and filter type (read about the filter types available below ).
- Click Add filter.
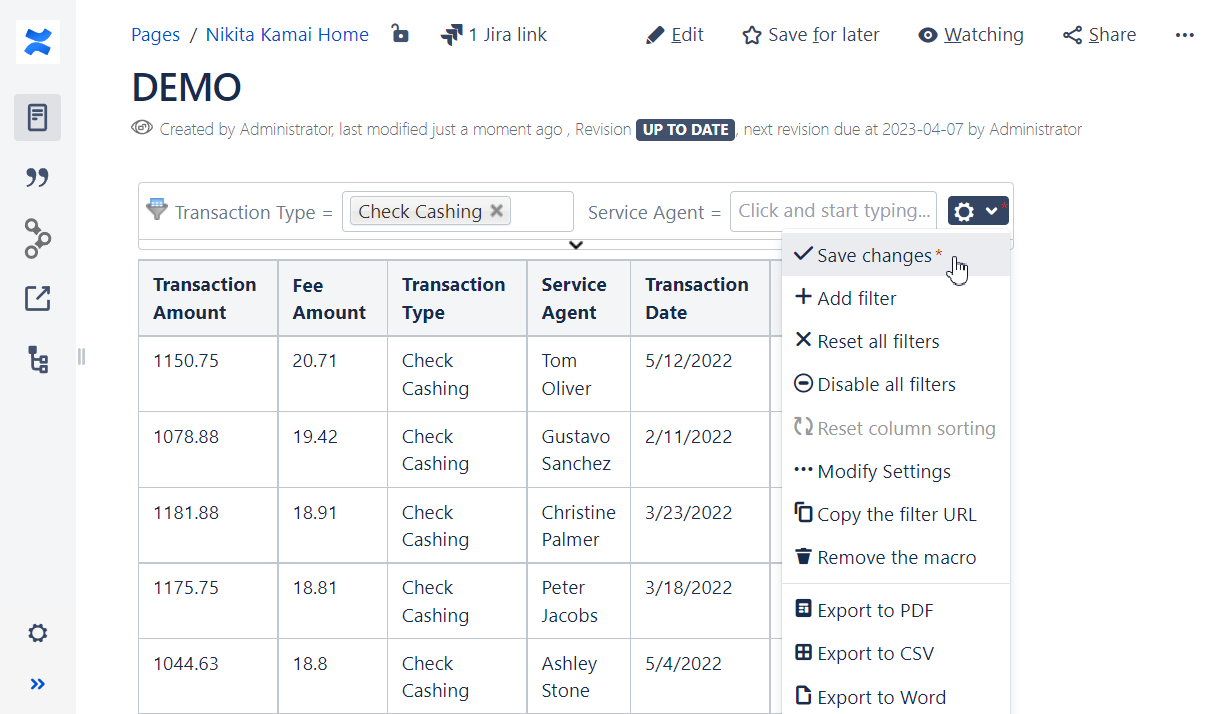
- To save the modifications in the macro body, click the cogwheel icon and select Save changes .
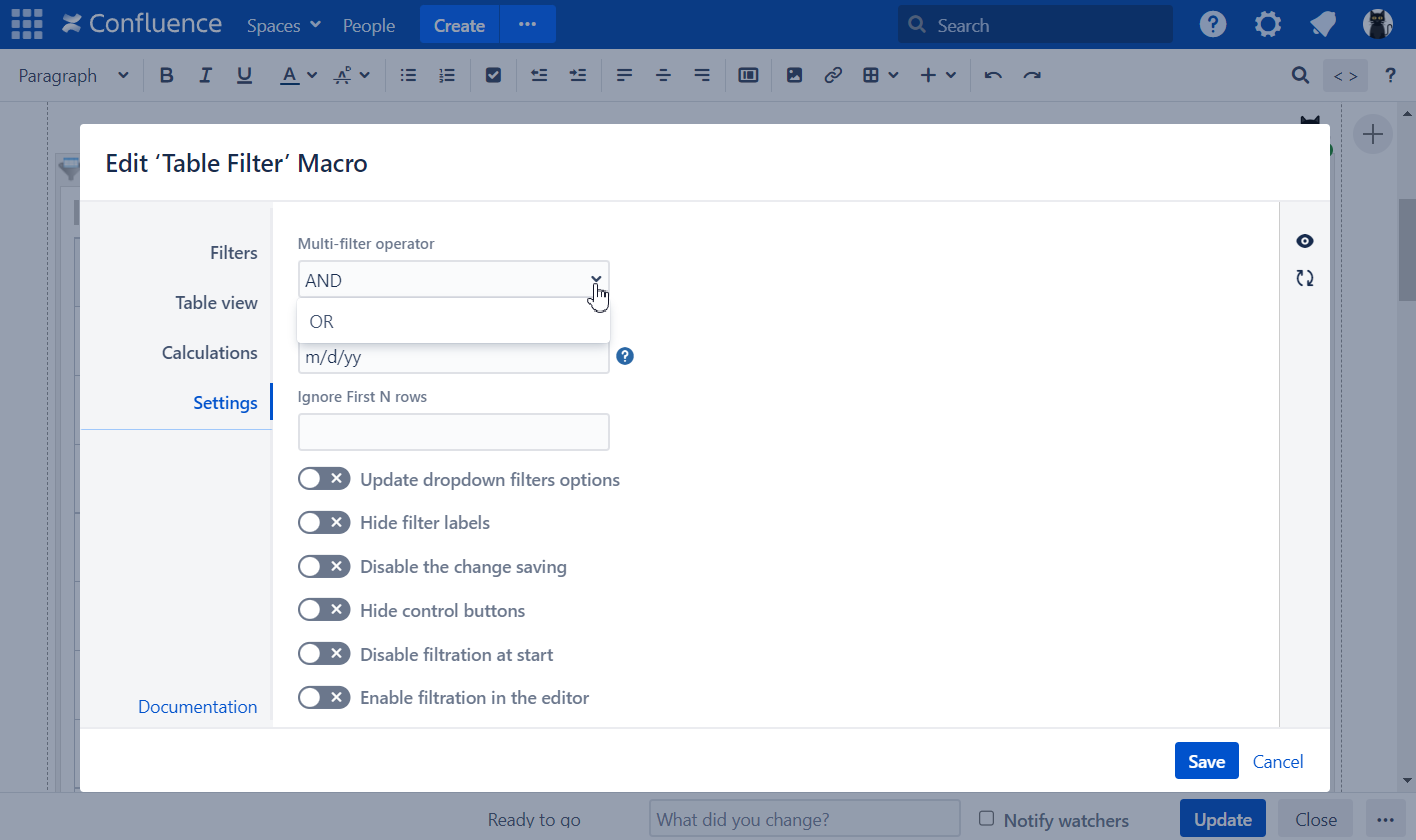
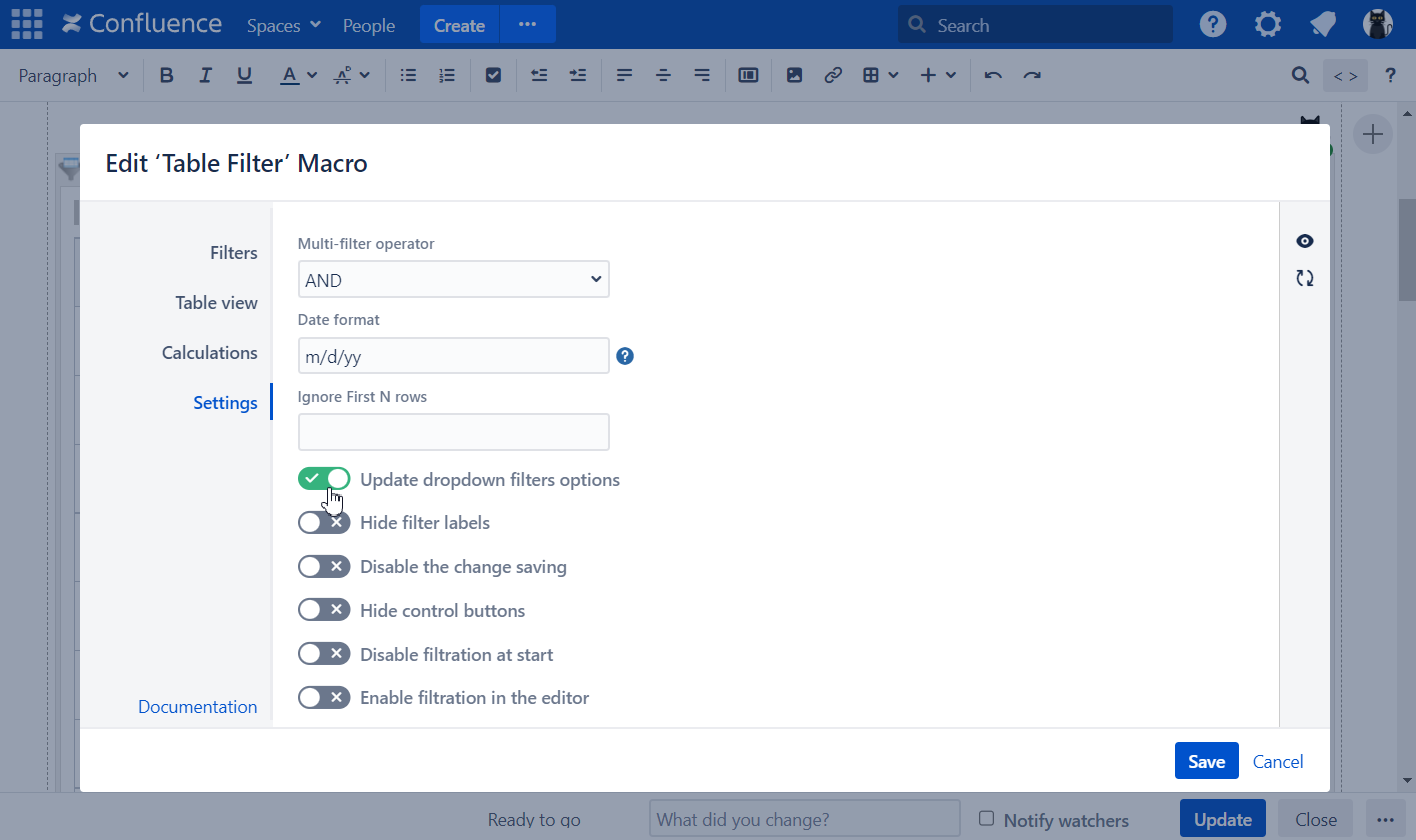
If you add filters to multiple columns, you may need to apply either all or separated filtration criteria. You can set the Multi-filter operation option.
- Switch the page to the edit mode.
- Select the macro and click Edit.
- Switch to the Settings tab.
- Locate the Multi-Filter operator box.
- Select the appropriate operator - AND or OR.
- Save the macro and the page.
Removing filters in the page view mode
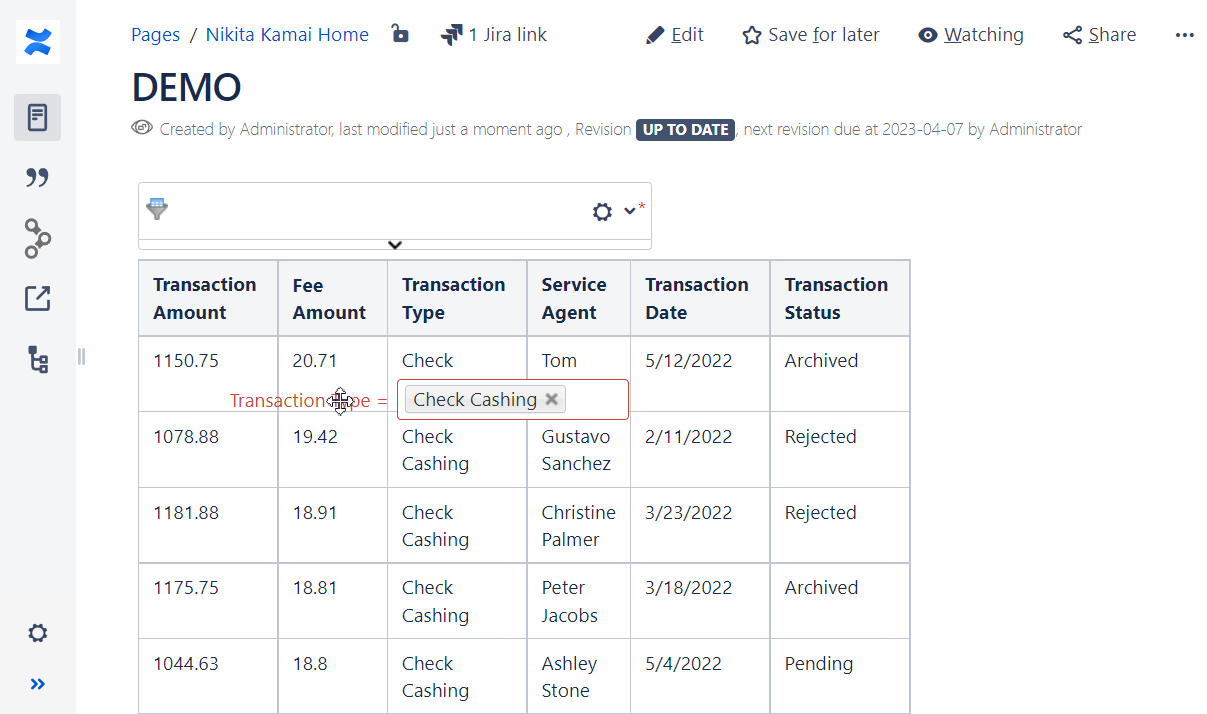
- On the filtration pane, locate the filter you want to delete.
- Click and drag the filter out of the filtration panel's range. It is highlighted red.
- Release the left mouse button. The filter will be deleted.
- To save the modifications in the macro body, click the cogwheel icon and select Save changes.
Look at this section if you want to remove the whole Table Filter macro from the table.
Adding and removing filters in the macro browser
To add filters to the table:
- Switch the page to the edit mode.
- Insert the Table Filter macro and paste the table within the macro body.
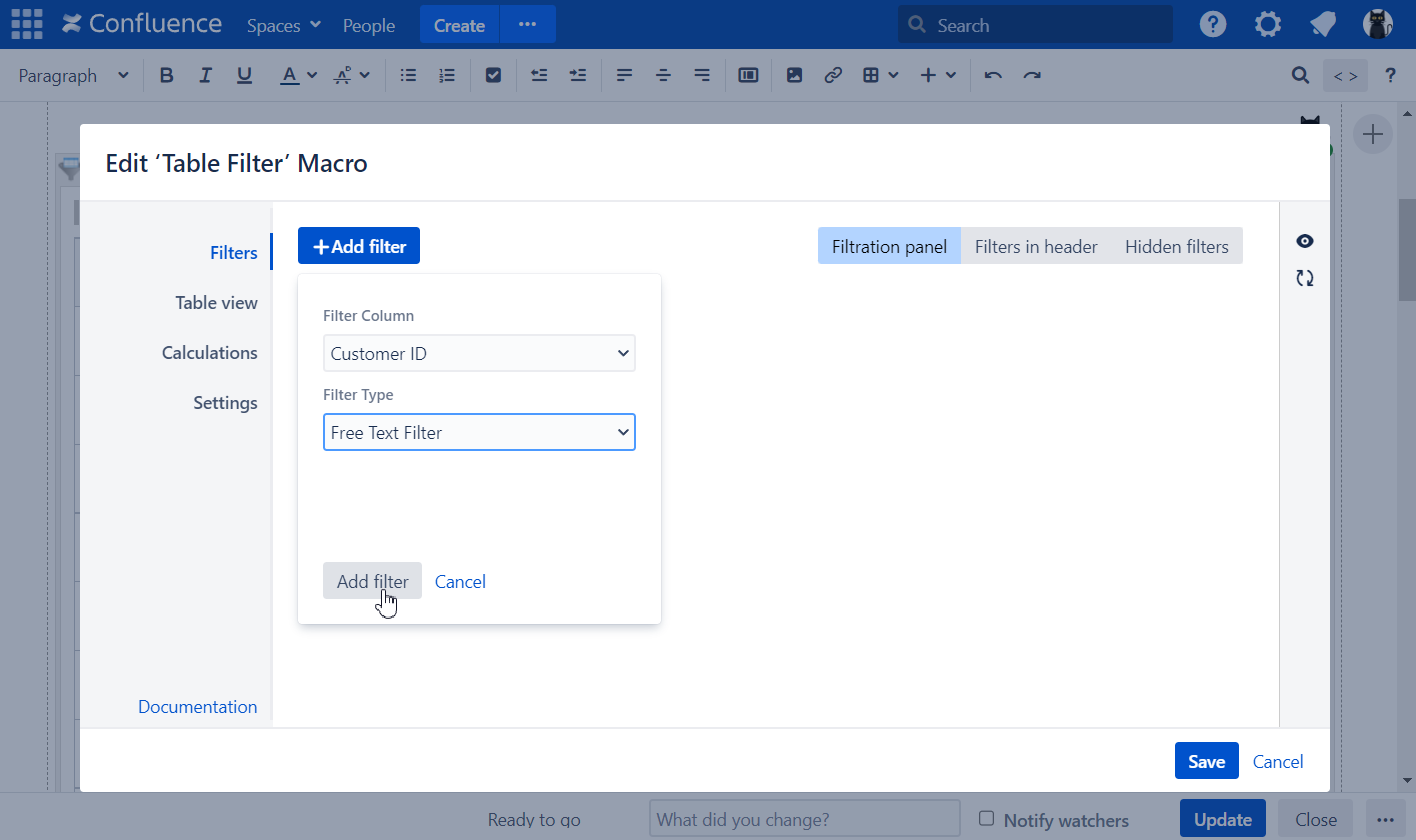
- Select the macro and click Edit.
In the Filters tab, click the Add filter button and select the column for filtration along with the filter type. You can select same columns to set different filters.
Save the macro and the page.
To remove filters from the columns click the urn icon to the right of the filter type box.
Selecting values to filter
Selecting values
In the page view mode:
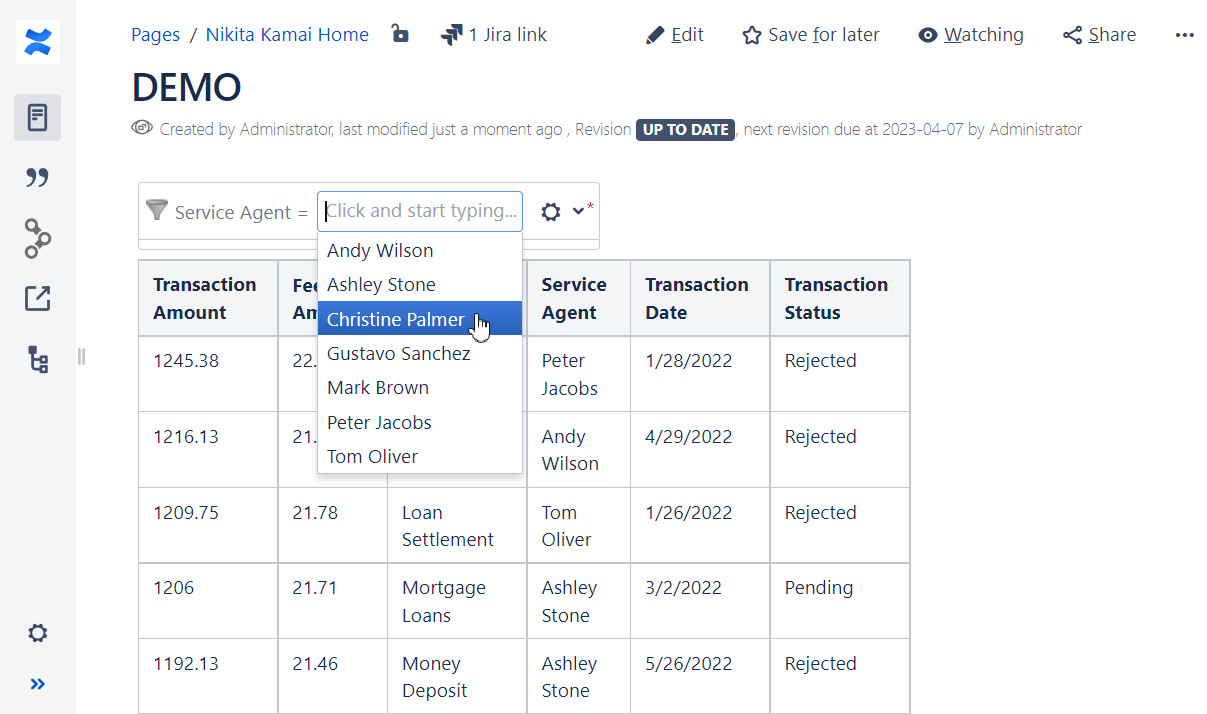
- After adding filters to a table, locate the filter you want to specify default values for.
- Select or enter the appropriate default values in filter boxes for one or multiple filters.
- To save the modifications in the macro body, click the cogwheel icon and select Save changes.
In the macro browser:
- Switch the page to the edit mode.
- Select the macro and click Edit.
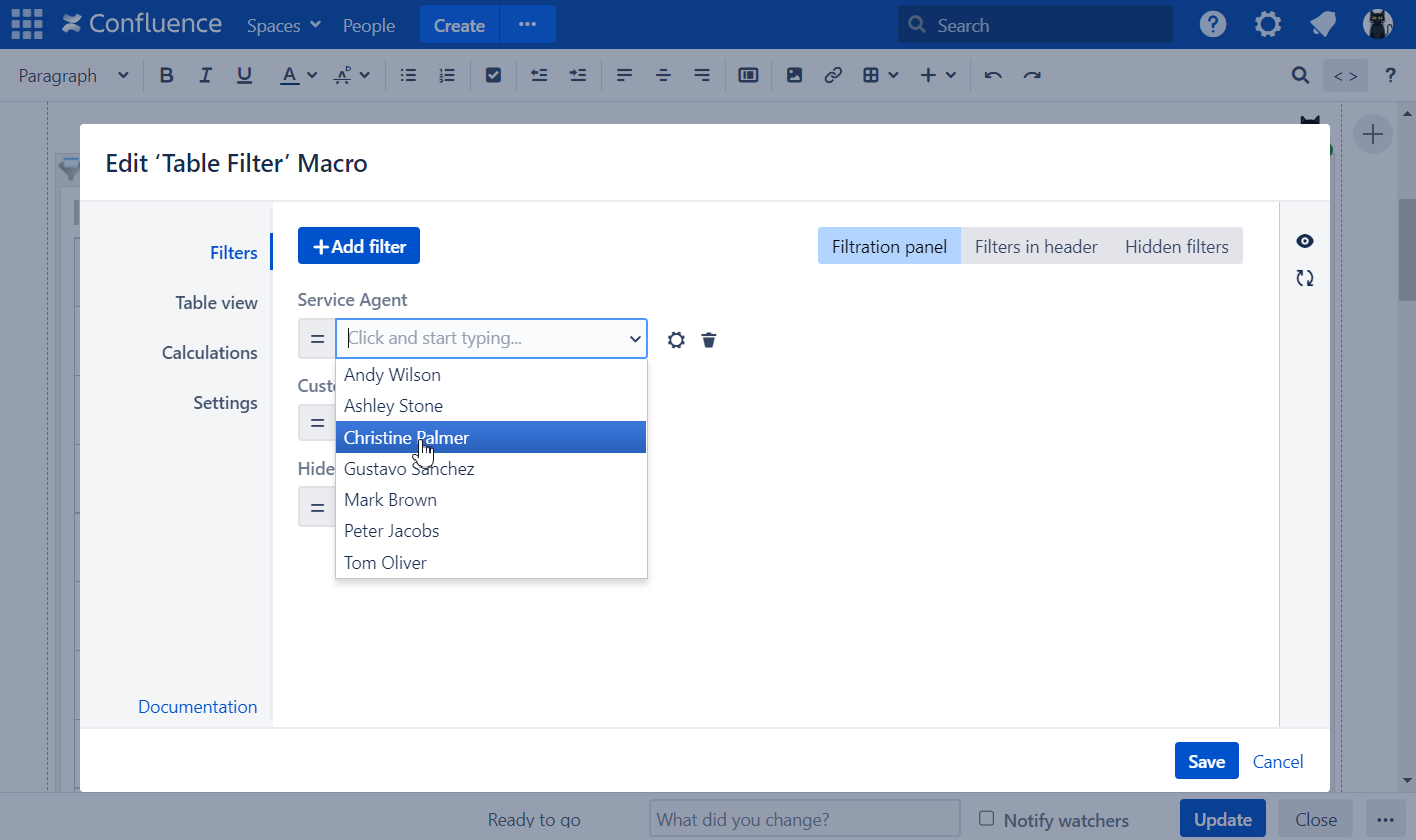
- Switch to the Filters tab.
- Select or enter the appropriate default values for available filters. You can set multiple values for the dropdown, free text, and global filters.
- Save the macro and the page.

Filtering rows not equal to selected values
In the page view mode:
- Click the = icon for the appropriate filter on the filtration pane. The icon changes to ≠, which means that the filter operates in the reverse mode.
- Click the ≠ icon to switch the filter back to the direct mode.
- To save the modifications in the macro body, click the cogwheel icon and select Save changes.
In the macro browser:
- Switch the page to the edit mode.
- Select the macro and click Edit.
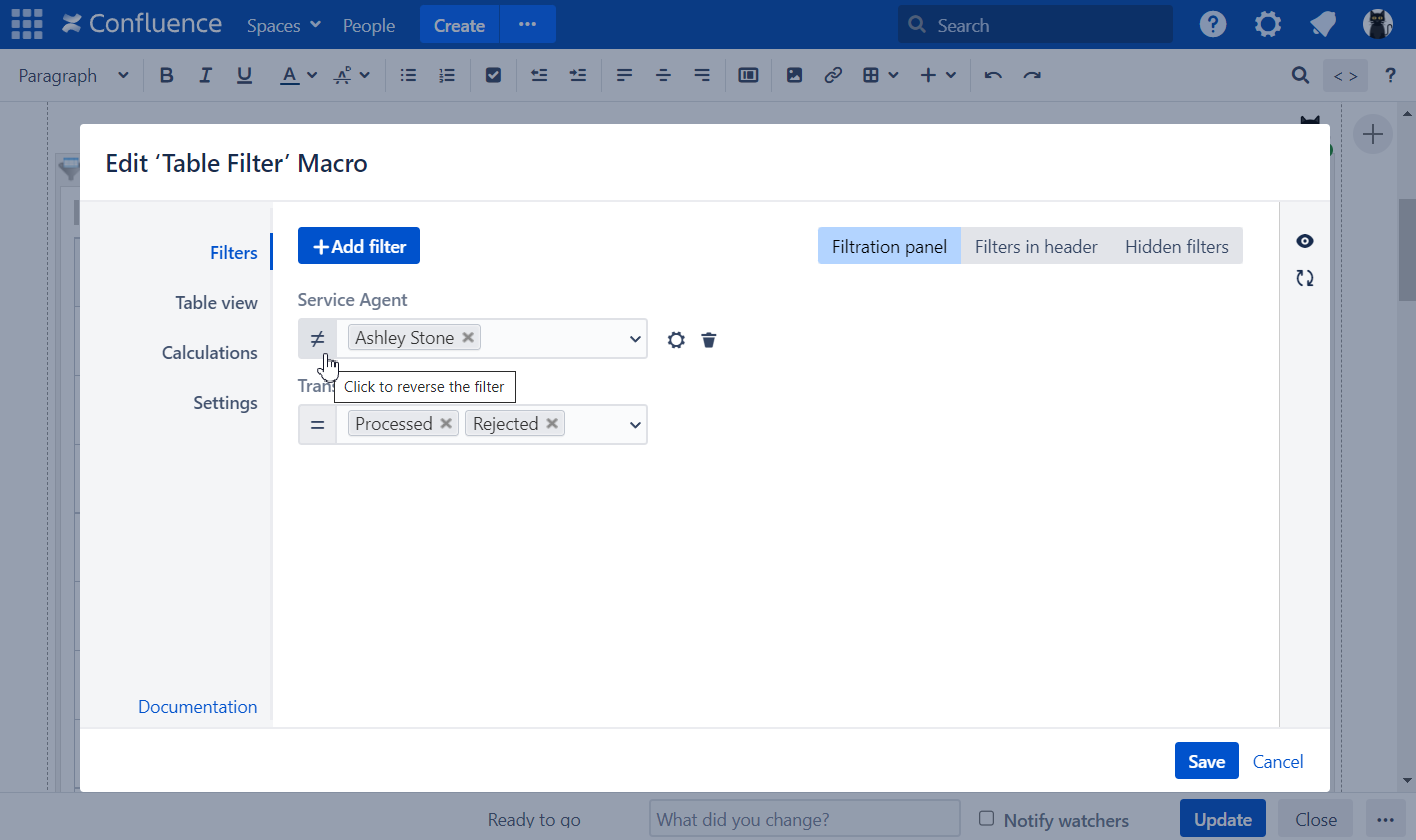
- Switch to the Filters tab.
- Click the = icon of the appropriate filter(s) set for the chosen column(s). The icon changes to ≠, which means that the filter operates in the reverse mode. Click the ≠ icon again to switch back to the direct mode.
- Save the macro and the page.

Resetting values
The app allows you to temporarily reset the defined filtration values. This may be useful when you deal with the table with multiple filters applied. Instead of clearing values for each filter, you can do this at once.
To reset filtration values:
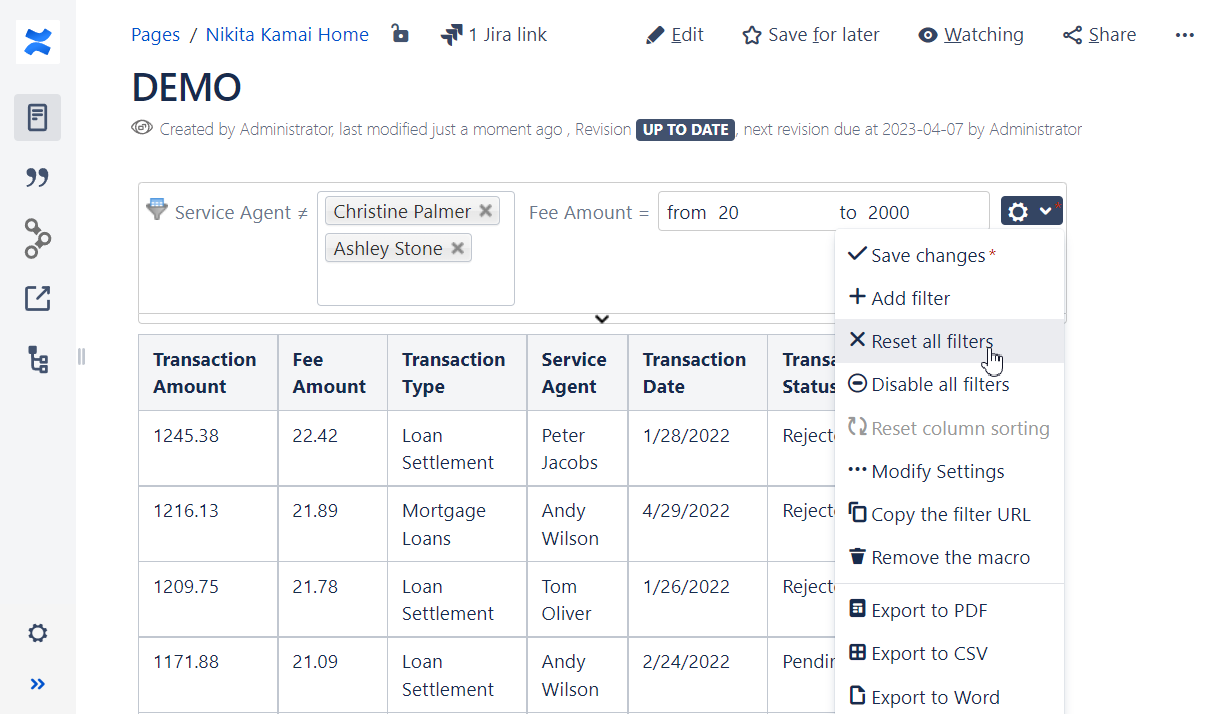
- Open the page with the table.
- On the filtration pane, click the cogwheel icon and select the Reset all filters .
- To save the modifications in the macro body, click the cogwheel icon and select Save changes.
All values in the filters are reset. If the changes are not saved, the default filtration values will be restored upon the page reload.
Ignoring top rows when filtering
Set this option if you have some data in the top rows of a table that you don't want to be filtered.
- Switch the page to the edit mode.
- Select the macro and click Edit.
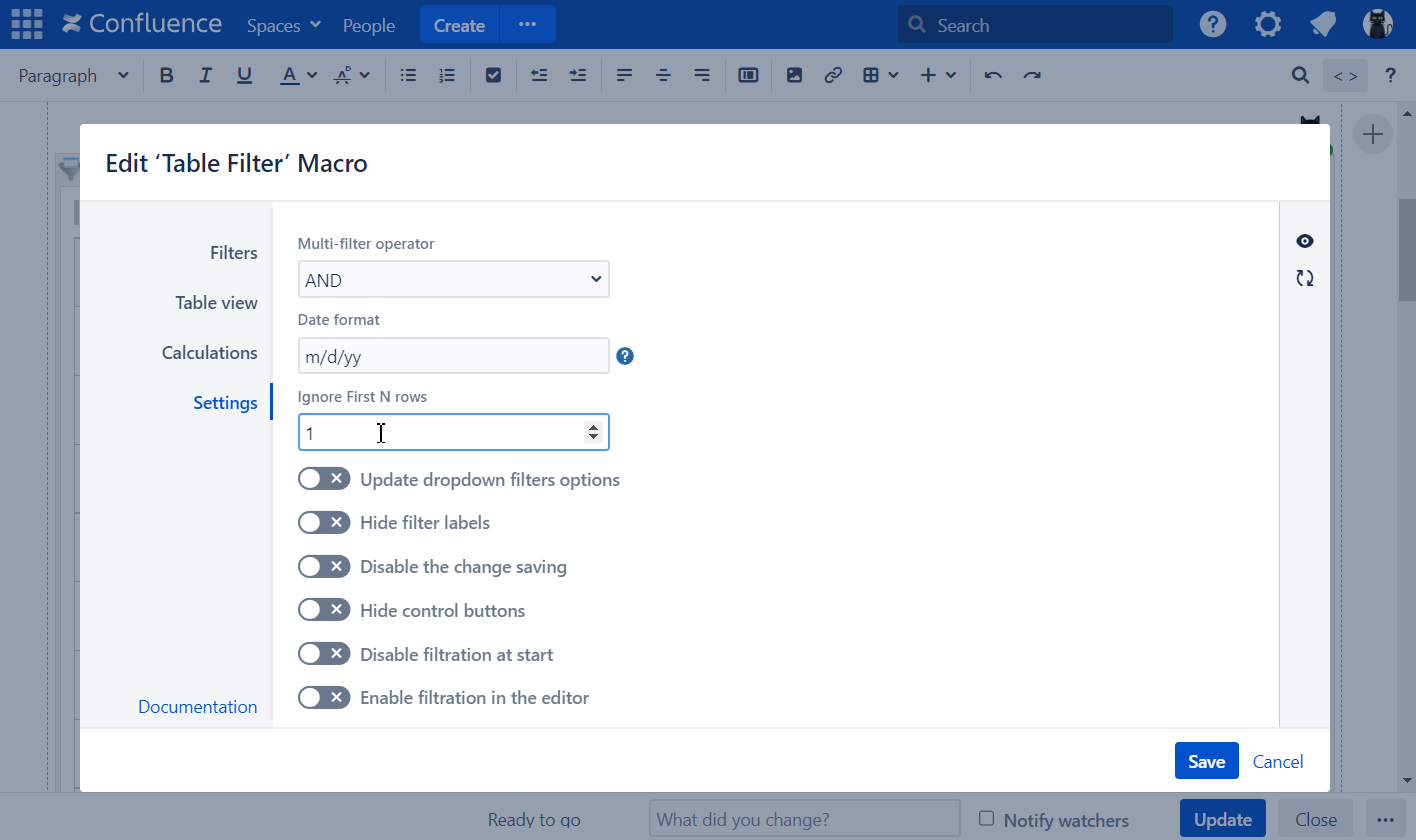
- Select the Settings tab.
- Locate the Ignore First N rows
- Enter the number of table rows to display.
- Save the macro and page.
Filter types available
Dropdown Filter
Displays the list of unique values stored in the selected column of your table. You can select one or multiple values for data filtration in this dropdown filter.
To filter delimited values with the Dropdown filter, set the Cell value delimiters option:
Switch the page to edit mode.
Select the macro and click Edit.
Switch to the Filter tab.
Locate the appropriate column with the selected Dropdown filter and click the cogwheel icon to the right.
Locate the Cell value delimiter field.
Enter the character (multiple characters) used to separate values in cells.

Save the macro and the page.
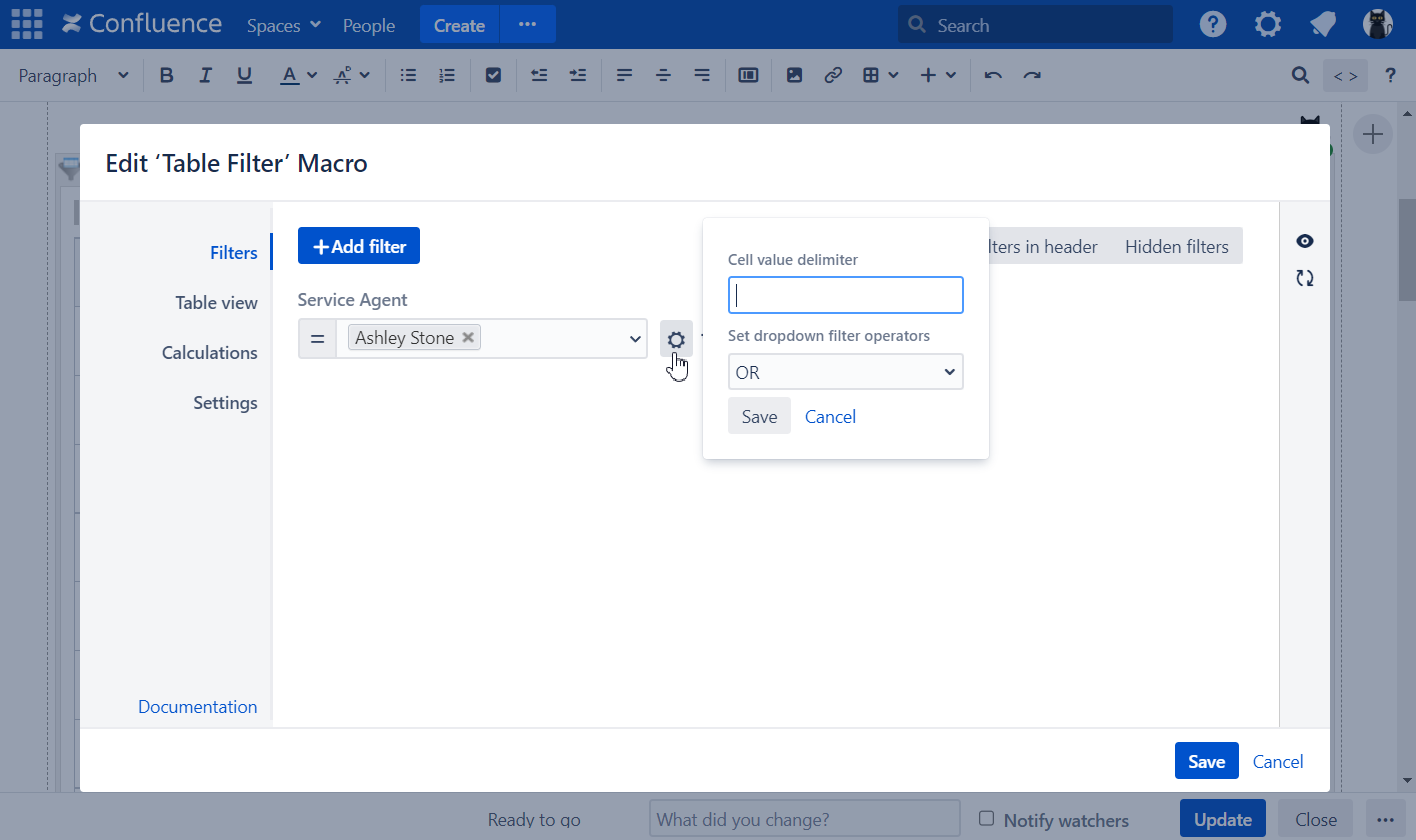
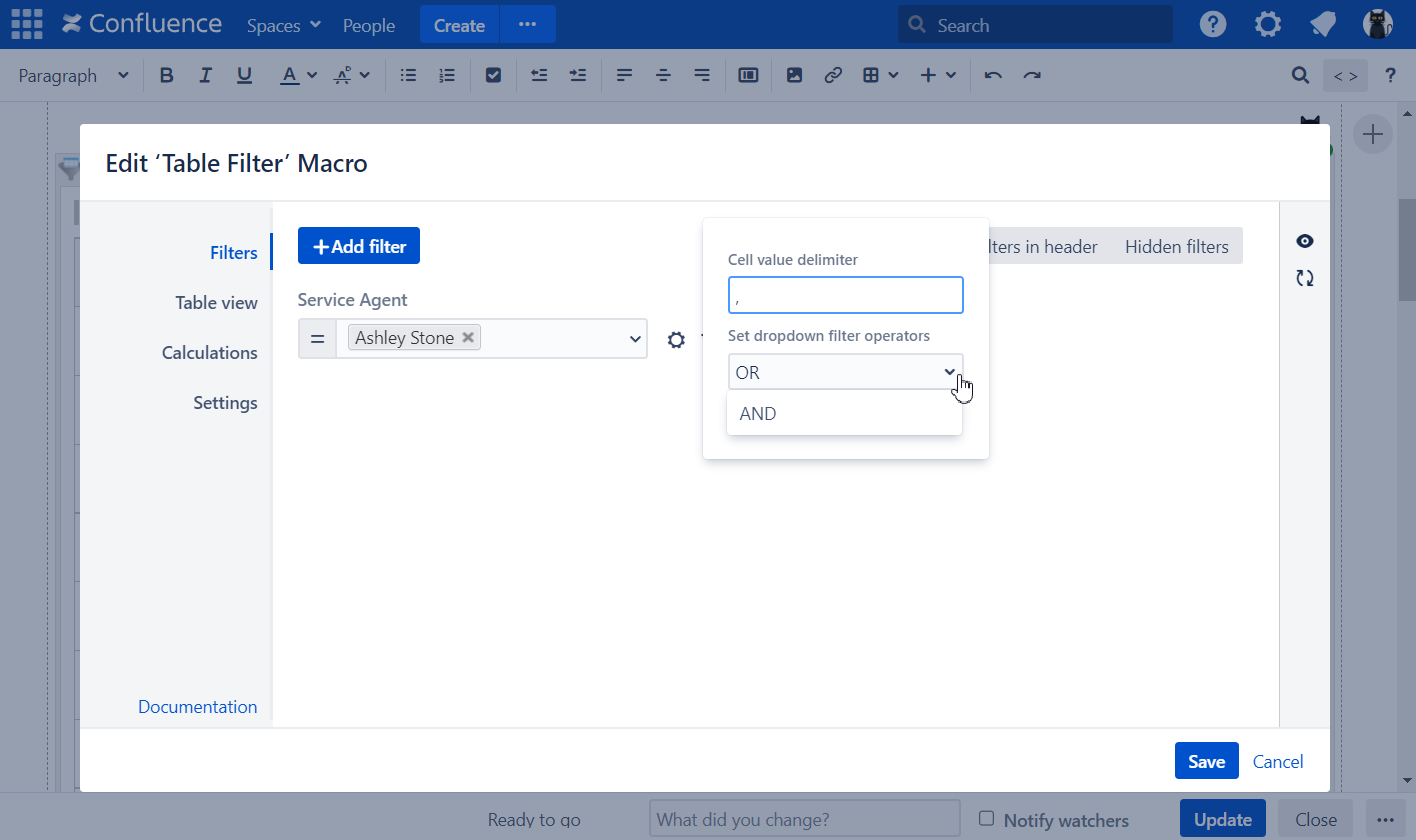
To filter all selected values, choose OR operator in the Set dropdown filter operators option.
To choose the way of dropdown list displaying set the Dropdown filters options updating option.
Switch the page to the edit mode.
Select the macro and click Edit.
Switch to the Settings tab.
Click the Update dropdown filter options slider to display only the unique values from the selected column available after other filters were applied.
Click the Update dropdown filter options slider again to display all the unique values from the selected column of the table.
Save the macro and the page.
You can also filter tables with @-user mentions by the current user (write or select @currentUser ).
To filter tables by the current page title, enter @pageTitle in the dropdown filter.
Free Text Filter
Allows you to enter text queries for filtration of data in the selected column of your table.
- For more complex text filtration use regular expressions.
- To filter tables by the current page title, enter @pageTitle in the free text filter.
Global Filter
Allows you to enter text queries for simultaneous filtration of data throughout your Confluence table.
- For more complex text filtration use regular expressions.
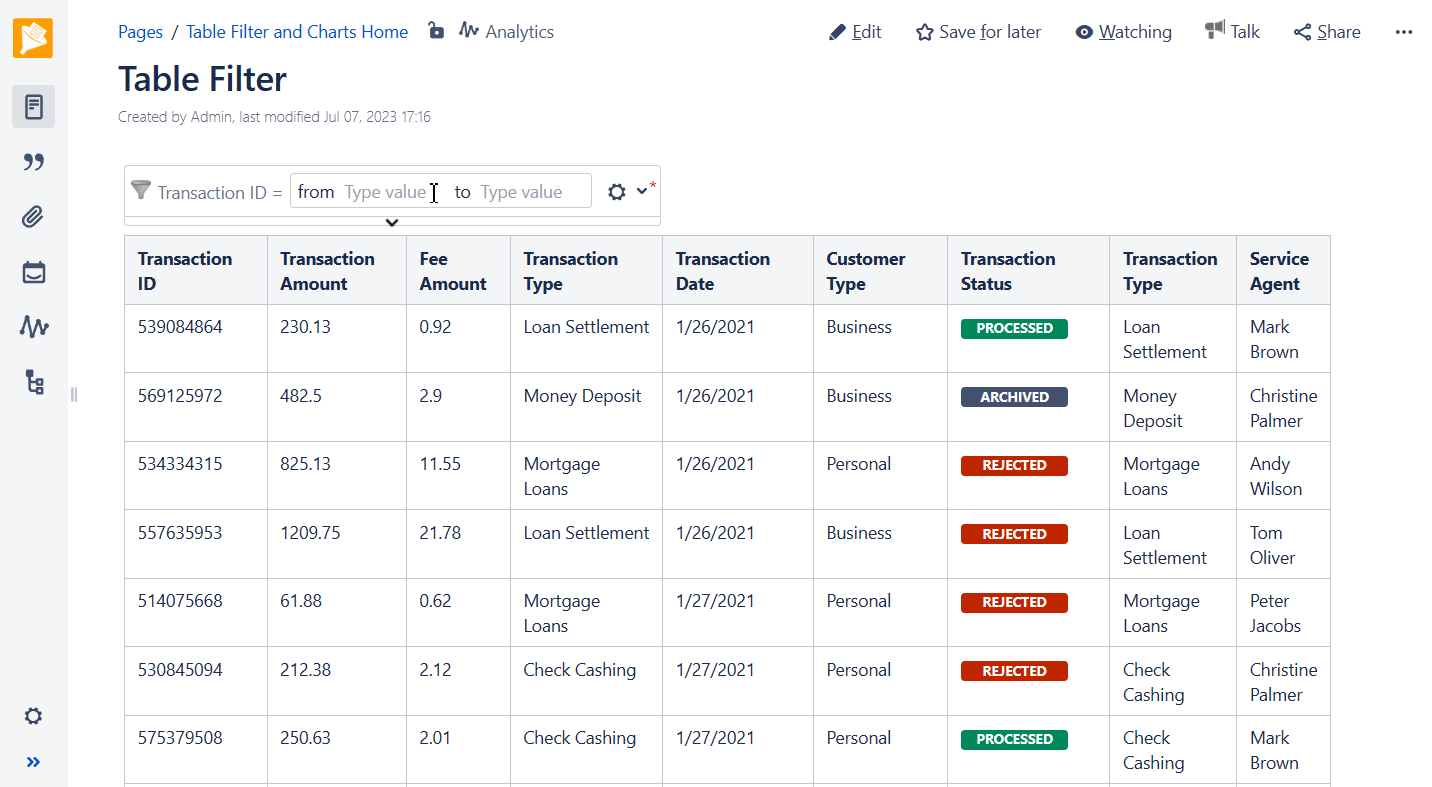
Number Filter
Allows you to specify the number range for showing data in the table. Alternatively, you can set the start or end value instead of the number range. Both cardinals and decimals are supported.
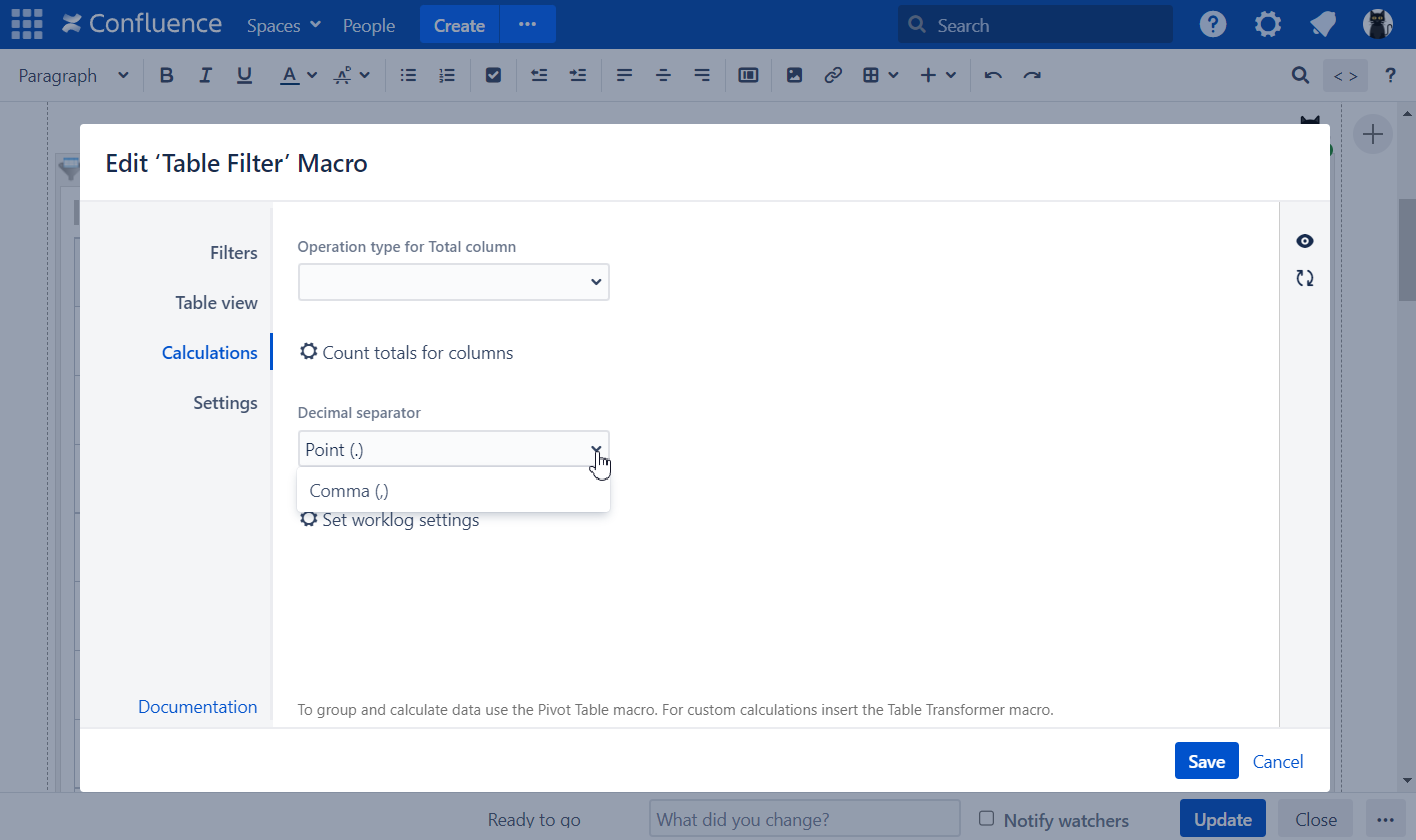
- To filter the values containing the decimal places set the Decimal separator.
- Switch the page to the edit mode.
- Select the macro and click Edit.
- Switch to the Сalculations tab.
- Locate the Decimal separator field.
- Select the correct decimal separator from the list, as follows:
- Point
- Comma
- Save the macro and the page.
- To filter the table with JIRA worklogs or time intervals with the Number range filter set the Worklog settings .
Date Range Filter
Allows you to specify the date range for showing data in the table. Alternatively, you can set the start or end value instead of the date range. You can either select the date format from the pre-defined ones or manually specify the required date format.
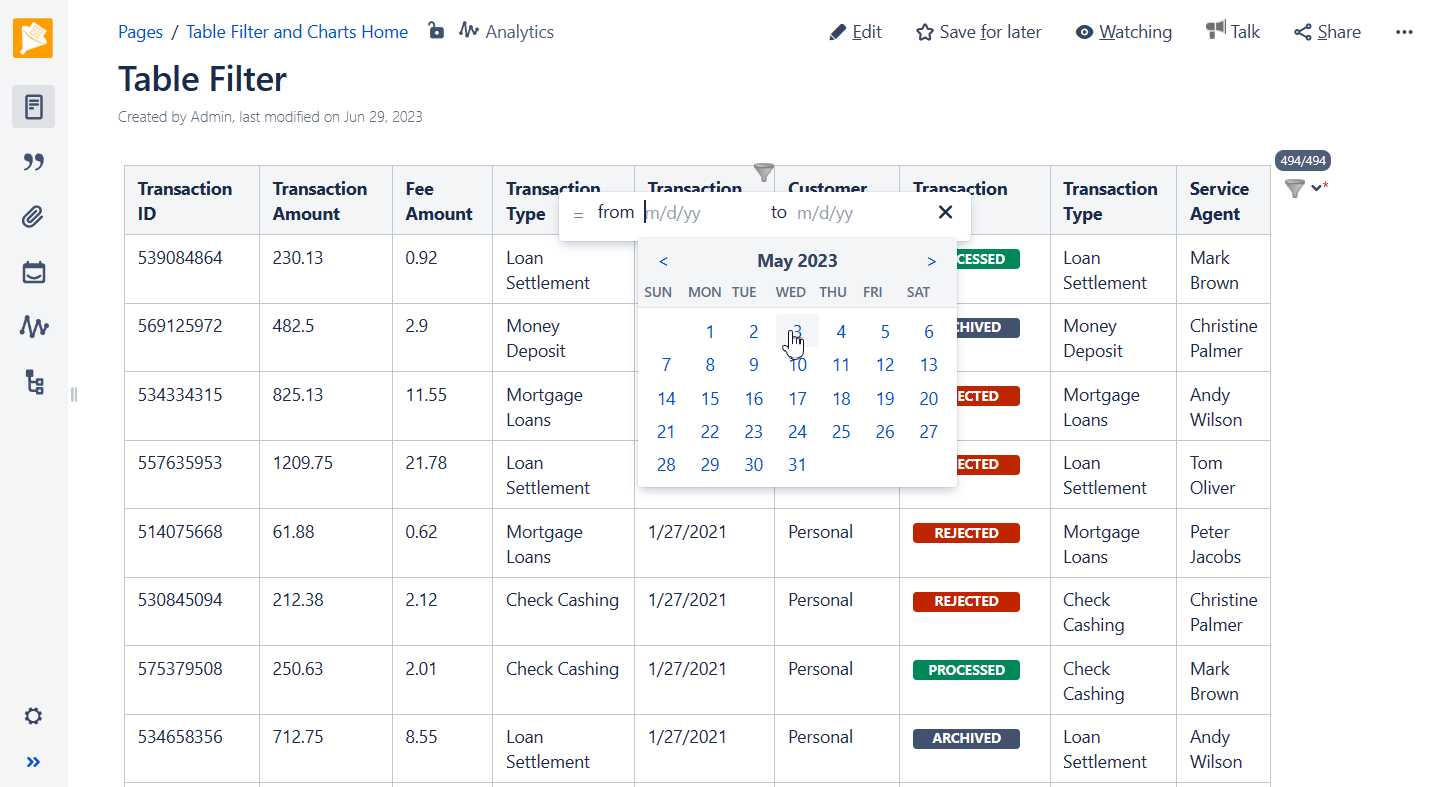
- To filter with the Date range filter set the correct Date format. When the dates are inserted with help of the date picker "//" , the Table Filter macro defines the date format in the table automatically .
- To filter by the dynamic date ranges set the dynamic values in the Date range filter's input . The filtered results will automatically update according to today's date .
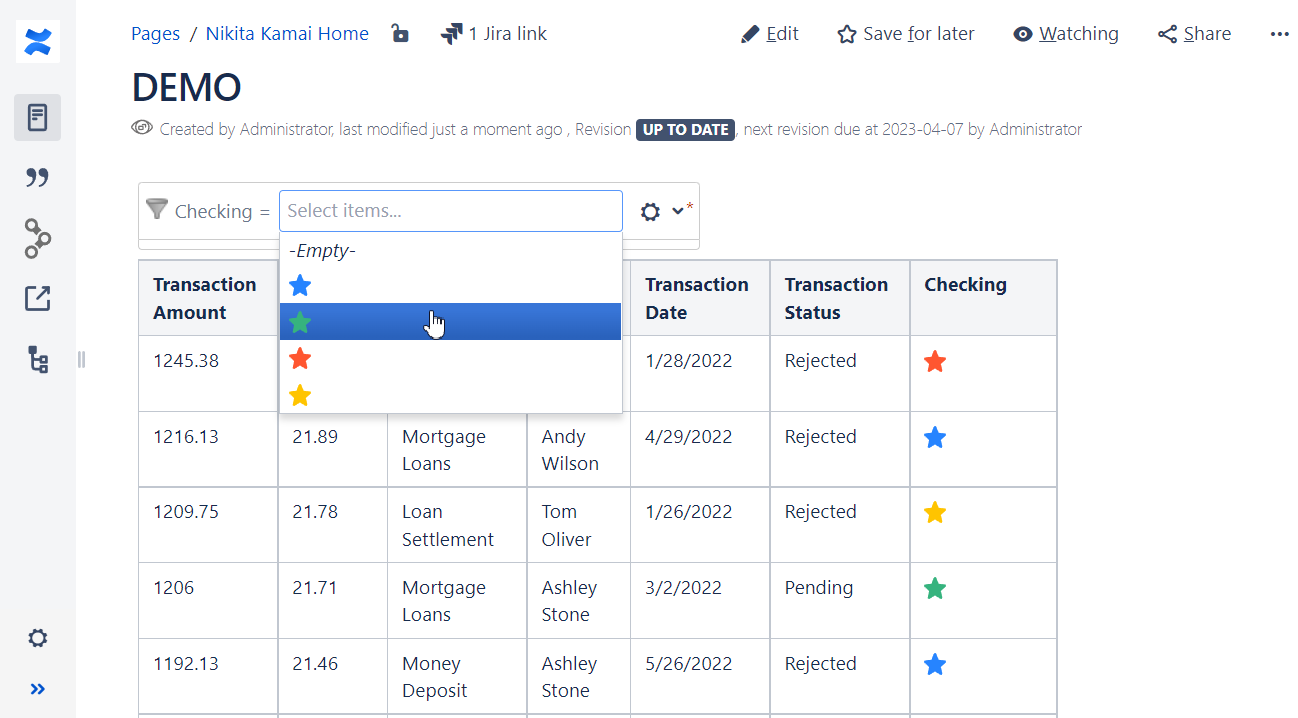
Visual Filter
Allows you to filter your table by one or multiple icons, emoticons, images or checked / unchecked boxes.
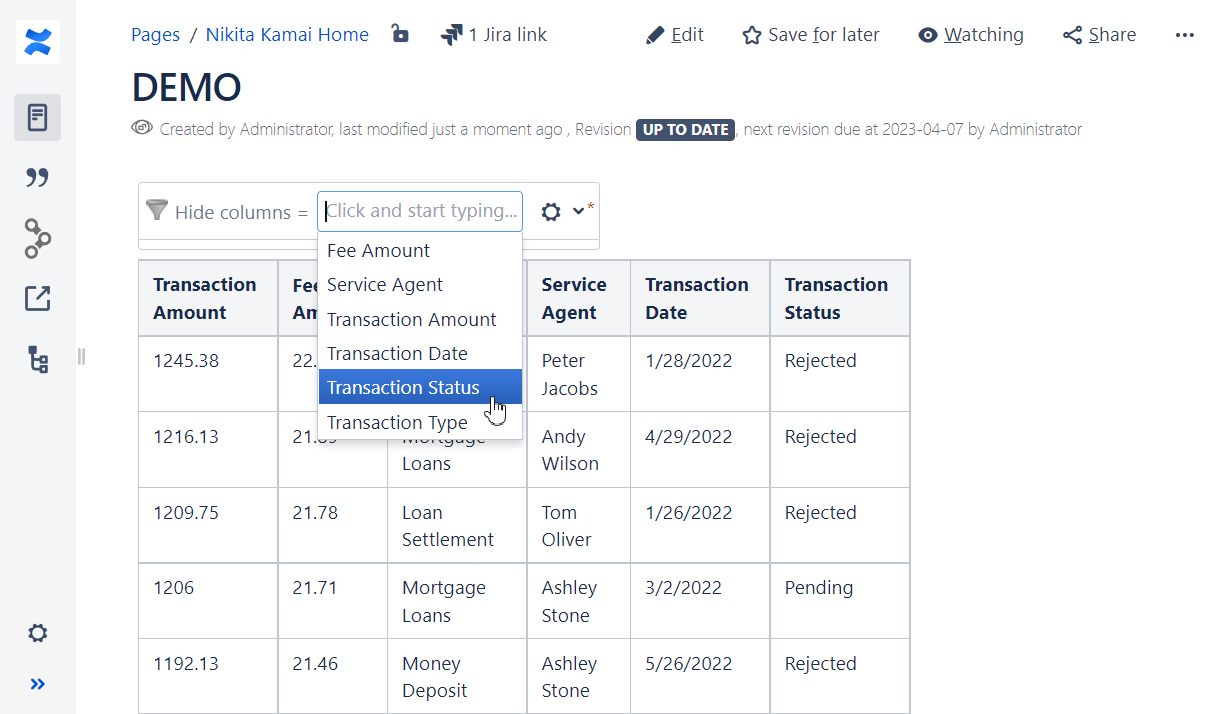
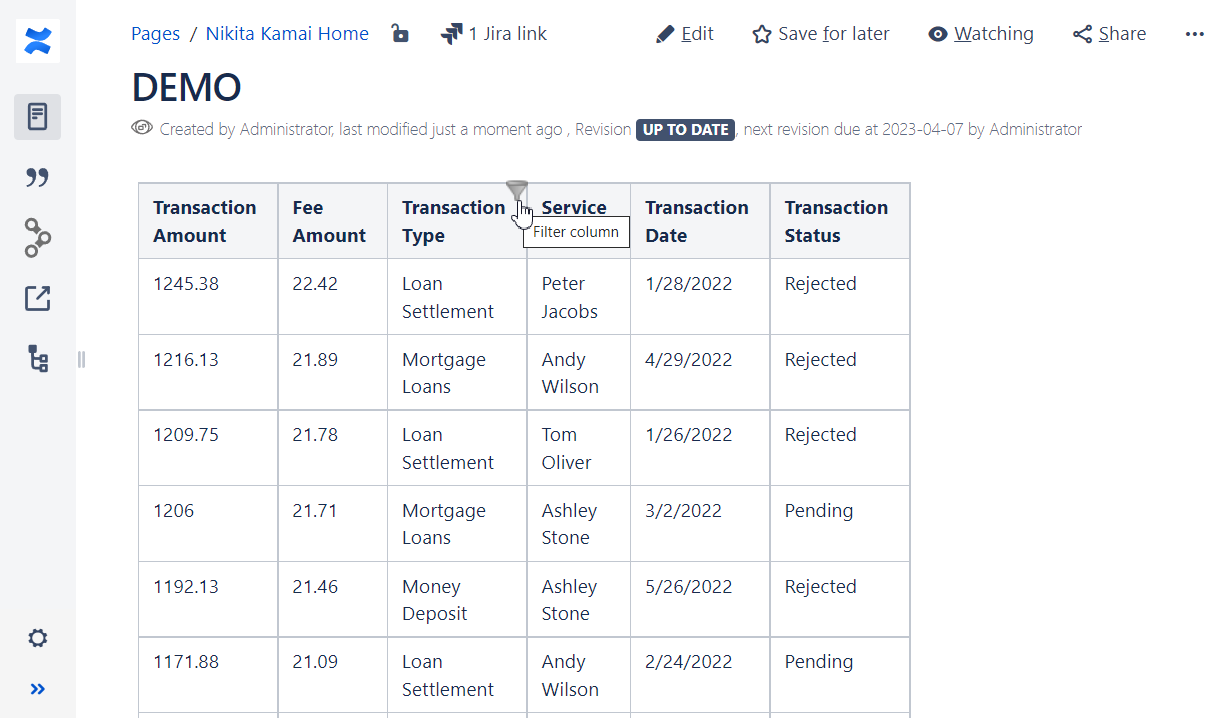
Hide Columns
Allows you to hide unnecessary table columns.
- To hide columns in the page view mode:
- On the filtration pane in the page view mode, locate the cogwheel icon and click it.
- Select Add filter.
- Select Hide columns from the Filter types list.
- Click Add filter.
- Locate the Hide columns filter box and select the columns you want to hide.
- To save the modifications in the macro body, click the cogwheel icon and select Save changes .
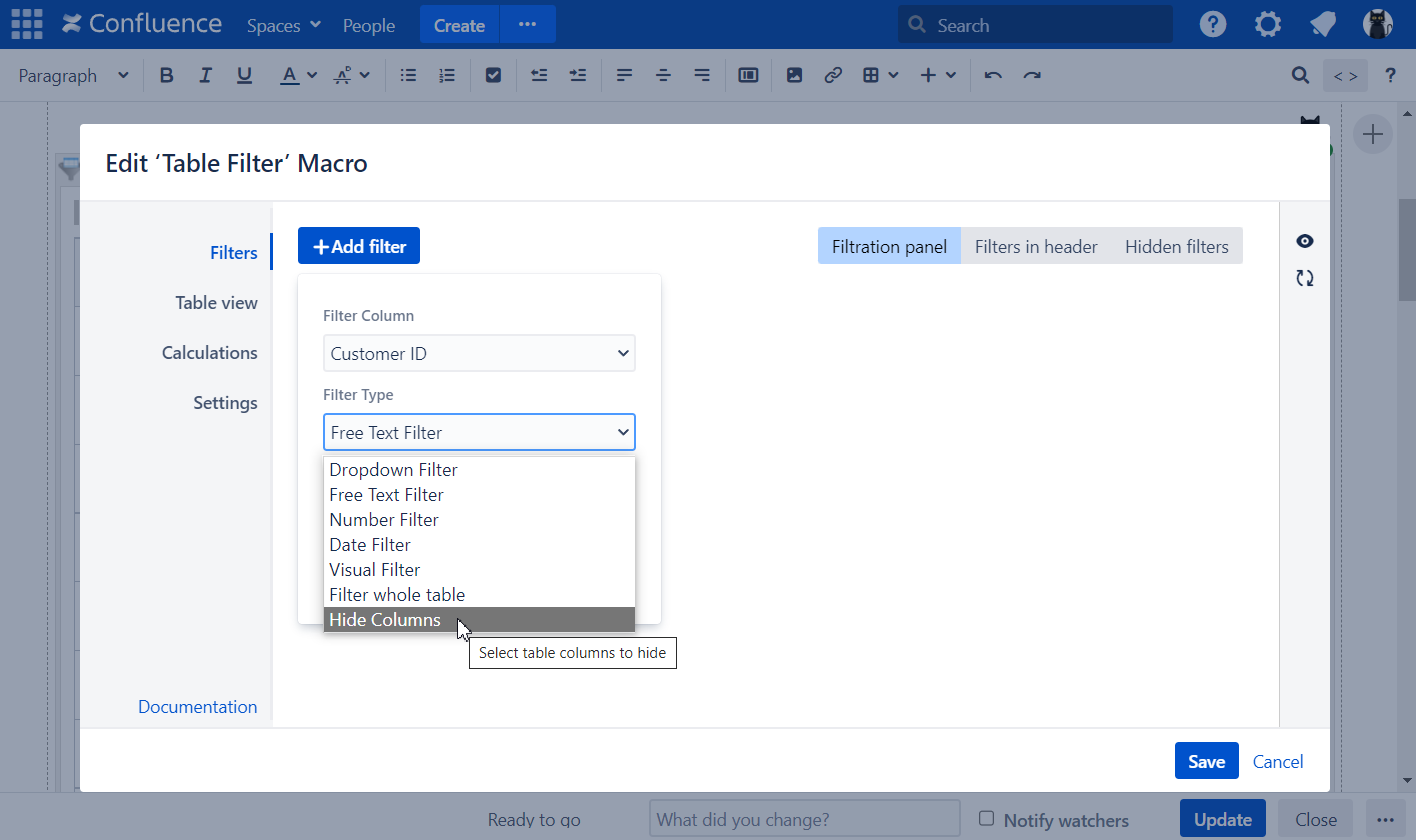
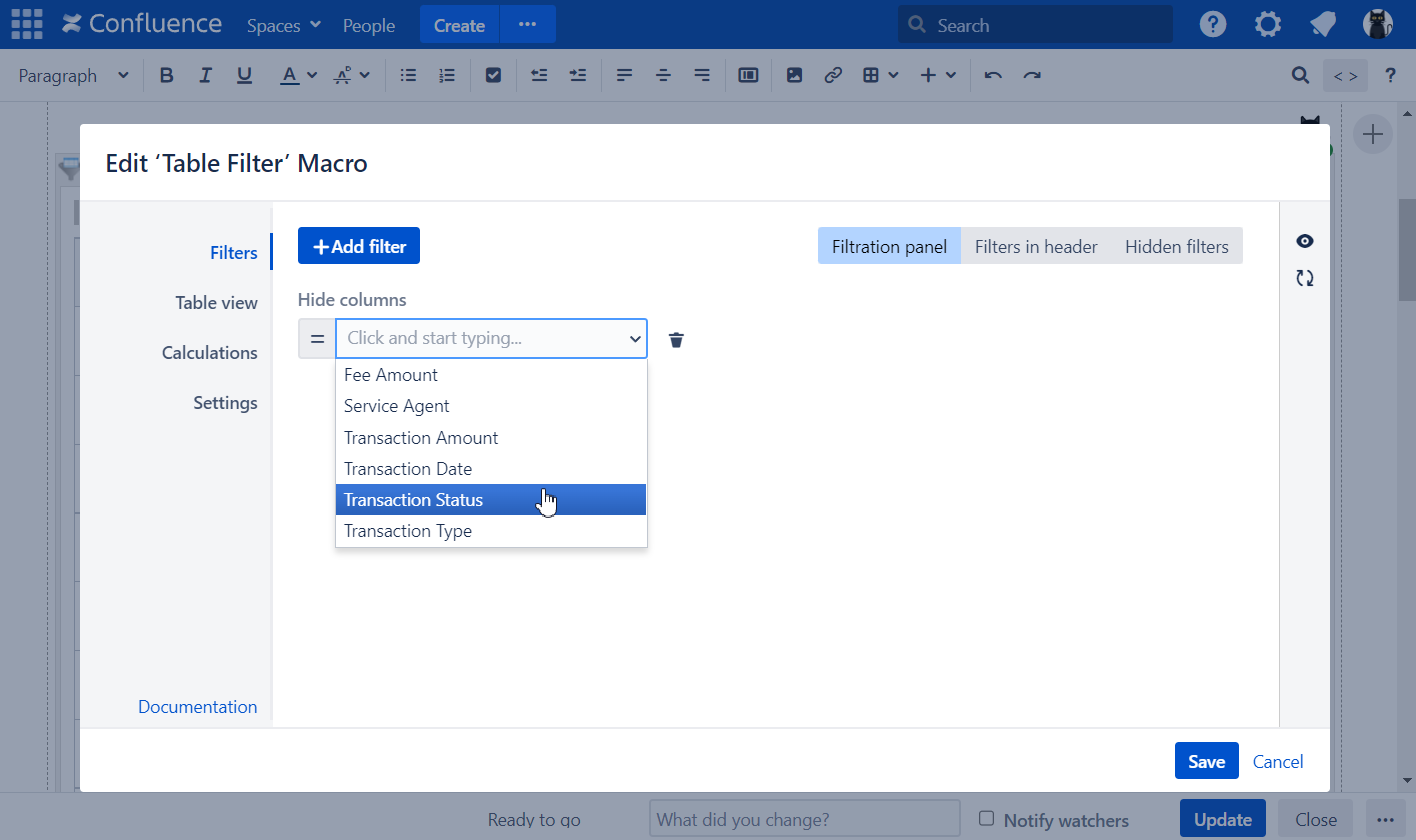
- To hide columns in the page edit mode:
- Switch the page to the edit mode.
- Select the macro and click Edit.
- Switch to the Filters tab.
- Click Add filter.
- Select the Hide columns in the filter types and choose the columns you want to hide.
- Save the macro and the page.