Download PDF
Download page How to Use Handy Cards.
How to Use Handy Cards
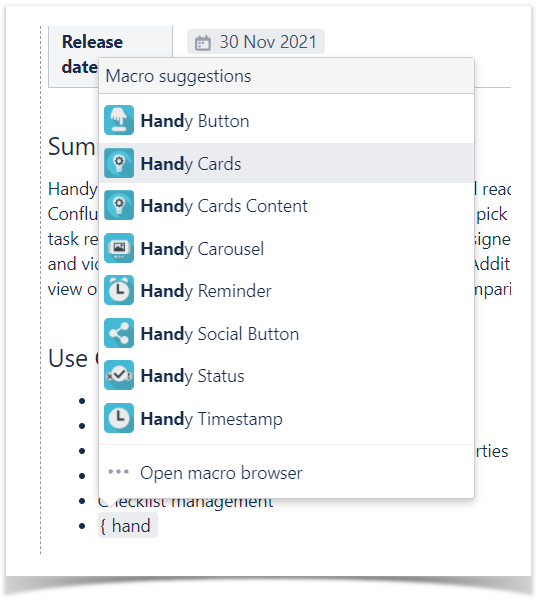
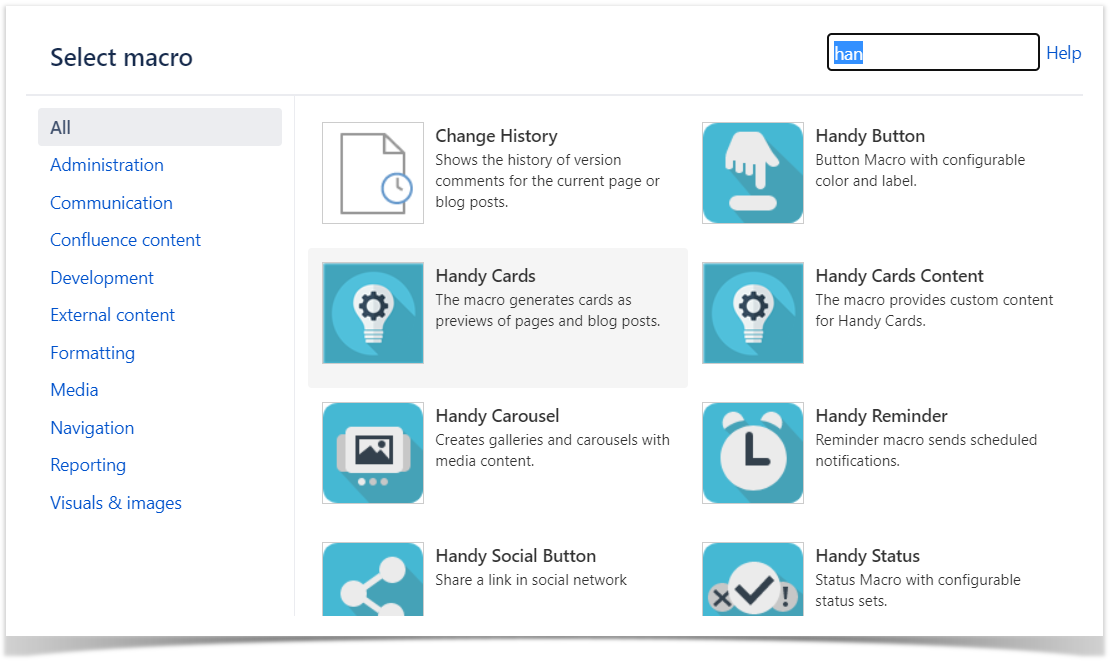
Insert Handy Cards
Go to the edit mode.
- Position the mouse pointer in the appropriate place on the page.
| Option 1 | Option 2 |
|---|---|
|
|
Check out our article to learn more about highlighting links in Confluence.
Create Handy Cards for child pages
When inserting the Handy Cards macro on the parent page, you can create previews for all the child pages. Handy Cards will display either the beginning of the child pages or the content from the Excerpt macros used across the child pages.
Choose child pages for Handy Cards
- Insert Handy Cards.
- Choose Create cards for Child pages.
- Specify additional parameters if needed (see below).
- Click Insert.
Specify Handy Cards content source
This parameter allows you to select the source for generating previews displayed on Handy Cards for child pages.
You can choose to display out of 2 options.
Top of the page
Handy Cards content will be generated automatically using the specified number of characters and the image from the beginning of all the child pages.
You need to specify the following:
- Number of characters: type the number of the characters in the output
![]() Handy Cards can display from 1 to 500 characters as a page preview. If not specified, the default number of characters will be used. It's 250 characters.
Handy Cards can display from 1 to 500 characters as a page preview. If not specified, the default number of characters will be used. It's 250 characters.
- Image options
- The first image or placeholder
This option leads to the same size of all cards on the page. If any of your pages don't have an image with the image option for the cards selected, a default image placeholder will be displayed on a card for content consistency.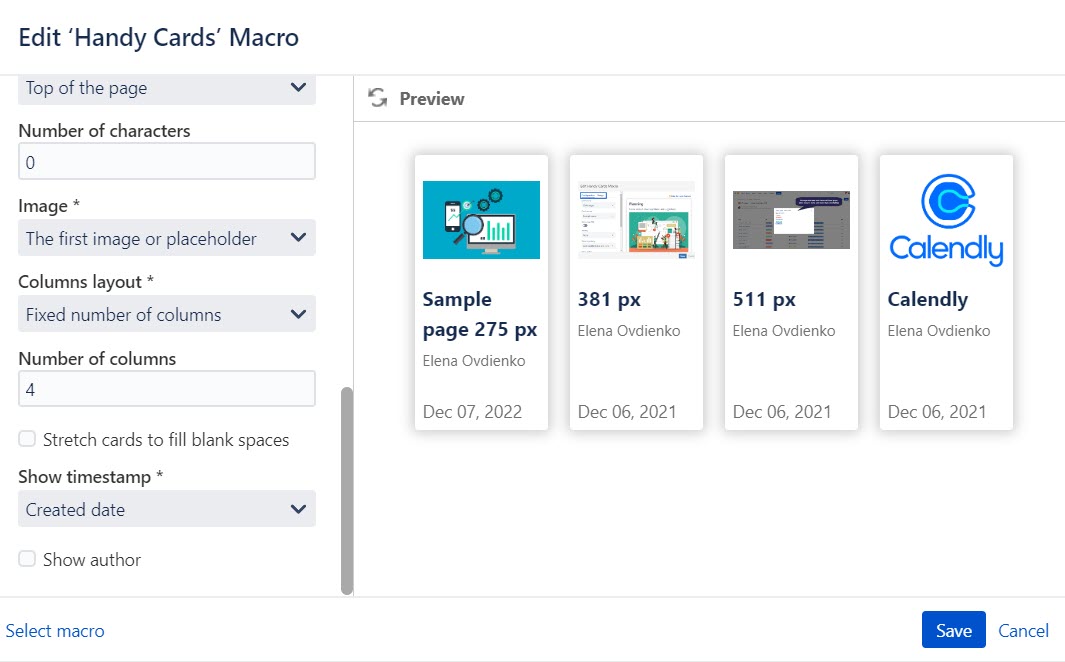
- The first image or empty
This option leads to the minimum card size possible without any blank spaces. Please note that in this case, the card size can be different if your image sizes are different.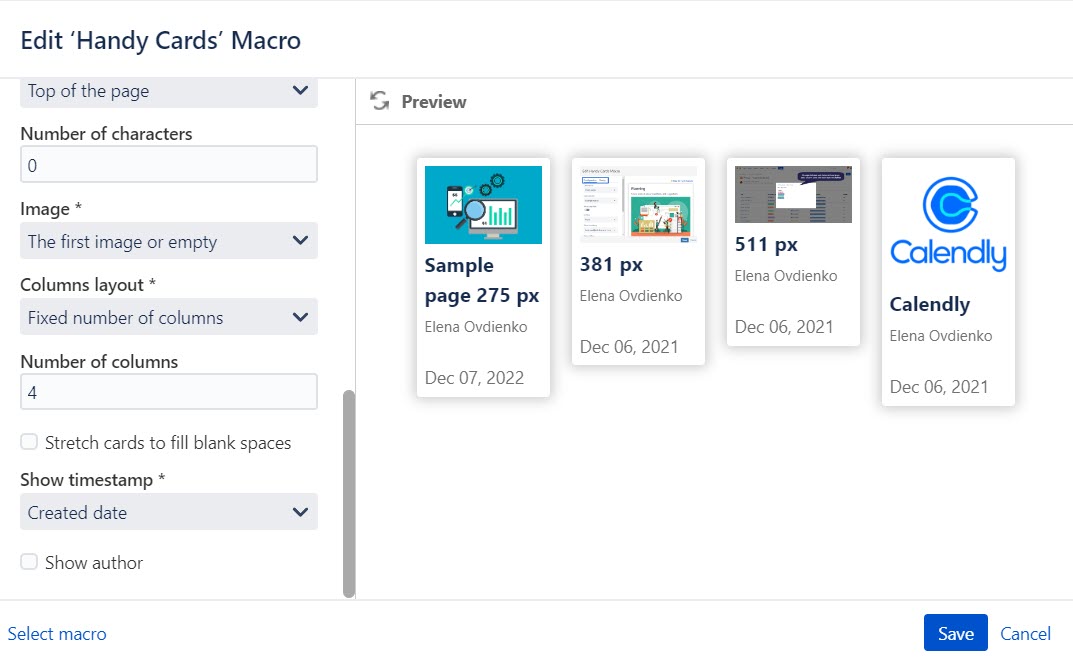

- Specific image on the page
To display a particular image from a source page on a card, you need to specify it in the Image name field. - No image
- The first image or placeholder
The Excerpt macro
Handy Cards content will be generated automatically using the Excerpt macros inserted manually on the child pages.
If a child page has no Excerpt macro when The Excerpt macro is selected as the content source for Handy Cards, the page preview for this page is generated automatically using the first image and 250 characters of text from it.
Tick the Show page title checkbox to add it to your cards.
![]() If you have more than one Excerpt macro on a page, Handy Cards will use any random Excerpt macro as the content source.
If you have more than one Excerpt macro on a page, Handy Cards will use any random Excerpt macro as the content source.
![]() For the correct work of Handy Cards, don't place links within the Excerpt macros.
For the correct work of Handy Cards, don't place links within the Excerpt macros.
The title of the page and the name of the Space are automatically depicted on Handy Cards created from the top of child pages.
If you want only certain information from your child pages to be displayed on Handy Cards, you can use the Excerpt macro as the content source.
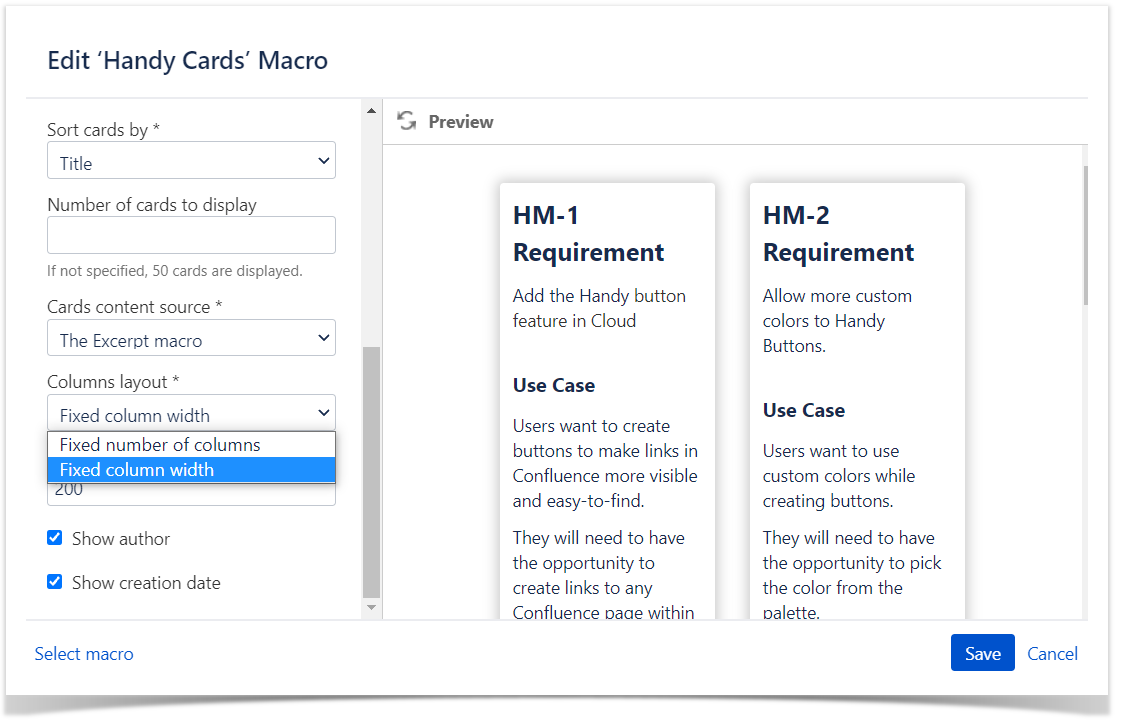
Specify columns layout
This parameter allows you to select the option of displaying cards in the page view mode.
You can choose to display:
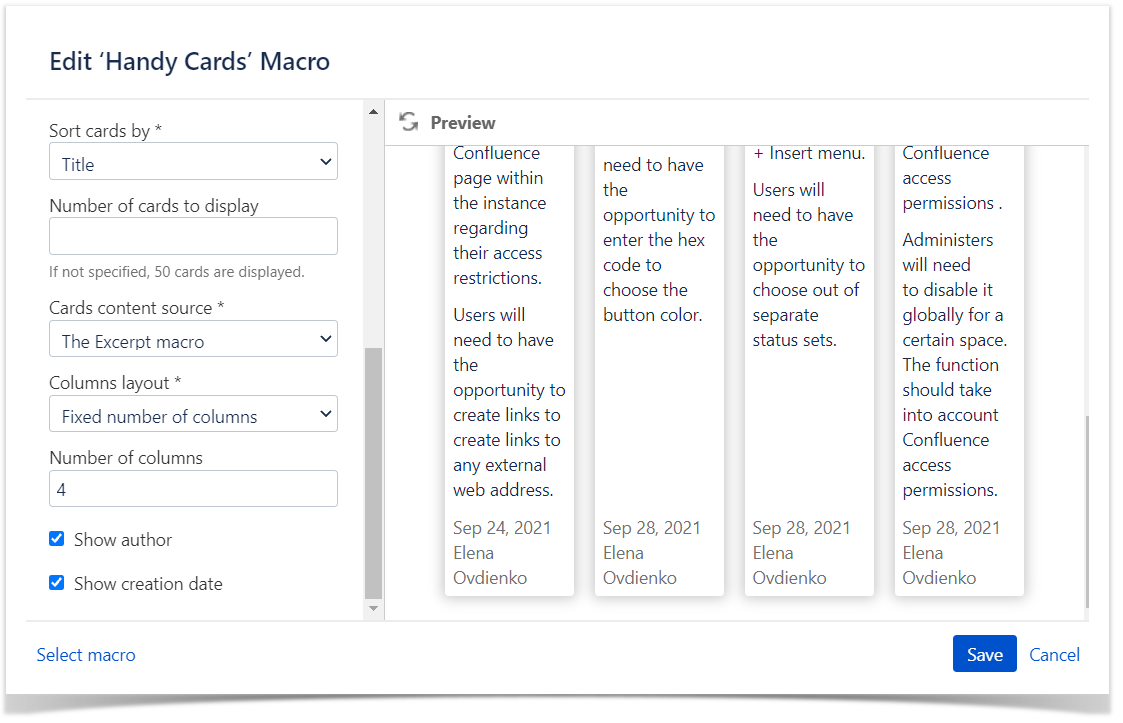
- Fixed number of columns. Specify the number of columns and their width becomes responsive to the screen size.
Additionally, you can tick the Stretch cards to fill blank spaces checkbox to automatically fill the empty spaces on the last row of cards.
- Fixed column width. Specify the column width and their number becomes responsive to the screen size.
Specify other parameters
You can include or exclude some additional information when creating Handy Cards.
Show timestamp
Choose whether you need to add date and time to your card.
- Click Show timestamp.
- Choose one of the options to show:
- none
- created
- last-modified
- Click Insert (on cards creation) or Save (on cards editing).
Show author
Tick a checkbox to add the author to Handy Cards.
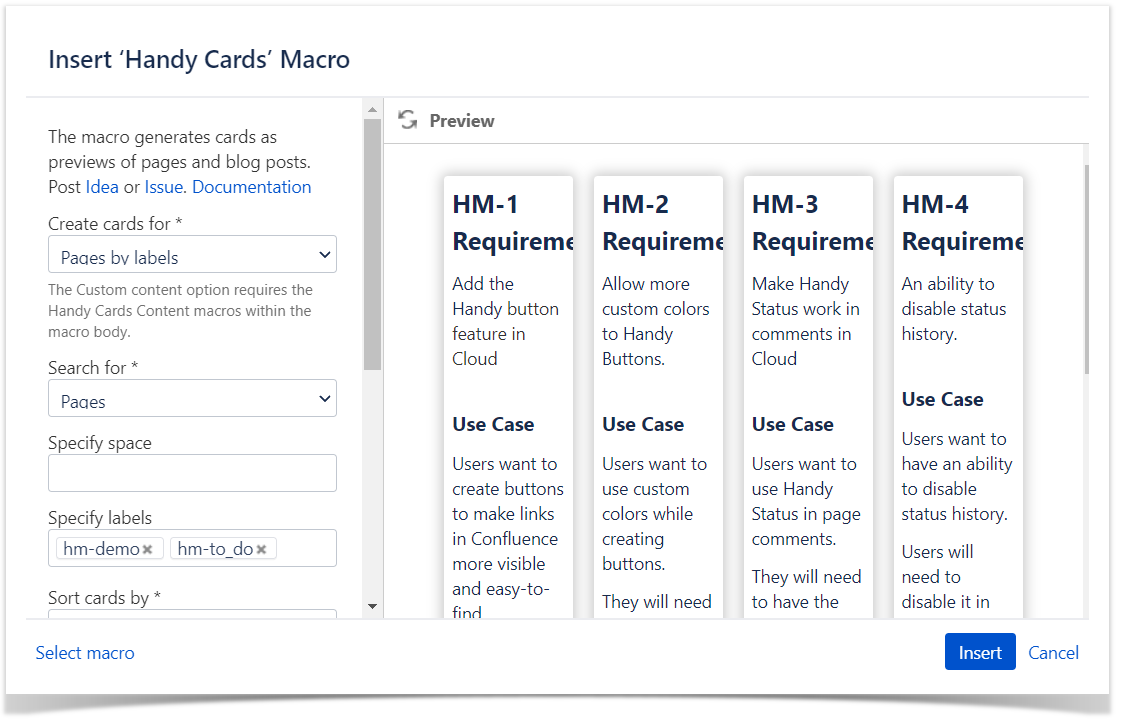
Create Handy Cards for pages by labels
You can create previews for all the pages and/or blog posts in your instance or for a particular space or for pages by labels.
Choose pages by labels for Handy Cards
- Insert Handy Cards.
- Choose Create cards for pages by labels.
- Specify additional parameters if needed (see below).
- Click Insert.
Choose the page type
You can create Handy Cards for pages by labels of a different type. You can search for:
- Pages and blog posts
- Pages
- Blog posts
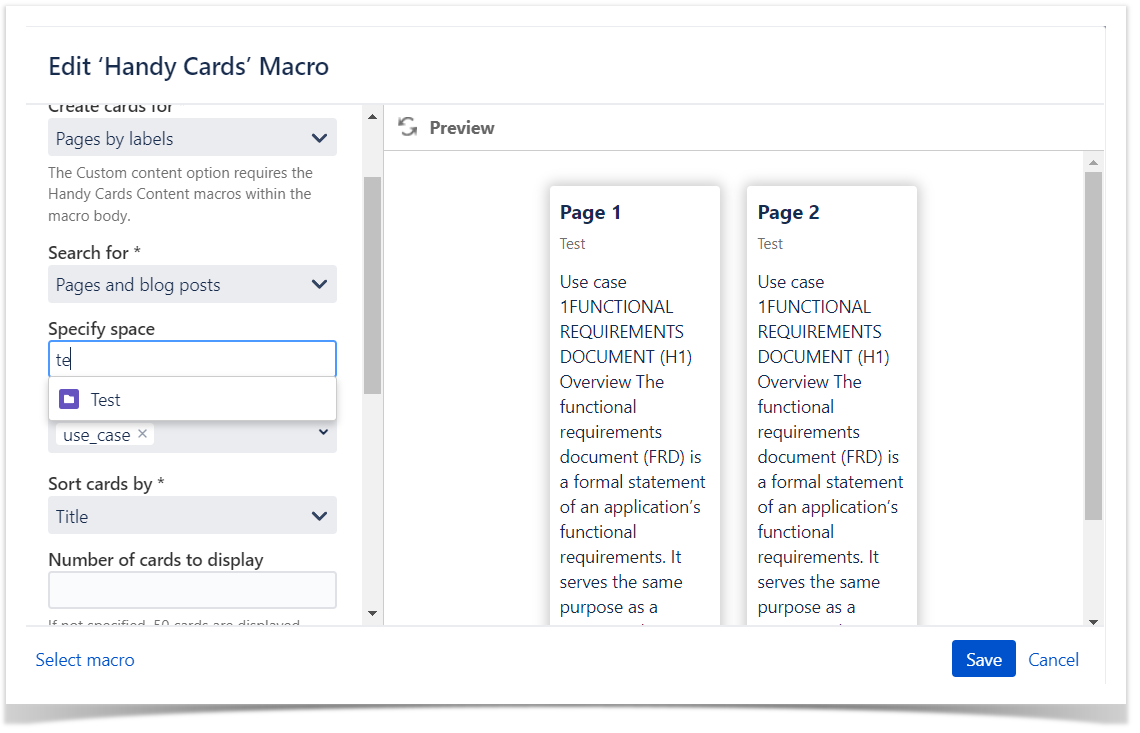
Limit the page space
You can create Handy Cards for pages by labels of a certain space. Use this option to make sure that all your Handy Cards are created for pages by labels from one space only.
- Locate the Specify space field.
- Start typing the space for which you want to create Handy Cards.
- Choose the one from the prompted variants.
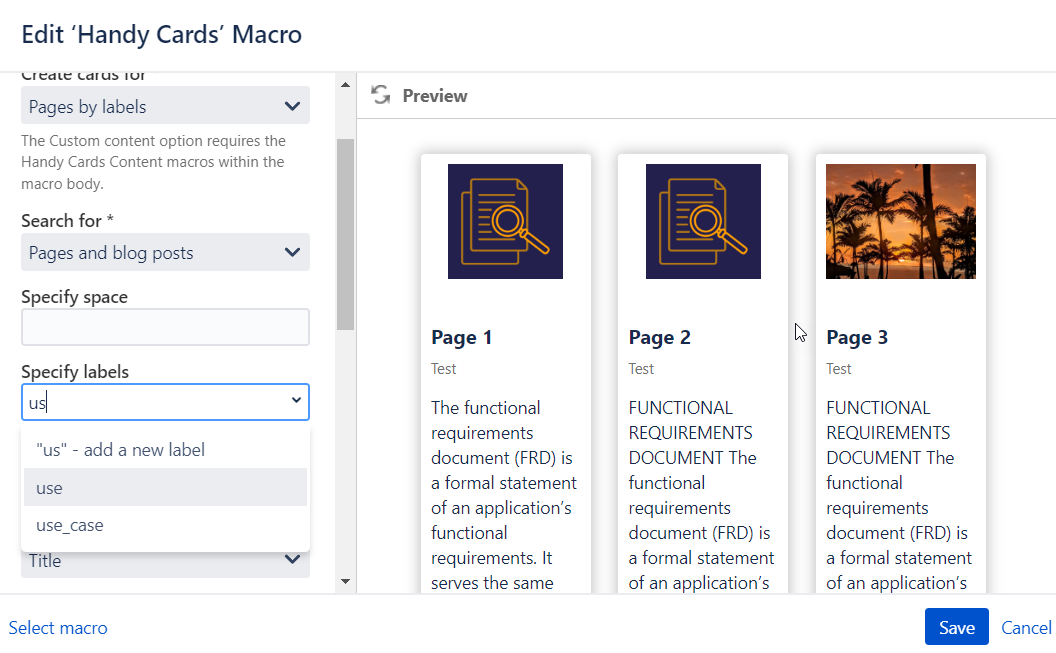
Choose labels for cards source
- Locate the Specify labels field.
- Start typing the page label you want to create Handy Cards for.
- Choose the one from the prompted variants.
- Add some more labels if needed.
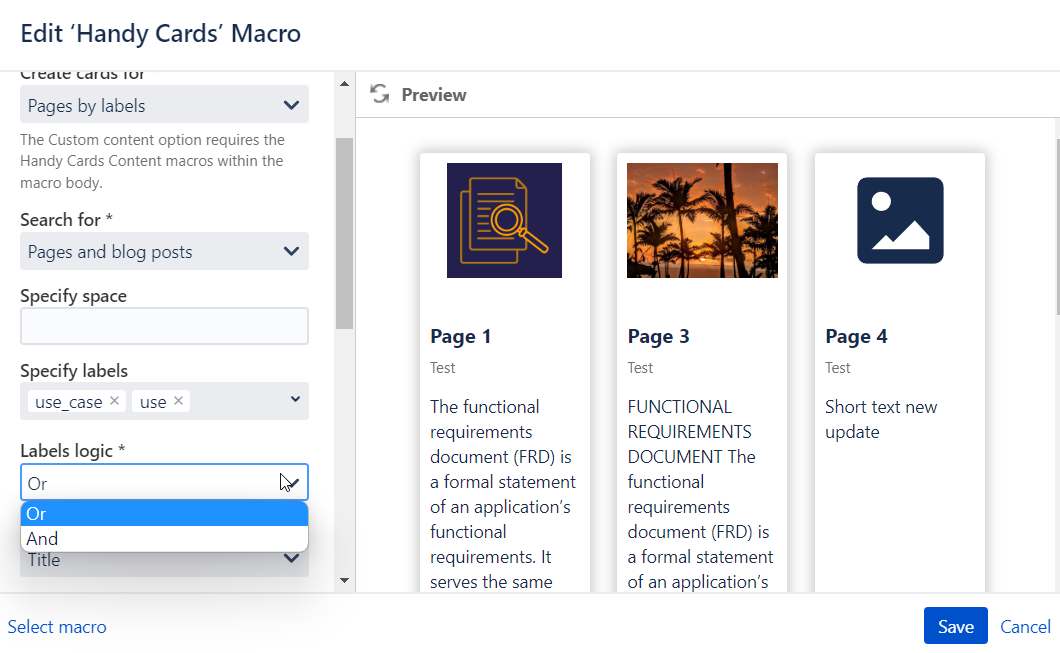
Specify label logic
- Locate the Label logic field.
- Choose AND or OR logic for labels to create cards:
- For AND logic - all the labels specified need to be present on a page to create a card from it
- For OR logic - any of the labels specified need to be present on a page to create a card from it
Choose sort order
- Locate the Sort cards by field.
- Choose one of the options available
- Creation date
- Title
- Last modified date and time
Choose the desired number of cards
If you have a lot of cards to be created for the specified parameters, you can choose the desired number to appear on your page.
- Locate the Number of cards to display field.
- Enter the desired number of cards (1-1000). The maximum number of cards to display is 1000 cards.
When the maximum number of cards to display is not specified, the macro displays 50 cards by default.
Specify Handy Cards content source
This parameter allows you to select the source for generating previews displayed on Handy Cards for child pages.
You can choose to display out of 2 options.
Top of the page
Handy Cards content will be generated automatically using the specified number of characters and the image from the beginning of all the child pages.
You need to specify:
- Number of characters: type the number of the characters in the output
![]() Handy Cards can display from 1 to 500 characters as a page preview. If not specified, the default number of characters will be used. It's 250 characters.
Handy Cards can display from 1 to 500 characters as a page preview. If not specified, the default number of characters will be used. It's 250 characters.
- Image options
- First image
- Specific image on the page
To display a particular image from a source page on a card, you need to specify it in the Image name field. - No image
![]() If any of your pages don't have an image with the image option for cards selected, a default image placeholder will be displayed on a card for content consistency.
If any of your pages don't have an image with the image option for cards selected, a default image placeholder will be displayed on a card for content consistency.
The Excerpt macro
Handy Cards content will be generated automatically using the Excerpt macros inserted manually on the child pages.
If a child page has no Excerpt macro when The Excerpt macro is selected as the content source for Handy Cards, the page preview for this page is generated automatically using the first image and 250 characters of text from it.
Tick the Show page title checkbox to add it to your cards.
![]() If you have more than one Excerpt macro on a page, Handy Cards will use any random Excerpt macro as the content source.
If you have more than one Excerpt macro on a page, Handy Cards will use any random Excerpt macro as the content source.
![]() For the correct work of Handy Cards, don't place links within the Excerpt macros.
For the correct work of Handy Cards, don't place links within the Excerpt macros.
The title of the page and the name of the Space are automatically depicted on Handy Cards created from the top of child pages.
If you want only certain information from your child pages to be displayed on Handy Cards, you can use the Excerpt macro as the content source.
Specify columns layout
This parameter allows you to select the option of displaying cards in the page view mode.
You can choose to display:
| Fixed number of columns |
|---|
Specify the number of columns and their width becomes responsive to the screen size. 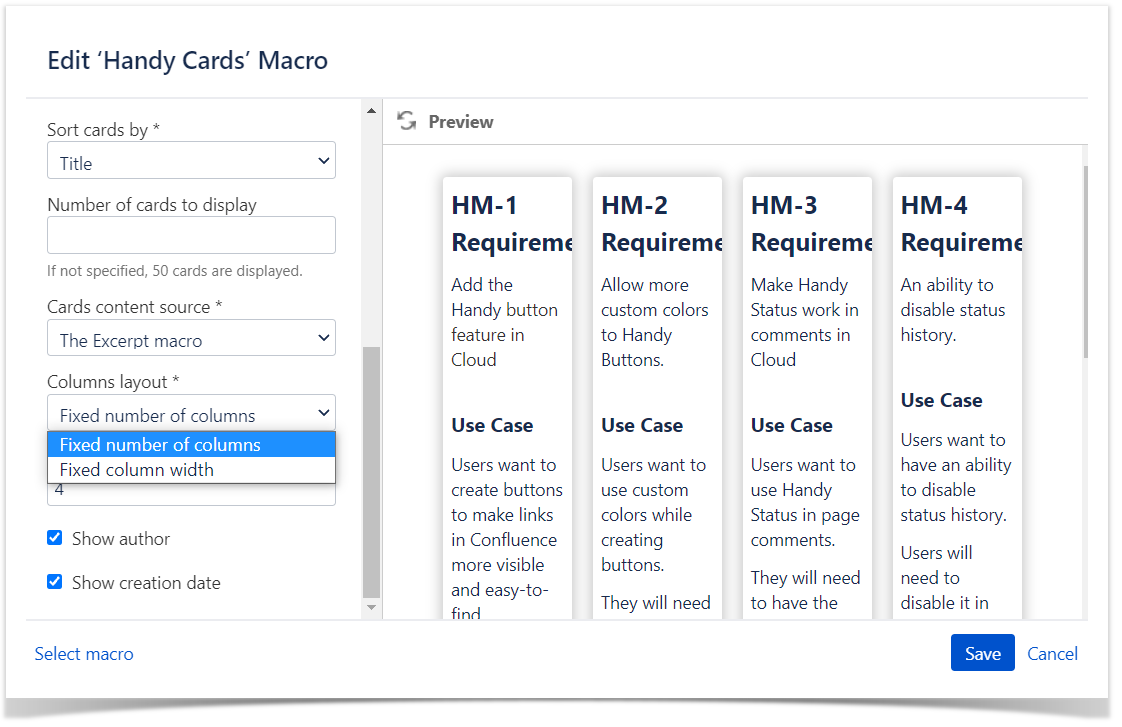 |
| Fixed column width |
|---|
Specify the column width and their number becomes responsive to the screen size.
|
Specify other parameters
You can use checkboxes to include or exclude some additional information when creating Handy Cards.
Select from these parameters:
- Show author
- Show creation date
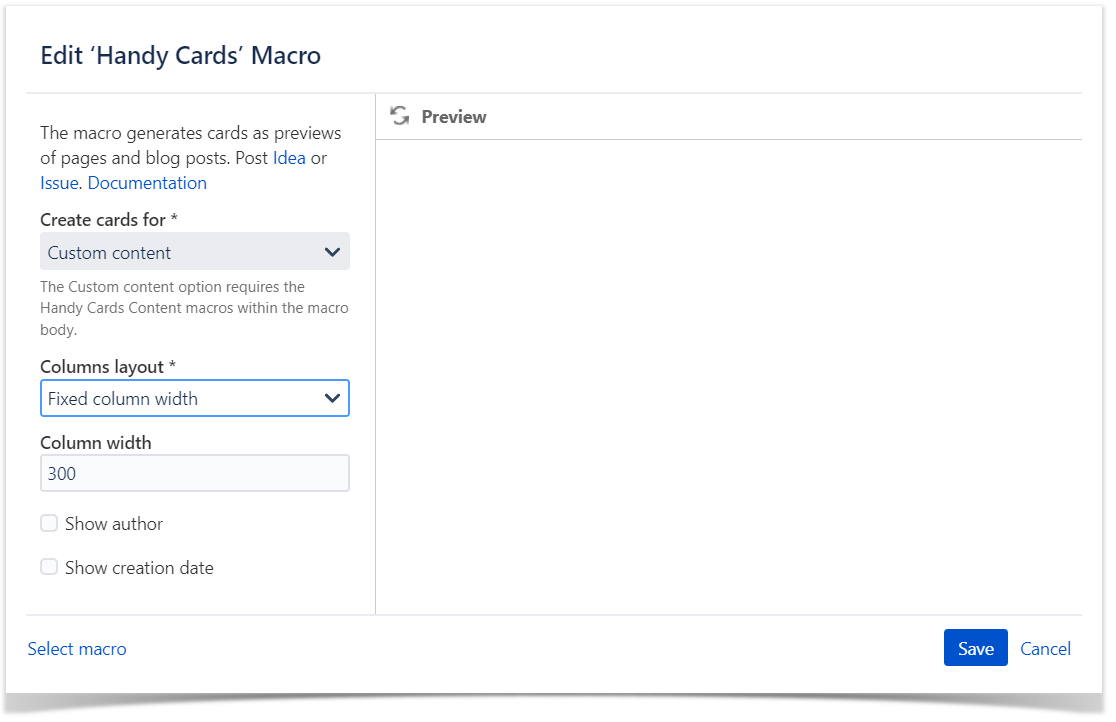
Create Handy Cards for custom content
You can create previews for any external content on Confluence pages.
Use custom content as a source for Handy Cards
- Locate the Create cards for field when inserting the Handy Cards macro.
- Choose the Custom content option.
- Specify additional parameters if needed (see below).
- Click Insert.
The Custom content option requires the Handy Cards Content macro within the Handy Cards macro body. The Handy Cards Content macro is a part of the Handy Macros for Confluence app. No additional installations or purchases are needed.
Specify columns layout
This parameter allows you to select the option of displaying cards in the page view mode.
You can choose to display:
| Fixed number of columns |
|---|
Specify the number of columns and their width becomes responsive to the screen size. |
| Fixed column width |
|---|
Specify the column width and their number becomes responsive to the screen size.
|
Specify other parameters
You can use checkboxes to include or exclude some additional information when creating Handy Cards.
Select from these parameters:
- Show author
- Show creation date
Use the Handy Cards Content macro
You need to add the Handy Cards Content macro inside the Handy Cards macro to specify the required custom content.
- After adding the Handy Cards macro as described above, place the mouse pointer in the Handy Cards body.
- Insert the Handy Cards Content macro.
- Locate the Link field.
- Enter the external web address for which you want your Handy Card to be created. Please, start the web address from http:// or https://.
- Click Save.
- If you want any text and/or image to appear on your Handy Cards created for custom content, place them inside the Handy Cards Content macro. Otherwise, Handy Cards will appear on your Confluence pages as clickable empty white cards.
- Add another Handy Cards Content macro if you want to create several Handy Cards for custom content.
- Repeat steps 3-7 as many times as needed.