| Warningmybanner |
|---|
This version of the app's documentation is outdated. Please find the information you're looking for here: |
| Panel | ||||||
|---|---|---|---|---|---|---|
| ||||||
Table Filter for Confluence add-on allows you to manage filters in the page view mode. You can add all types of filters, remove the unnecessary filters, and regulate the order of filters on the filtration pane and set their width. You can save all the modifications, including the selected or specified filtration values in the macro body on the fly. |
Starting from version 3.1.0 Table Filter add-on supports management of filters in the view page mode. In such a way, you can manage filters of all types, including the box for hiding specific columns of the table.
| Table of Contents |
|---|
| Widget Connector | ||||||
|---|---|---|---|---|---|---|
|
You may encounter the four situations, as follows:
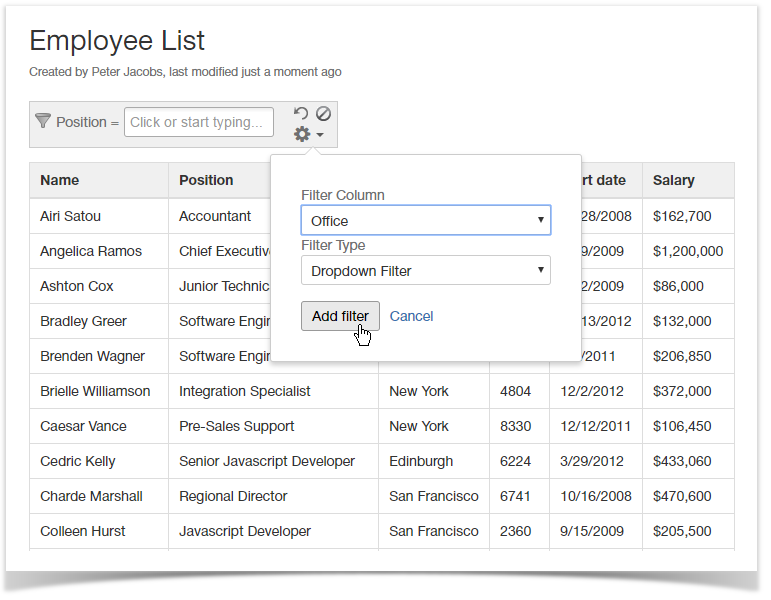
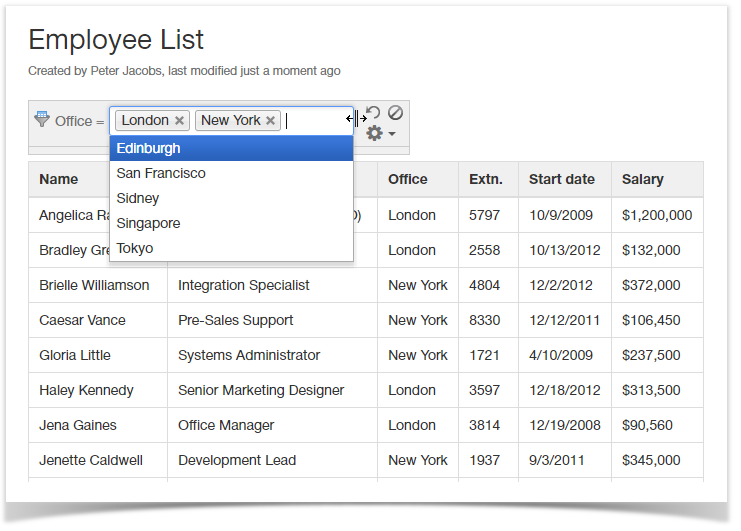
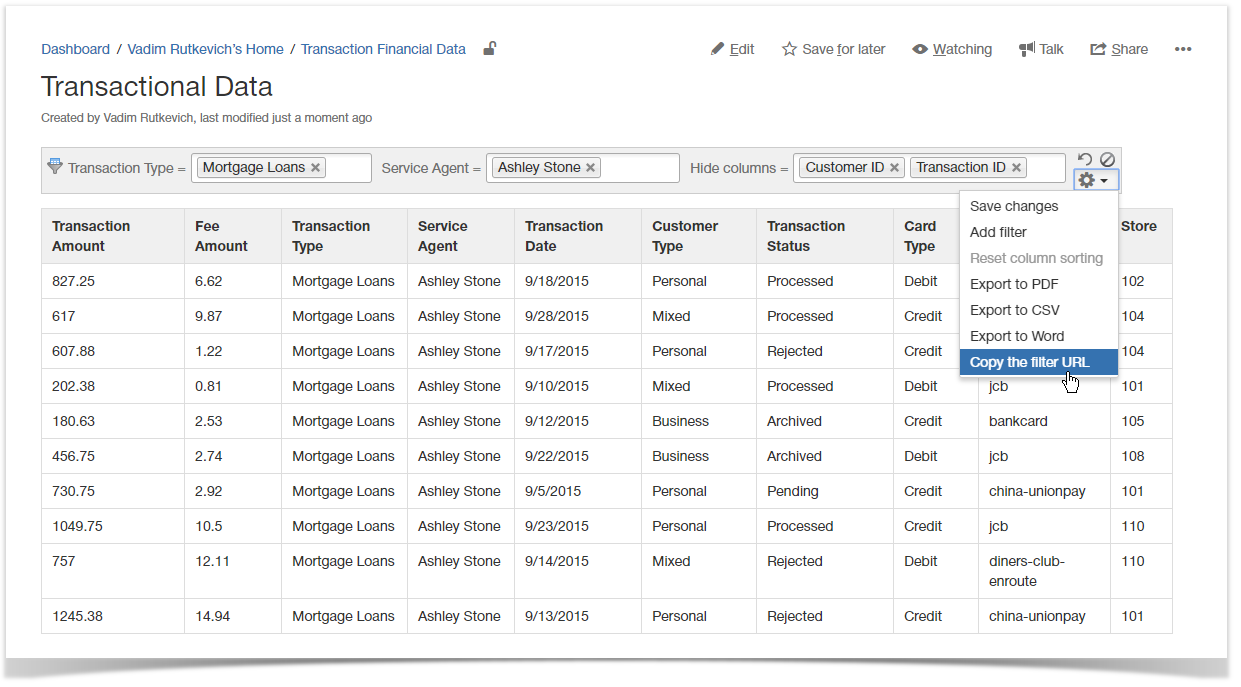
You have inserted the table into the Table filter macro, added filters and saved the page. In this case, you will see the screen similar to the one displayed. You can add new filters by clicking the cogwheel icon and then selecting Add filter.
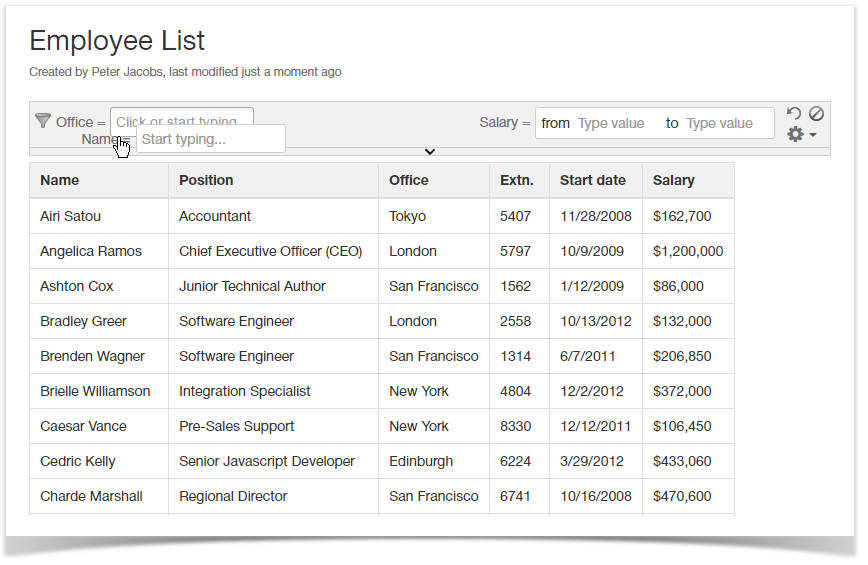
| You have inserted the table into the Table filter macro and saved the page without any configuration. In this case, you will see the screen similar to the one displayed. You can add the required filters by clicking the cogwheel icon and then selecting Add filter.
|
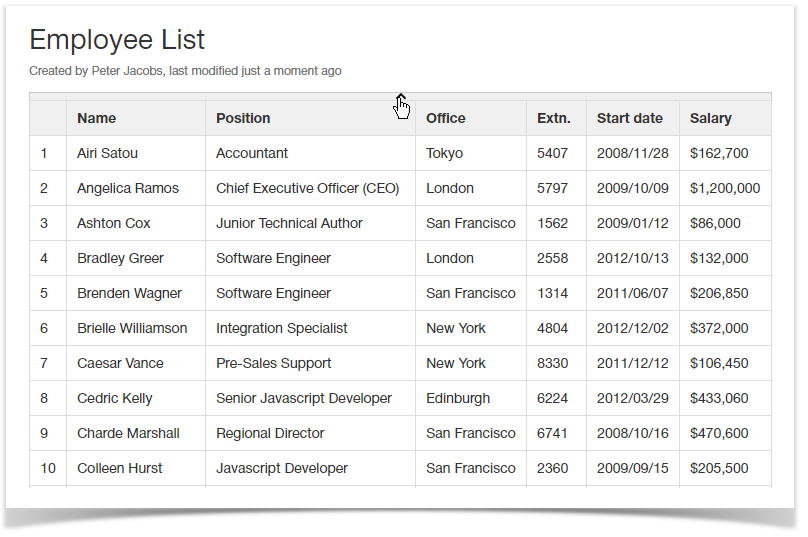
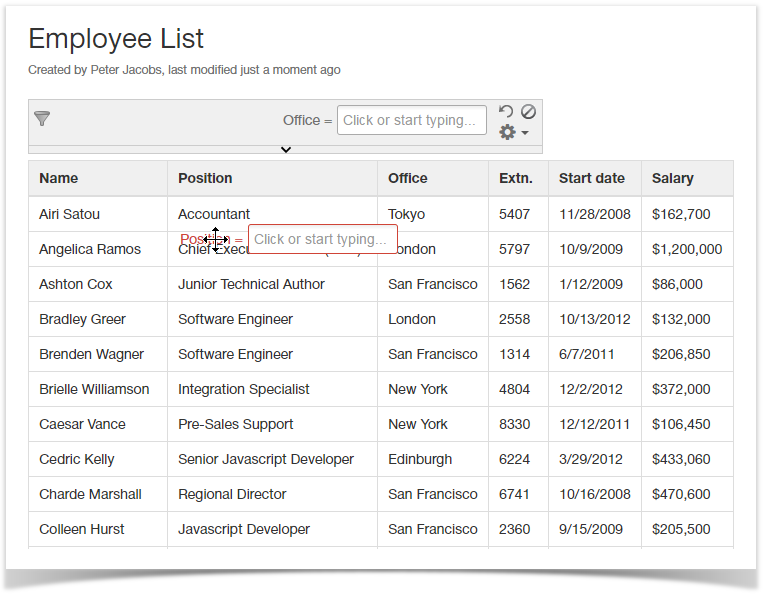
You have inserted the table into the Table filter macro and enabled automatic row numbering or/and default sorting. In this case the filtration is displayed as collapsed. You can expand it by hovering over the table header and clicking the appeared expanding pane. Then you can add filters by clicking the cogwheel icon and selecting Add filter.
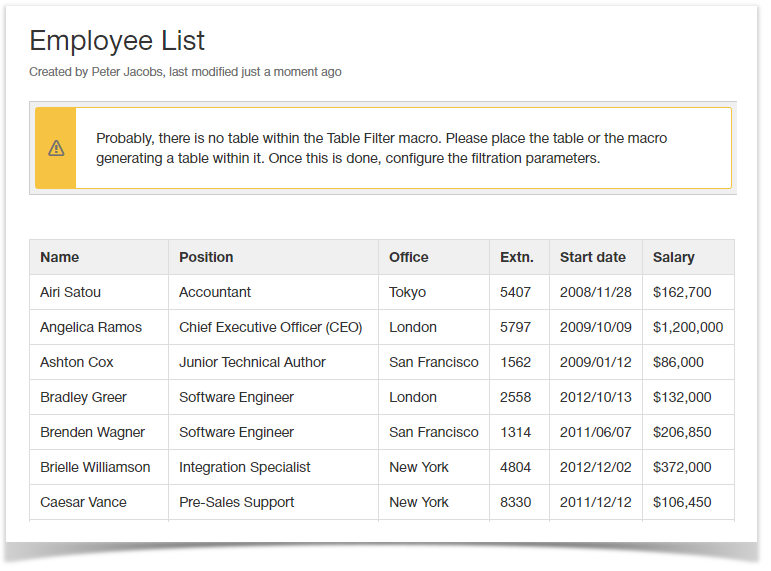
| You have not inserted the table into the Table filter macro. In this case, you will see the corresponding notification about the missing table in the macro body. You will have to switch the page to the edit mode and insert the table into the macro body. Then you can add the filters either when editing the page or viewing it.
|
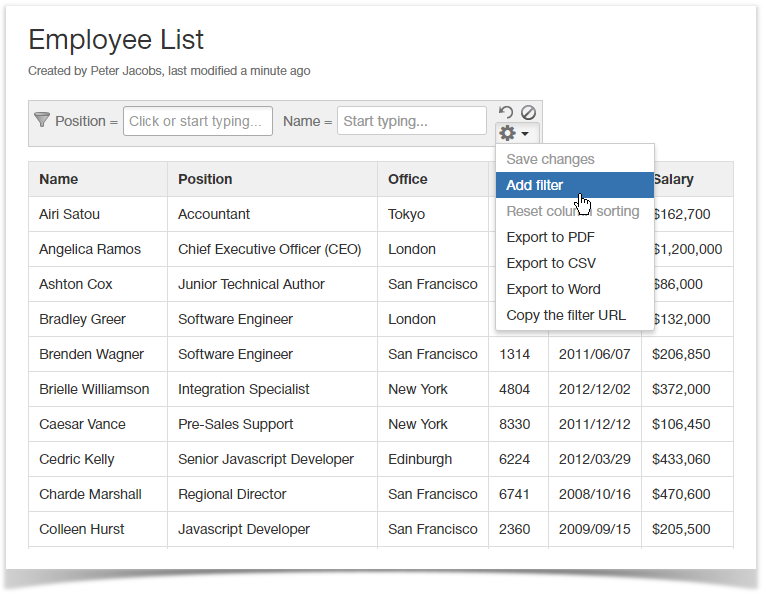
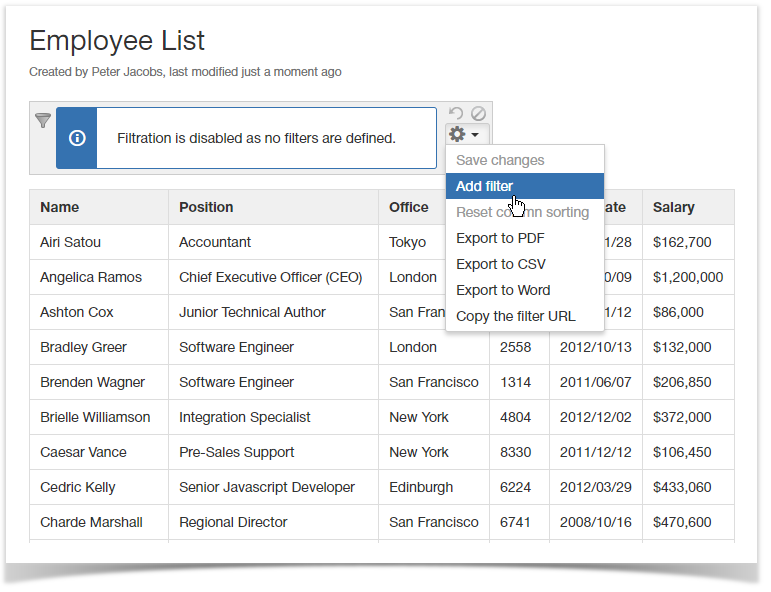
Adding filters in the page view mode
- On the filtration pane, locate the cogwheel icon and click it.
- Select Add filter.
- Select the appropriate column and filter type.
- Click Add filter.
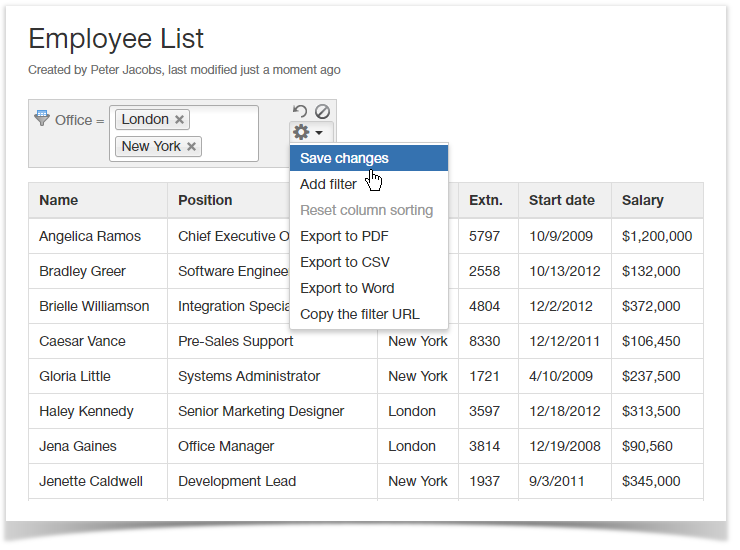
- To save the modifications in the macro body, click the cogwheel icon and select Save changes.
| Info |
|---|
If adding the number or date filters, additional configuration of the data format may be required. |
Deleting filters in the page view mode
- On the filtration pane, locate the filter you want to delete.
- Click and drag the filter to the bottom of the page. It is highlighted red.
- Release the left mouse button. The filter will be deleted.
- To save the modifications in the macro body, click the cogwheel icon and select Save changes.
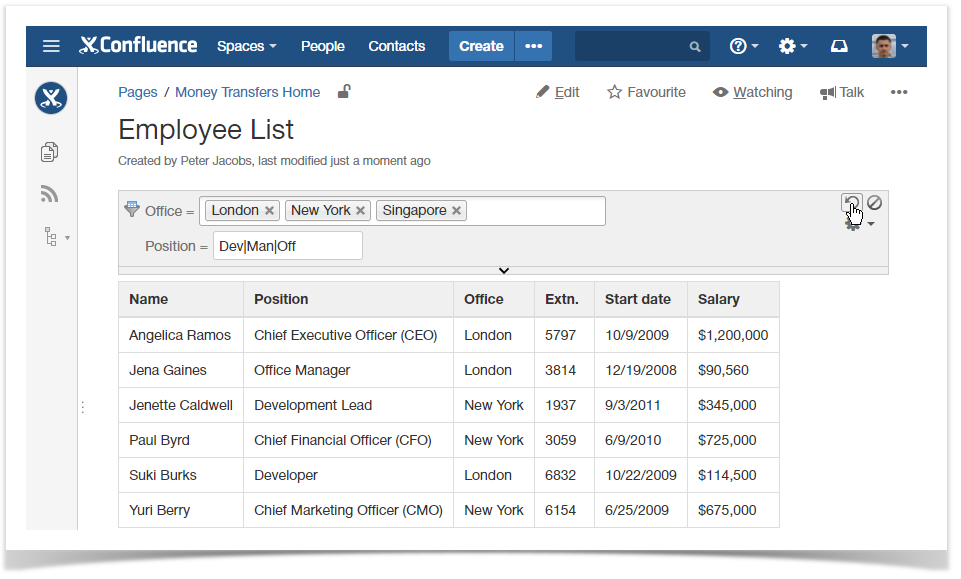
Saving default values for filters in the page view mode
- Locate the filter you want to specify default values for.
- Select or enter the appropriate default values for one or multiple filters.
- To save the modifications in the macro body, click the cogwheel icon and select Save changes.
Regulating filter width in the page view mode
- Locate the filter box which width you want to change.
- Position the mouse pointer at the right border of the filter box, until the cursor changes.
- Click and hold the left mouse button and drag the filter box border to the left or or to the right.
- Release the left mouse button when width of the filter box is appropriate.
- To save the modifications in the macro body, click the cogwheel icon and select Save changes.
| Info |
|---|
You can change the box width for the following filter types:
|
Changing order of filters on the filtration pane
- Locate the filter box which position on the filtration pane you want to change.
- Click and drag the filter box to the appropriate position on the filtration pane.
- Release the left mouse button when complete.
- To save the modifications in the macro body, click the cogwheel icon and select Save changes.
Resetting default values
Table Filter and Charts add-on allows you to temporarily reset the defined filtration values. This may be useful when you deal with the table with multiple filters applied. Instead of clearing values for each filter, you can do this at once.
To reset filtration values:
- Open the page with the table.
- On the filtration pane, locate and click the Reset all filters
 icon.
icon.
All values in the filters are reset. The default filtration values will be restored upon the page reload.
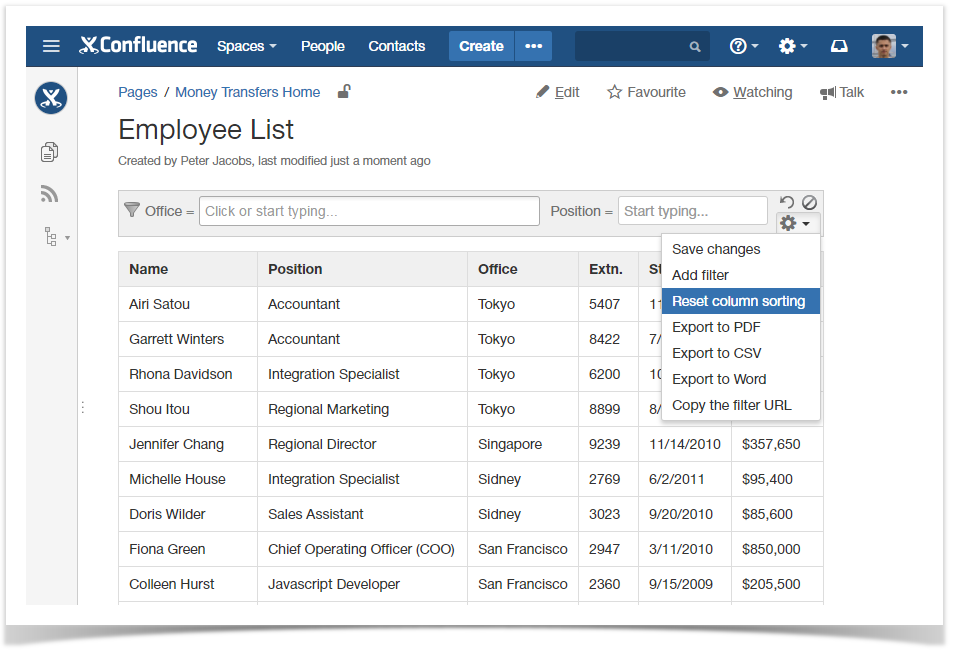
Resetting the sorting order
Table Filter and Charts add-on allows you to reset the applied sorting order.
To reset the default sorting order for columns:
- Open the page with the table.
- On the filtration pane, locate and click the cogwheel icon.
- Select Reset column sorting.
Sharing filtration results with colleagues
Table Filter and Charts add-on allows you to share the filtered results with your colleagues. The sharing link contains all the necessary filtration parameters and the sorting order that can temporarily override the currently set filtration parameters and sorting. The saved filtration parameters are not affected anyhow by this method until you rewrite them by saving changes.
To share the filtration results:
- Open the page with the table.
- On the filtration pane, locate and click the cogwheel icon.
- Select Copy the filter URL.
- Share the link with colleagues.
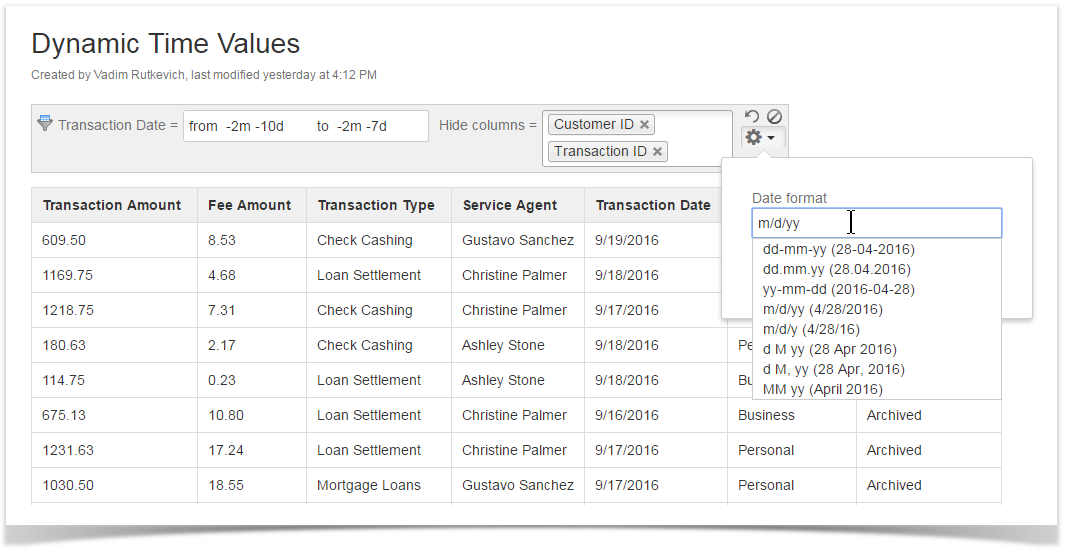
Setting the Date Format
- Open the page with the table.
- On the filtration pane, locate and click the cogwheel icon.
- Select Modify settings.
- Select the appropriate date format from the pre-defined patterns or specify your custom format.