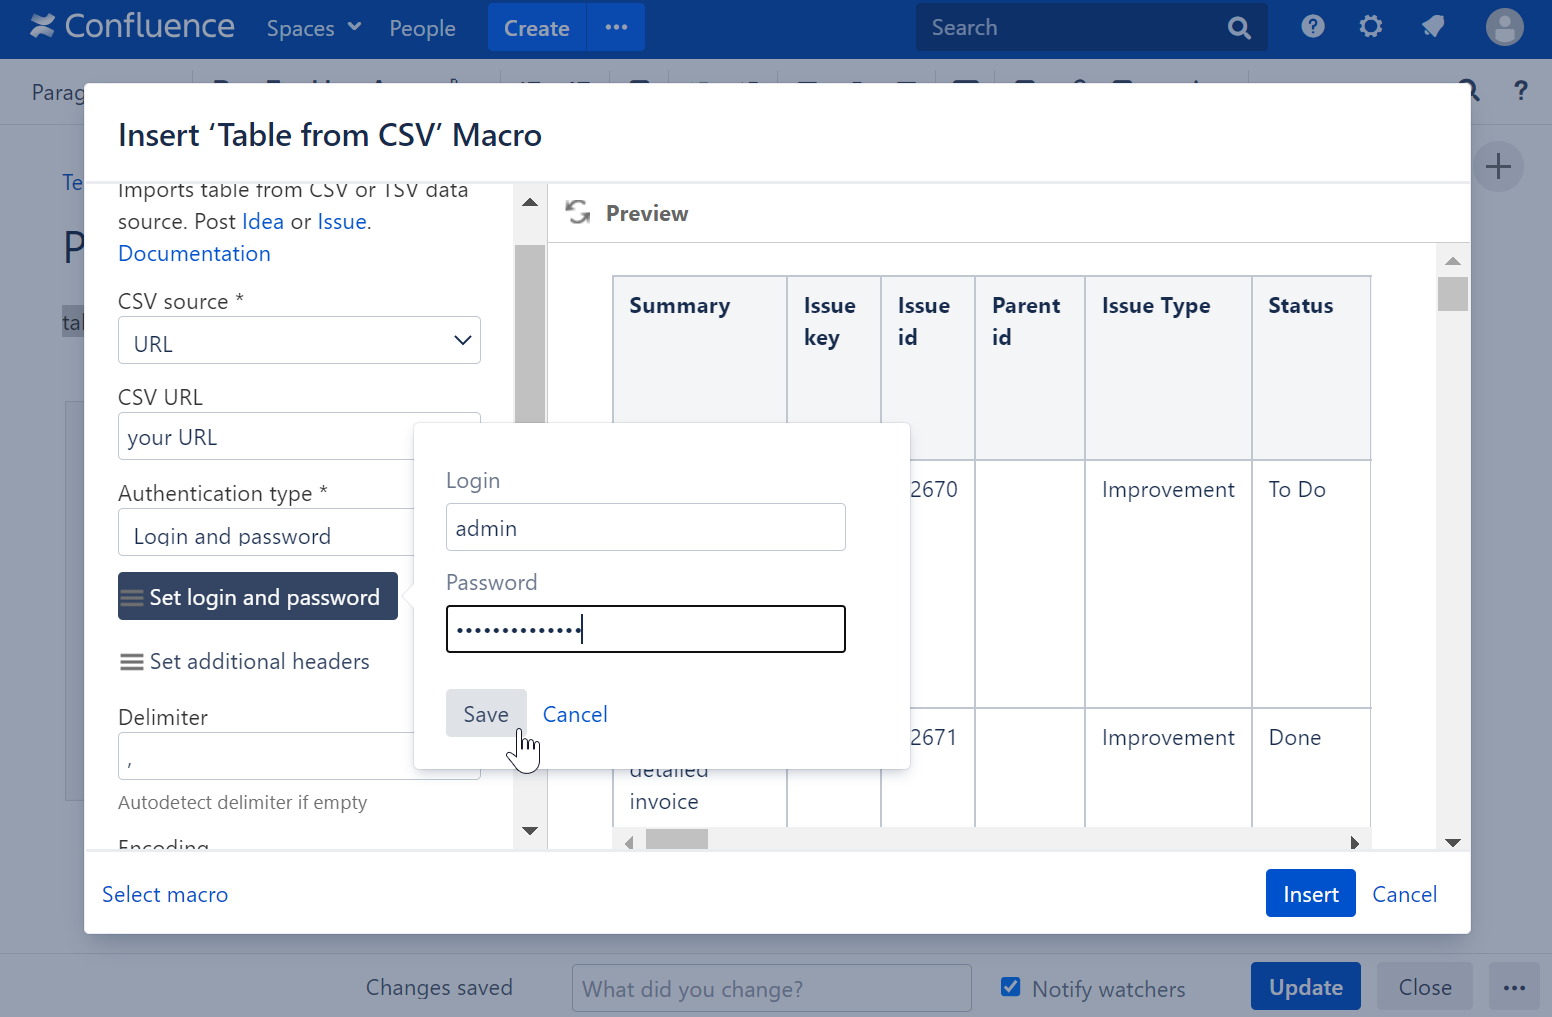
Login and password or a custom authentication header are encrypted by the AES-256 algorithm using a secret key and are saved in the macro parameters.In Confluence Cloud, a secret key is stored in the encrypted AWS RDS
The encrypted authentication data can be used only in your Confluence instance and only for the URL you specified when configured the macro, so it is impossible to steal it and use somewhere else.
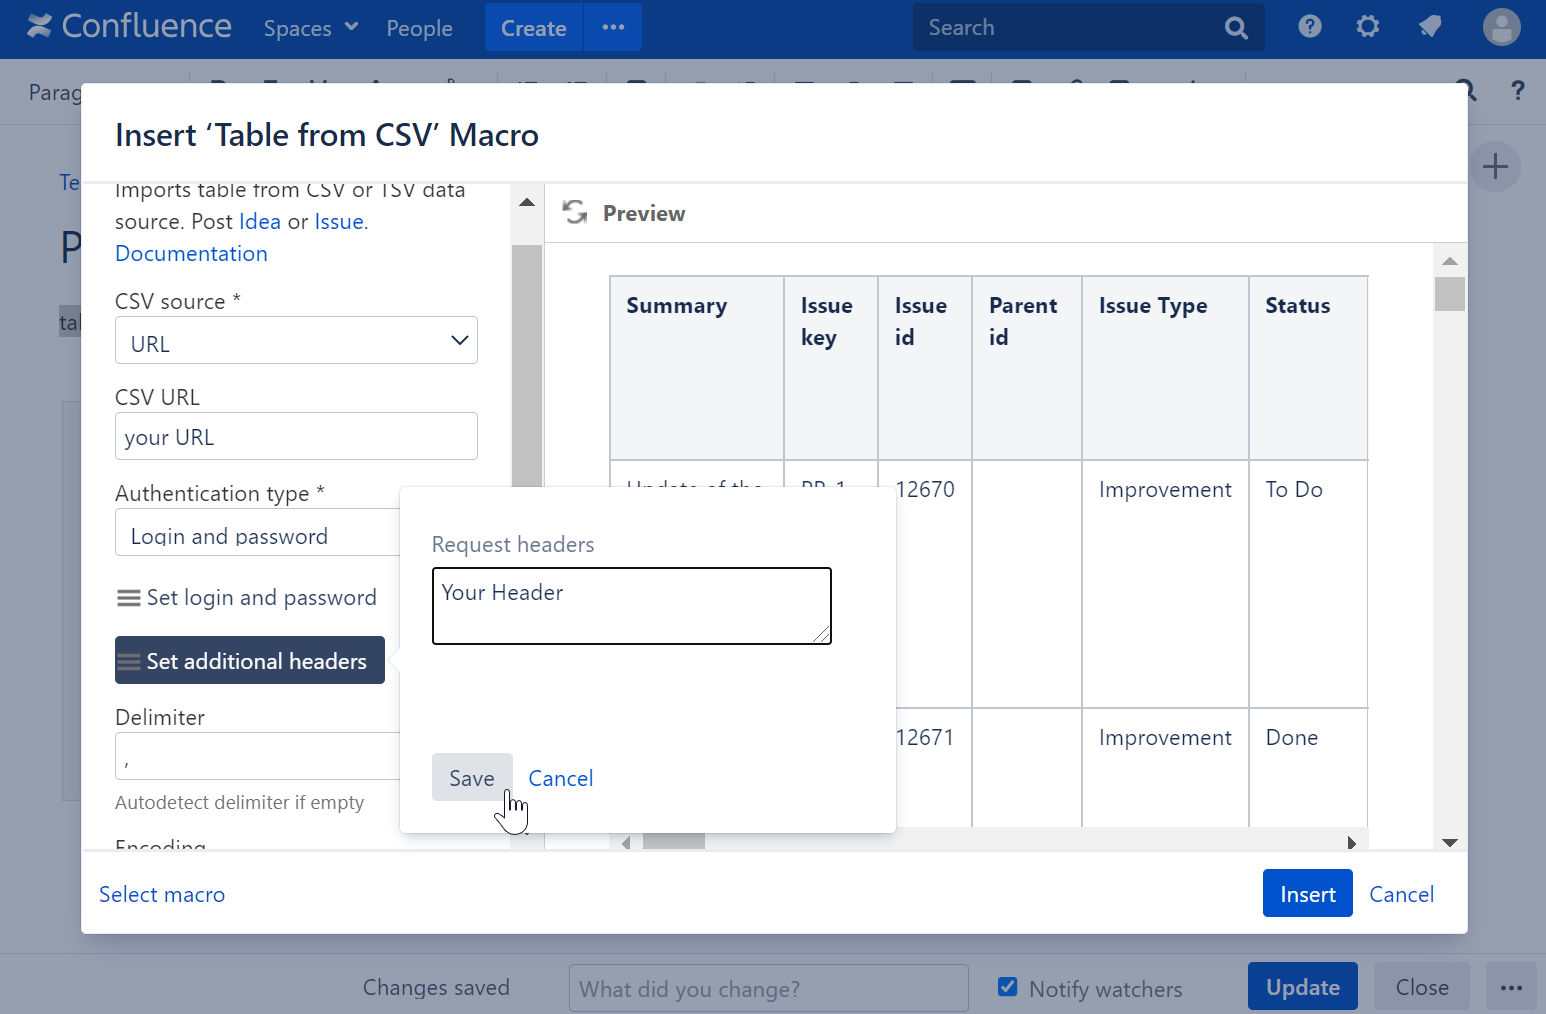
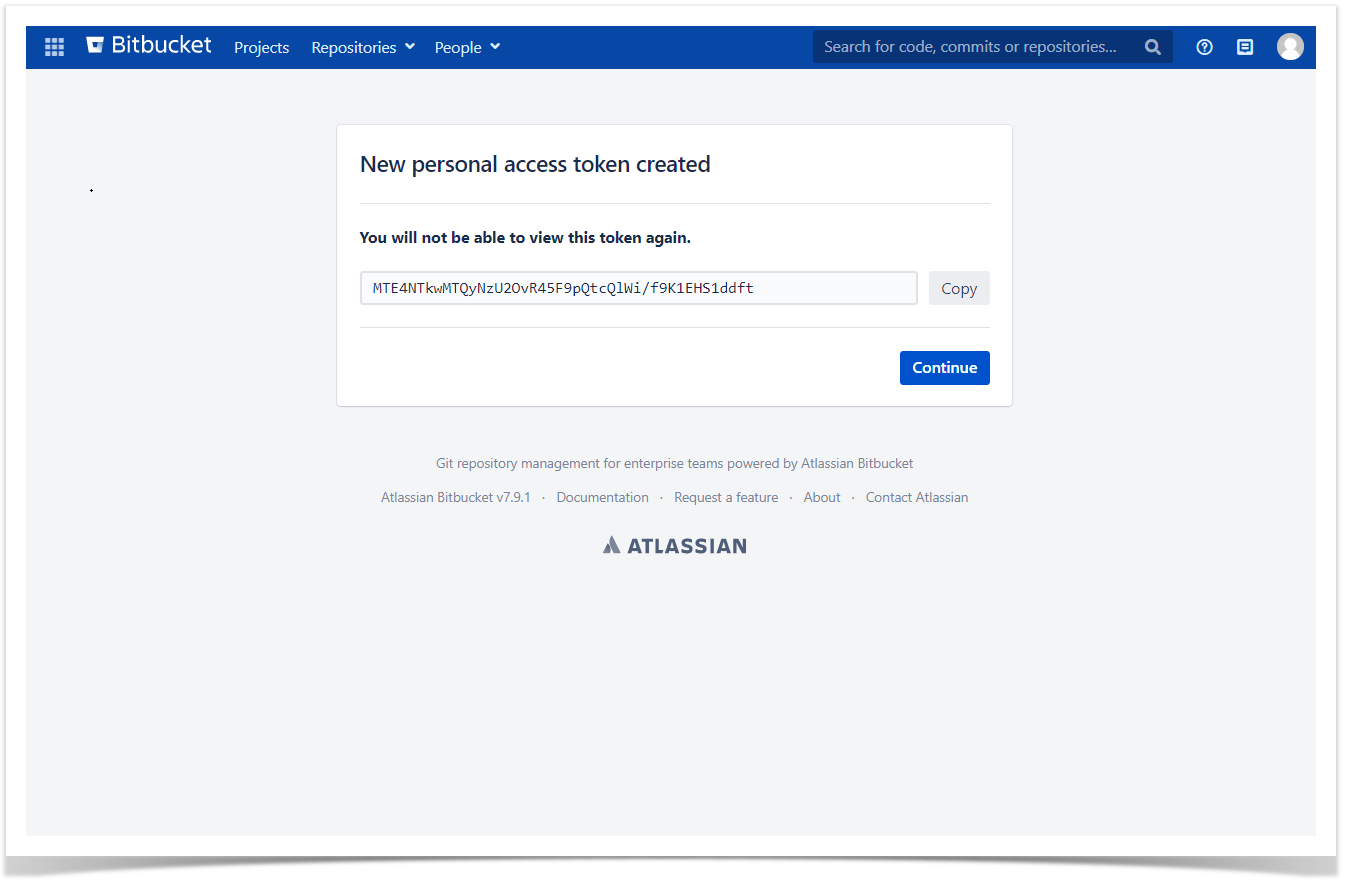
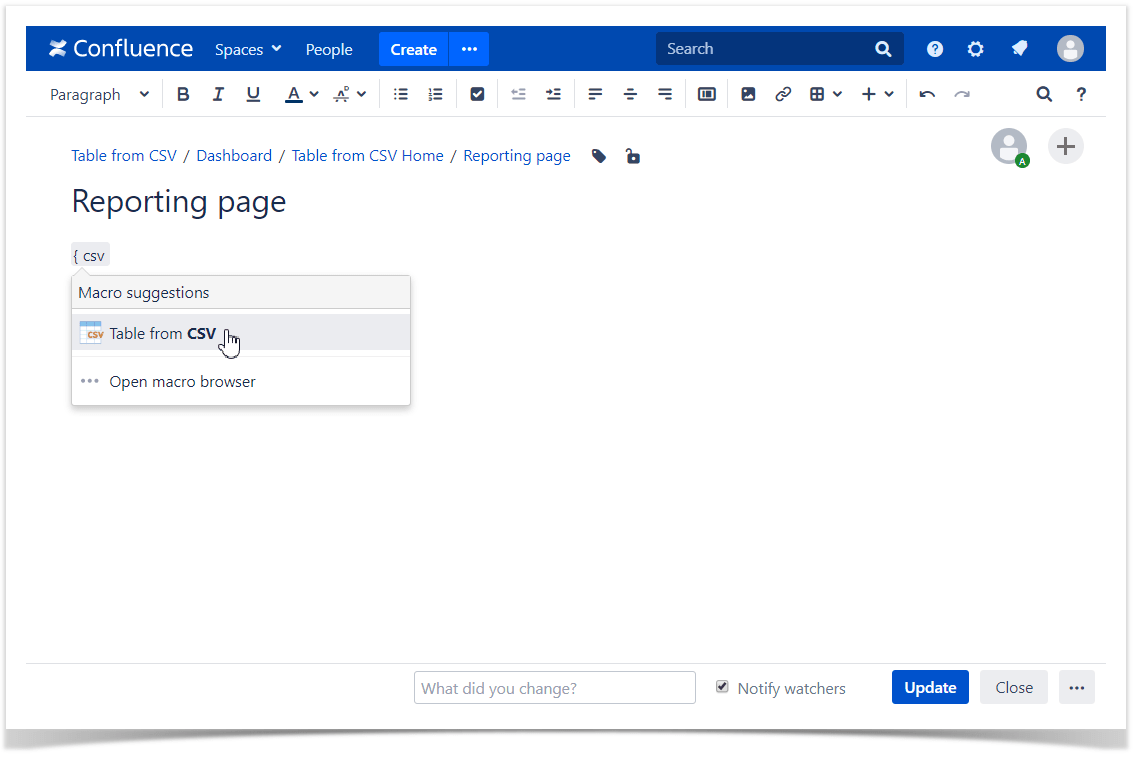
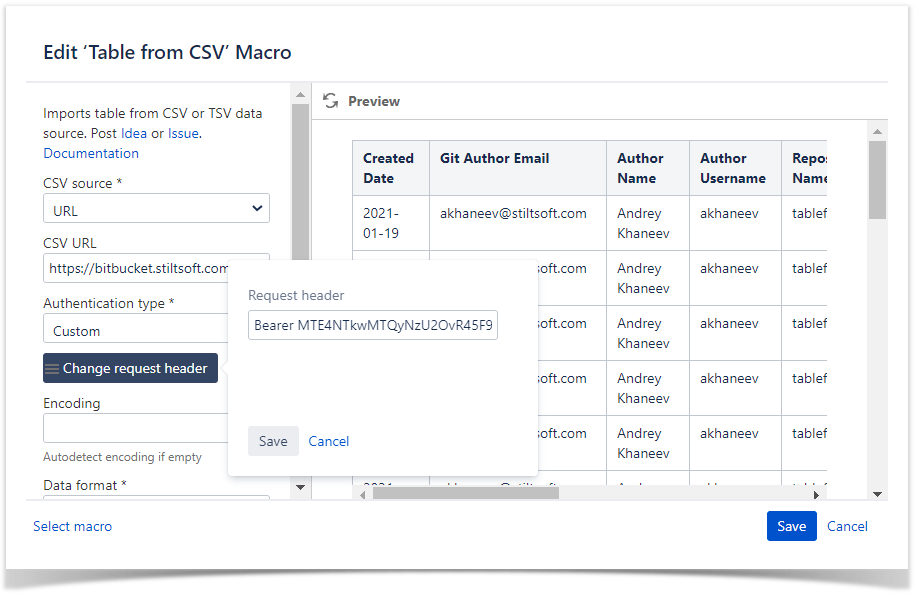
Custom Authentication with a Bitbucket access token
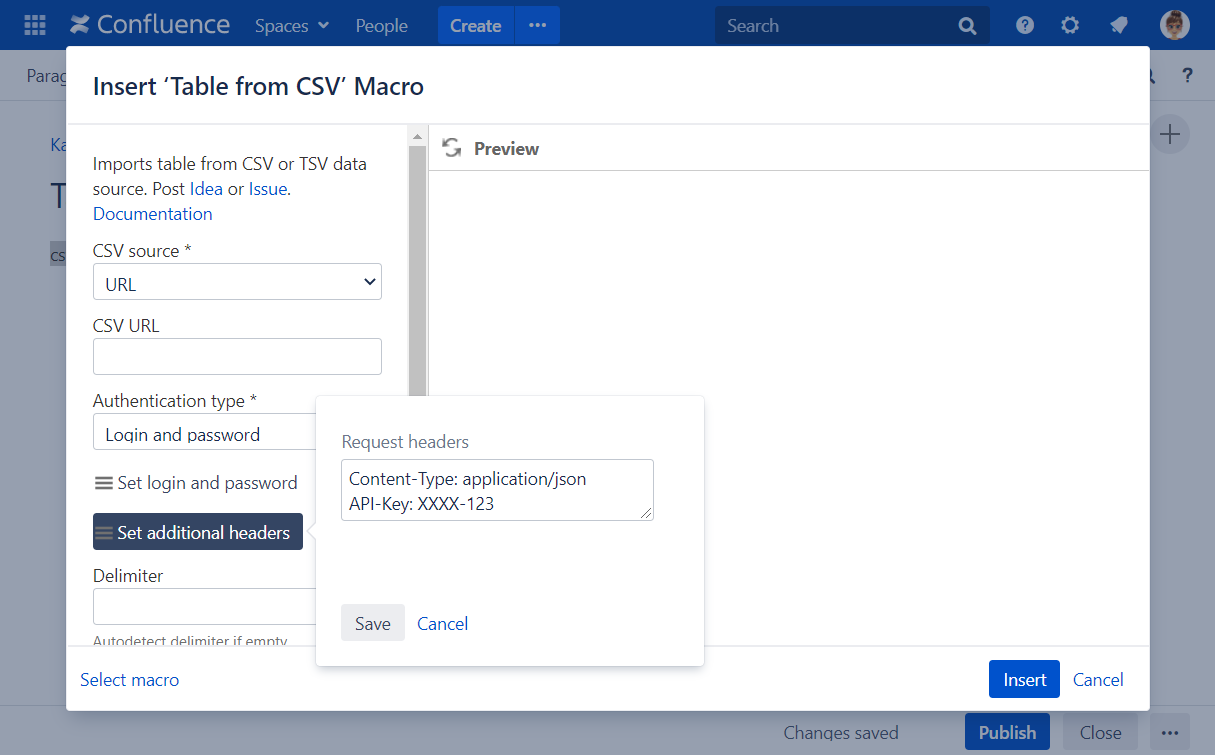
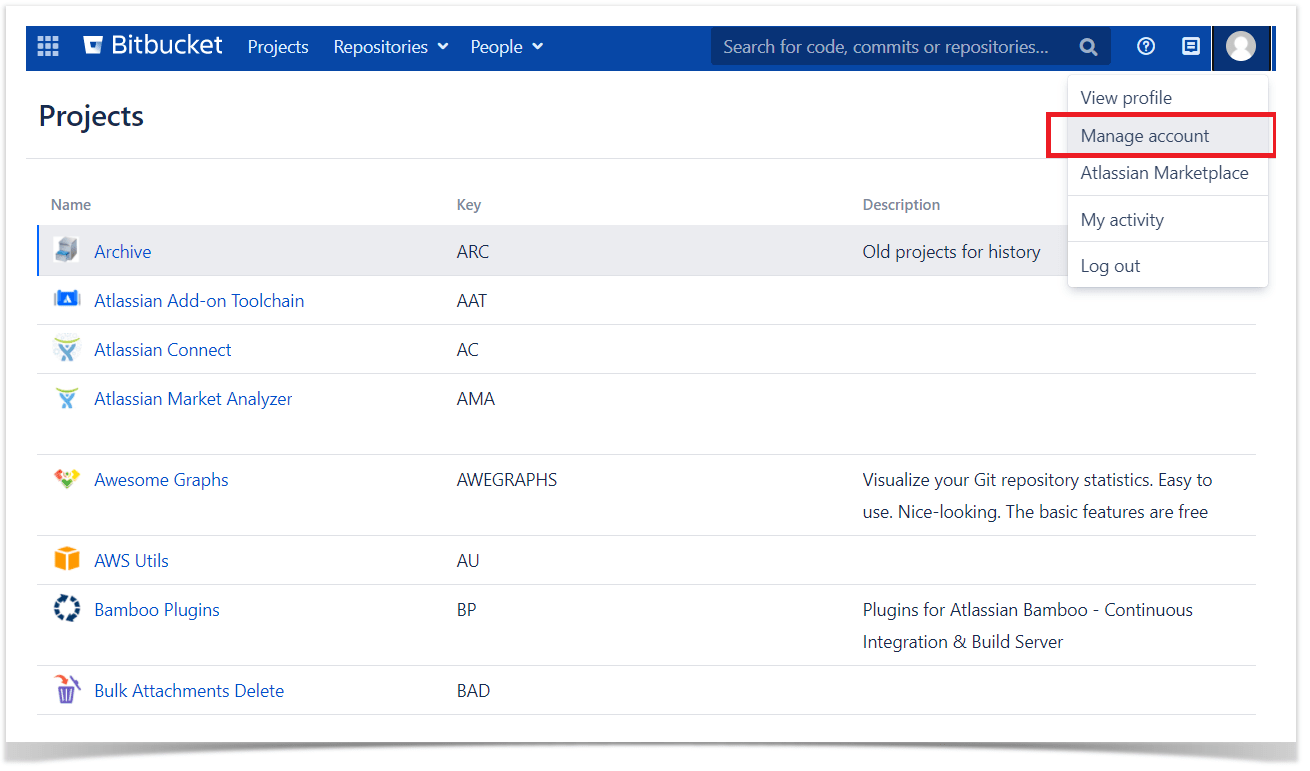
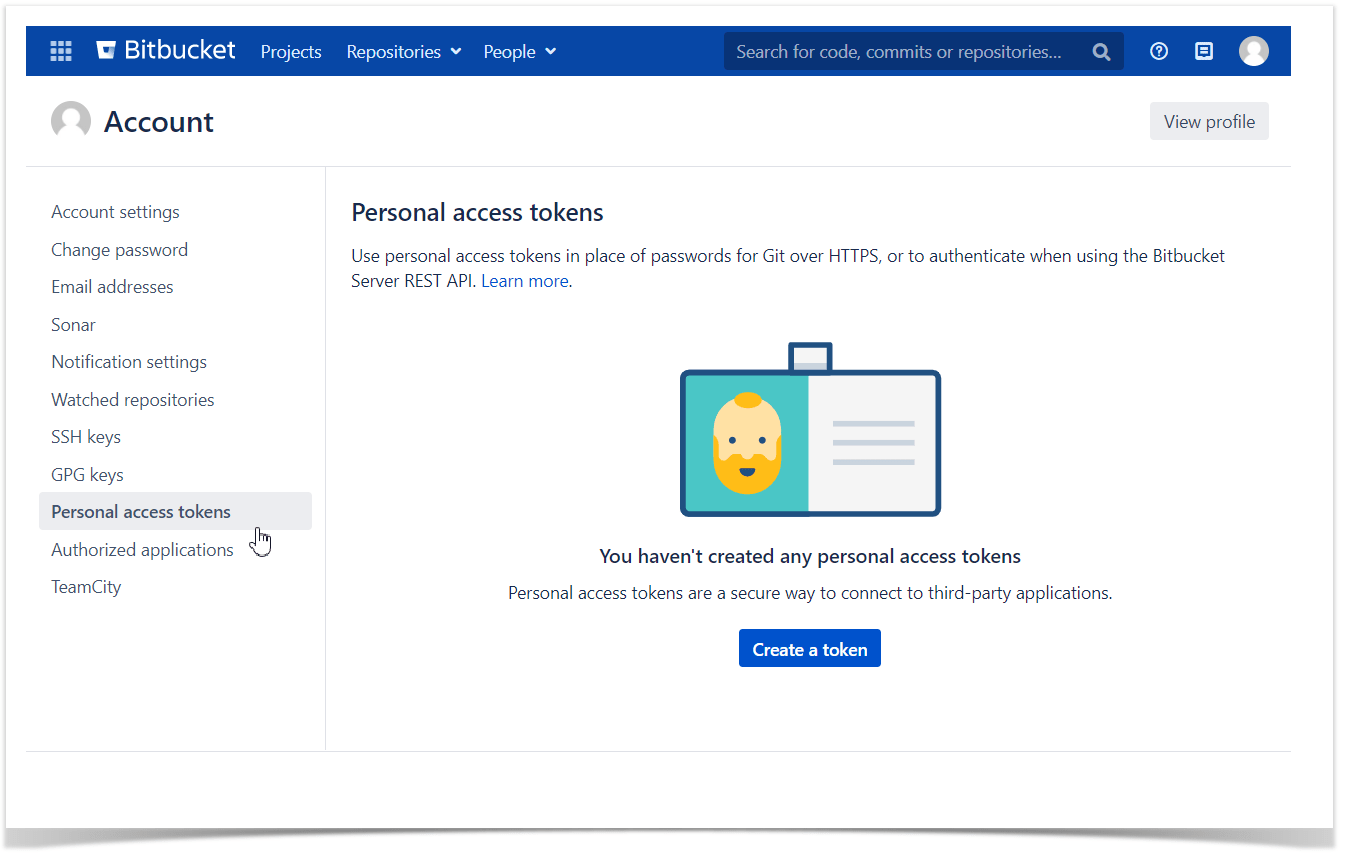
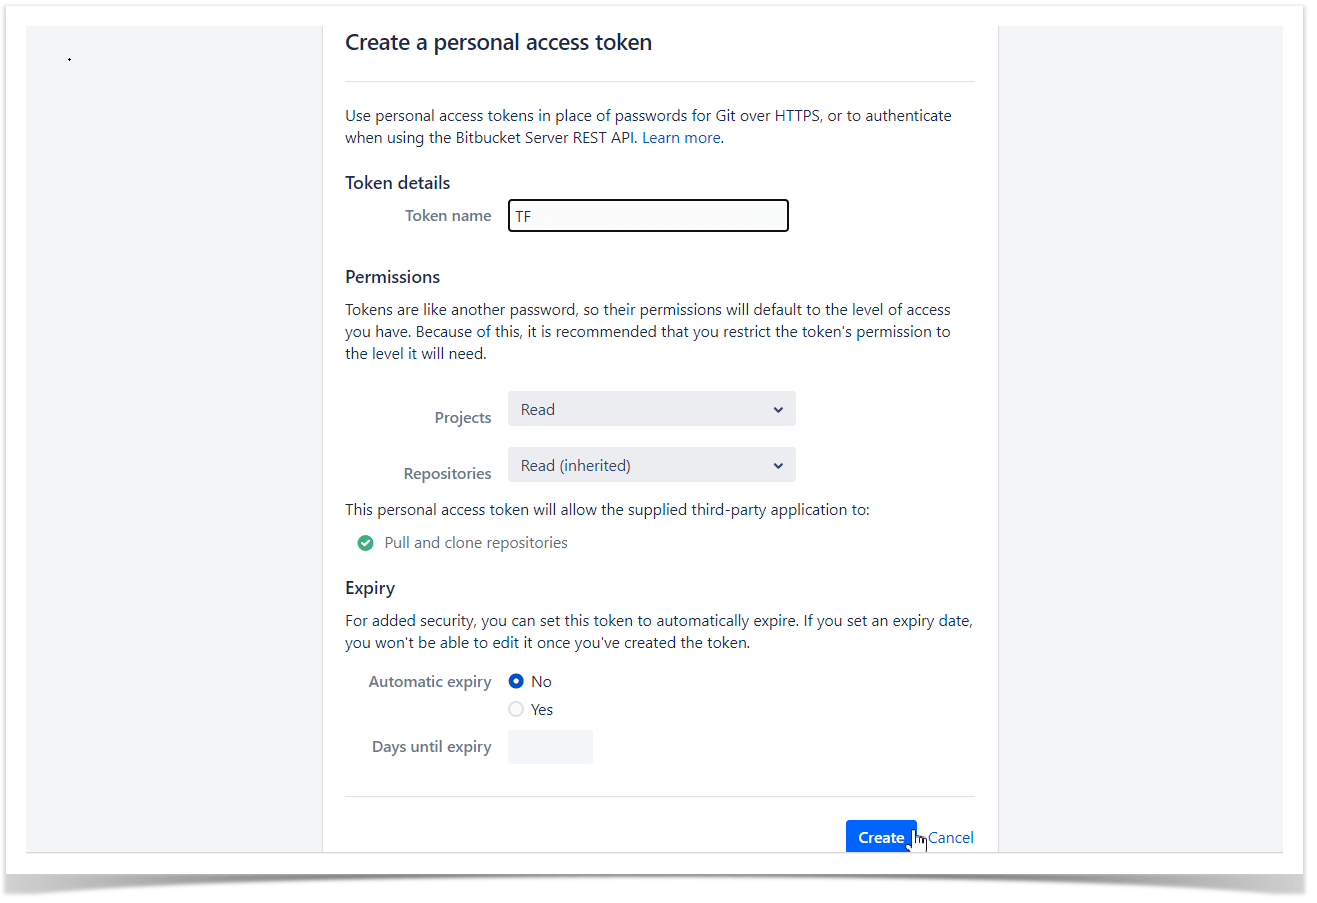
1. Create a personal access token in your Bitbucket account. 2. Insert the Table from CSV macro on the Confluence page. 3. Add a URL to CSV. 4. Select the Authentication type: Custom. 5. Use Bearer Auth without the username. Change request header: Bearer Your_Token 6. Save Request header
In general, custom header consists of Auth_Type Your_Secret
Cookie Notice
This website uses cookies for analytics, personalization and advertising. By continuing to browse, you agree to our use of cookies. Learn more