Join our Product Advisory program to get free access to our new Cloud apps and start contributing to solutions that will be used worldwide.View terms and conditions |
This is quick start guide for Smart Attachments for Jira Cloud. If you use Smart Attachments for Jira Server or Data Center, please see this documentation. |
About
The Smart Attachments app for Jira Cloud lets you tag documents with labels and use them for better file searchability in Jira issues. Now you can instantly find the required document in a blink of an eye.
Take advantage of the following capabilities:
- label documents with one or multiple labels
- filter assets against specific labels
- group files by some label and view files at once
- find the labeled document among others
Managing Labels of Attachments
The Smart Attachments for Jira Cloud app allows you to manage labels for attachments within issues, as follows:
- tag attachments with labels
- remove labels from attachments
- filter attachments by label
- group attachments by label
Tagging attachments with labels
- Open the issue with attachments you want to tag with labels.
- On the issue sidebar, click Open Smart Attachments.
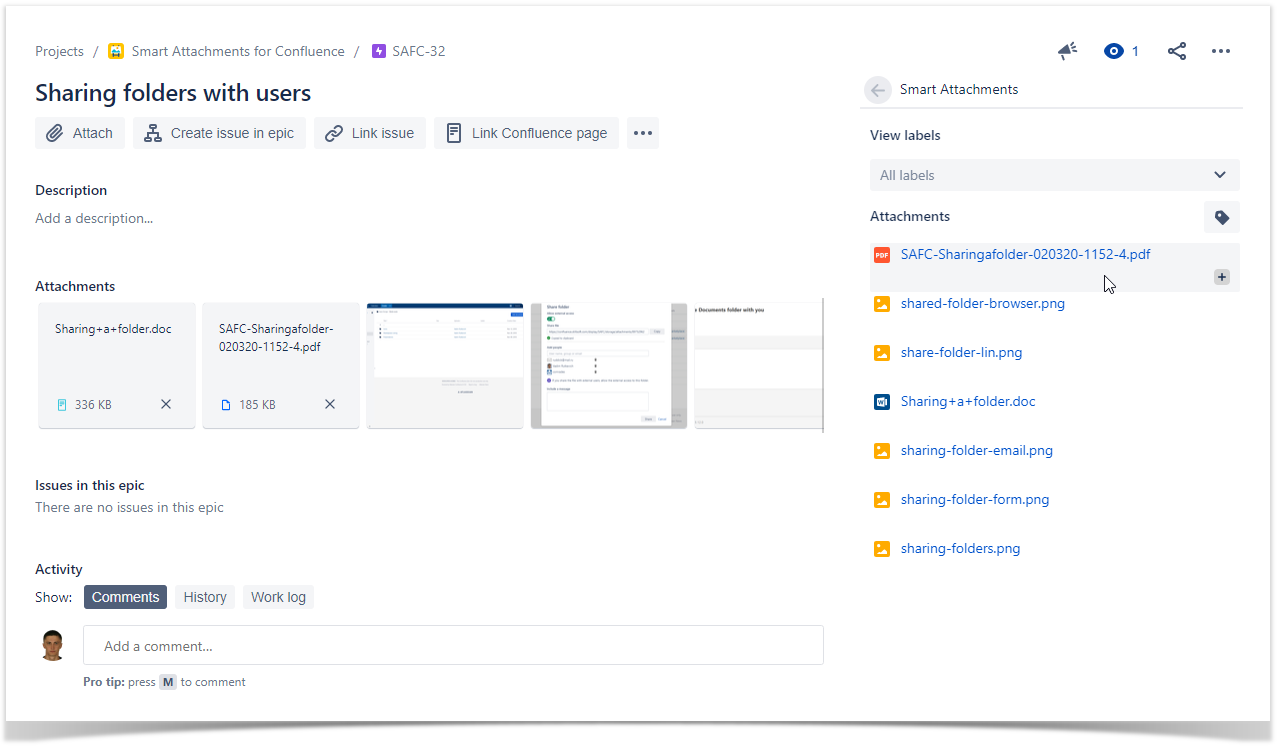
- Hover over the attachment and click the
 icon.
icon. - Start entering the label and select from the prompted matches.
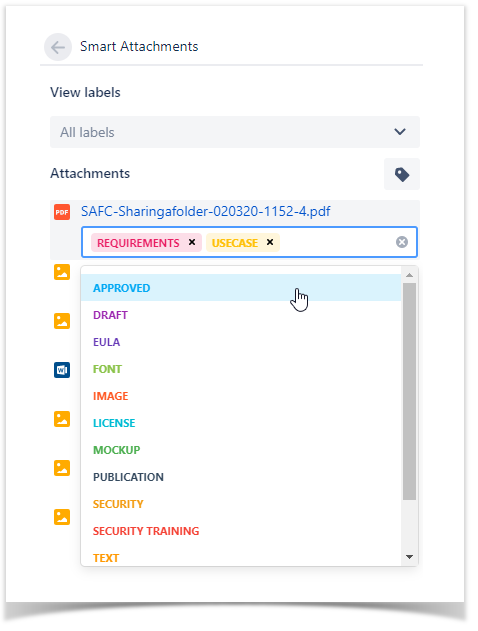
- If the label you enter does not exist, the app will prompt you to create a new label.
You add up to 5 labels to one attachment or document. |
Removing labels from attachments
- Open the issue with attachments which you want to remove labels from.
- Hover over the attachment and click the
 icon.
icon.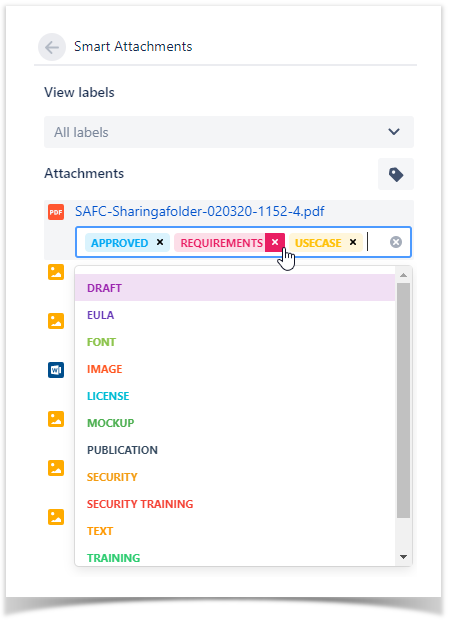
- Delete one or multiple labels.
Filtering attachments by label
- Above the list with attachments, locate the View labels box.
- Select one or multiple labels to view attachments that has any of the selected labels.
- The app will automatically filter attachments by label.
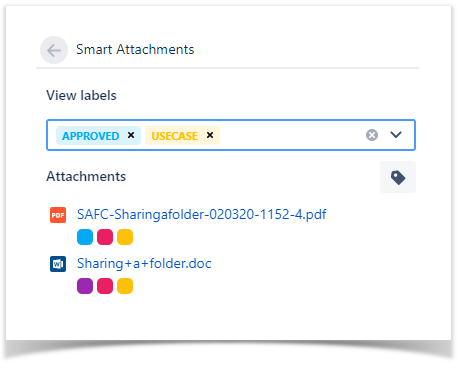
You can also click a specific label on the list with attachment to start filtration of attachments by label.
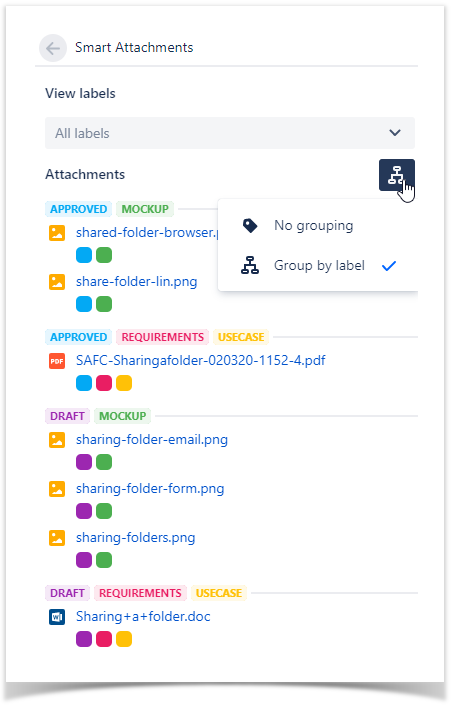
Grouping attachments by label
You can group attachments by labels (like by categories). The app saves the grouping option per project.
- Open the issue.
- Click the
 icon.
icon. - Select Group by label. The app will group attachments by labels, as follows:
Grouping attachments by date
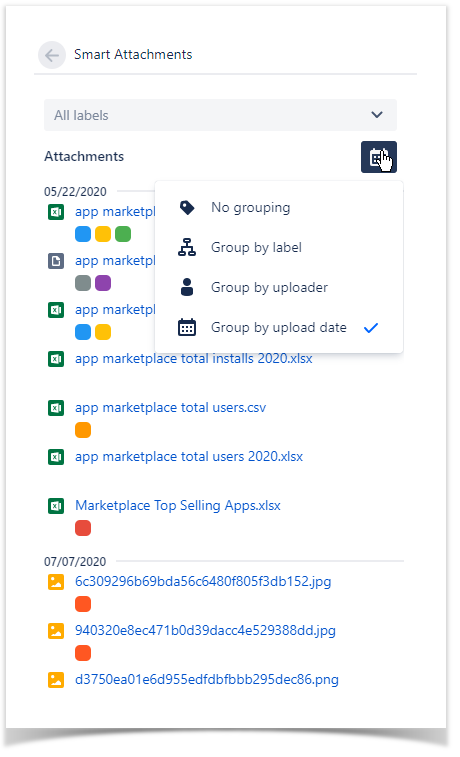
You can group attachments by dates. The app saves the grouping option per project.
- Open the issue.
- Click the
 icon.
icon. - Select Group by date. The app will group attachments by upload dates, as follows:
Grouping attachments by uploader
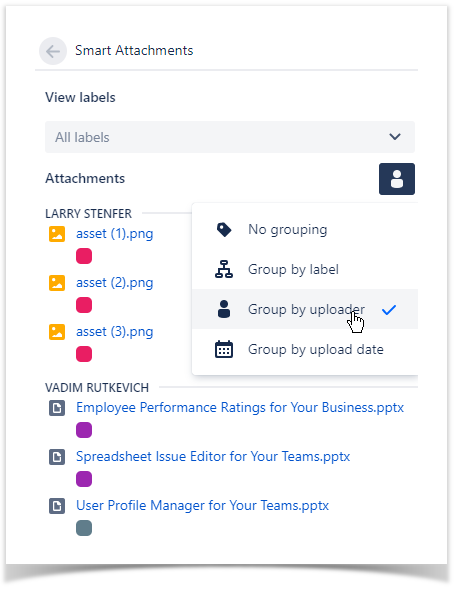
You can group attachments by dates. The app saves the grouping option per project.
- Open the issue.
- Click the
 icon.
icon. - Select Group by uploader. The app will group attachments by uploaders, as follows:
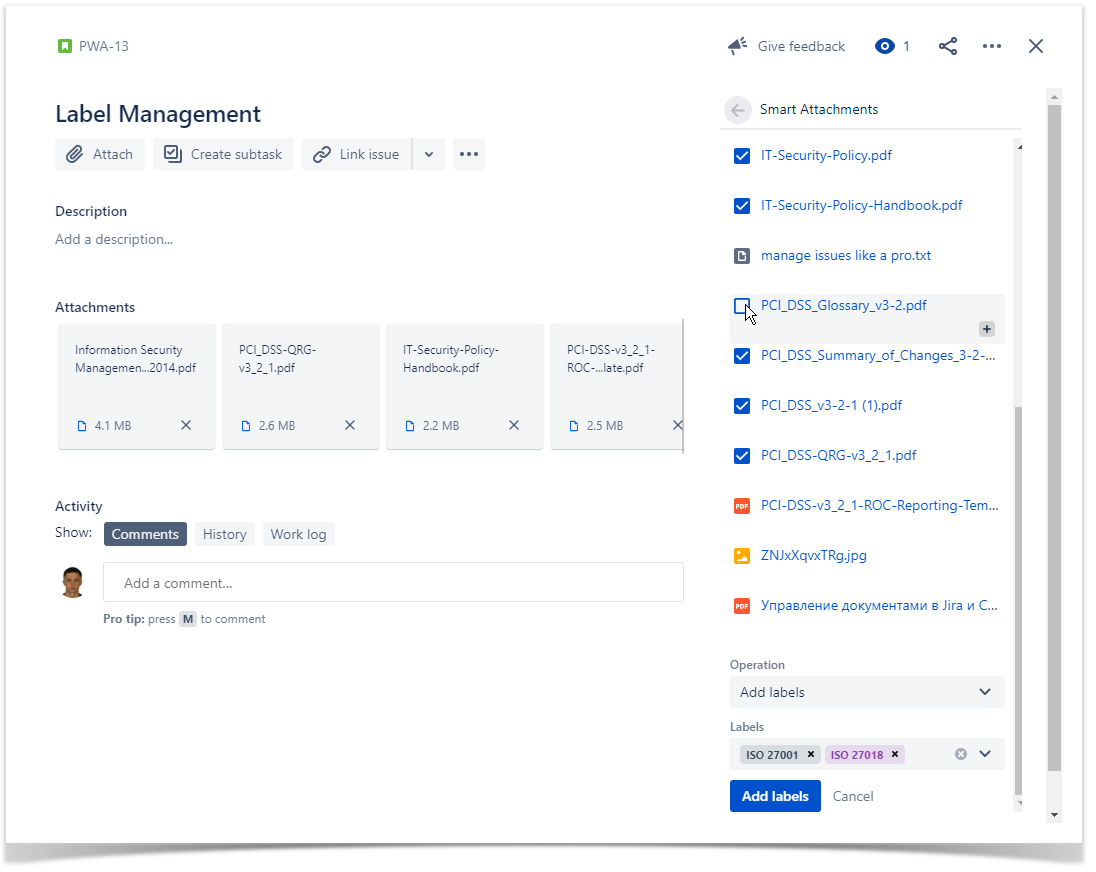
Managing bulk operations on attachments
- Open the issue with attachments.
- Open the Smart Attachments section.
- Select the attachments which you want to perform a bulk operation on.
- Select the operation you want to perform.
- Select labels you want to add or replace the existing labels with.
- Confirm the operation.
Administering labels
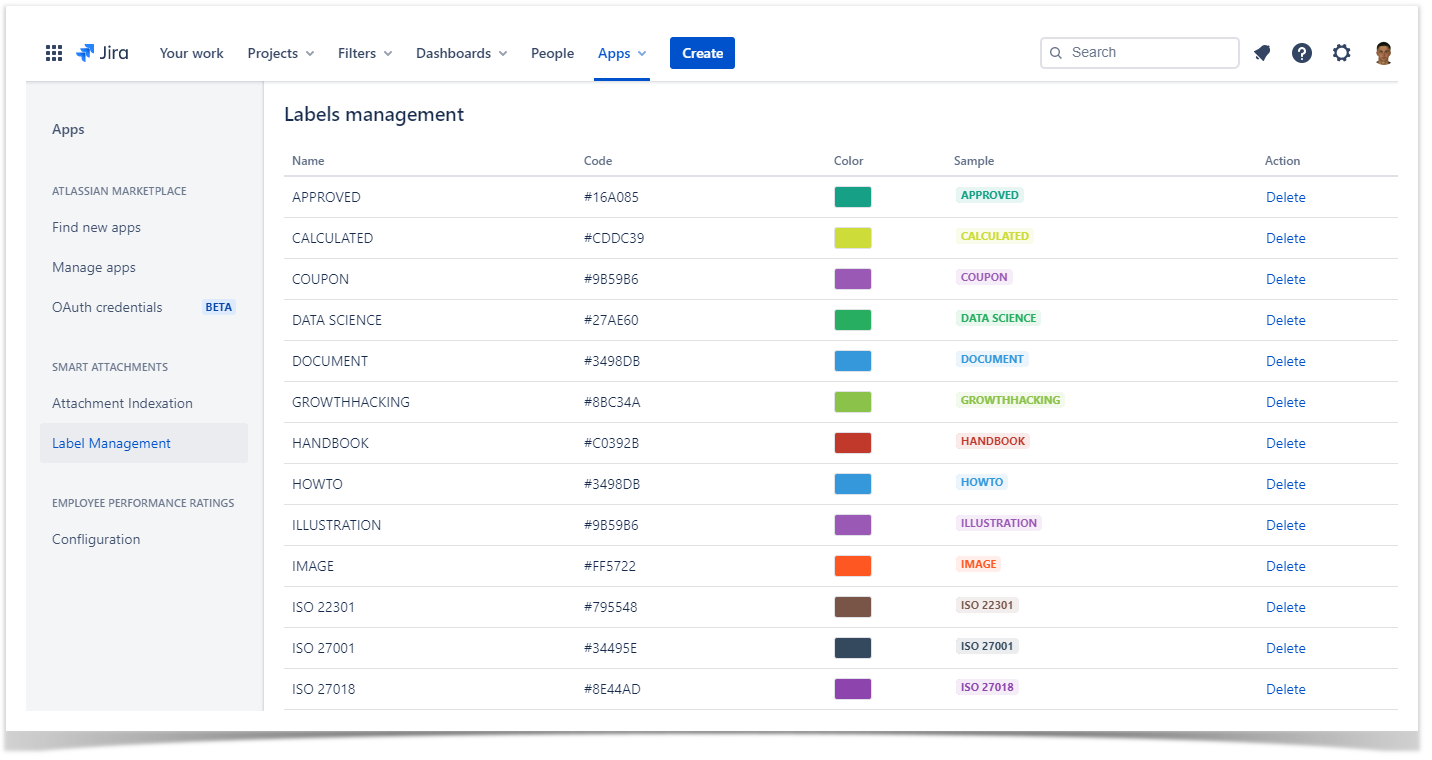
- Navigate to Jira administration > Apps.
- Locate the Smart Attachments section and click Label management.
- On the opened page, you can see the list of labels registered in your Jira Cloud instance.
You can edit the label names and delete the no longer needed labels.
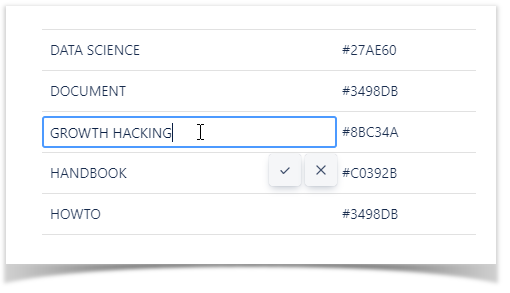
Editing the label name
- Hover over the label name and click it.
- Update the name.
- Click the Confirm icon to save the updated name.
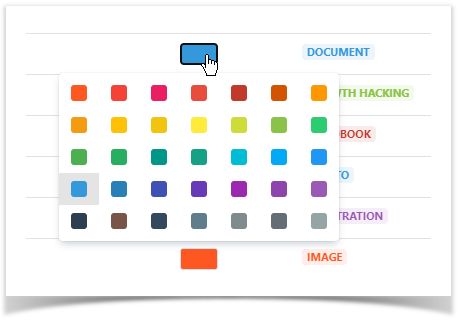
Picking a new color for labels
- Click the color picker.
- Select a new color.
Deleting a label
You can delete the no longer needed labels. The label is deleted for the entire Jira Cloud instance.
- Locate the label you want to delete.
- Click Delete.
- Confirm the removal of the label.
<script id='pixel-script-poptin' src='https://cdn.popt.in/pixel.js?id=8a9df7d64153d' async='true'></script> |