Download PDF
Download page How to export macros and results.
How to export macros and results
Macros export options
Export to PDF
Available in the following macros:
Table Filter
Pivot Table
Chart from Table
Table Transformer
Steps to export:
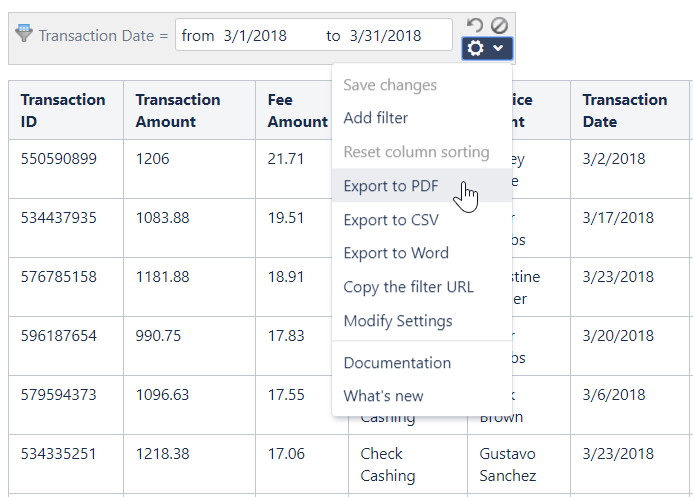
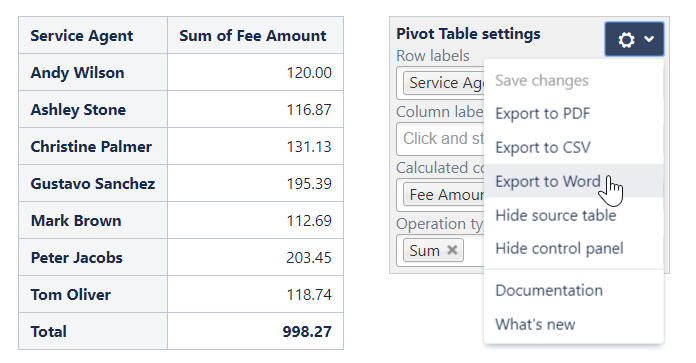
On the filtration or control pane, locate the cogwheel icon and click it.
Click Export to PDF.
Save the file to your local computer for opening.
Export to Word
Available in the following macros:
Table Filter
Pivot Table
Chart from Table
Table Transformer
Steps to export:
- On the filtration or control pane, locate the cogwheel icon and click it.
- Click Export to Word.
- Save the file to your local computer for opening.
Export to CSV
Available in the following macros:
Table Filter
Pivot Table
Table Transformer
The add-on allows you to export data to CSV, as follows:
- default settings
- custom settings
The default CSV format uses the following parameters:
- Encoding: UTF-16LE.
- Unicode BOM: BOM \uFFFE
- Separator: Tab.
- Quote Character: Double Quotes.
The сustom CSV format uses the following parameters:
- Encoding: UTF-8.
- Unicode BOM: -
- Separator: Manually
- Quote Character: Manually
To export filtered data or pivot table to CSV (with default settings):
- Open the page with the table.
- Apply the necessary filters.
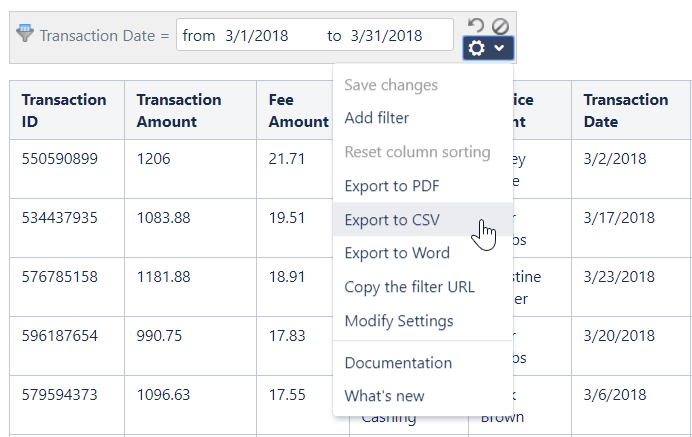
- On the filtration pane, click the cogwheel icon.
- Select Export to CSV.
- In the Export Options form, select Default settings.
- Click Export.
- Save the file to your local computer for opening.
To export hyperlinks as clickable links to CSV:
- Select the Export clickable links option.
- Define the appropriate list separator according to the local parameters on your machine.
To export filtered data or pivot table to CSV (with custom settings):
- Open the page with the table.
- Apply the necessary filters.
- On the filtration pane, click the cogwheel icon.
- Select Export to CSV.
- In the Export Options form, select Custom settings.
- Define the following parameters:
- Delimiter character - specify the character to delimit table columns.
- Quote character - specify the character to delimit separate call values.
- Export table header - update or delete the table header in the CSV file before export.
- Show all tasks - enable if you have several tasks with checkboxes inside one table cell.
- Click Export.
- Save the file to your local computer for opening.
Export to CSV via REST API
The feature is available for Data Center version 12.2.0 and newer.
Available for the following macros:
Table Filter
Pivot Table
- Chart from Table
Table Transformer
- Table Excerpt Include
To export your table to CSV via REST API, you may use the /rest/table-filter/1.0/service/export/csv url.
This endpoint accepts 5 parameters:
- pageId (mandatory) - the page ID number where the required macro is located. You may read how to get your page ID number in the Atlassian Documentation.
- id (optional) - unique identifier of the required macro on the page.
- macroName (optional) - the name of the required macro on the page ("table-filter" by default). Available macro names are "table-filter", "pivot-table", "table-chart", "table-joiner" (that stands for the Table Transformer macro), and "table-excerpt-include".
The macro id and macroName parameters can be found in the source code of your page. - macroNumber (optional) - the serial number of the required macro on the page (1 by default).
- delimiter (optional) - the output data delimiter (comma by default).
The internal logic is as following: if the id is passed through the request, then we try to find the macro and its table on the page with the specified pageId. If the id was not passed or the macro with such id was not found on the specified page, we try to find the required macro using its macroName and macroNumber. If there is still no any result, you'll get the 404 error and need to adjust your request. If the required macro is found, we'll convert its table to the CSV format and return the file.
An example of the request:
http://my-confluence-instance.com/rest/table-filter/1.0/service/export/csv?pageId=1147061&id=69a5f057-38eb-4af5-989b-e9aba26ea1e7¯oName=table-joiner¯oNumber=2&delimiter=;Note that to export a table via REST API, you should have the permission to view the page where the required macro is located.
Export as image
Available in the folloving macros:
Chart from Table
Steps to export:
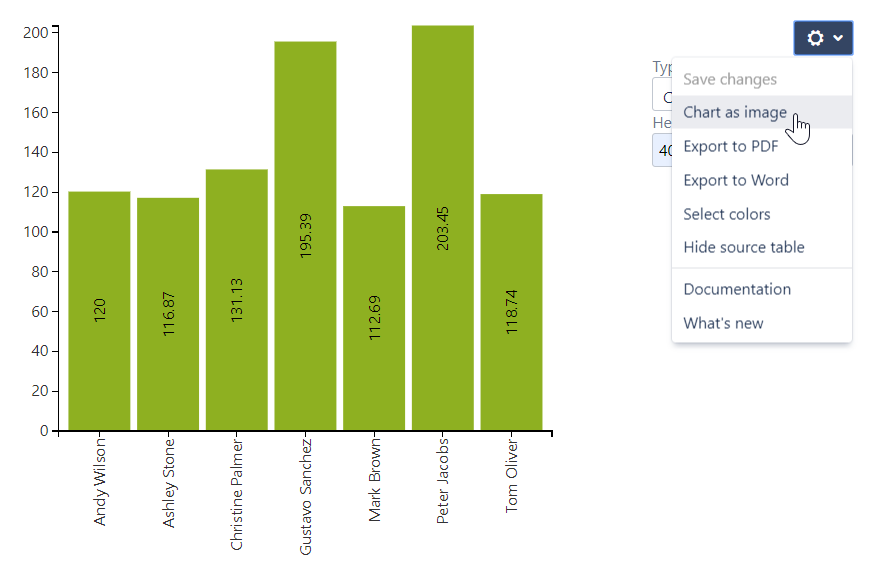
- On the control pane, locate the cogwheel icon and click it.
- Click Chart as image.
- Save the file to your local computer for opening.
Exporting the whole page, page tree or space
Apply the required filters to your data table or configure the pivot table or chart.
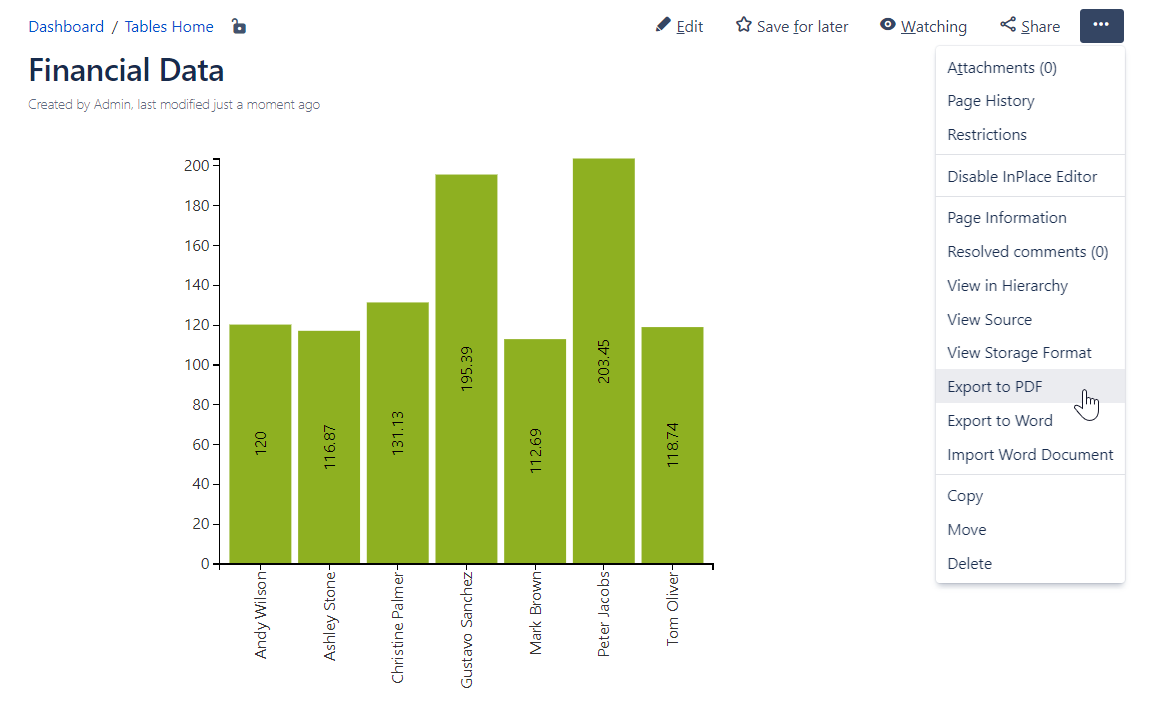
Chose any export option of Confluence.
All the information from the page will be exported.
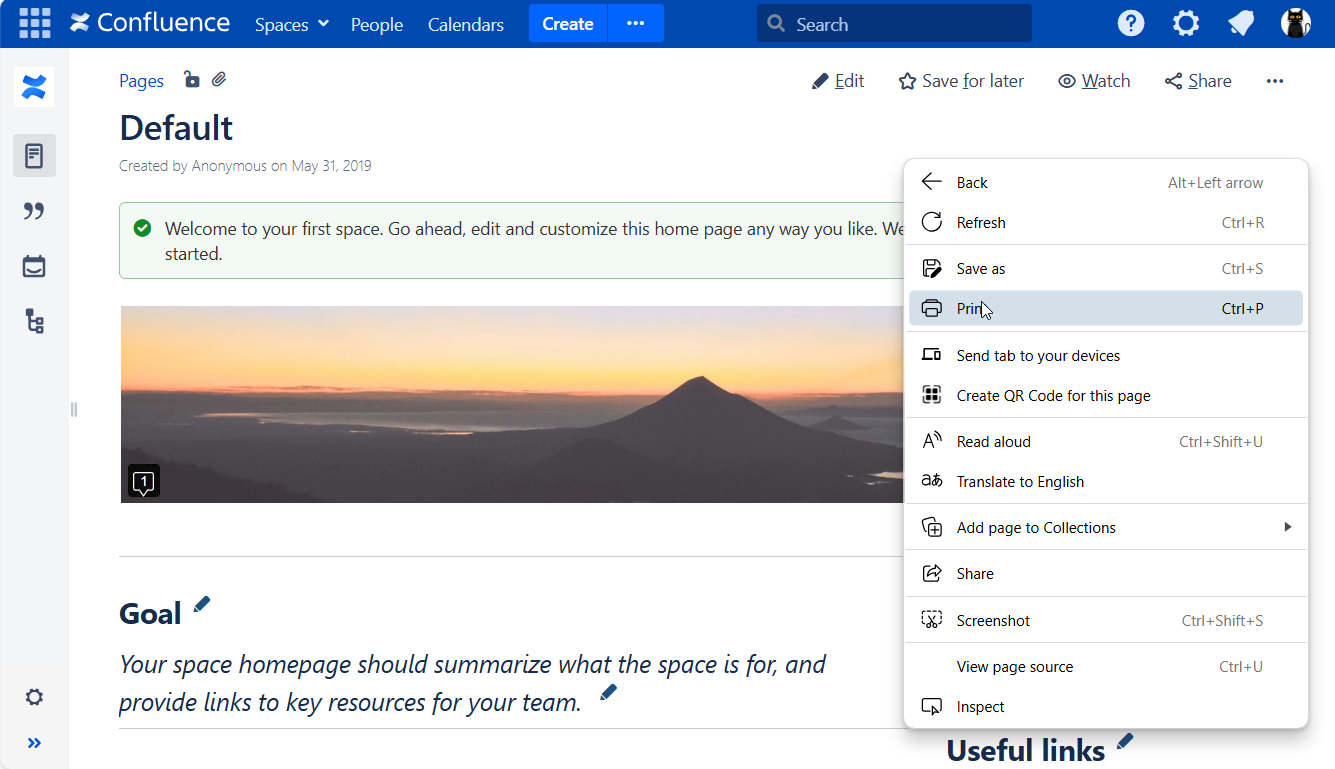
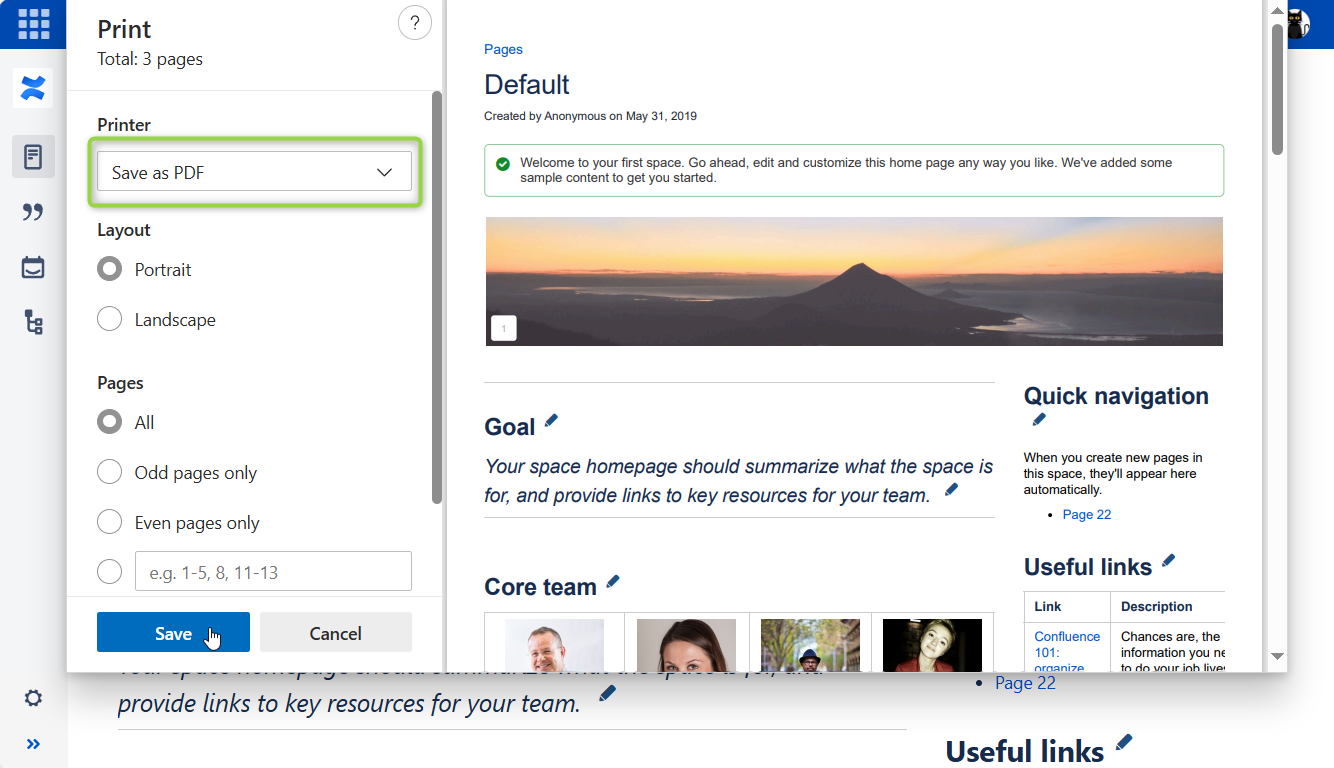
Saving the whole page to PDF via browser
Navigate to the needed webpage containing the app macros.
Right-click with a mouse to select the Print option (OR press CTRL+P).
Choose the Save as PDF option in the Printer settings.
Browser printing allows to avoid any potential 3rd-party macro compatibily, default Confluence export, etc. issues that might be intermittently taking place in terms of page view display proving this option to be an effective and operational exporting alternative.
Sharing filter URL with colleagues
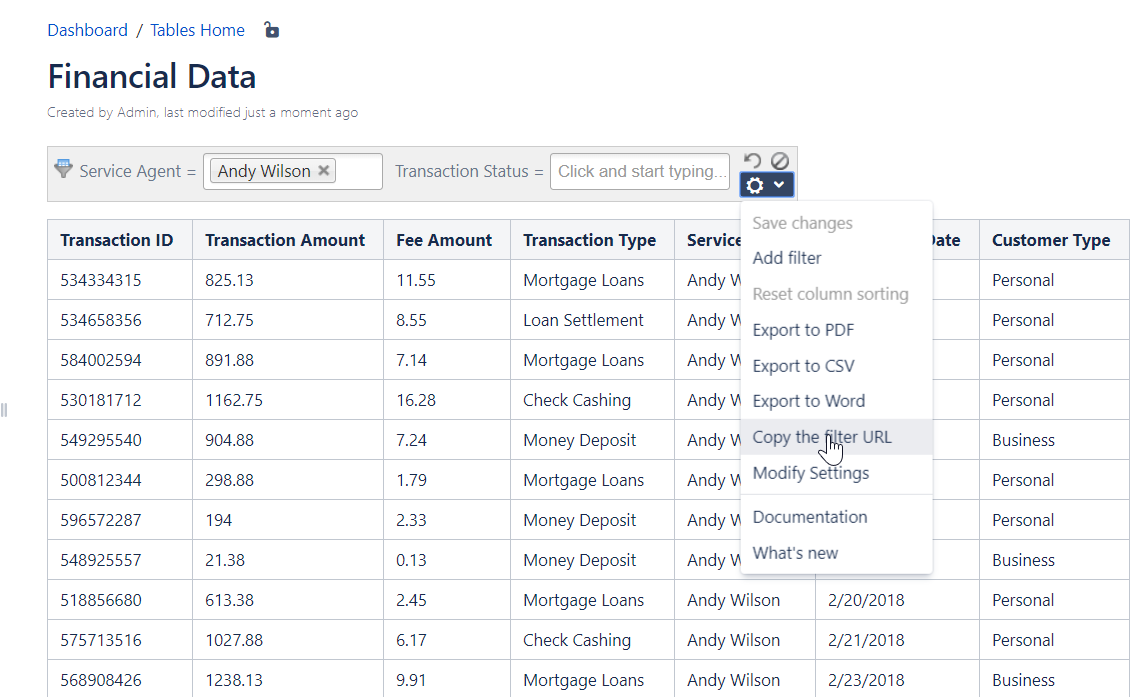
You can share the results achieved with the filtration pane of Table Filter with your colleagues. The sharing link contains all the necessary filtration parameters and the sorting order that can temporarily override the currently set filtration parameters and sorting. The saved filtration parameters are not affected anyhow by this method until you rewrite them by saving changes.
To share the filtration results:
- Open the page with the table.
- On the filtration pane, locate and click the cogwheel icon.
- Select Copy the filter URL.
- Share the link with colleagues.
See also a blog post: One-Click Table Filtration in Confluence
Creating a user macro to display export features as links
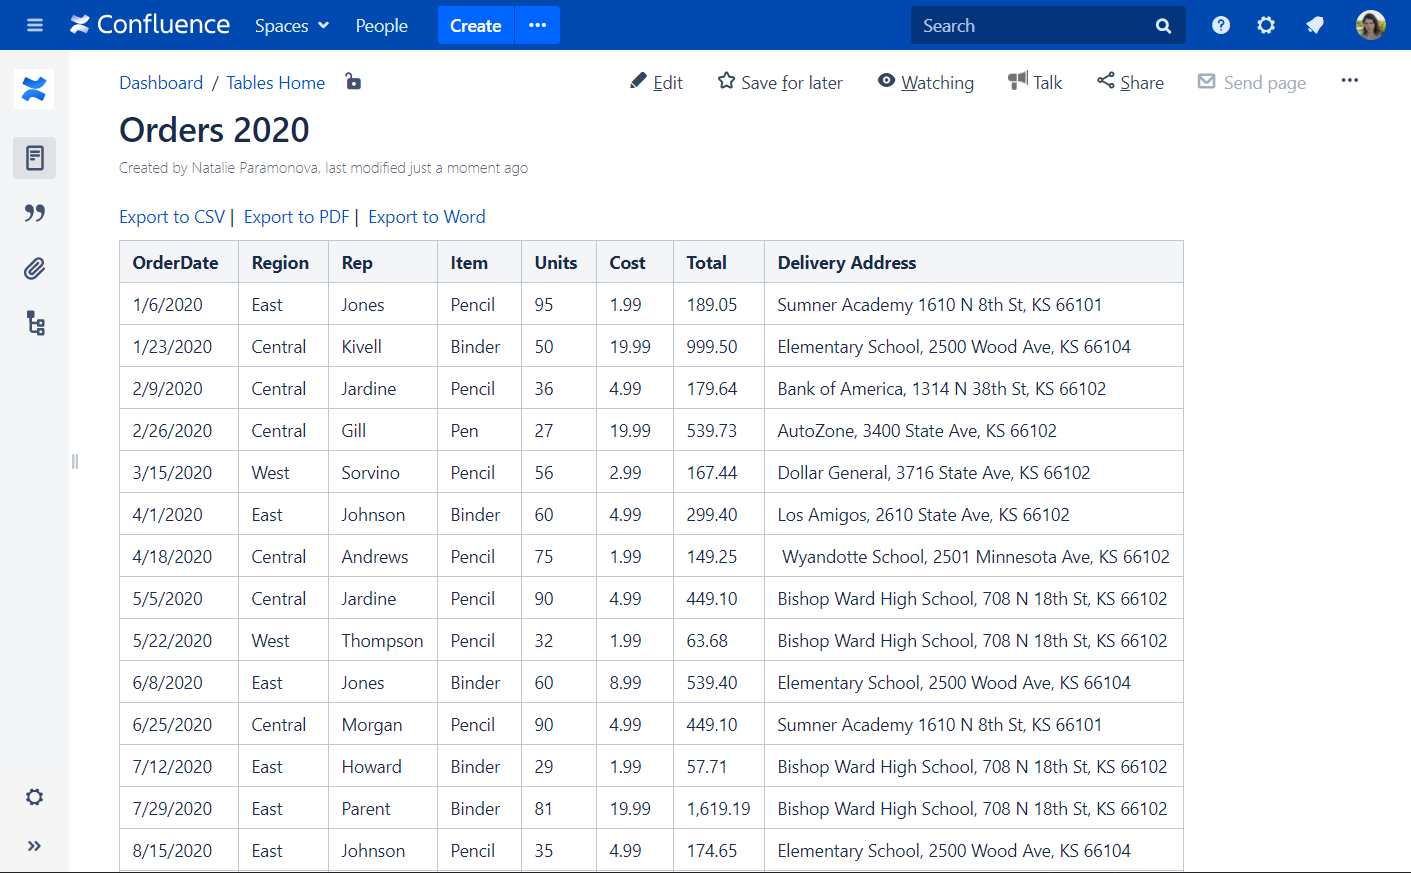
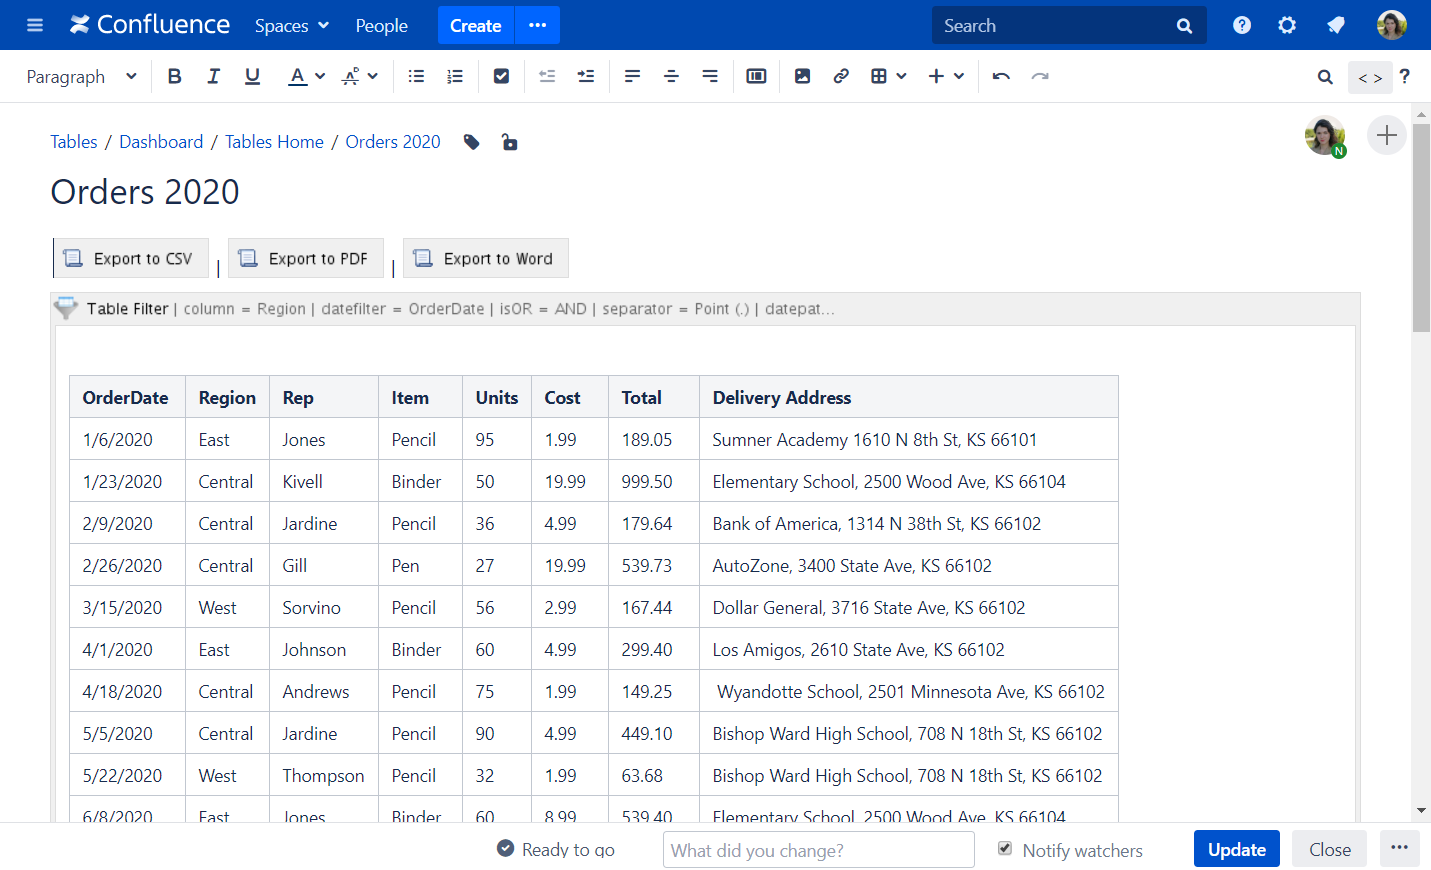
To display export features as links, you can create a user macro.
If you have only one Table Filter, Pivot Table or Chart from Table macro on the page, then create the following user macro and insert it on the page:
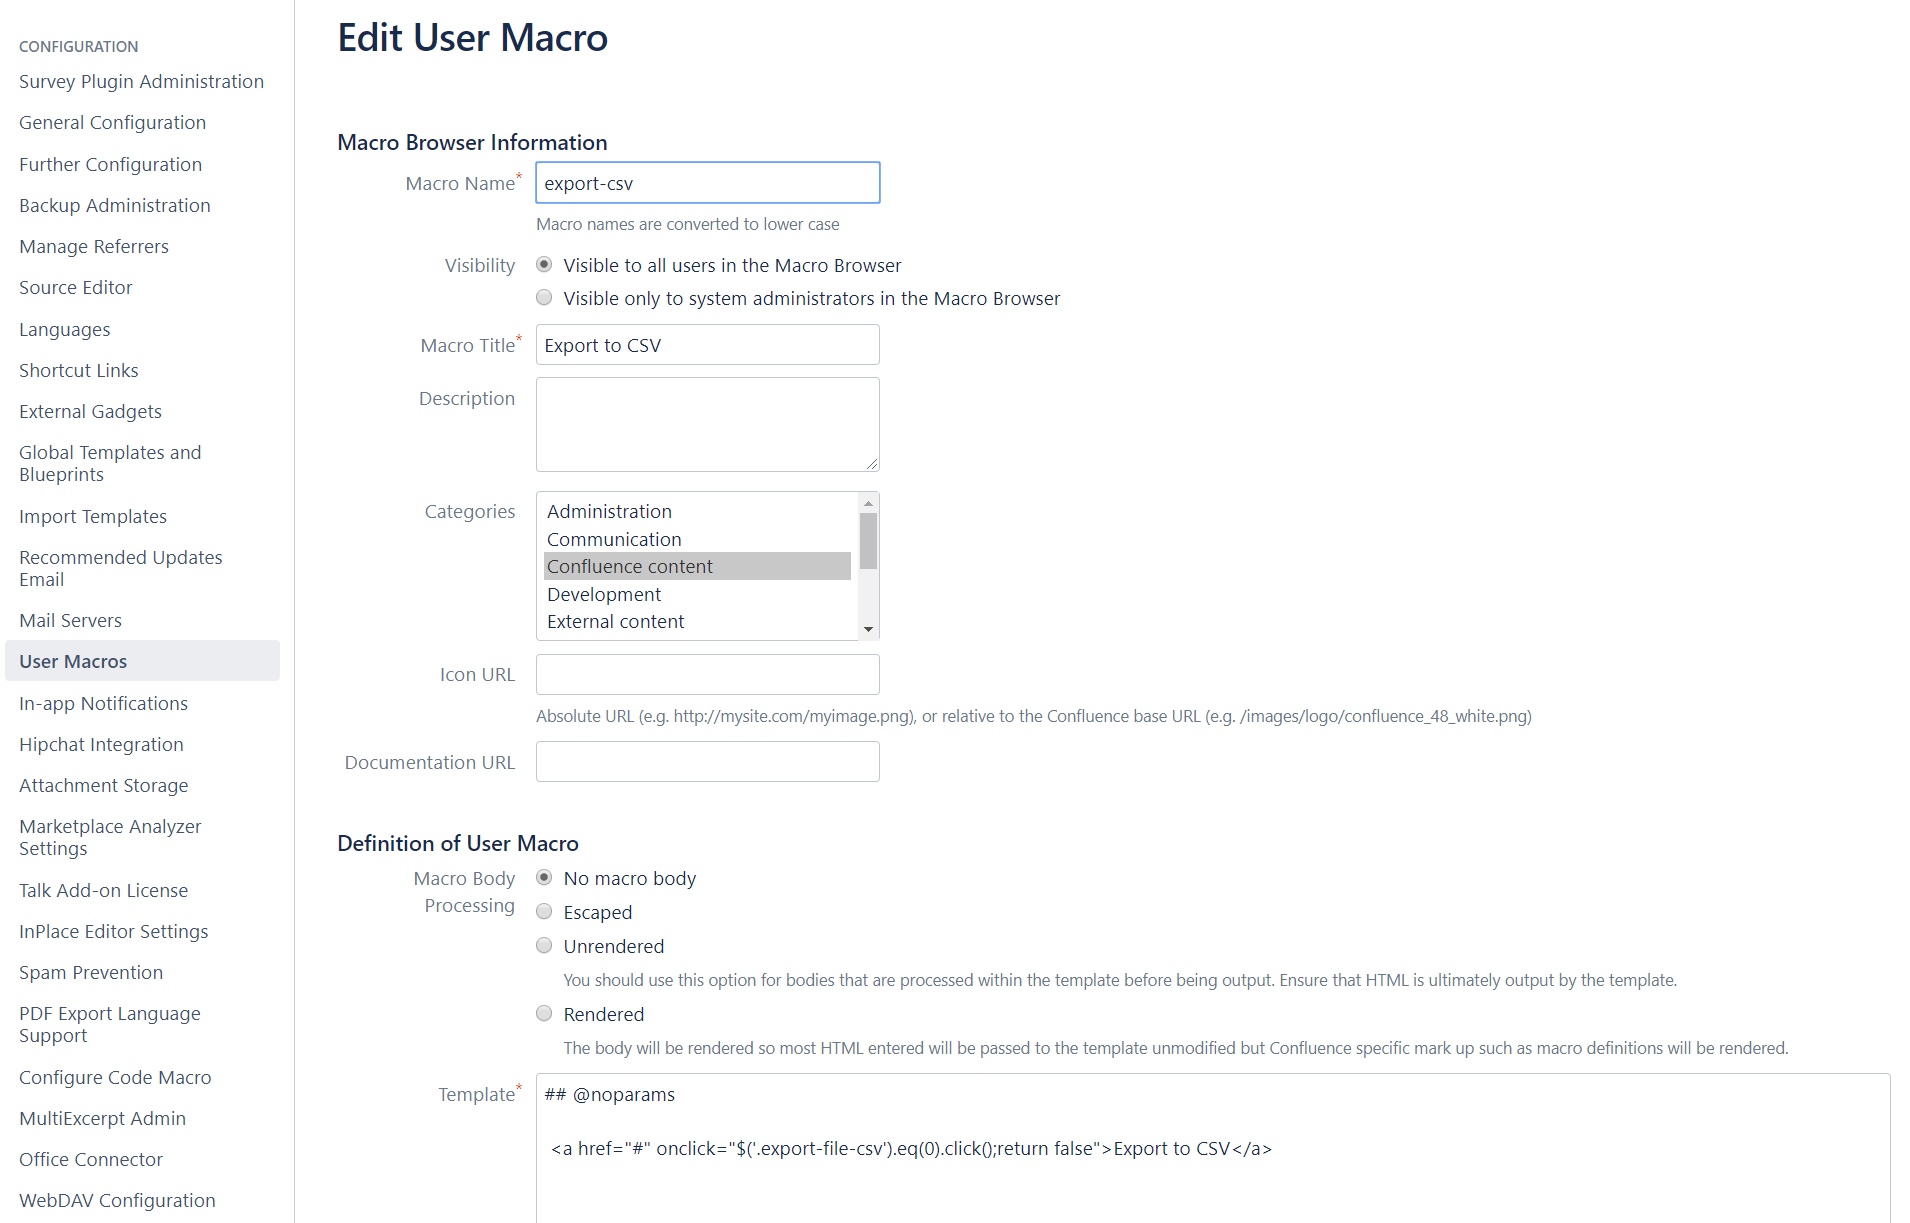
- For export to CSV:
## @noparams

<a href="#" onclick="$('.export-file-csv').eq(0).click();return false">Export to CSV</a>- For export to PDF:
## @noparams

<a href="#" onclick="$('.export-file-pdf').eq(0).click();return false">Export to PDF</a>- For export to Word:
## @noparams

<a href="#" onclick="$('.export-file-doc').eq(0).click();return false">Export to Word</a>If you have multiple macros on the page, then create the following user macro and insert it inside one or multiple macros:
- For export to CSV:
## @noparams

<a href="#" onclick="$(this).parents('.tablefilter-outer-wrapper, .pivot-content, .table-chart-contents').eq(0).find('.export-file-csv').eq(0).click();return false">Export to CSV</a>- For export to PDF:
## @noparams

<a href="#" onclick="$(this).parents('.tablefilter-outer-wrapper, .pivot-content, .table-chart-contents').eq(0).find('.export-file-pdf').eq(0).click();return false">Export to PDF</a>- For export to Word:
## @noparams

 <a href="#" onclick="$(this).parents('.tablefilter-outer-wrapper, .pivot-content, .table-chart-contents').eq(0).find('.export-file-doc').eq(0).click();return false">Export to Word</a>