Download PDF
Download page How to manage category schemes.
How to manage category schemes
Jira global settings
Edit the category scheme
You can modify the configuration of category schemes.
The app uses the locking of category schemes, so you may not be able to modify the category scheme while another user is editing it. The default locking timeout is five minutes. The locking is automatically removed upon expiry of this timeout if no actions are performed on the category scheme. All the unsaved modifications may be lost.
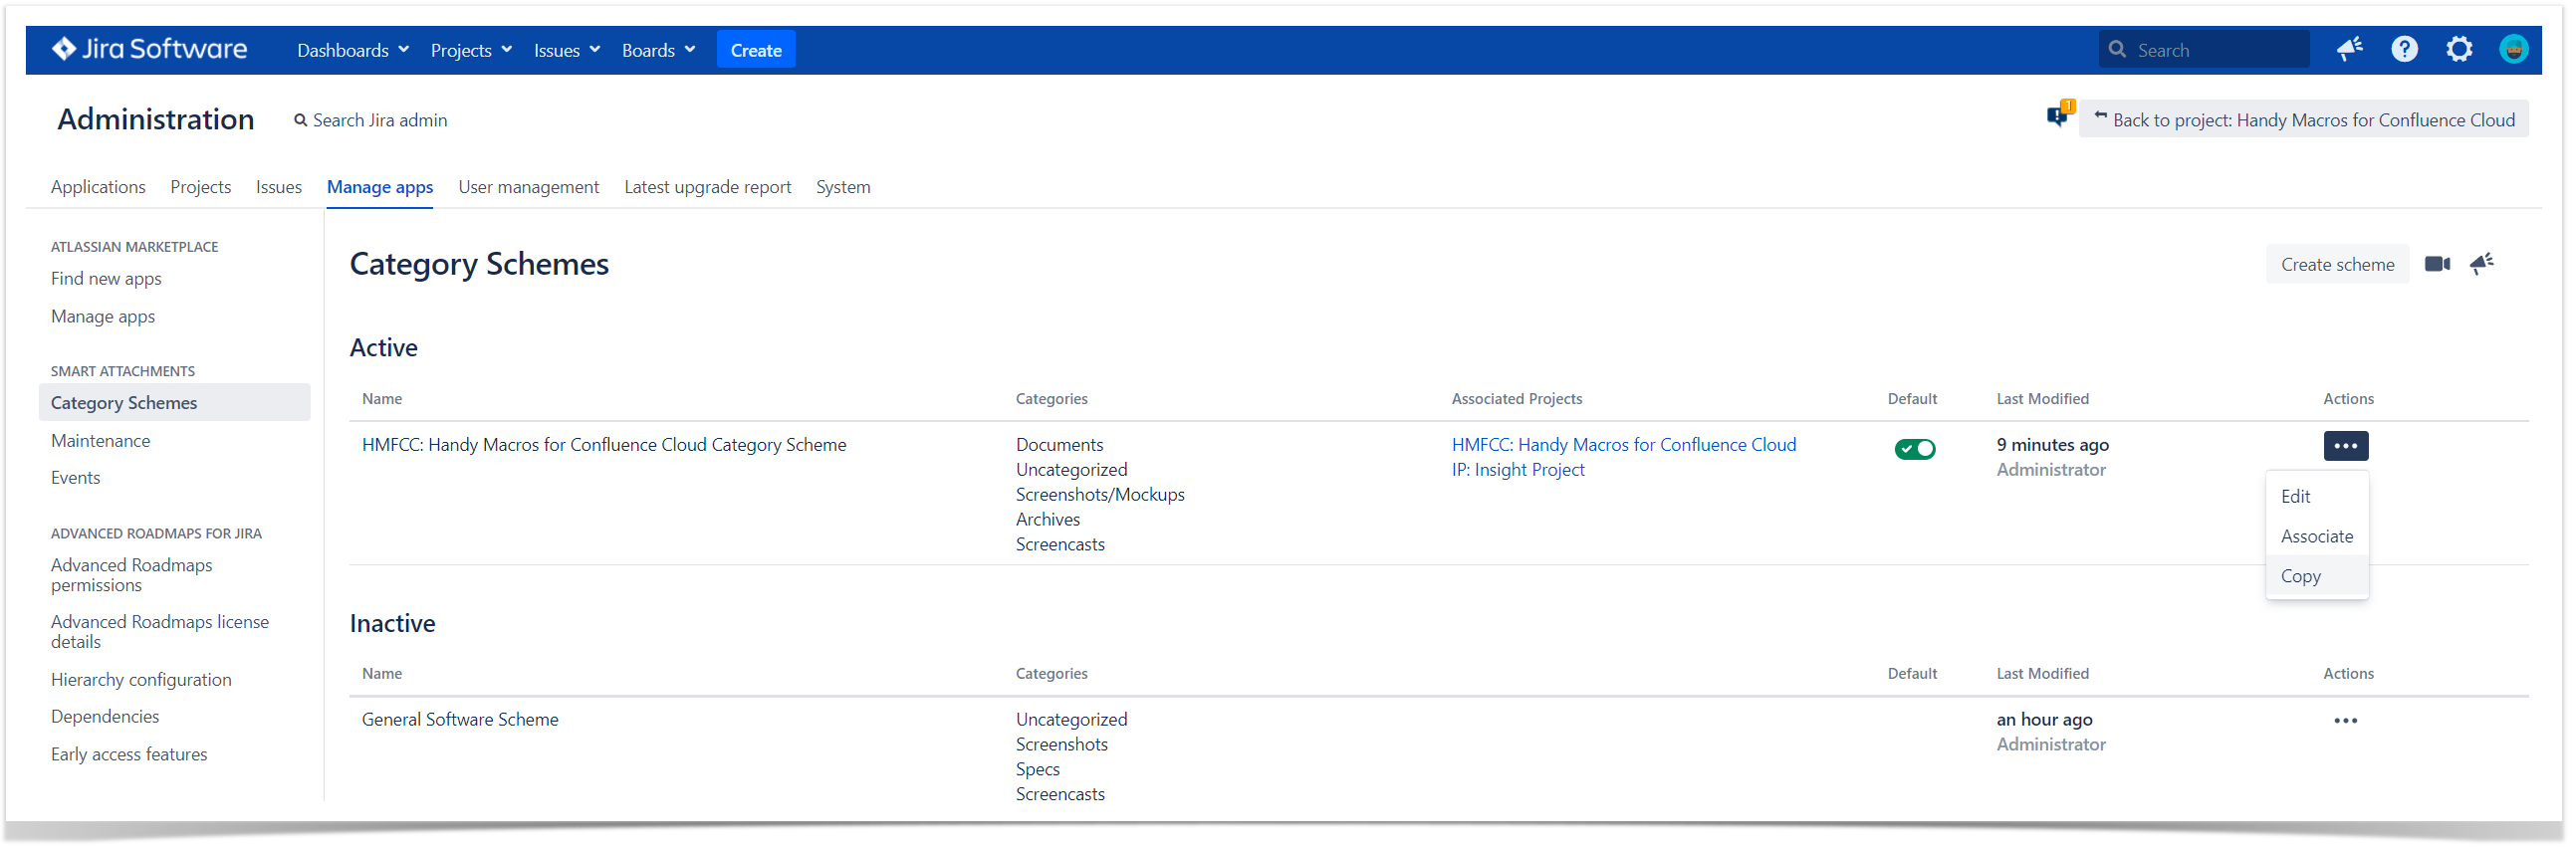
- On the list with category schemes, locate the one you want to edit.
- Click the More button.
- Select Edit.
- Make the appropriate modifications in the category scheme.
- When complete, click Save.
Associate the category scheme with certain projects
You can associate one category scheme with one or multiple projects.
The category scheme which is associated with multiple projects becomes a shared category scheme. All modifications in this scheme will be automatically propagated to all the associated projects. The shared category scheme can be edited only in the Category Schemes section. It can't be edited within the project administration section.
- Open the Jira administration console.
- Select the Manage apps tab.
- On the sidebar, locate Smart Attachments > Category Schemes.
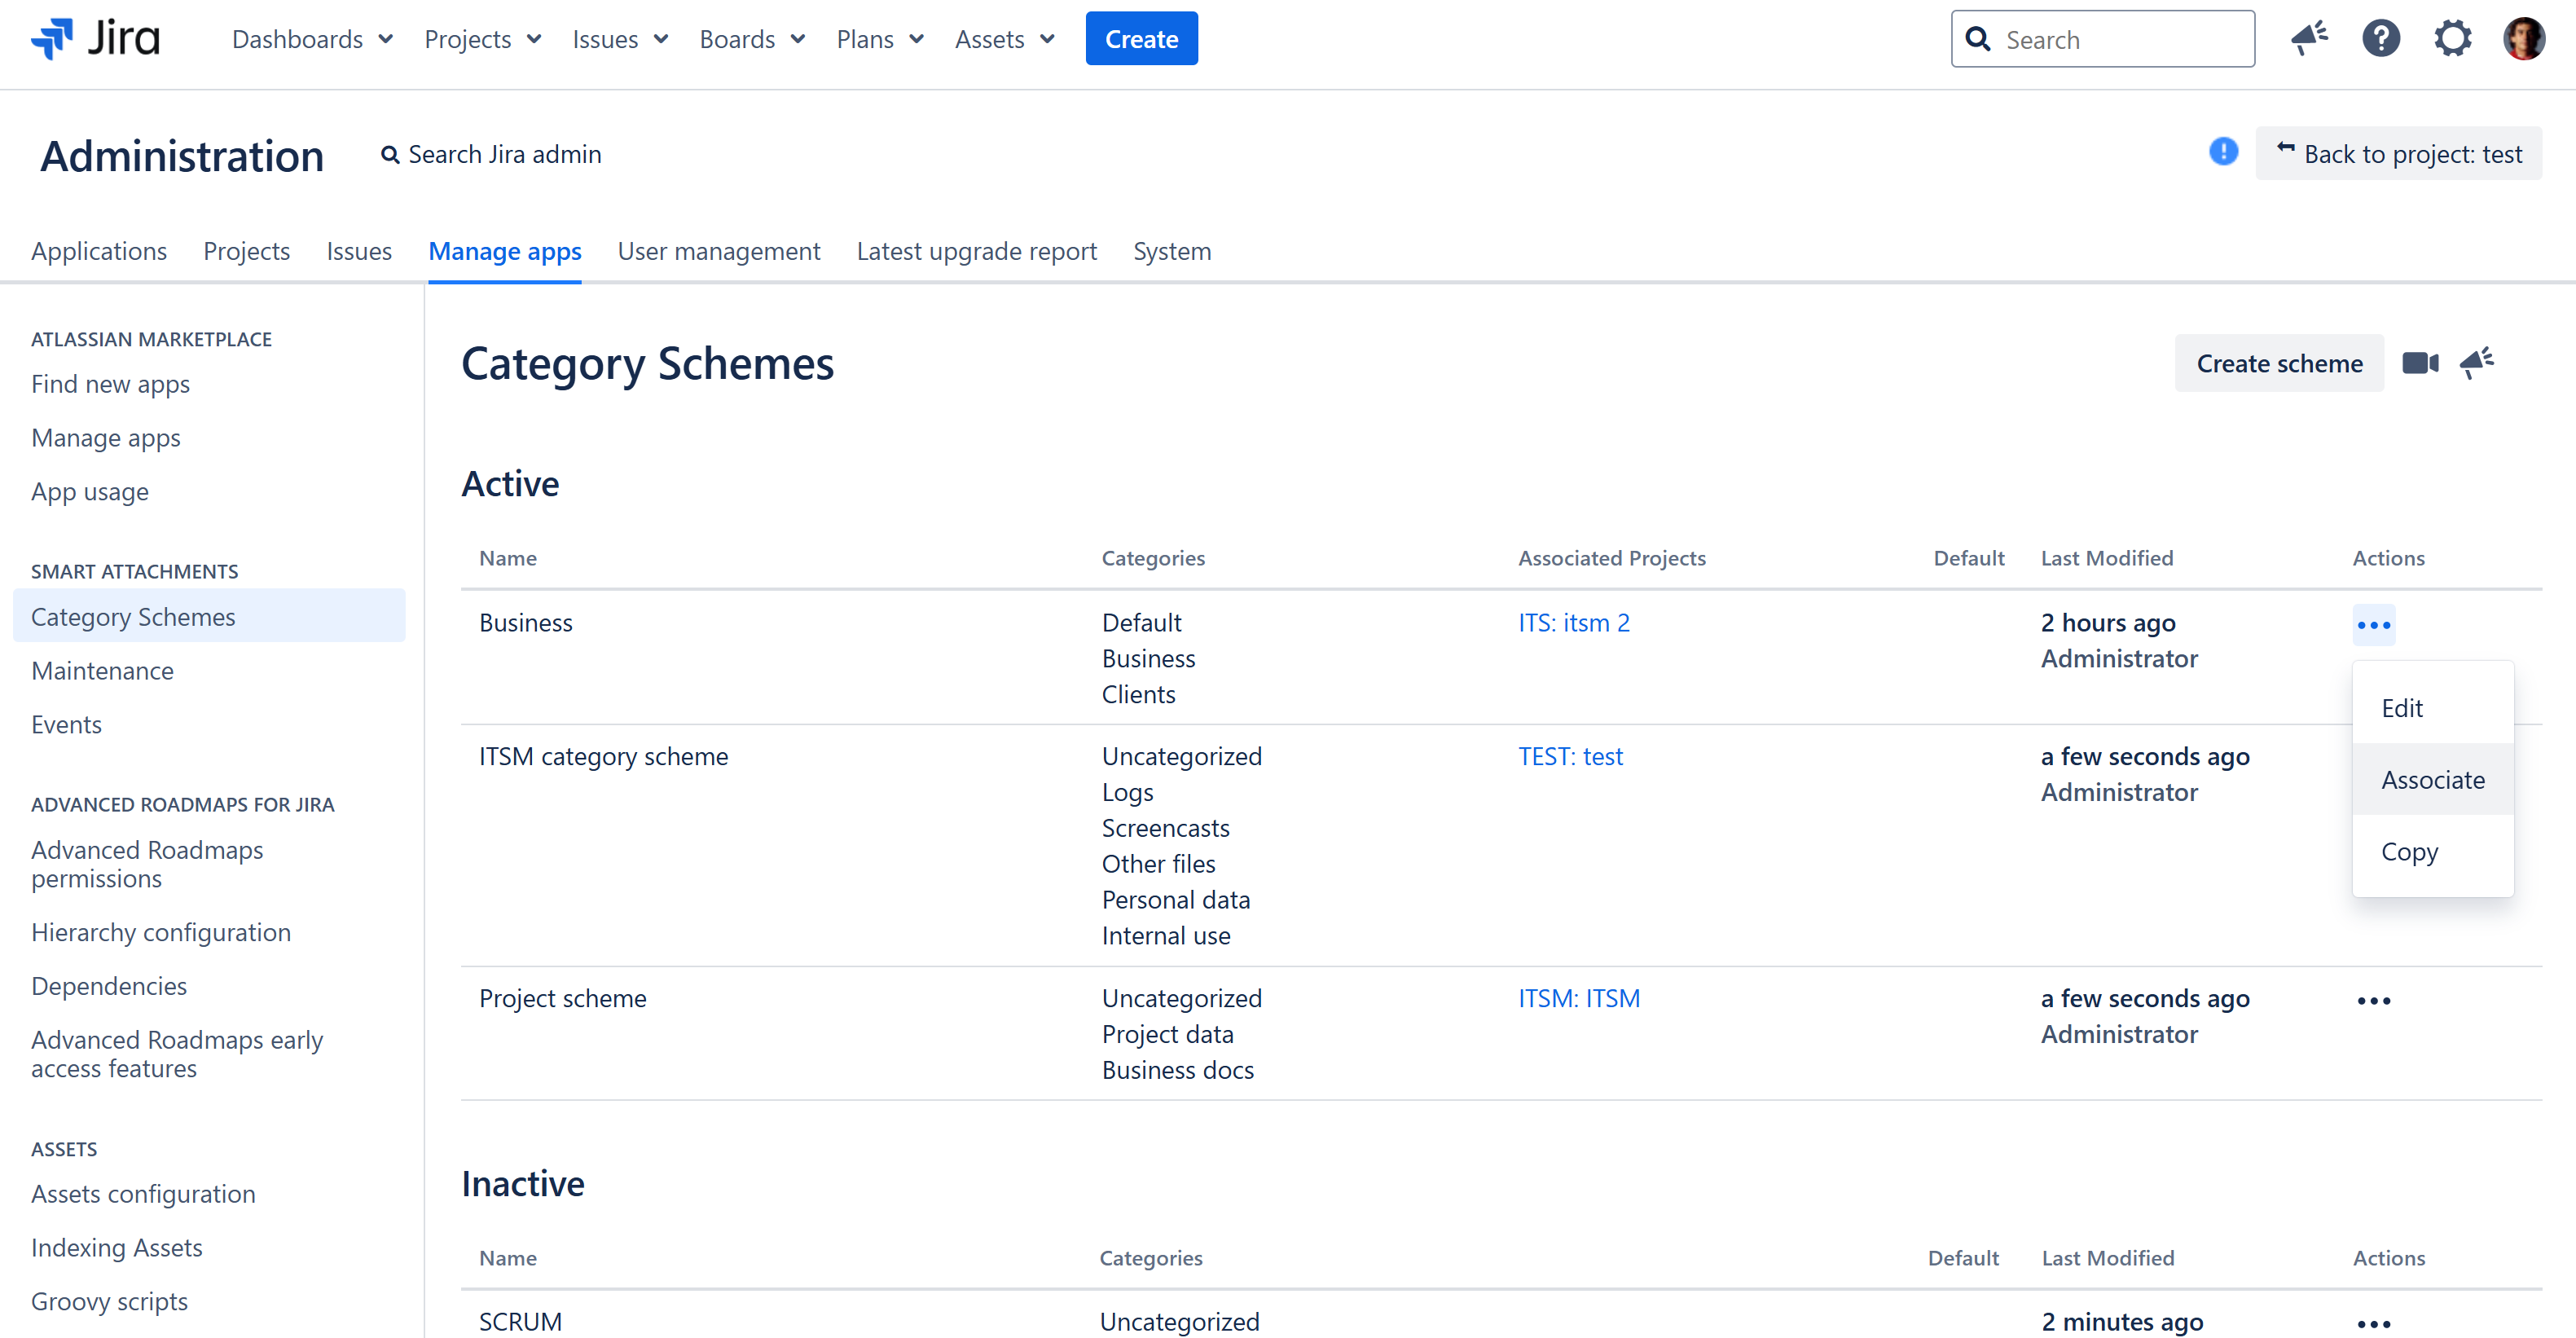
- On the list with category schemes, locate the one you want to associate with a certain project.
- Click the More button.
- Select Associate.
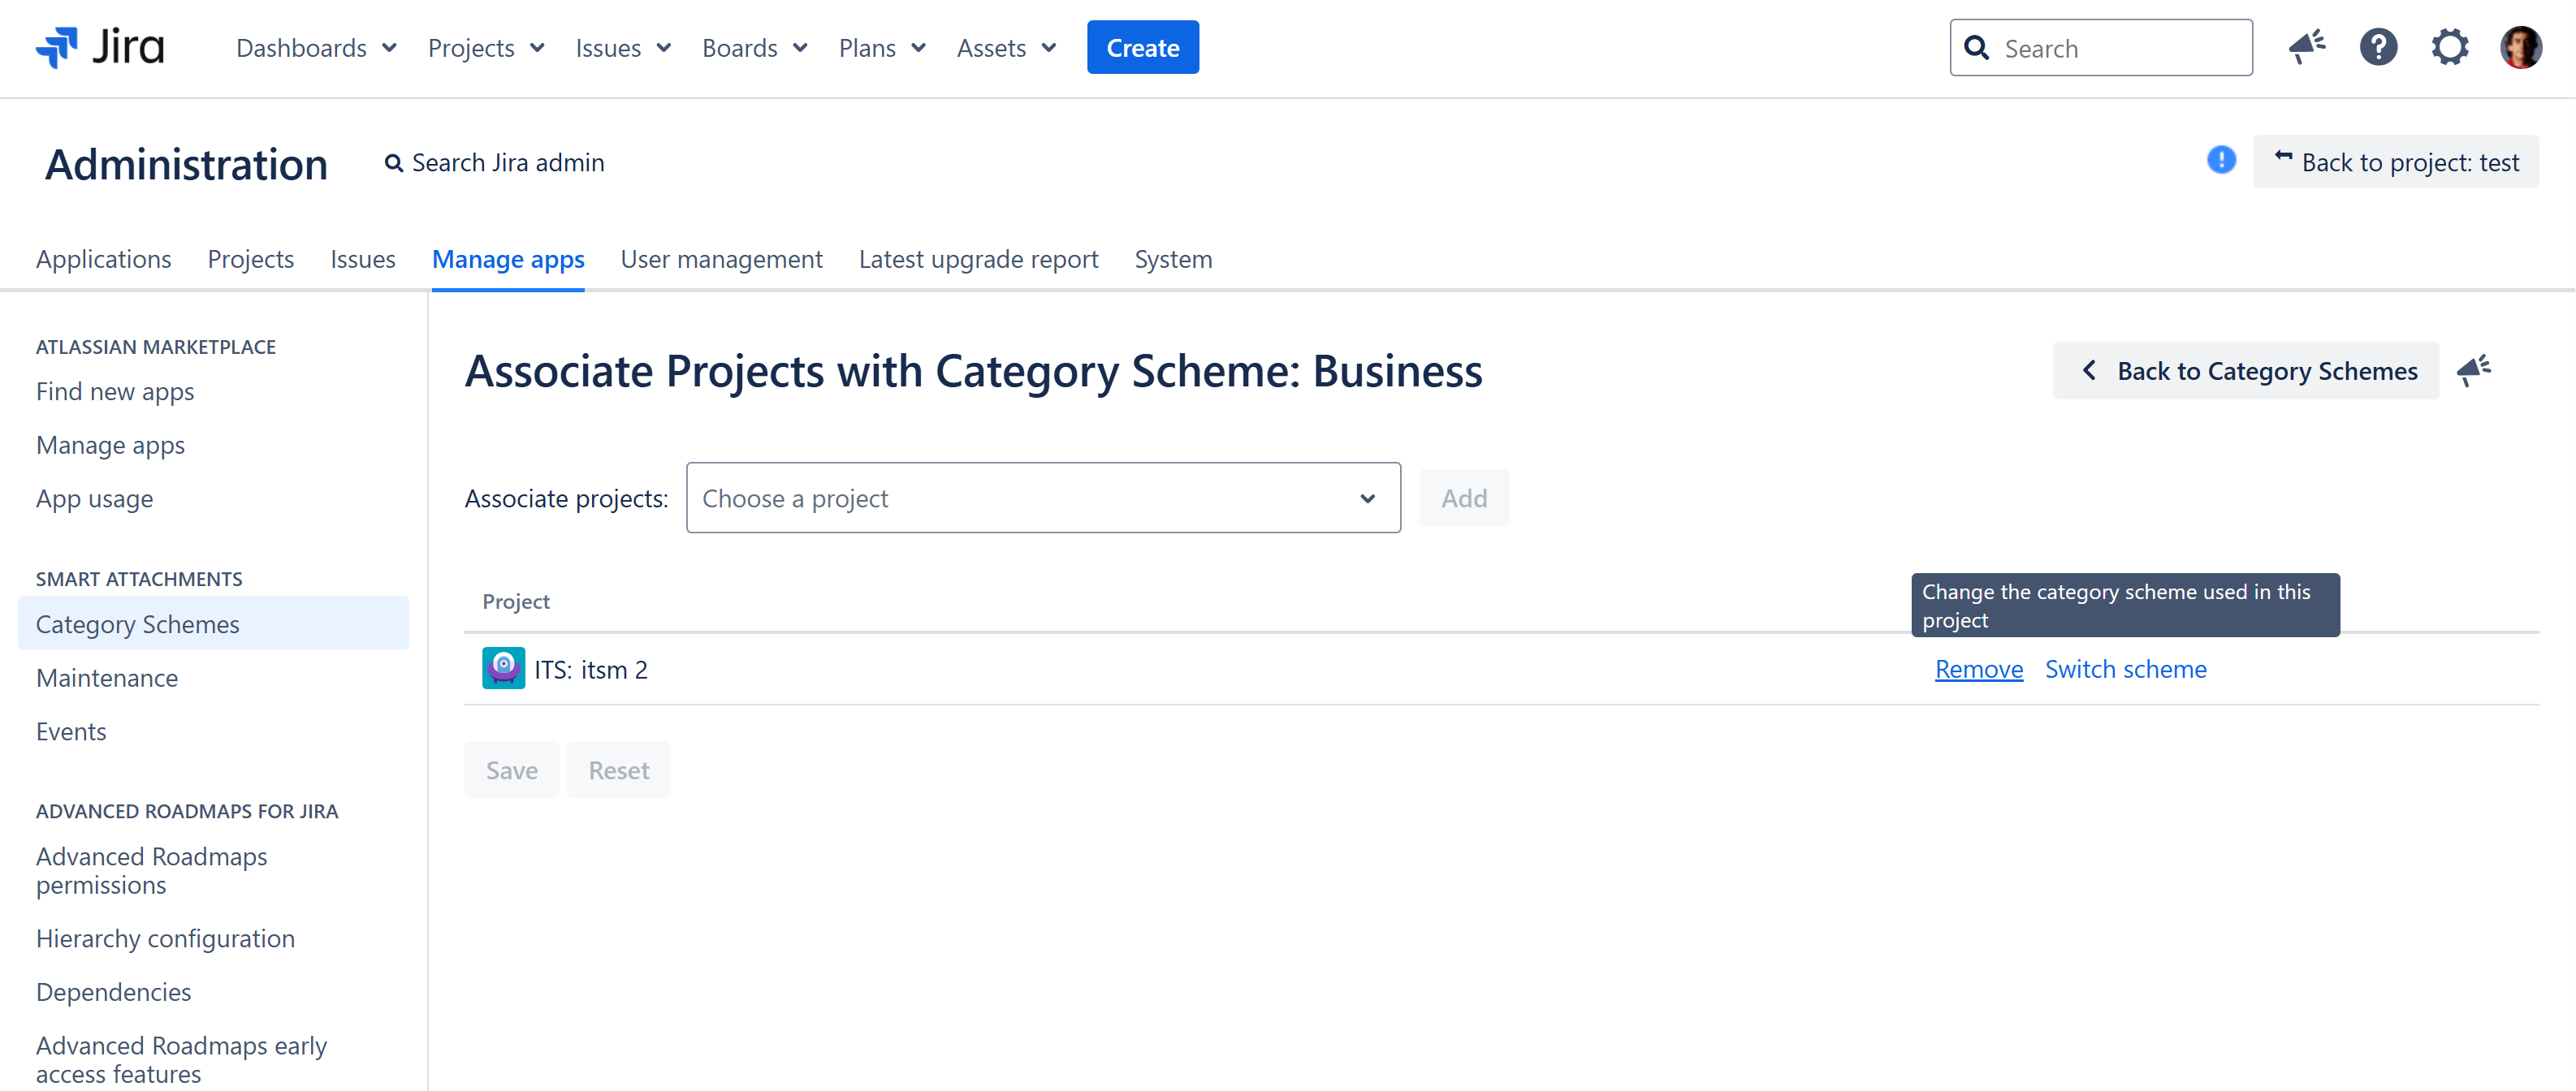
- Start entering the name of the project you want to associate with the category scheme.
- When complete, click Save.
The category scheme will be associated with the specified project. Categories will be shown according to the category scheme settings.
Remove the association of the project with the category scheme
Please, be careful while de-associating projects with the category scheme. All the attachments from categories will become uncategorized.
- Open the Jira administration console.
- Select the Manage apps tab.
- On the sidebar, locate Smart Attachments > Category Schemes.
- On the list with category schemes, locate the one you want to remove association for.
- Click the More button.
- Select Associate.
- On the list with projects, locate the one which you want to de-associate from the category scheme.
- Click Remove.
- When complete, click Save.

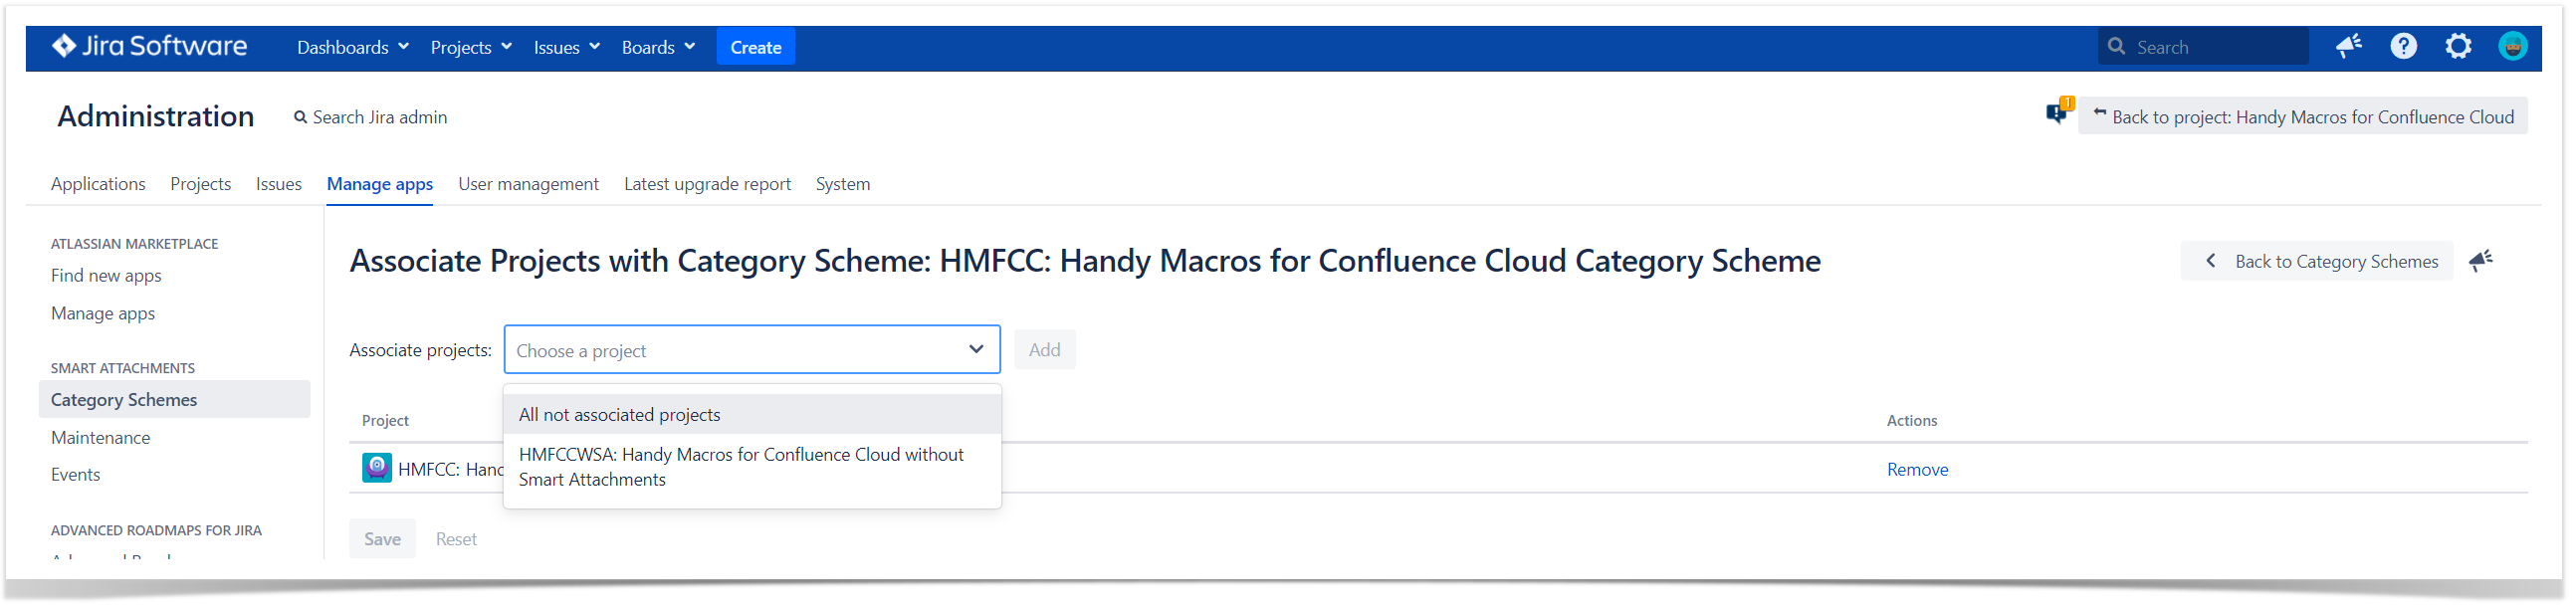
Associate the category scheme with all non-associated projects
You can associate a certain category scheme with all non-associated projects at once. Smart Attachments categories will be shown in all these projects according to the category scheme settings.
This feature is available from Smart Attachments for Jira 2.11.2.
- Open the Jira administration console.
- Select the Manage apps tab.
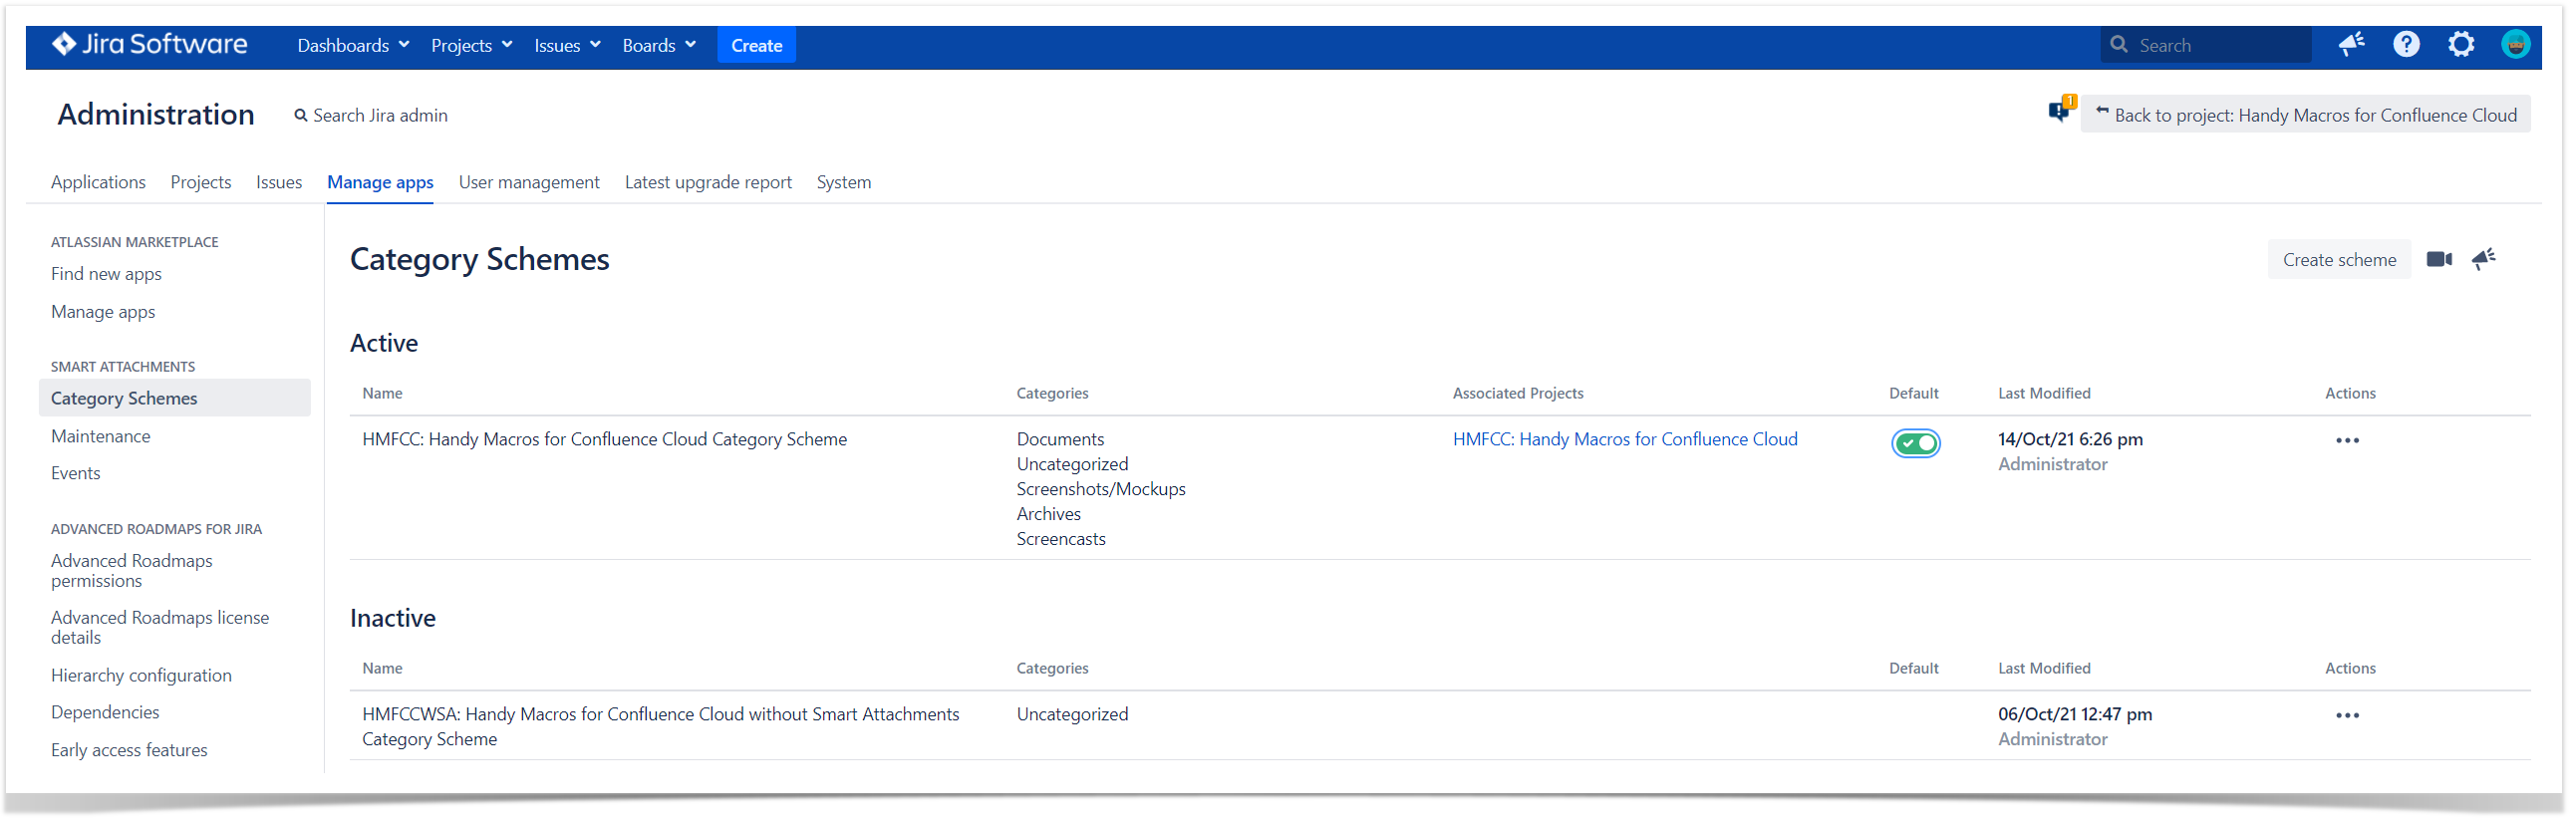
- On the sidebar, locate Smart Attachments > Category Schemes.
- On the list with category schemes, locate the one you want to associate with all non-associated projects.
- Click the More button.
- Select Associate.
- Click the dropdown menu next to Associate projects.
- Choose All not associated projects.
- Click Save.
Set the default category scheme
You can set the default category scheme. If doing so, you will have this category applied to all newly-created projects. Later on, this can be changed as described in the Associate the category scheme with projects section.
This feature is available from Smart Attachments for Jira 2.11.0.
- On the list with category schemes, locate the one you want to use by default.
- Switch on the
 toggle.
The category scheme will be used by default in all new projects.
Copy the category scheme
- On the list with category schemes, locate the one you want to copy.
- Click the More button.
- Select Copy.
- In the Copy Category Scheme form, specify the scheme name.
- Click Copy.
A newly copied scheme is automatically placed into the inactive schemes. It is not associated with any projects.
Delete the category scheme
You can delete the category scheme which is not associated with any project (being in the Inactive schemes list). Note that you can't delete an active category scheme. To delete such a scheme you first need to remove its association with Jira projects.
- On the list with category schemes, locate the one you want to associate with projects.
- Click the More button.
- Select Delete.
- In the Delete Category Scheme form, click Delete.
Switch the category scheme
You can switch the project from the current scheme to a new scheme created beforehand. In this case, you will have to manually select mappings for categories from the source category scheme to the target category scheme.
The mapping for the default scheme category (Uncategorized) can't be selected during the scheme switch. All attachments from the default category appear in the respective default category after the category switch process.
- Open the app settings from global administration (Administration > Smart attachments > Category Schemes > Associate).
- Select any scheme associated with one of your Jira projects from the list of active schemes.
- Click the Actions menu on the right and select Associate.
- Select the Switch scheme action for the project where you want to switch the currently used category scheme.
- Acknowledge the category switch in the modal dialog that appears once you trigger the process.
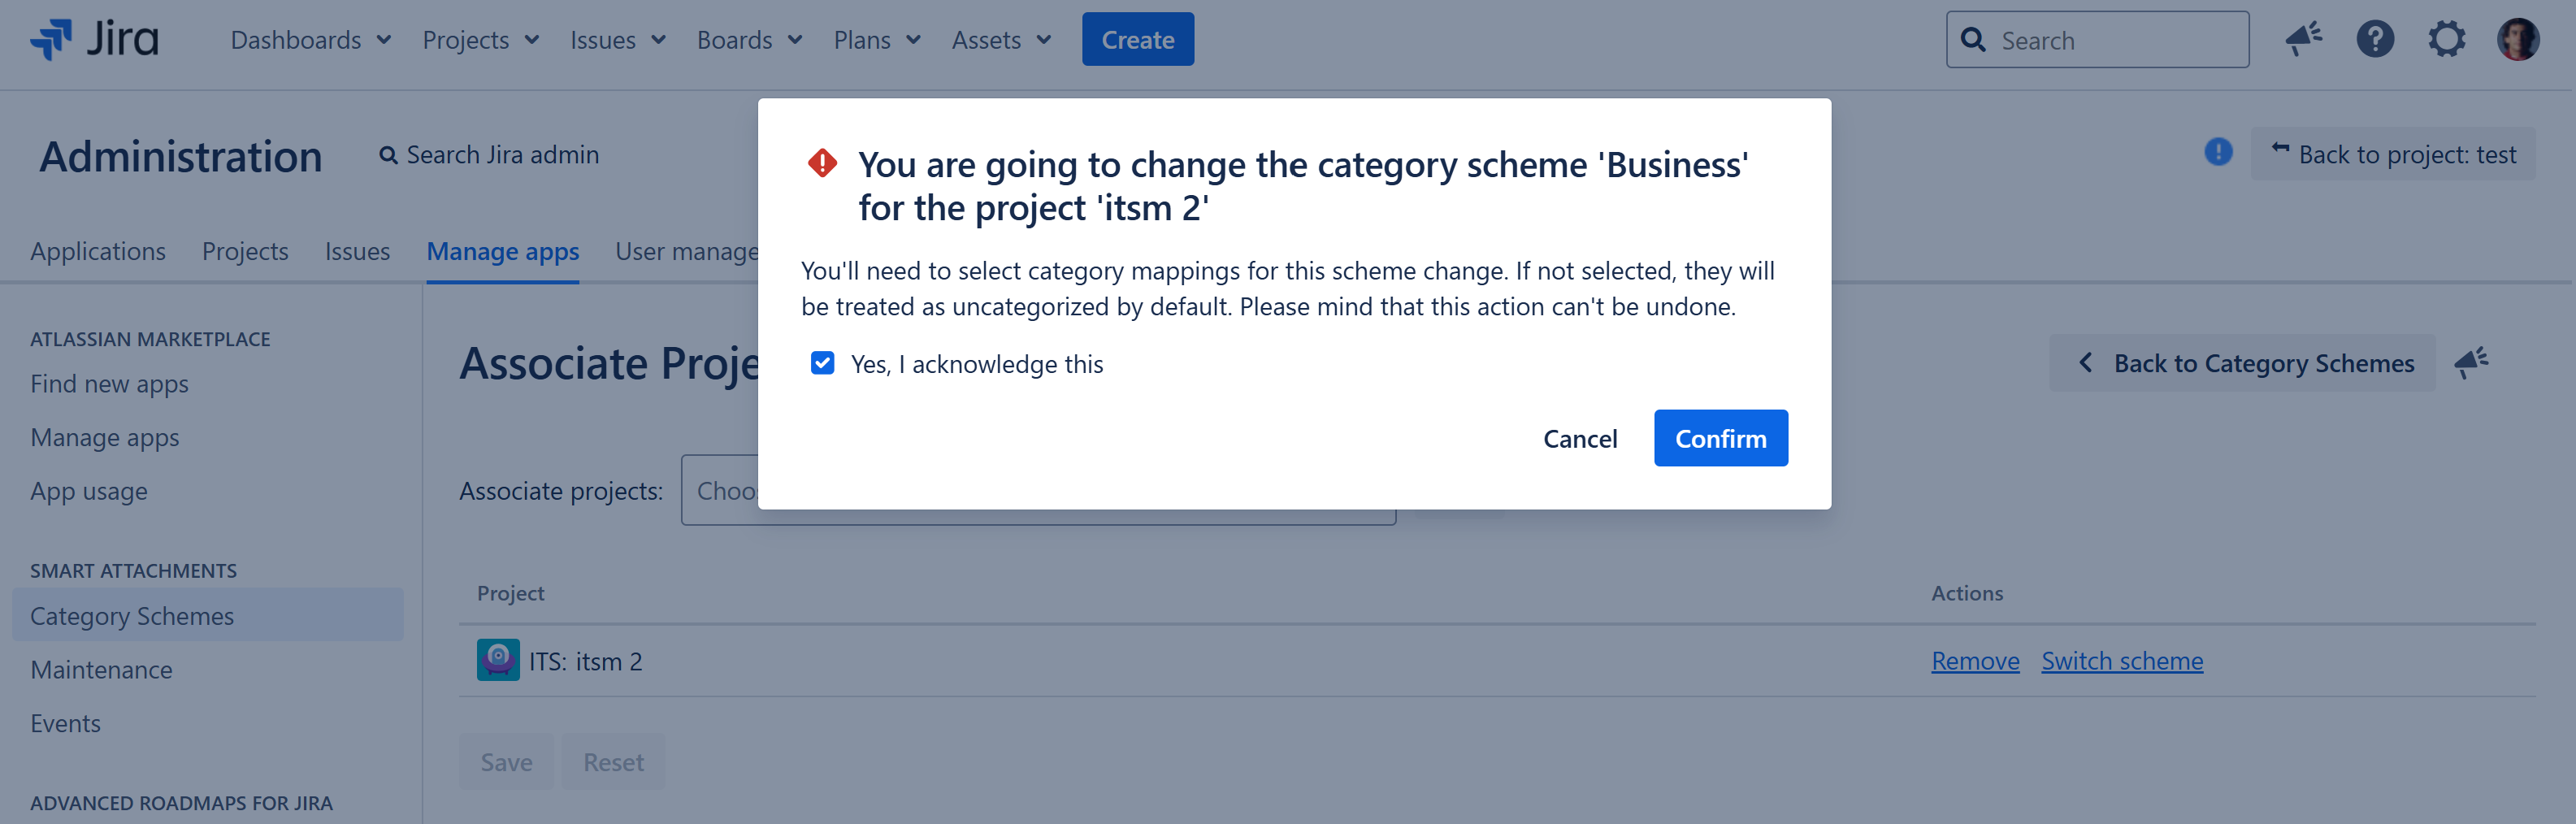

Please note that the category switch can't be undone. Therefore, you need to acknowledge all changes made during this transition from the source scheme to the target scheme.
- Select the target scheme for the selected Jira project.
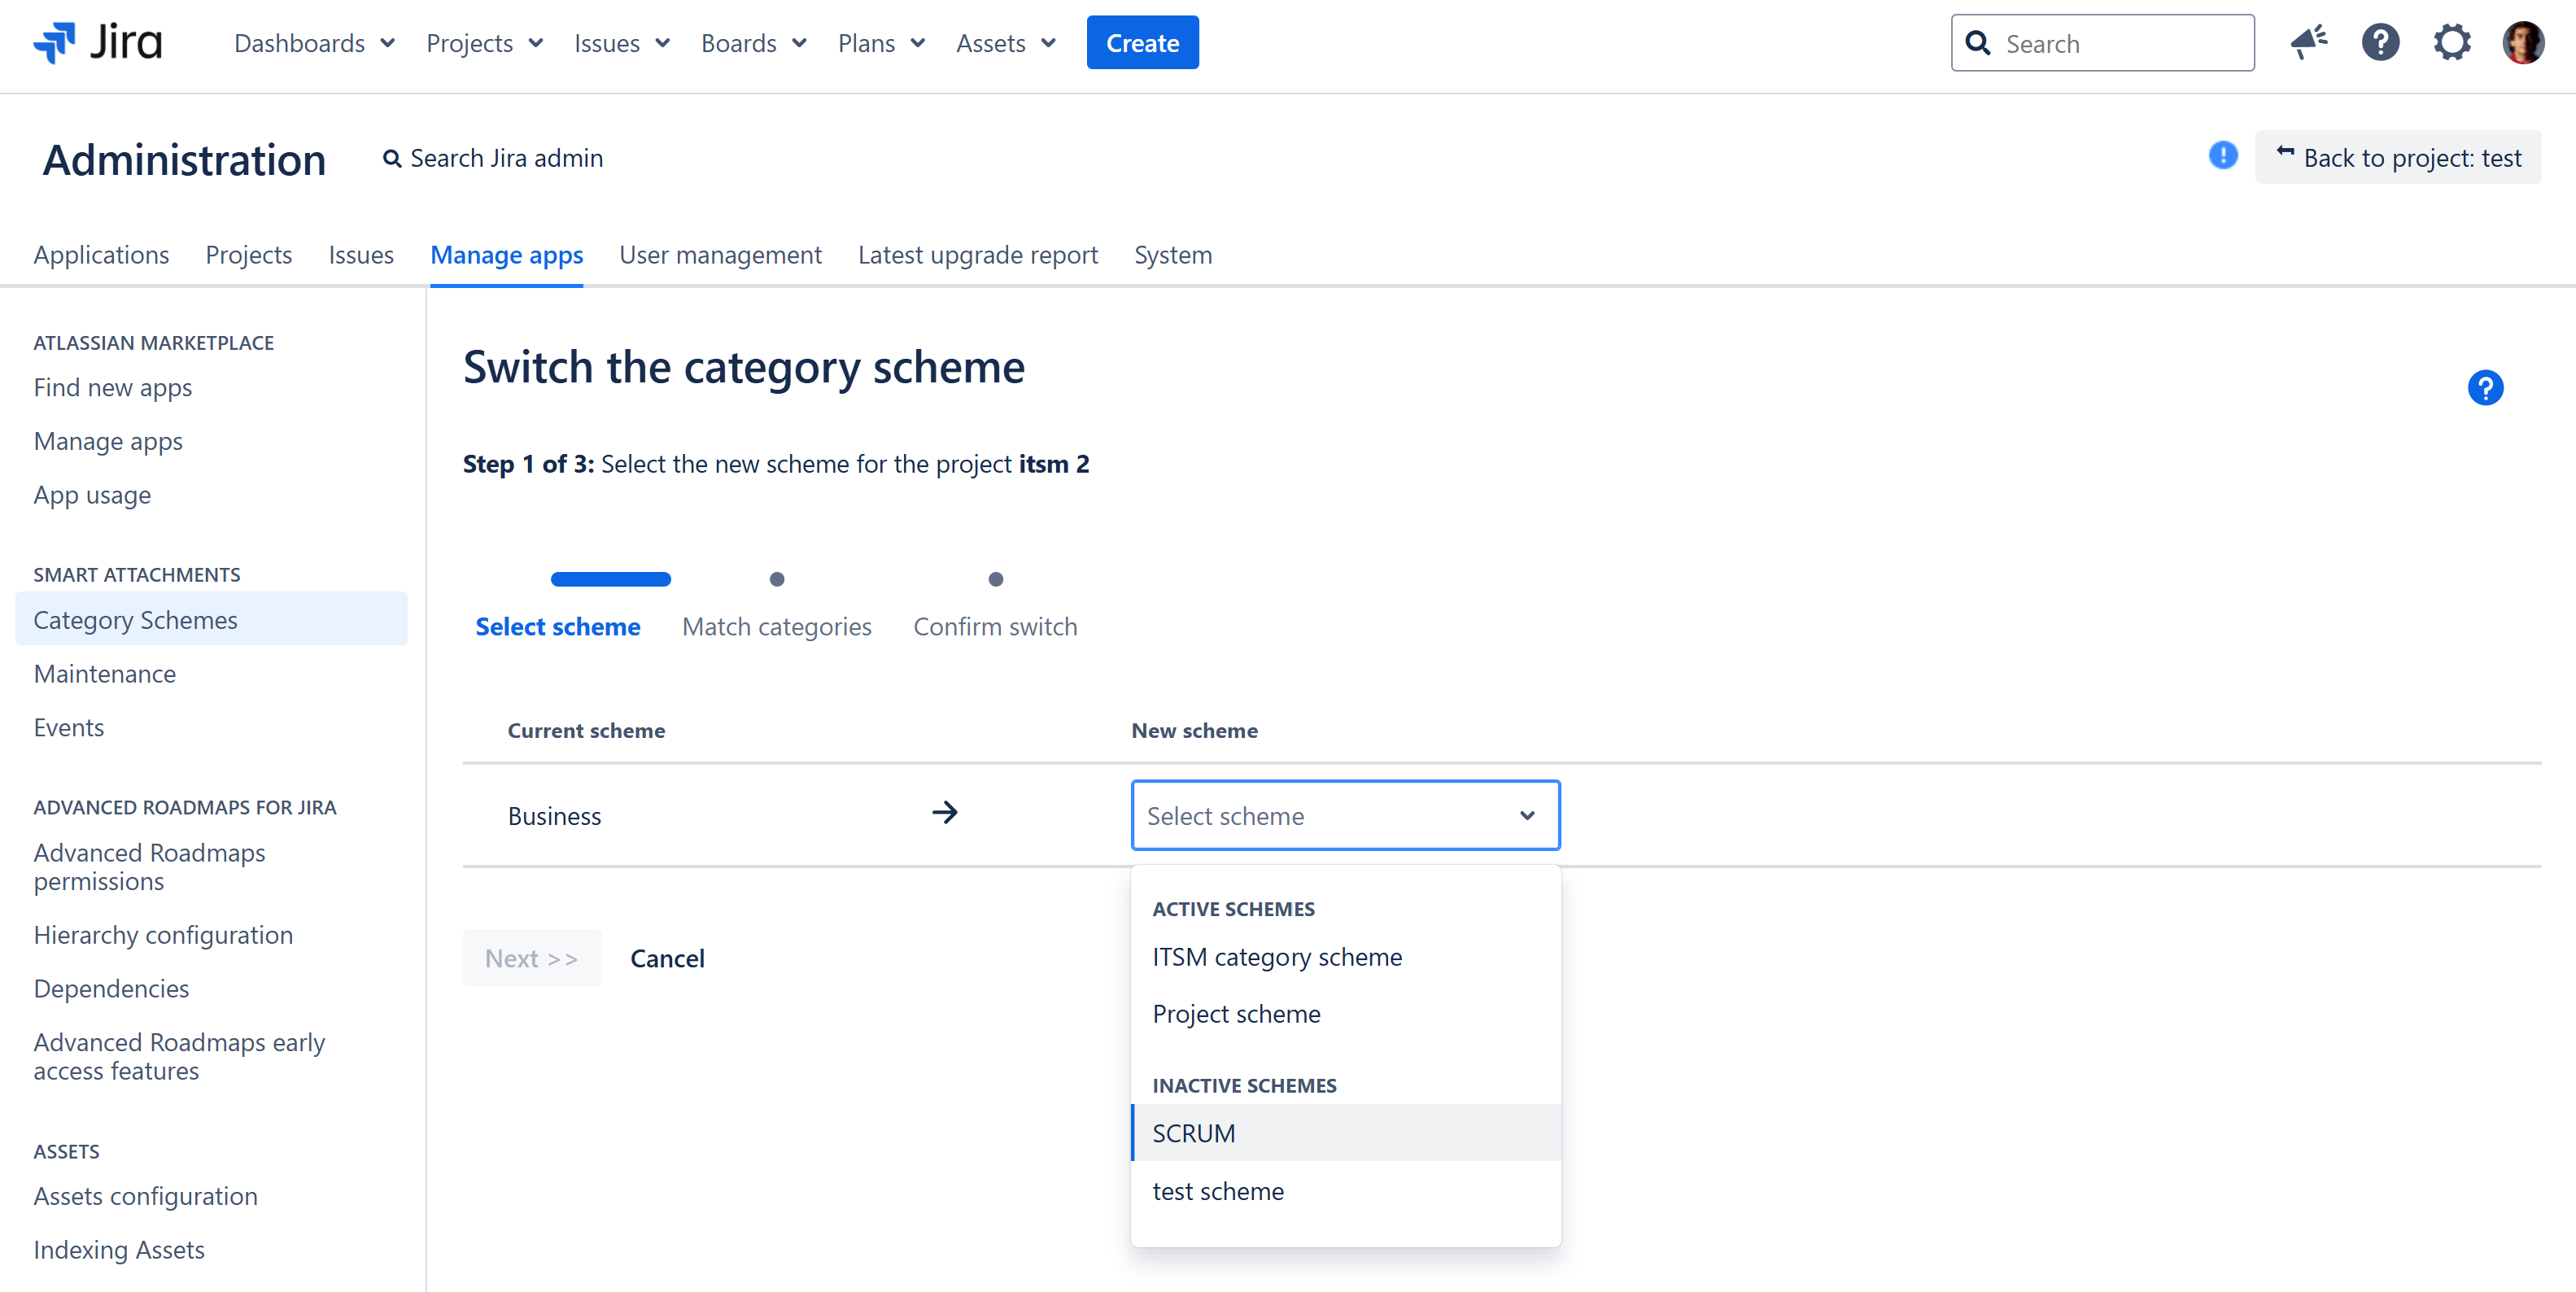
- Click Next to proceed to the next step of the category switch.
- Select the new categories to replace the existing categories. You can select any mapping type for all categories except the default one.

- Click Next to proceed to the next step of the category switch or Previous to return to the previous step.
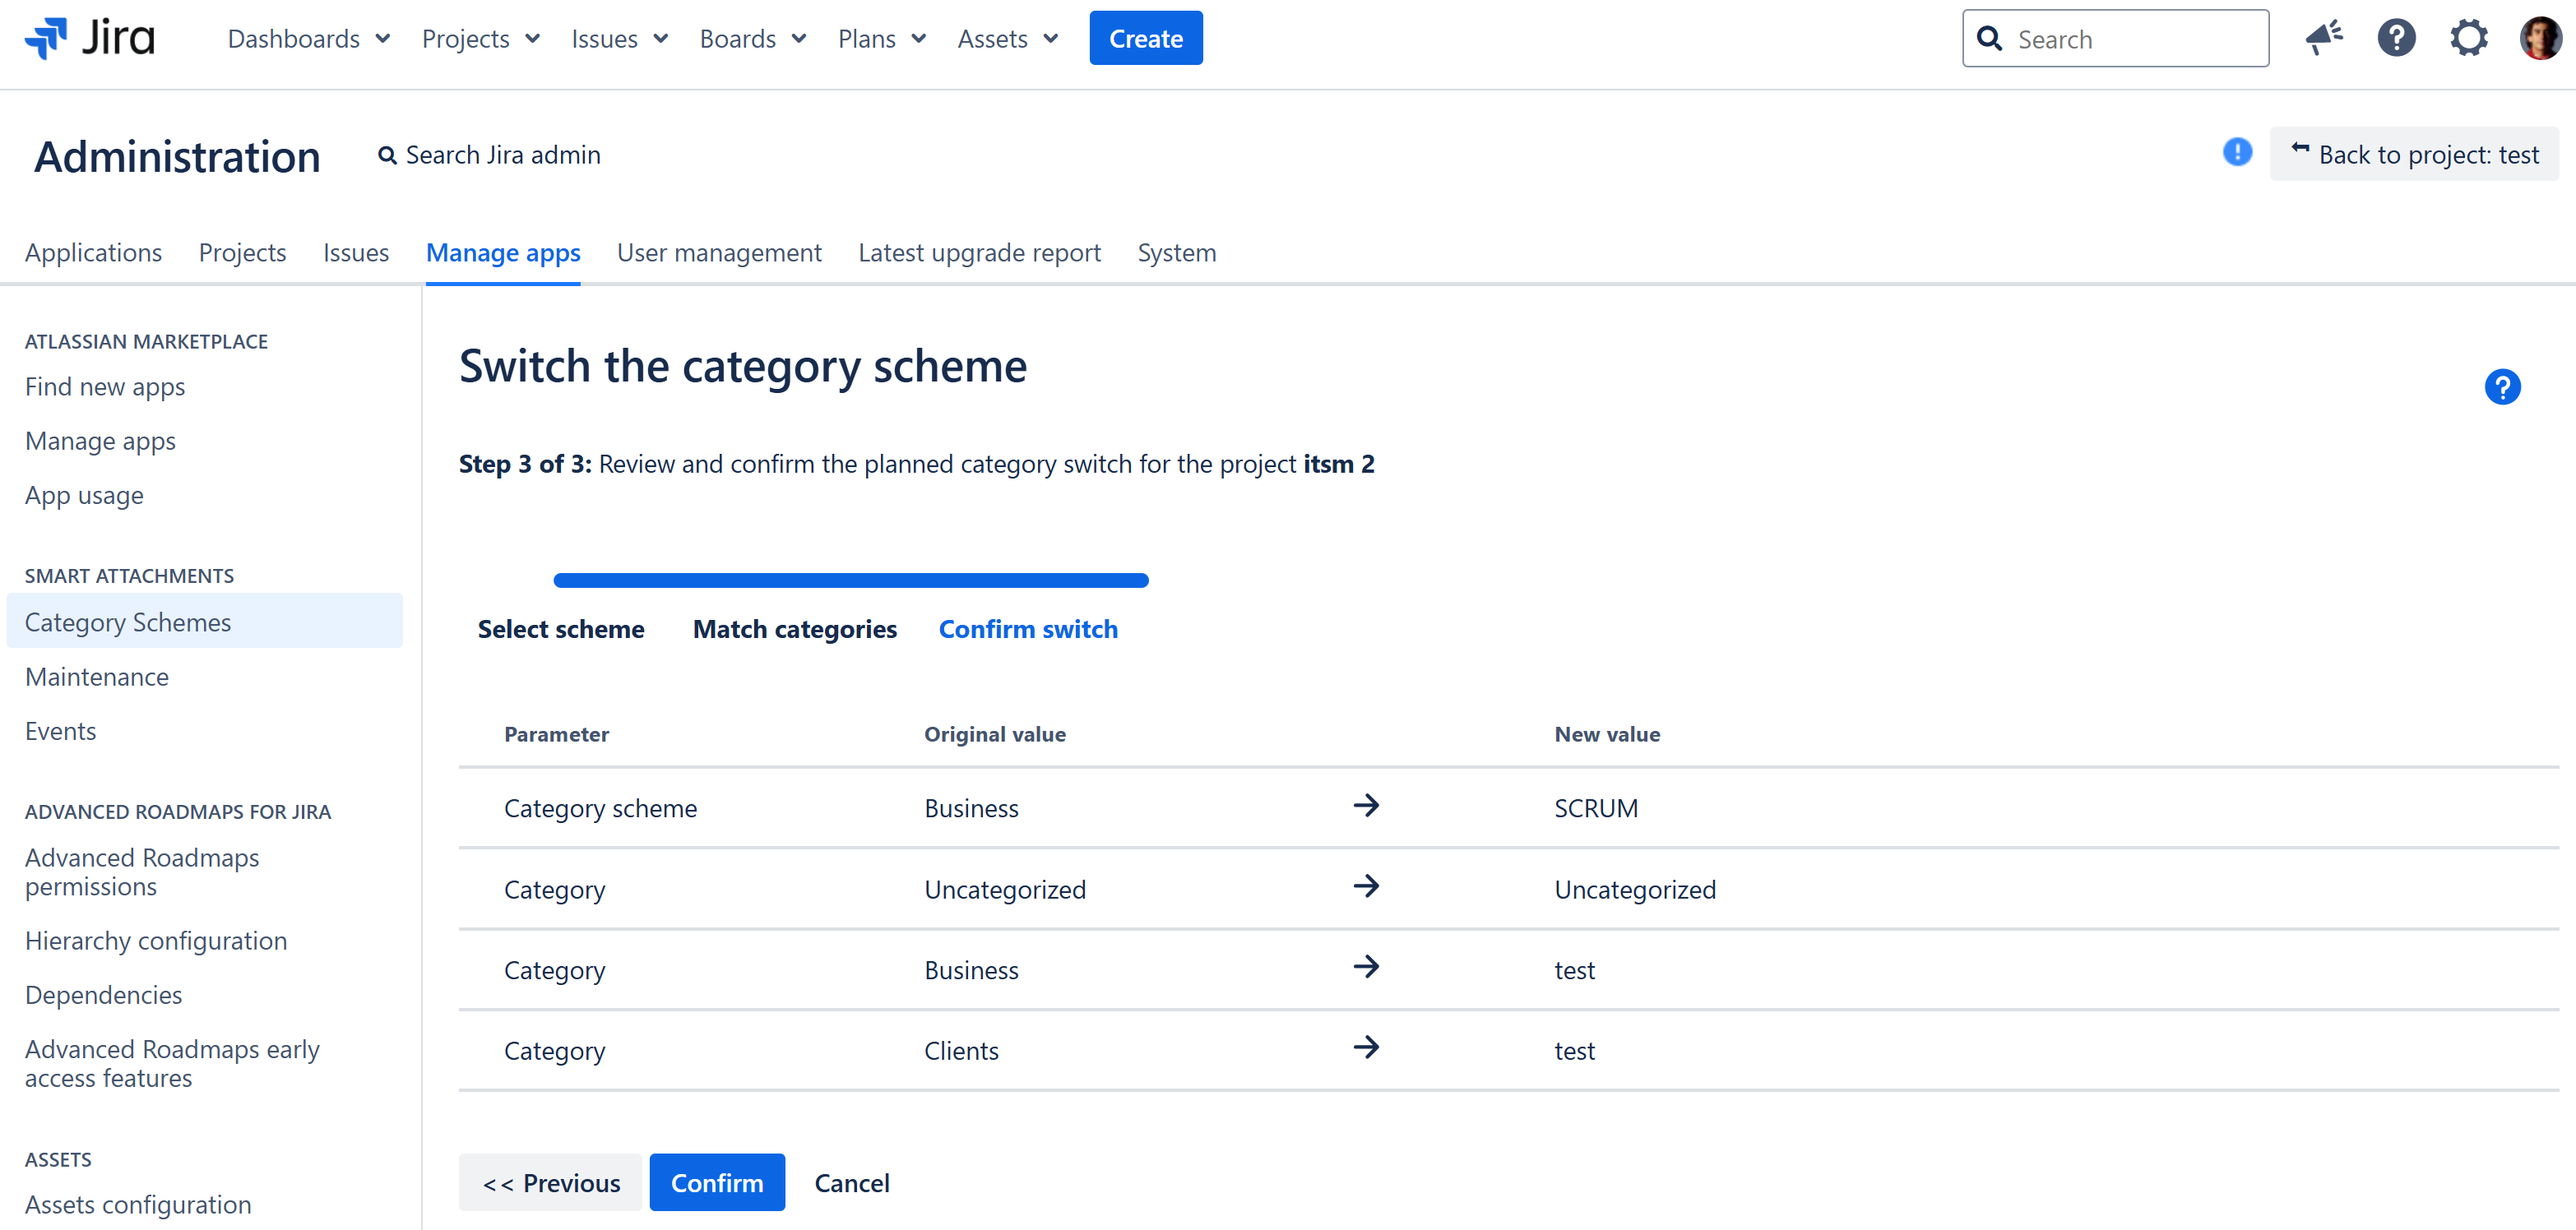
- Review and confirm the planned category switch.
- Click Confirm for the category switch or Cancel the action.
Please note that access restrictions and status-specific restrictions on the attachments from the source scheme will be removed in case of a category switch. The access restrictions and status-specific restrictions on the attachments from the target scheme will apply instead. Thus, you need to consider the attachment restrictions used for the categories of the target scheme while mapping categories during the transition.
Jira project settings
You can manage category schemes for a particular project from project settings. In this case, the action can be performed by the project administrator. Note that global category scheme settings override project settings. Thus, you can't edit from project settings a category scheme that is shared with several Jira projects.
Edit the category scheme
You can modify the configuration of category schemes from project settings.
- Navigate to Project settings from the project where you want to modify the category scheme.
- Locate SMART ATTACHMENTS > Scheme.
- See the scheme associated with the project.
- Click Actions > Edit scheme.
- Perform the required changes and click Save.
Change the category scheme
You can select a different category scheme for the project from its settings.
Mind that the previous Smart Attachments settings for this project will be reset after the scheme change. This can't be undone.
- Navigate to Project settings from the project where you want to modify the category scheme.
- Locate SMART ATTACHMENTS > Scheme.
- See the scheme associated with the project.
- Click Actions > Use a different scheme.
- Select a new scheme from the dropdown and click Save.
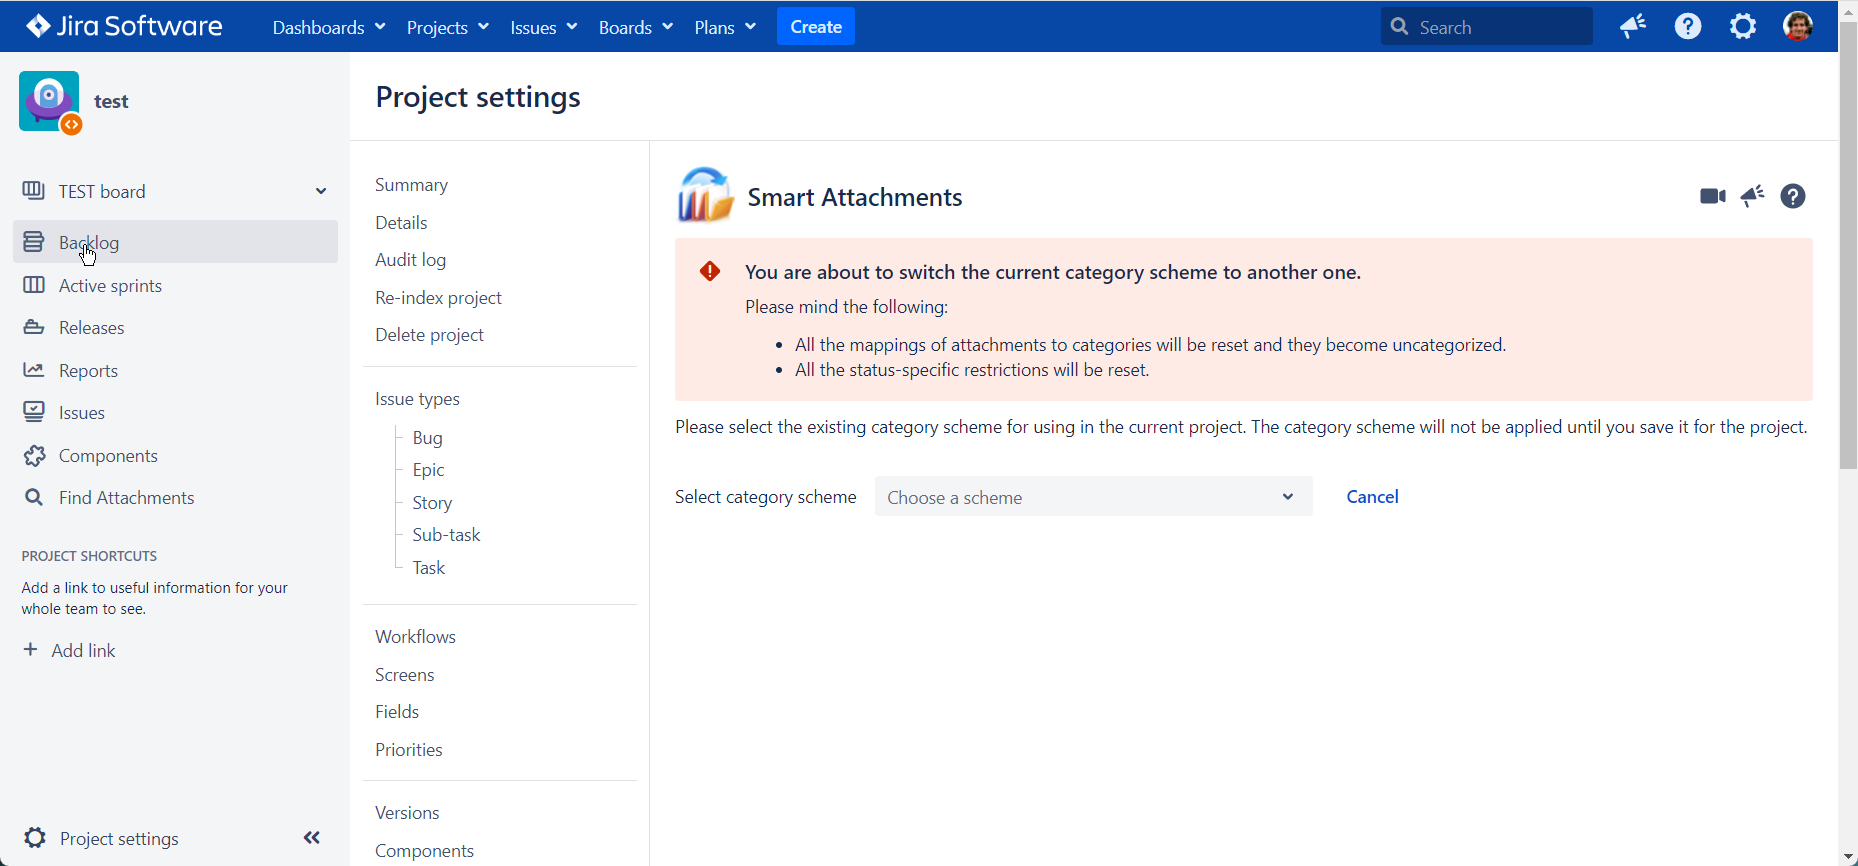
If you don't see available schemes to select from, your Jira administrator should create one in global settings first.
Mind that the previous Smart Attachments settings for this project will be reset after the scheme change. This can't be undone.
Restrict scheme-related actions
You can select to restrict scheme-related actions from project settings. This is useful for cases where you want only Jira site administrators to modify the category schemes for projects. The app allows you to restrict scheme-related actions from projects in several ways:
- suppress the Actions button for all Jira projects via dark feature flags
- hide all or selected options of the scheme-related actions via the announcement banner
Use the dark feature flag
You can add the dark feature flag to disable the Actions button from the scheme project settings.
Access the following URL as a Jira administrator account:
<BASE_URL>/secure/admin/SiteDarkFeatures!default.jspa
- Locate the Enable dark feature text area.
Type com.stiltsoft.jira.attahcategory.scheme.project.actions.control.disabled- Click the Add button.
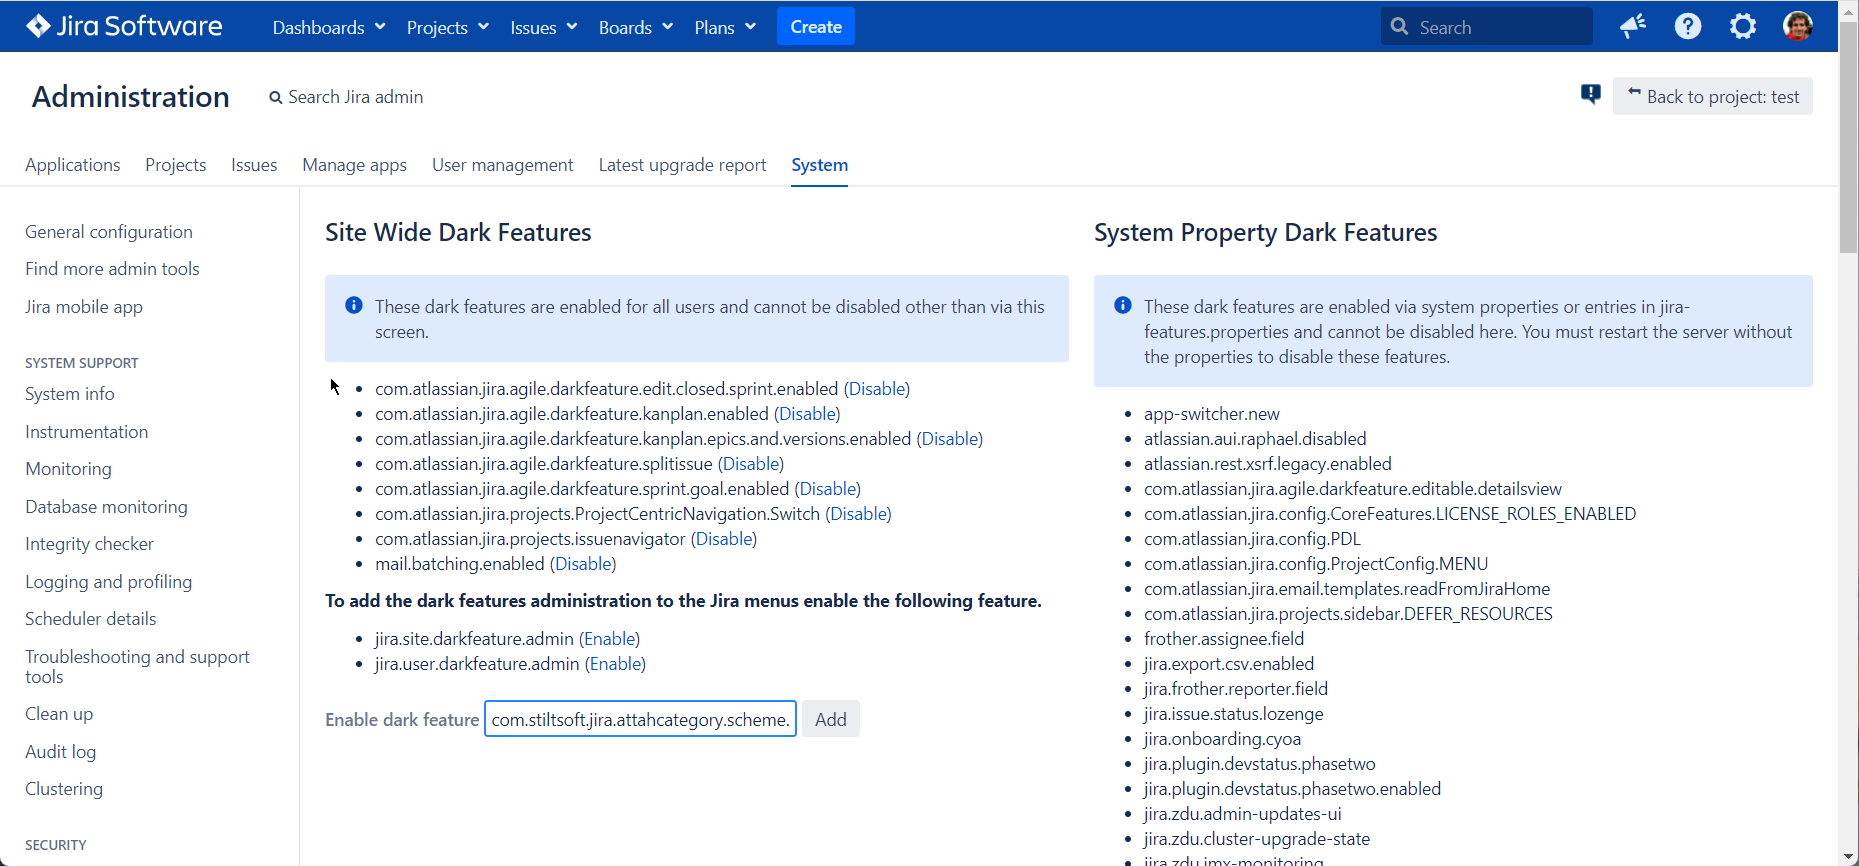
Once added, this dark feature flag disables all the actions available on the category scheme from project settings. The Actions button disappers.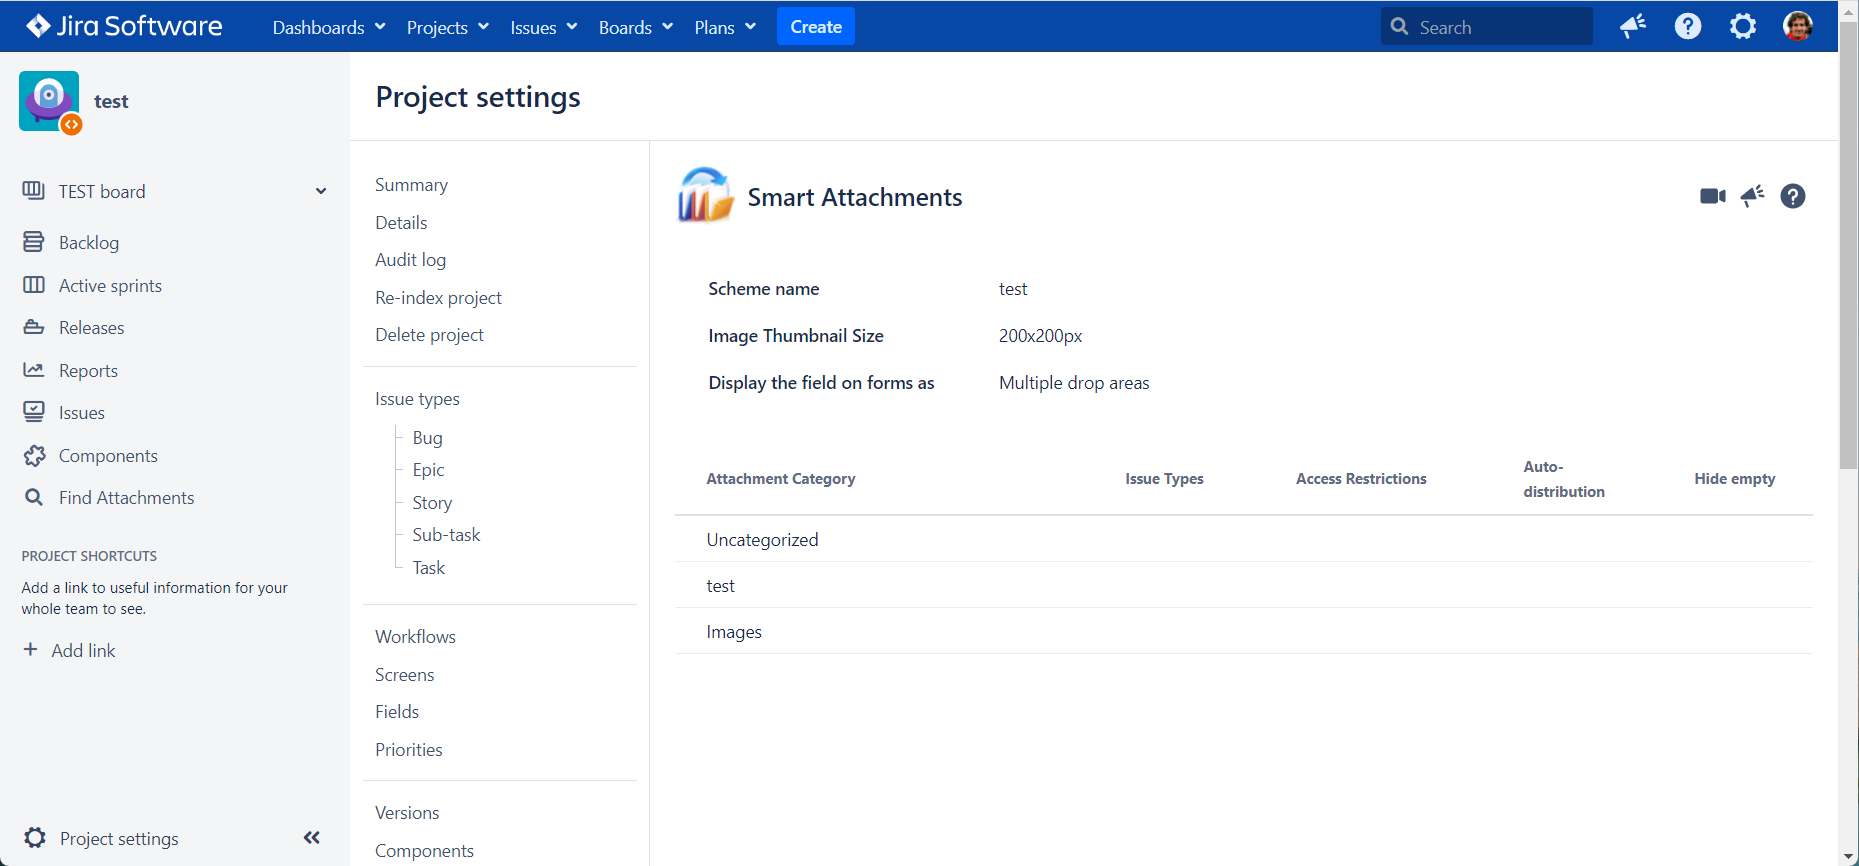
Add HTML tags to the announcement banner
You can hide all or certain scheme-related actions from the project settings using HTML tags.
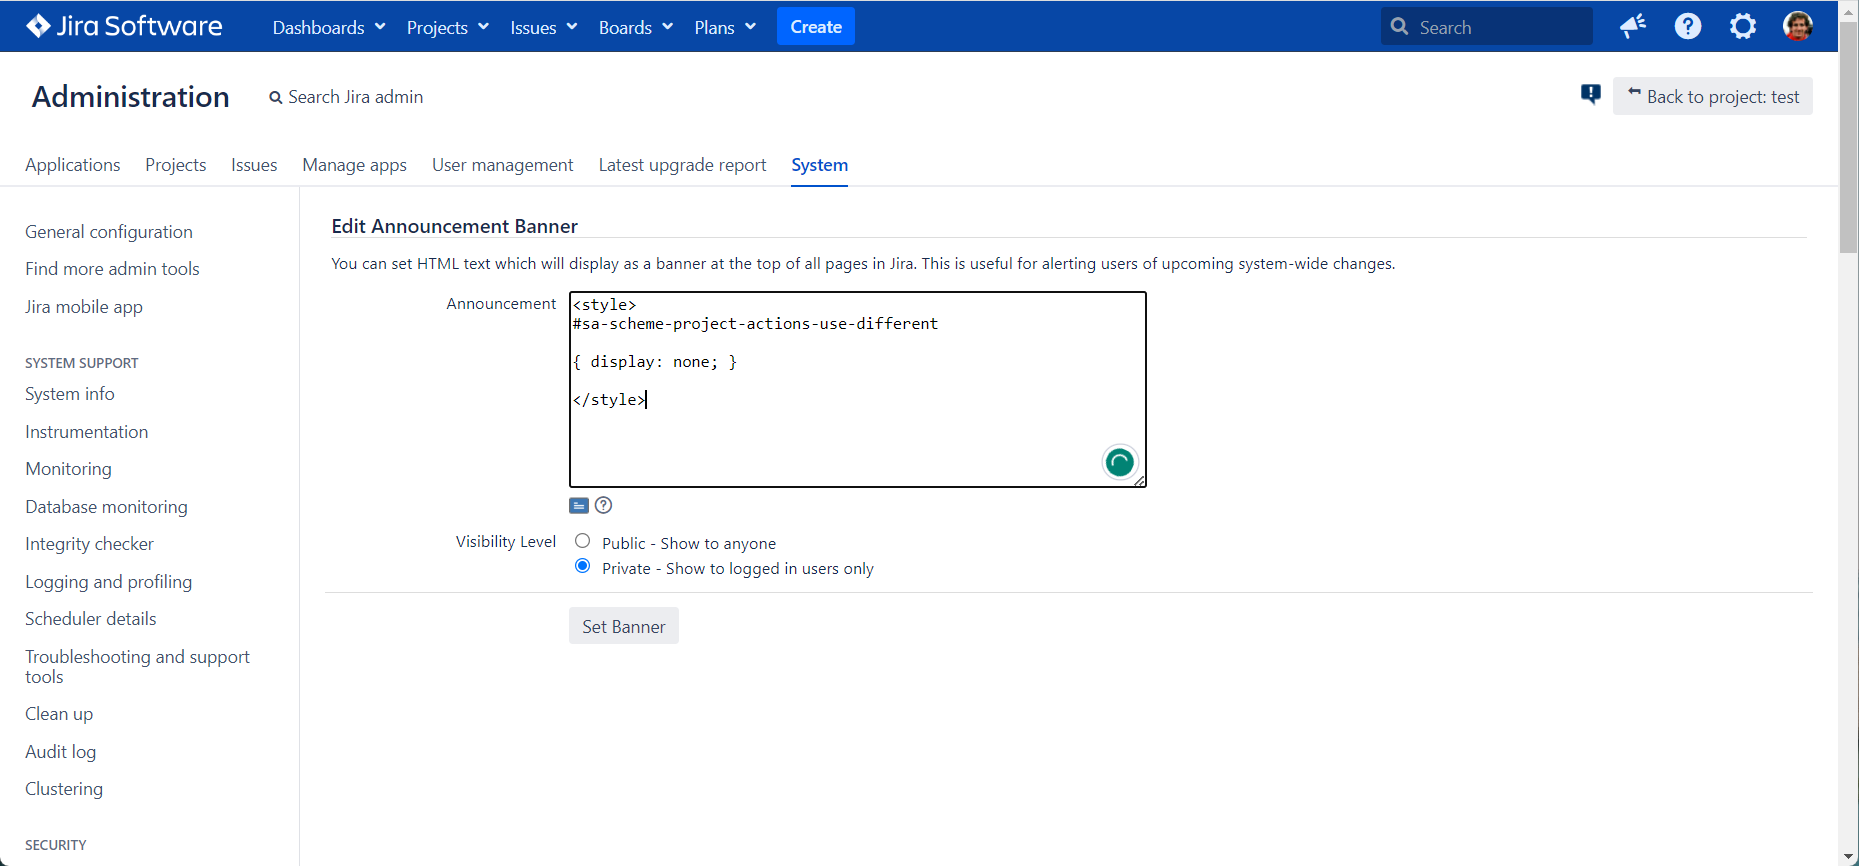
- Navigate to Global settings > System.
- Locate USER INTERFACE > Announcement Banner.
- Add one of the HTML tags you need
to hide the Actions button
<style>
#sa-scheme-project-actions-control
{ display: none; }
</style>- to hide the Edit scheme option
<style>
#sa-scheme-project-actions-edit
{ display: none; }
</style> to hide the Use a different scheme option
<style>
#sa-scheme-project-actions-use-different
{ display: none; }
</style>
- Click Set banner.
FAQ
Do Smart Attachments categories work in JSM?
The Smart Attachments categories are visible on the JSM portal since Smart Attachments 2.7.0. Your customers can view attachments in the categorized form on the customer portal.
At the moment, customers can’t manually add an attachment to the particular categories. They can only see the files grouped in categories on the portal. In addition, you can set the auto-distribution rules for the JSM portal. In this case, the files will be categorized automatically even if uploaded by users.
This is what we can do on the JSM portal due to technical limitations. The better integration is not available but we are looking for any changes to deliver it. We have a feedback form for feature requests if you are interested.