Starting from version 2.5.0, TeamCity Integration for JIRA add-on supports two types of application links:ways of creating application links. You can use either of these ways, as they both create the same entity of application link in JIRA.
The main difference between them is the method of creating application links.
| Talk | ||
|---|---|---|
|
...
...
All the existing application links created in JIRA will continue working as prior to update. For creating new application links to TeamCity servers you can use a new mechanism of their creationmechanism that is a bit quicker and simpler.
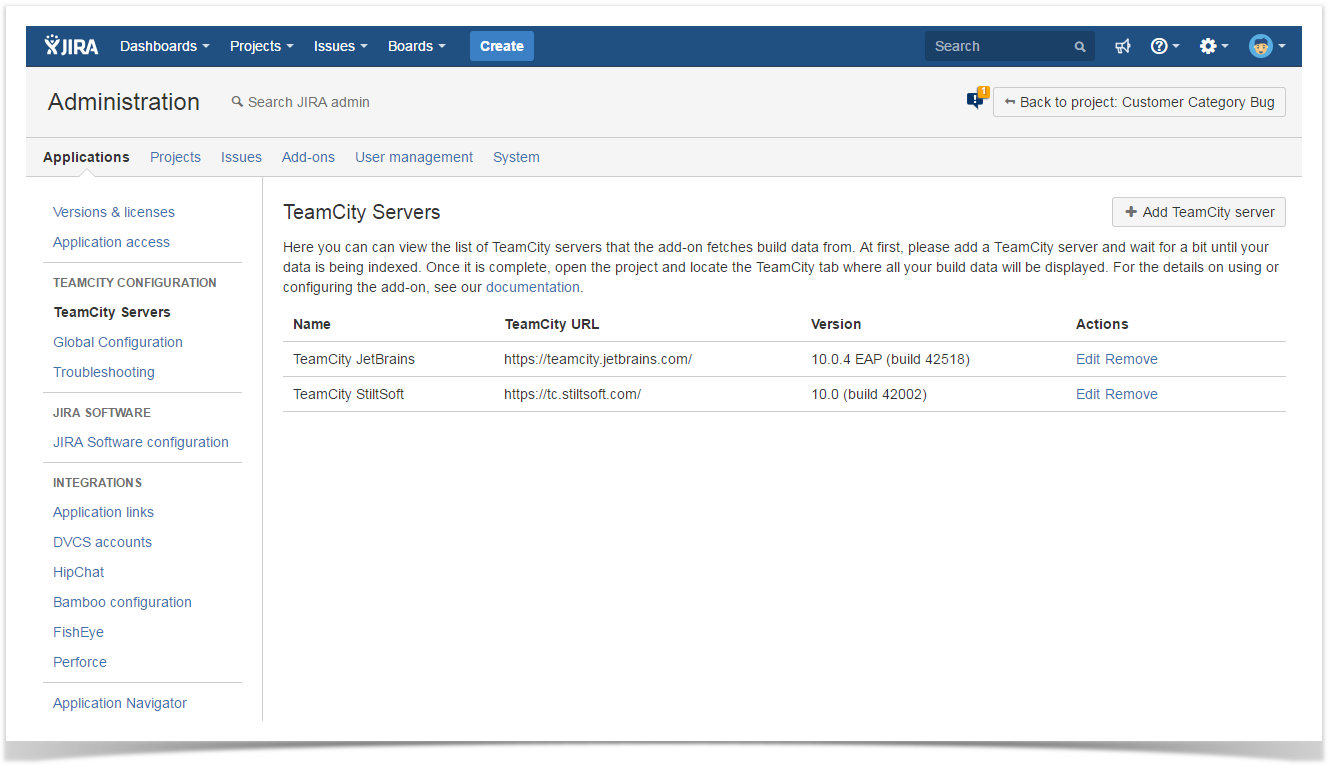
All the registered application links to TeamCity servers are displayed in both sections. You can add or edit application links in the Application Links section of JIRA or in the add-on specific section 'TeamCity Servers'. The mechanism of management is interchangeable and substitutable.
Creating a TeamCity Application Link (New Way)
- Navigate to JIRA > Administration > TeamCity Configuration > TeamCity Servers.
- Click Add TeamCity Server.
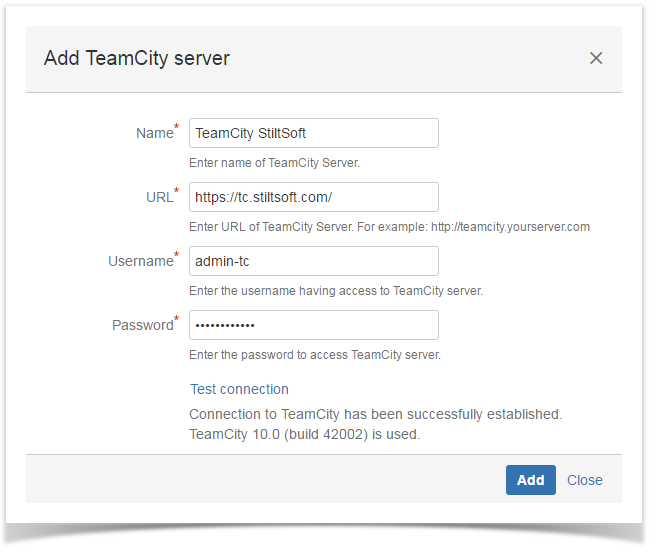
- In the Add TeamCity server form specify the following information:
- Name - enter the name of the TeamCity server.
- URL - enter address of the TeamCity server.
- Username - enter the username of the user account having access to TeamCity projects.
- Password - enter the password of the user account having access to TeamCity projects.
- Click Test connection to verify the connection to the TeamCity server.
- Click Add.
A new application link will appear on the list with other TeamCity application links.
Creating a Native Application Link (Old Way)
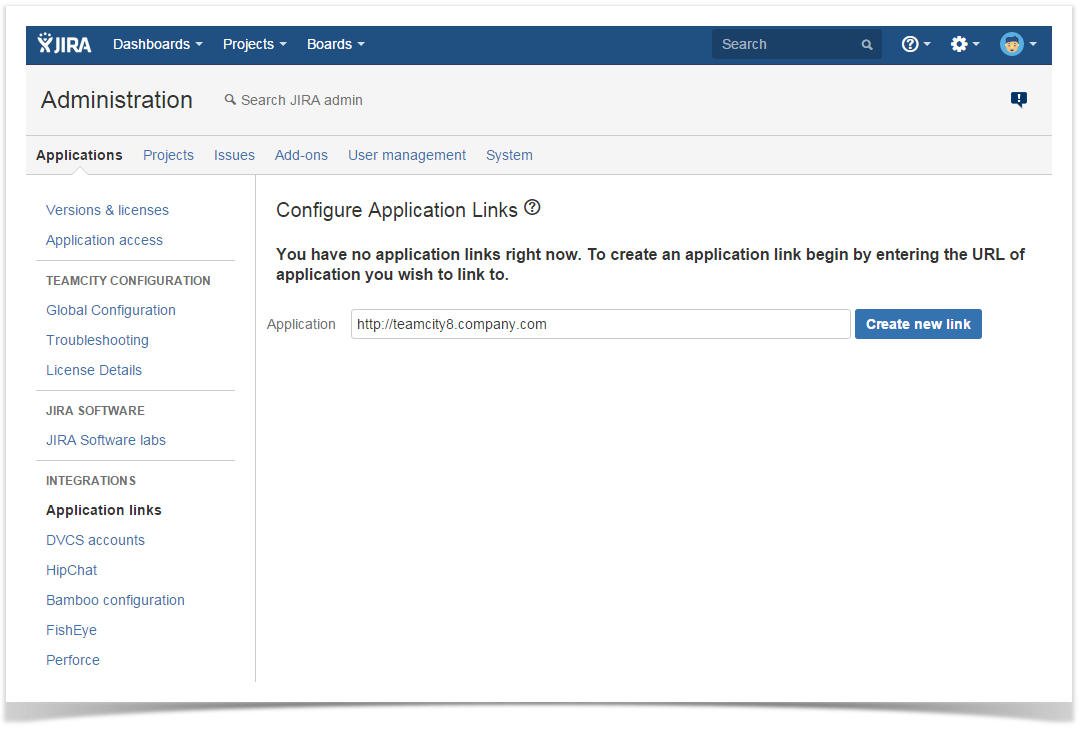
- Navigate to JIRA > Administration > Applications.
- In the Integrations menu group, locate and select Application Links.
- Enter address of TeamCity server.
- Click Create new link.
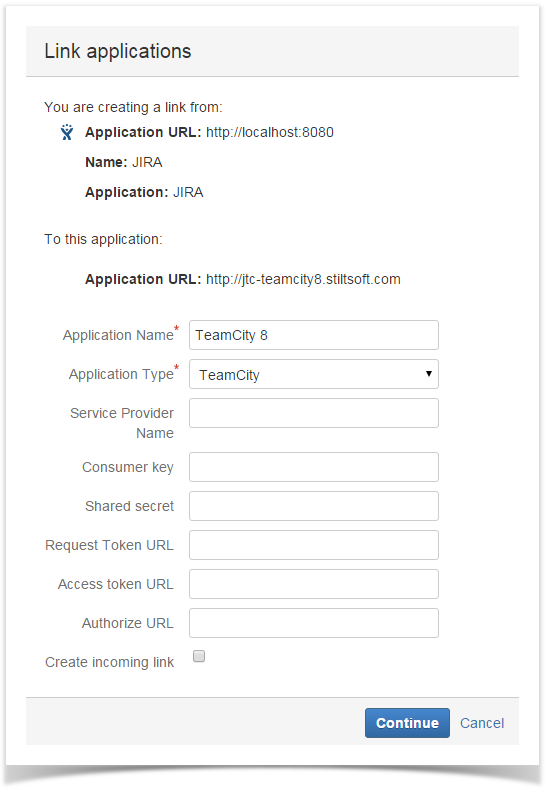
- In the prompted form, click Continue. Please ignore the displayed warning.
- In the Link application form, specify name of the application link and select 'TeamCity' as the application type.
- Click Continue.
- Once the application link has been created, click Edit.
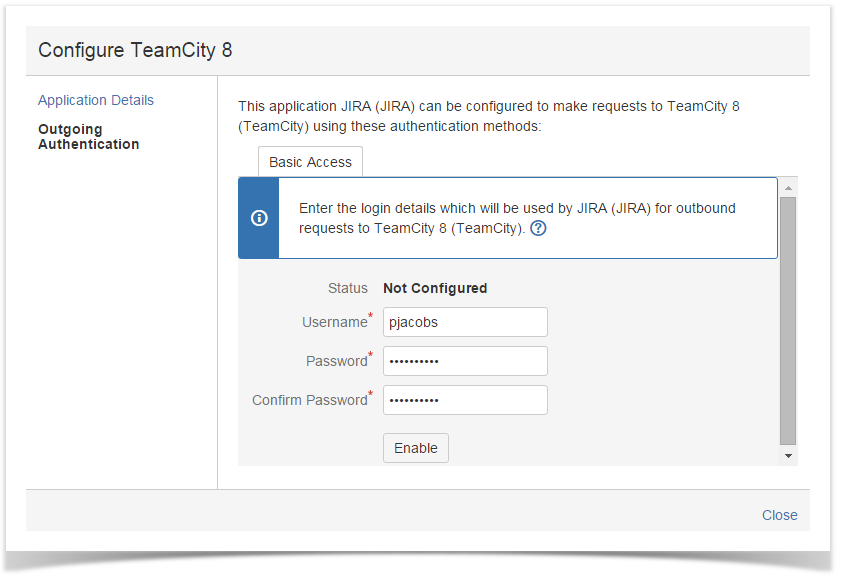
- In the opened form, switch to the Outgoing Authentication tab.
- Enter the username and password that will be used by JIRA for fetching build data from TeamCity server.
- Click Enable.
- Close the form.
