...
- add new filters and the box for hiding table columns
- delete the no longer needed filters and box for hiding table columns
- save the default values of filters
- define width of filter boxes
You may have encounter the four situations, as follows:
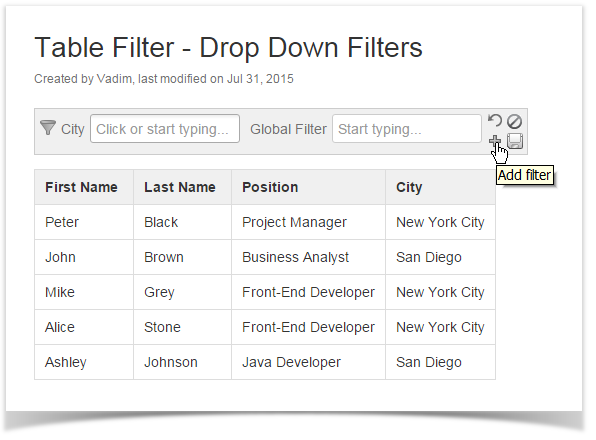
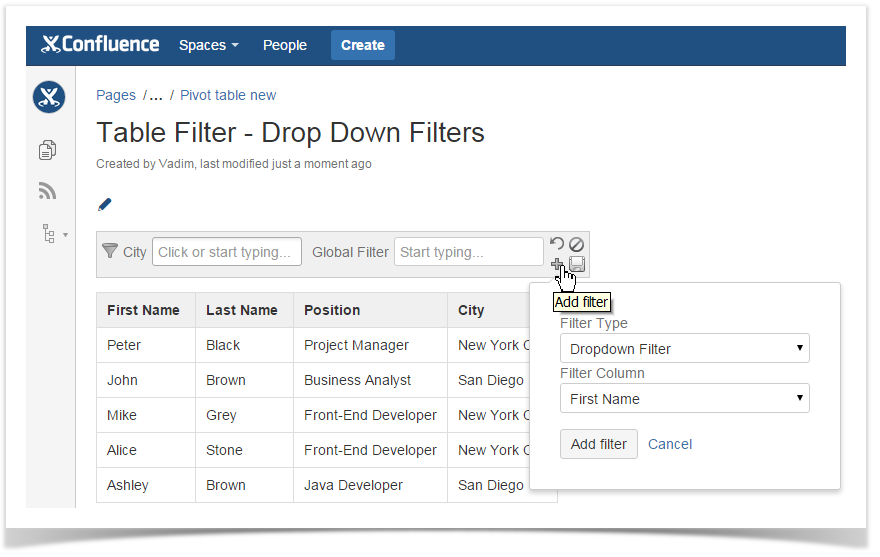
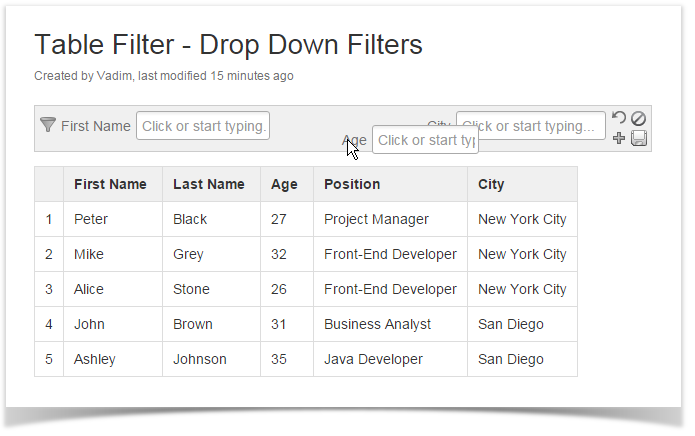
You have inserted the table into the Table filter macro, added filters and saved the page. In this case, you will see the screen similar to the one displayed. You can add new filters by clicking the Add filter icon.
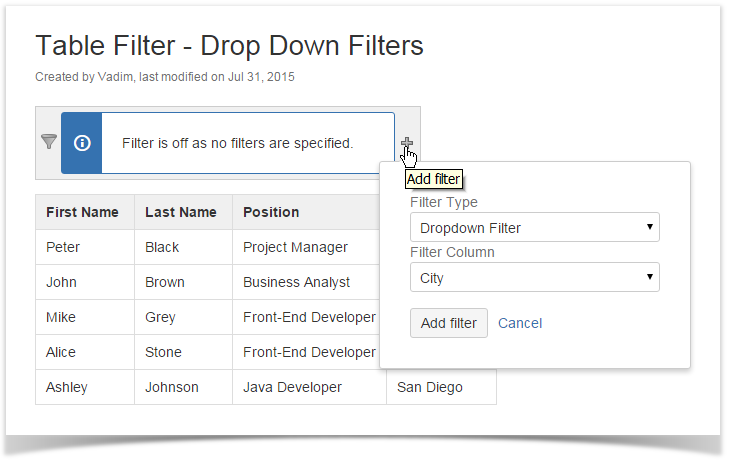
| You have inserted the table into the Table filter macro and saved the page without any configuration. In this case, you will see the screen similar to the one displayed. You can add the required filters by clicking the Add filter icon.
|
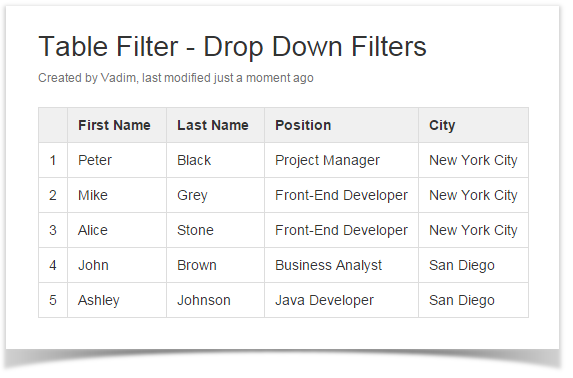
You have inserted the table into the Table filter macro and enabled automatic row number or/and default sorting. In this case, no filtration pane will be displayed. You will have to switch the page to the edit mode and then configure settings of the Table Filter macro while editing it.
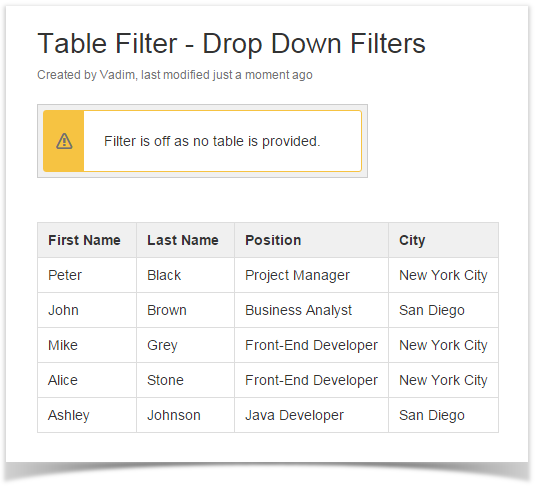
| You have not inserted the table into the Table filter macro. In this case, you will see the corresponding notification about the missing table in the macro body. You will have to swith the page to the edit mode and insert the table into the macro body. Then you can add the filters either when editing the page or viewing it.
|
Adding filters in the page view mode
- On the filtration pane, locate the Add filter icon and click it.
- Select the appropriate filter type and the column for data filtration.
- To save the modifications in the macro body, click the Save settings icon.
| Info |
|---|
If adding the number or date filters, additional configuration of the data format may be required. |
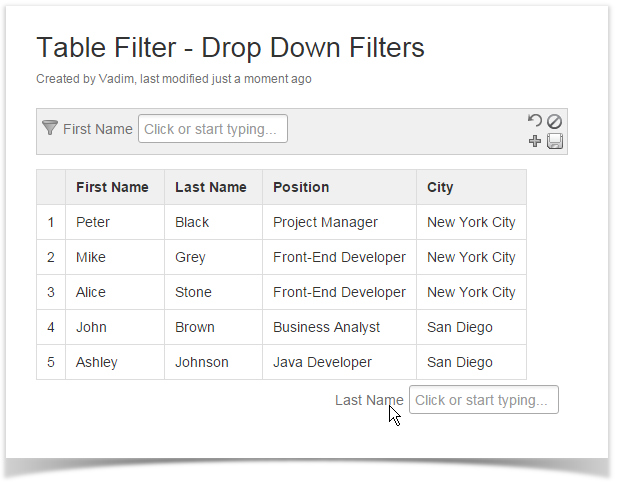
Deleting filters in the page view mode
- On the filtration page, locate the filter you want to remove.
- Click and drag the filter to the bottom of the page.
- Release the left mouse button. The filter will be removed.
- To save the modifications in the macro body, click the Save settings icon.
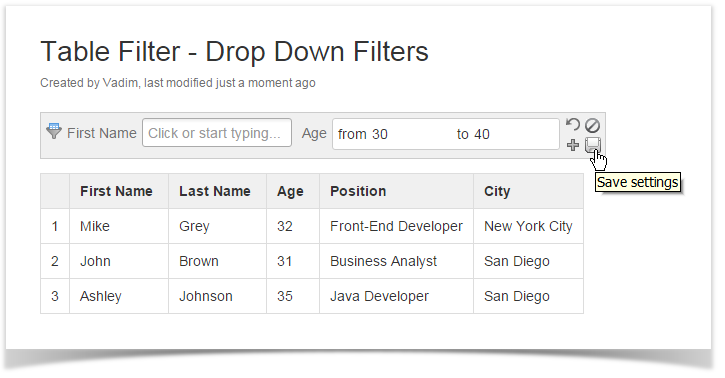
Saving default values for filters in the page view mode
- Locate the filter you want to specify default values for.
- Select or enter the appropriate default values for one or multiple filters.
- To save the modifications in the macro body, click the Save settings icon.
Saving filter width in the page view mode
- Locate the filter box which width you want to change.
- Position the mouse pointer at the right border of the filter box, until the cursor changes.
- Click and hold the left mouse button and drag the filter box border to the left or or to the right.
- Release the left mouse button when width of the filter box is appropriate.
- To save the modifications in the macro body, click the Save settings icon.
| Info |
|---|
You can change the box width for the following filter types:
|
Changing order of filters on the filtration pane
- Locate the filter box which position on the filtration pane you want to change.
- Click and drag the filter box to the appropriate position on the filtration pane.
- Release the left mouse button when complete.
- To save the modifications in the macro body, click the Save settings icon.
| Info |
|---|
You can only change order of filter boxes of the same type on the filtration pane. For example, you cannot position the global filter between the two dropdown filtersYou can add filters in the page view mode when at least one filter was added while editing the macro body. |
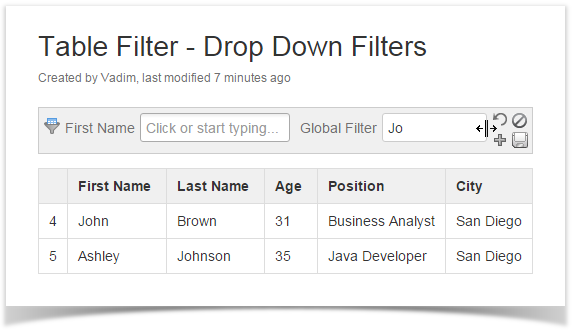
How to use regular expressions in textbox filters
...