Smart Attachments is a document management app for Confluence. It allows you to manage documents and store them in
the appropriate folders in Atlassian Confluence depending on their contents, objective or format.| Table of Contents |
|---|
folders with Confluence spaces. Here your teammates can quickly access these documents and get the latest document revisions in no time. Now you needn't worry that your project files are distributed through Confluence pages in a total mess.
| Table of Contents |
|---|
| Handy Carousel | ||||||||||||||||||||||||||||||||||||||||||||||||||||||||||||||||
|---|---|---|---|---|---|---|---|---|---|---|---|---|---|---|---|---|---|---|---|---|---|---|---|---|---|---|---|---|---|---|---|---|---|---|---|---|---|---|---|---|---|---|---|---|---|---|---|---|---|---|---|---|---|---|---|---|---|---|---|---|---|---|---|---|
|
Viewing documents
- Open the space storage.
- Open the document folder where the documents are stored.
- For each document, the following information is displayed:
- Name - name of the document.
- Size - size of the document
- Uploader - last uploader of the document / creator of the folder.
- Creation Date - date when the document was uploaded into the folder or the folder was created.
- Last Modified Date - date when the document or folder was modified (title updated).
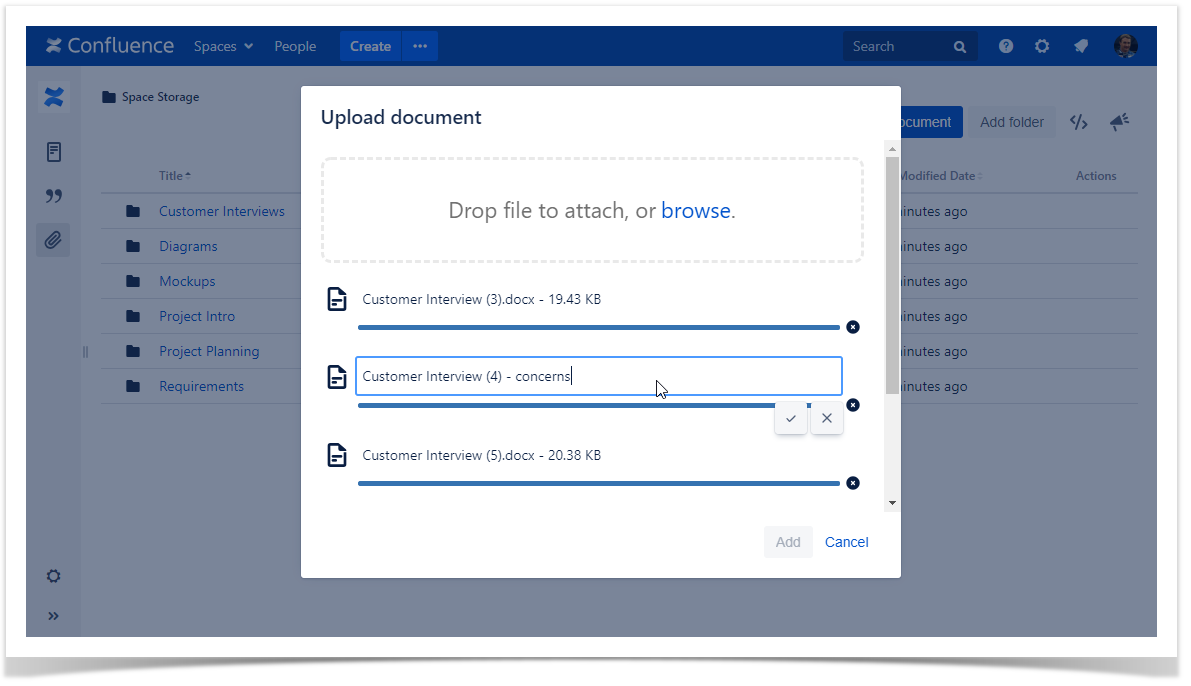
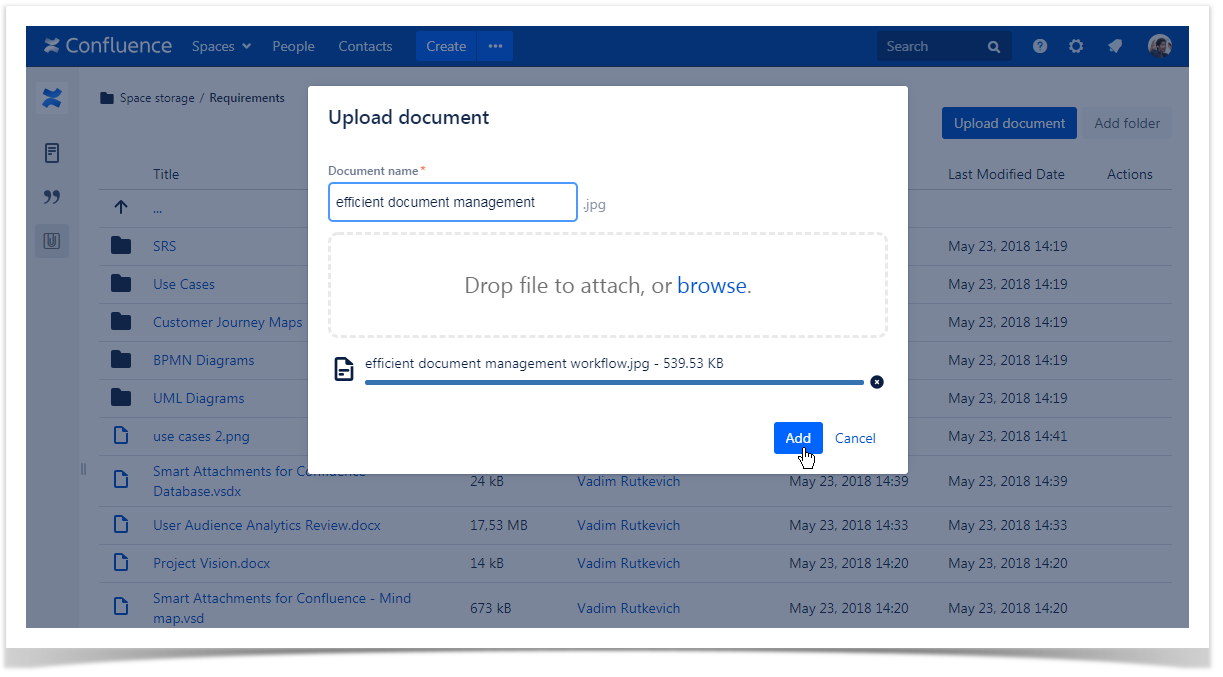
Uploading new documents
- Open the folder which you want to upload a new document to.
- Click Upload Add document.
- In the Upload document form, click Browse and select the file files on your local computer. You can also directly drop the file files to the form.Update the document name (if needed) before saving.
- Click Add.
To delete the currently selected fileattached document on the form:
Click the ![]() icon.
icon.
| Info |
|---|
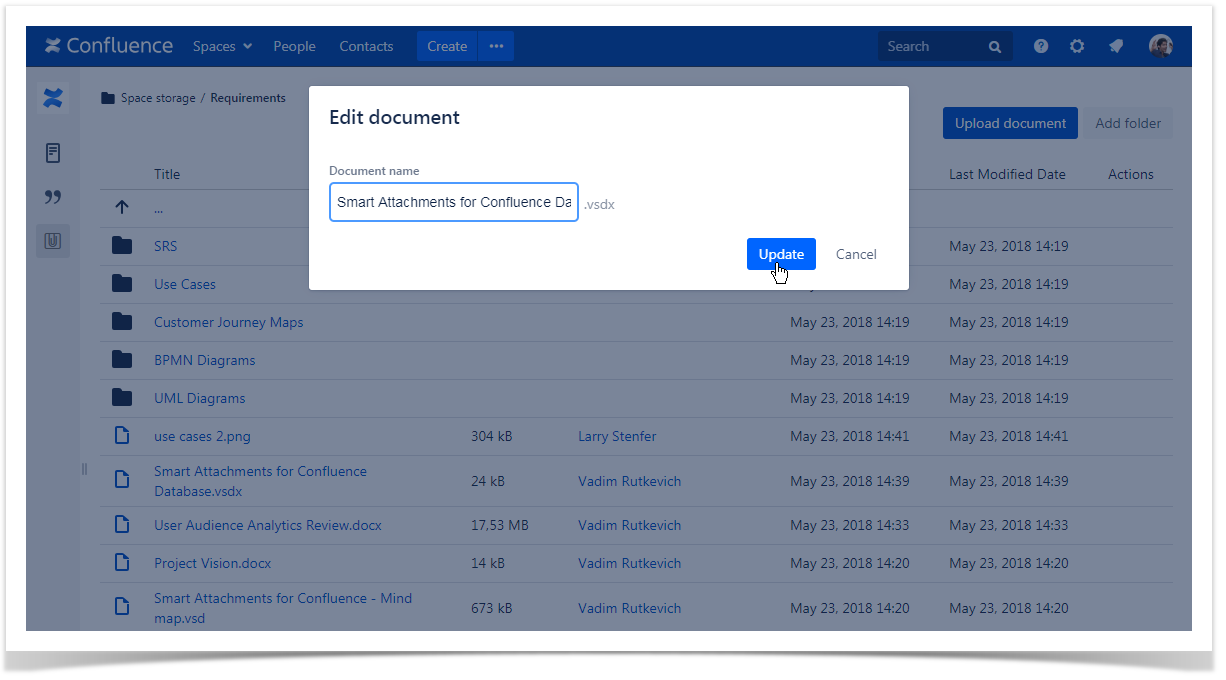
You can modify the name of the document, by hovering over the document name it and clicking it. Confirm the modified name by clicking |
Uploading documents to the storage while editing the page
- Switch the page to the edit mode.
- Drop files to the area named as Storage.
- In the Select folder in storage form, select the folder which you want to upload files to.
- Click Upload.

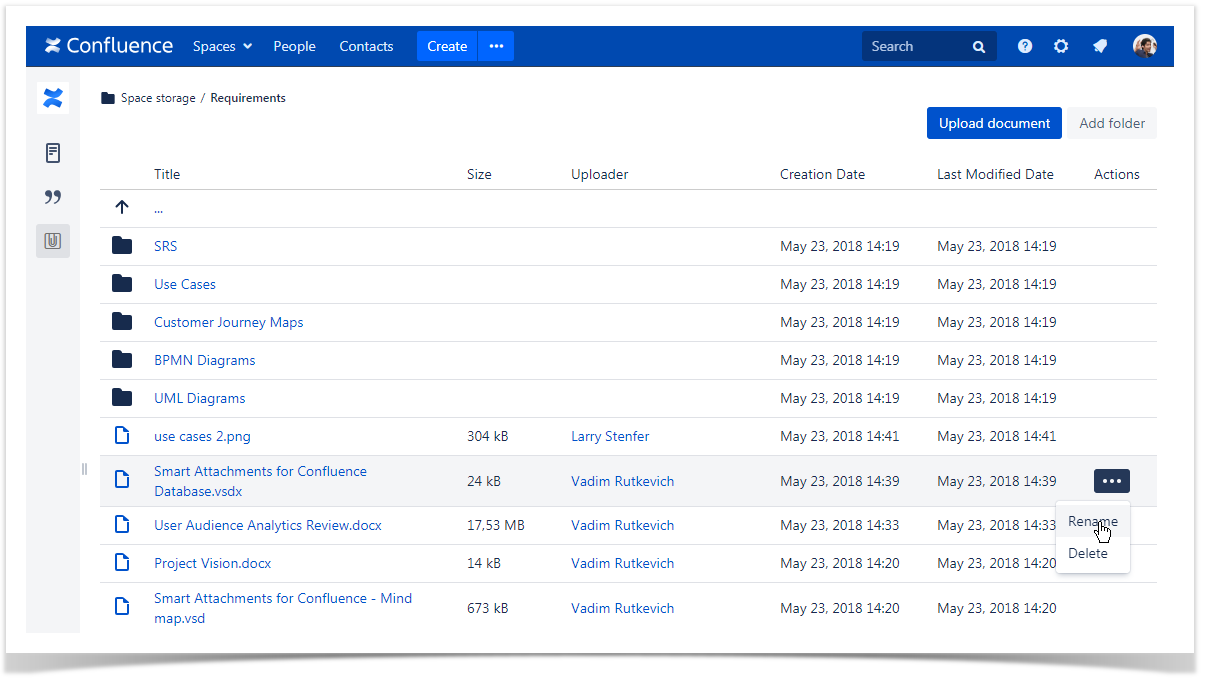
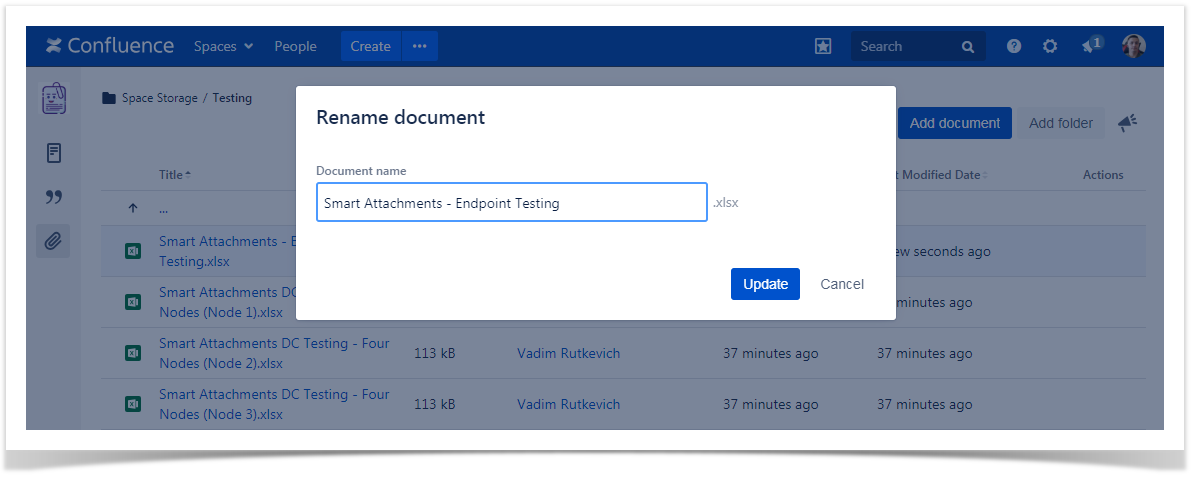
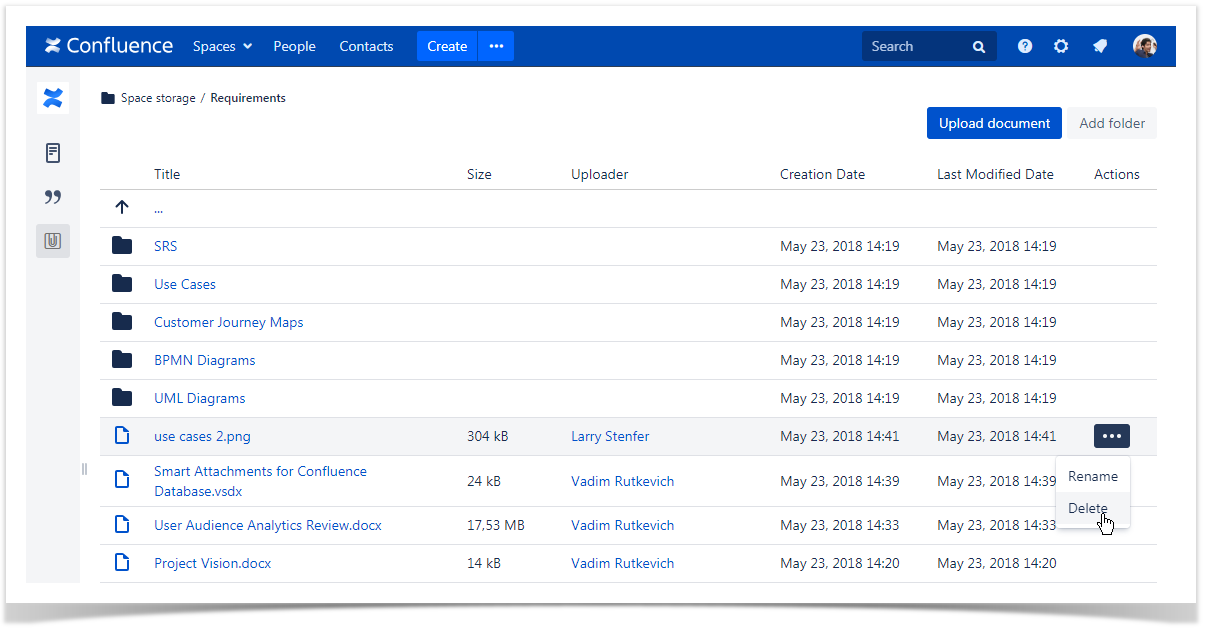
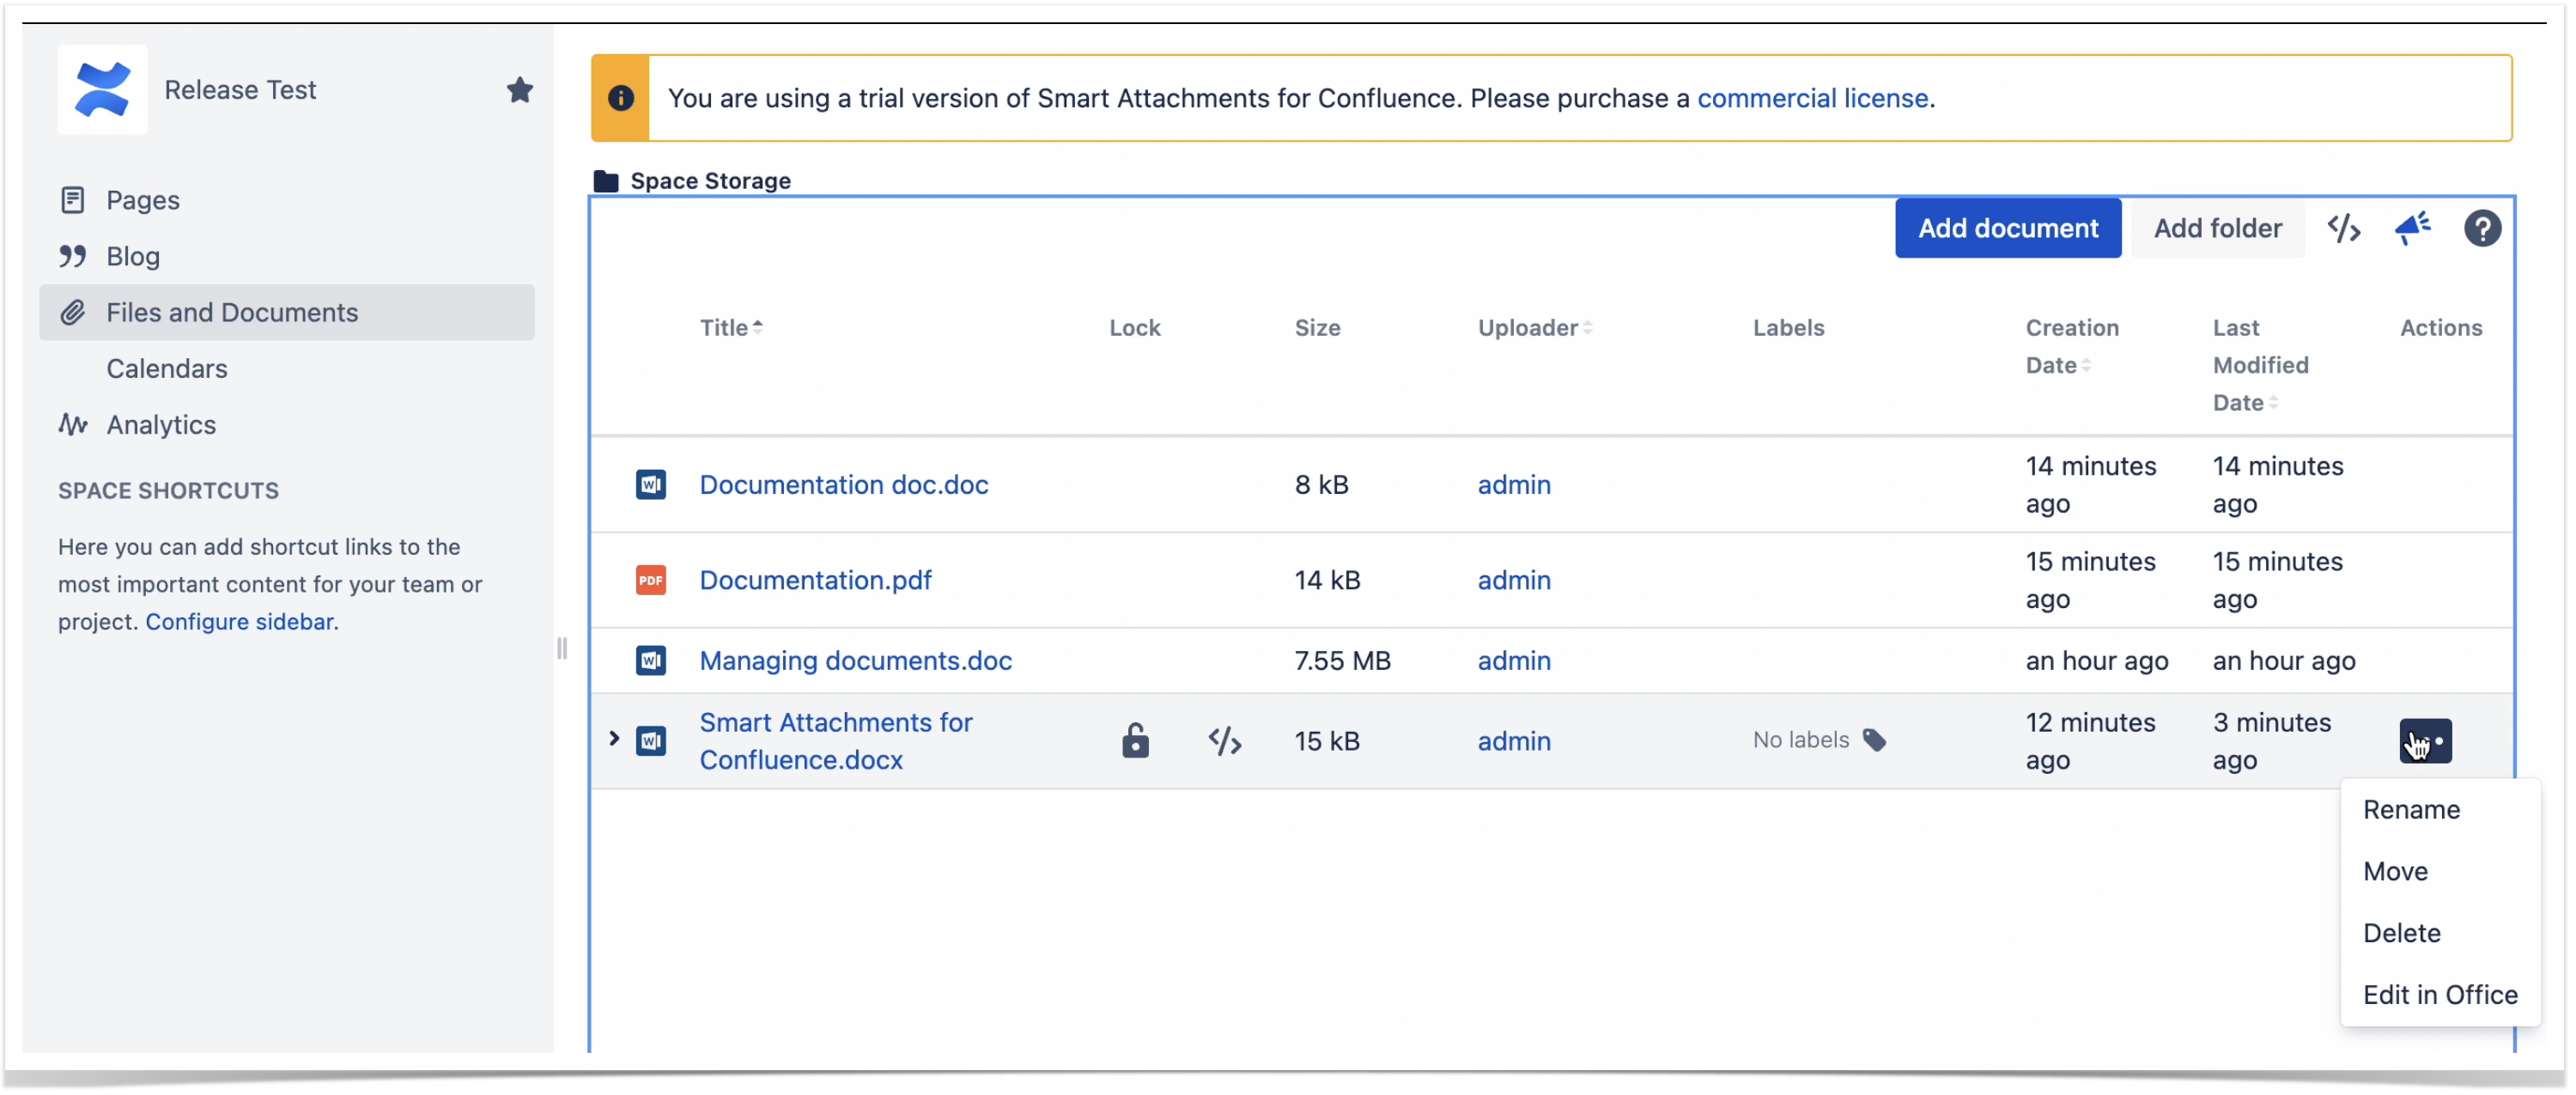
Renaming the document
- On the list with folders, locate the document you want to rename.
- Hover over the document.
- Click the [...] button.
- Select Rename.
- In the Edit document form, update the document name.
- Click Update..
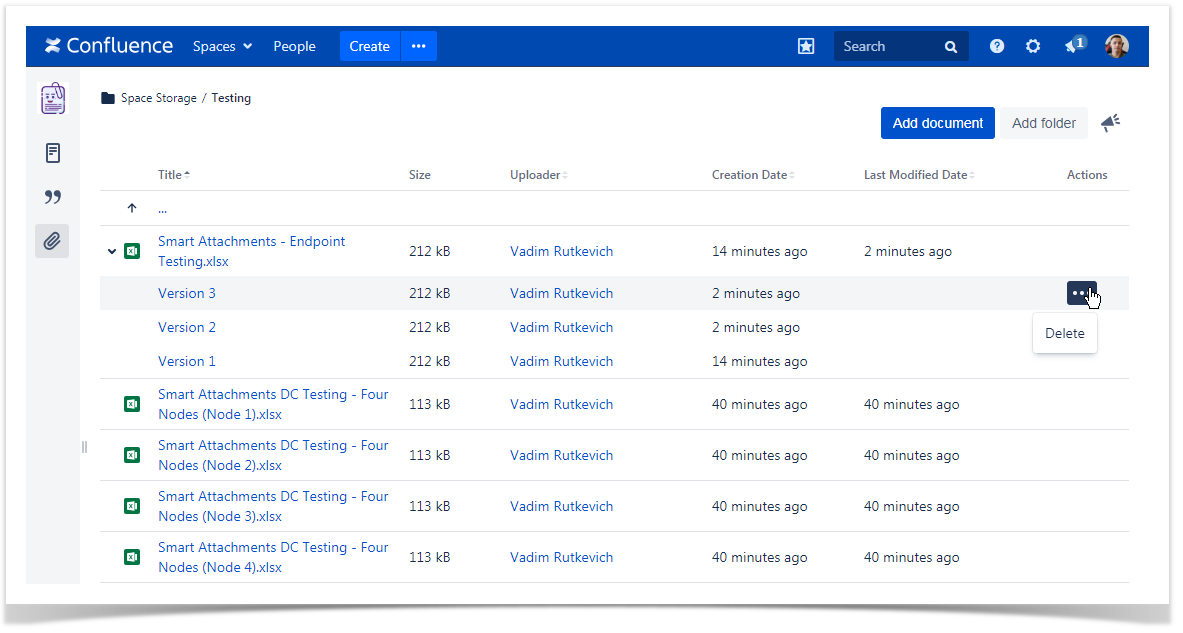
Managing document revisions
Smart Attachments for Confluence groups files having identical names into document revisions automatically.
- Drop files into the folder.
- Click the Expand revisions > icon.
- Locate the appropriate document revision.
To delete the document revision:
- Hover over the document revision.
- Click the [...] button.
- Select Delete.
Managing labels of documents
- On the list with documents, locate the document which you want to manage labels for.
- Hover over the document.
- Click the Edit labels
 icon.
icon. - In the Labels form, add or delete labels.
- Close the form.
Deleting the document
On the list with documents, locate the document you want to delete.
- Hover over the document.
- Click the [...] button.
- Select Delete.
- Confirm the removal of the document.
| Info |
|---|
The document will be deleted with all its revisions. If you have the permission to delete only your own attachments, you will not be able to delete a document containing revisions from multiple users. |
Embedding documents into Confluence pages
- On the list with documents, locate the document you want to embed.
- Hover over the document.
- Click the Copy link to embed
 icon.
icon. - Open the page which you want to embed the document into.
- Press Ctrl + V (for Windows/Linux) or Cmd + V (for MacOS).
The link will be converted into the embedded document.

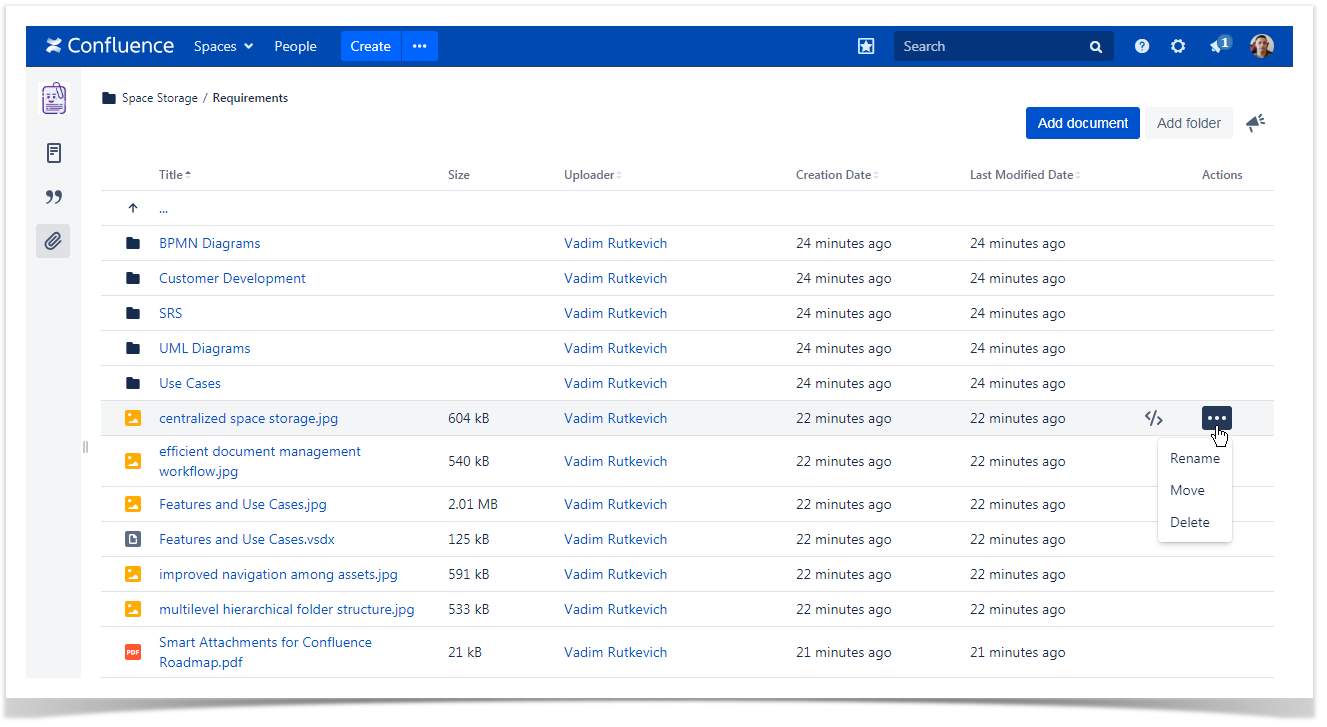
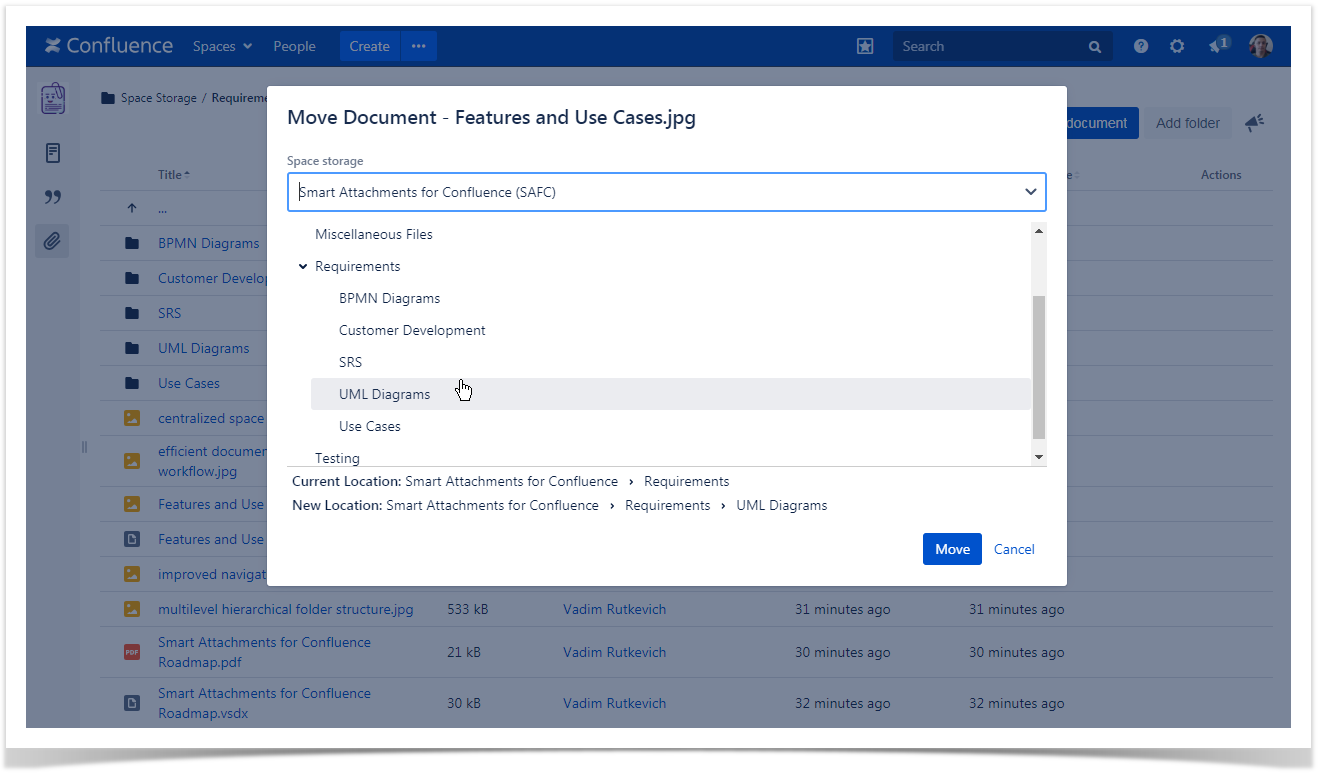
Moving documents to folders
- On the list with documents, locate the document you want to move.
- Hover over the document.
- Click the [...] button.
- Select Move.
- In the Move Document form, select the space storage and folder which you want to move the document to.
- Click Move.
You will automatically transition to the new location of the document.
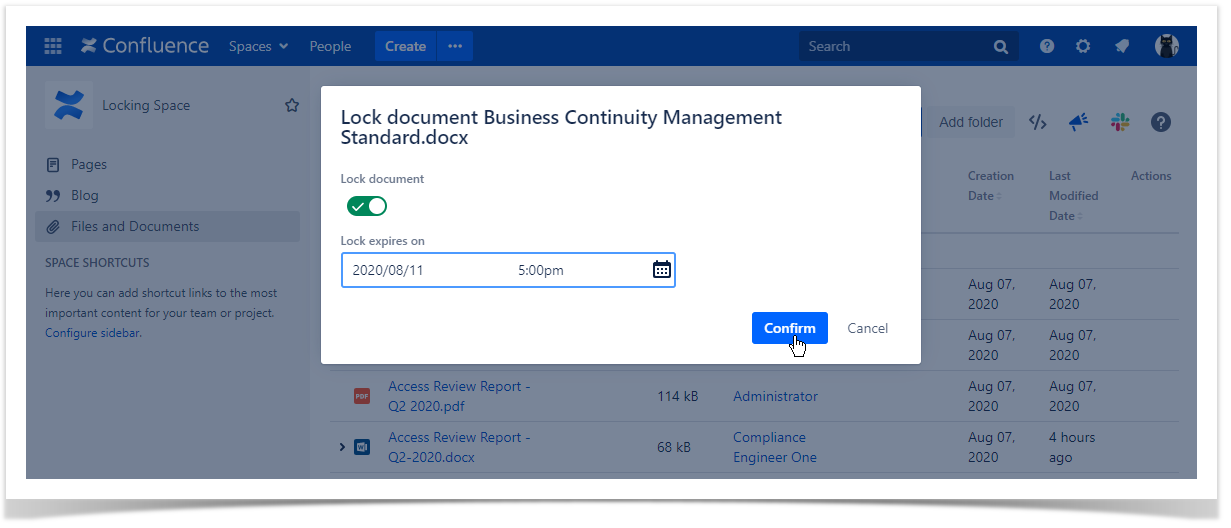
Locking documents
You can lock documents for a specific period of time. The automatic locking is set to documents that you start editing in Atlassian Companion.
Users from the confluence-administrators group can forcedly unlock the locked documents if needed.
- On the list with documents, locate the document you want to lock.
- Hover over the document.
- Click the Lock
 icon.
icon. - In the Lock document form, move the toggle right to enable the locking.
- Pick the date and time until which the document is locked.
- Click Confirm.
To unlock the document:
- On the list with documents, locate the locked document you want to unlock.
- Hover over the document.
- Click the Locked
 icon.
icon. - In the Lock document form, move the toggle left to disable the locking.
- Click Confirm.
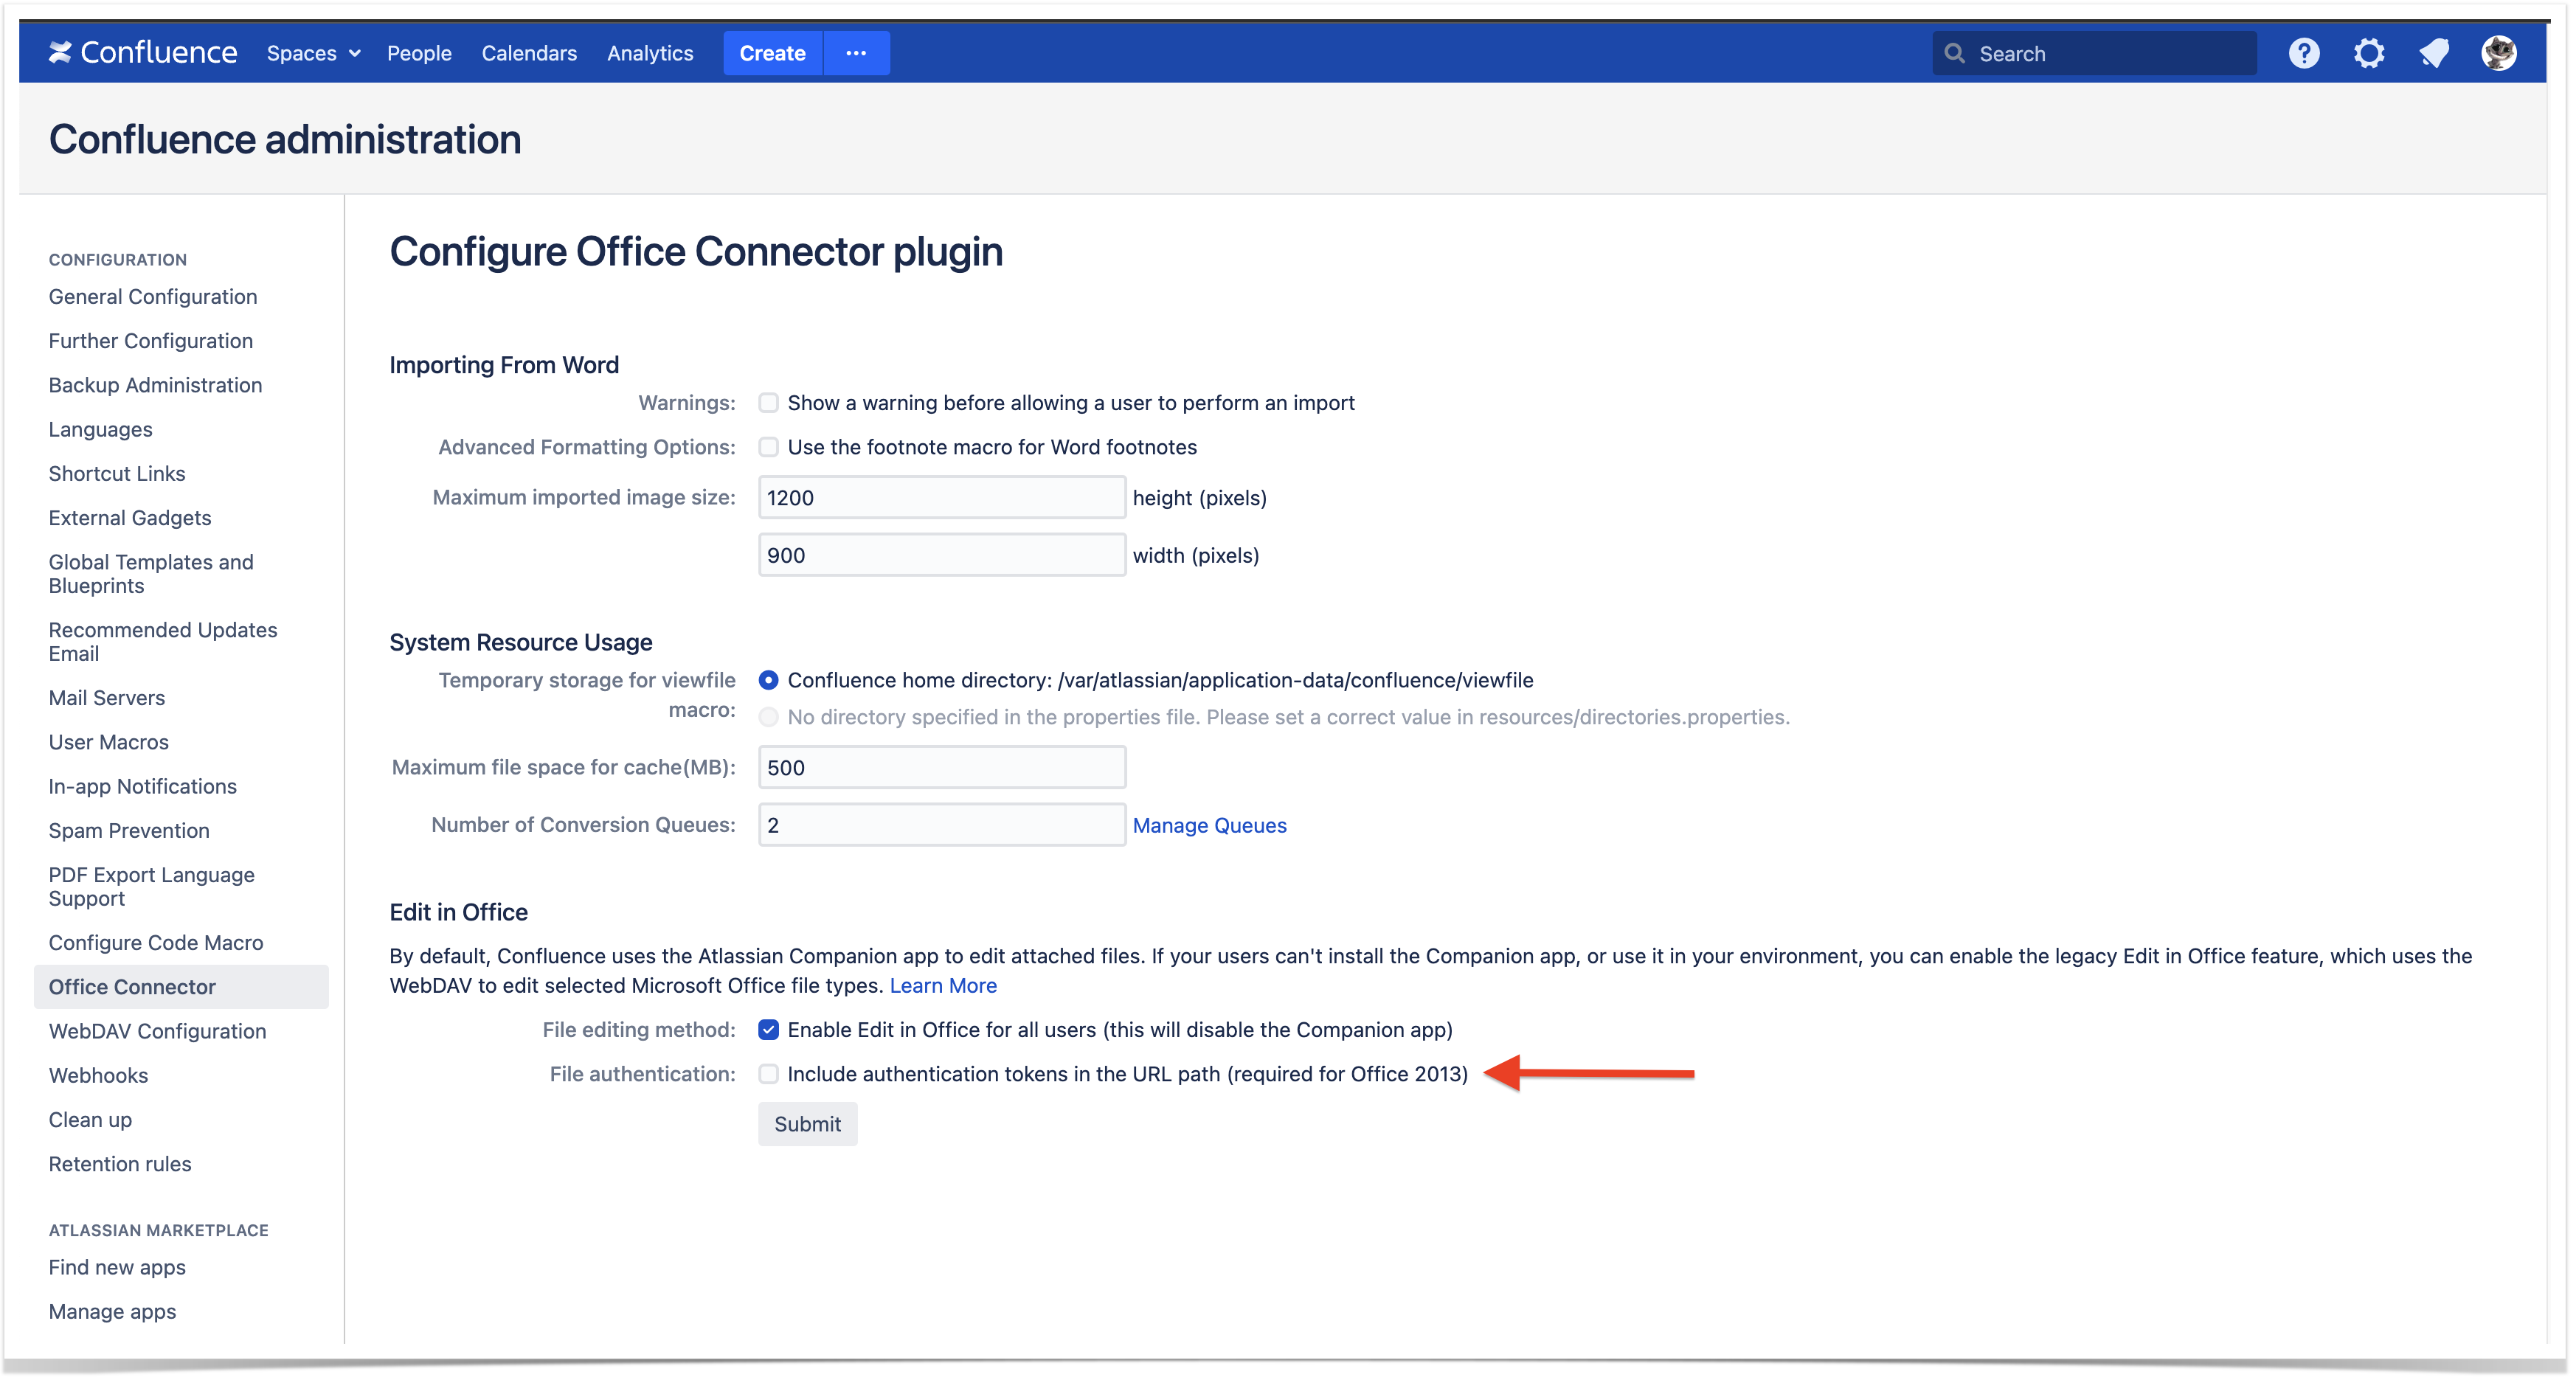
Edit documents in Space Storage
The Edit in Office feature in Space Storage allows to edit documents using the Office Connector method. Please mind that by default, Confluence uses the Atlassian Companion app to edit attached files. If your users can't install the Companion app, or use it in your environment, you can enable the legacy Edit in Office feature, which uses the WebDAV to edit selected Microsoft Office file types.
- Open the space storage.
- Locate the file you want to edit.
- Navigate to the edit icon
 in the Actions column and select Edit in Office.
 - Then click Open in the popup tab; edit the document and save it.
- Refresh the page to see a new file version.
NB! Please note, that only the first parameter is supported in Office Connector → Edit in Office Section
| Expand | ||
|---|---|---|
| ||
|