This page explains the following topics:
To filter a table, enter the Edit mode, find Table Filter in the Insert - Other Macros menu and insert it to the page. Then either copy and paste an already existing table or create a new table inside the macro.
To specify filtering parameters in the macro browser, click inside the macro and choose Edit in the appeared menu.
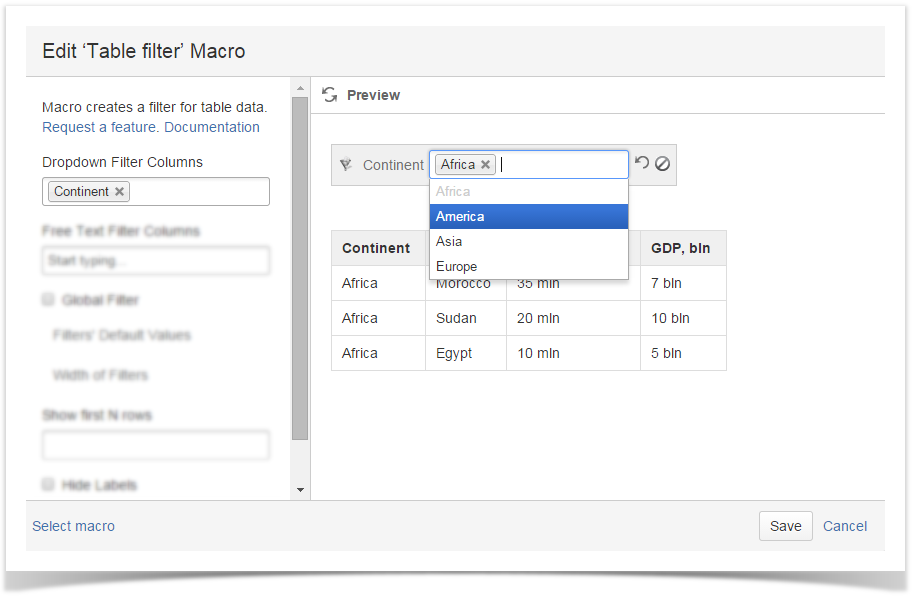
To add a drop-down list of values, enter table headers in the Column(s) field or choose them from the list.
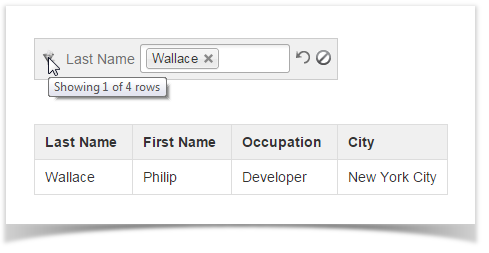
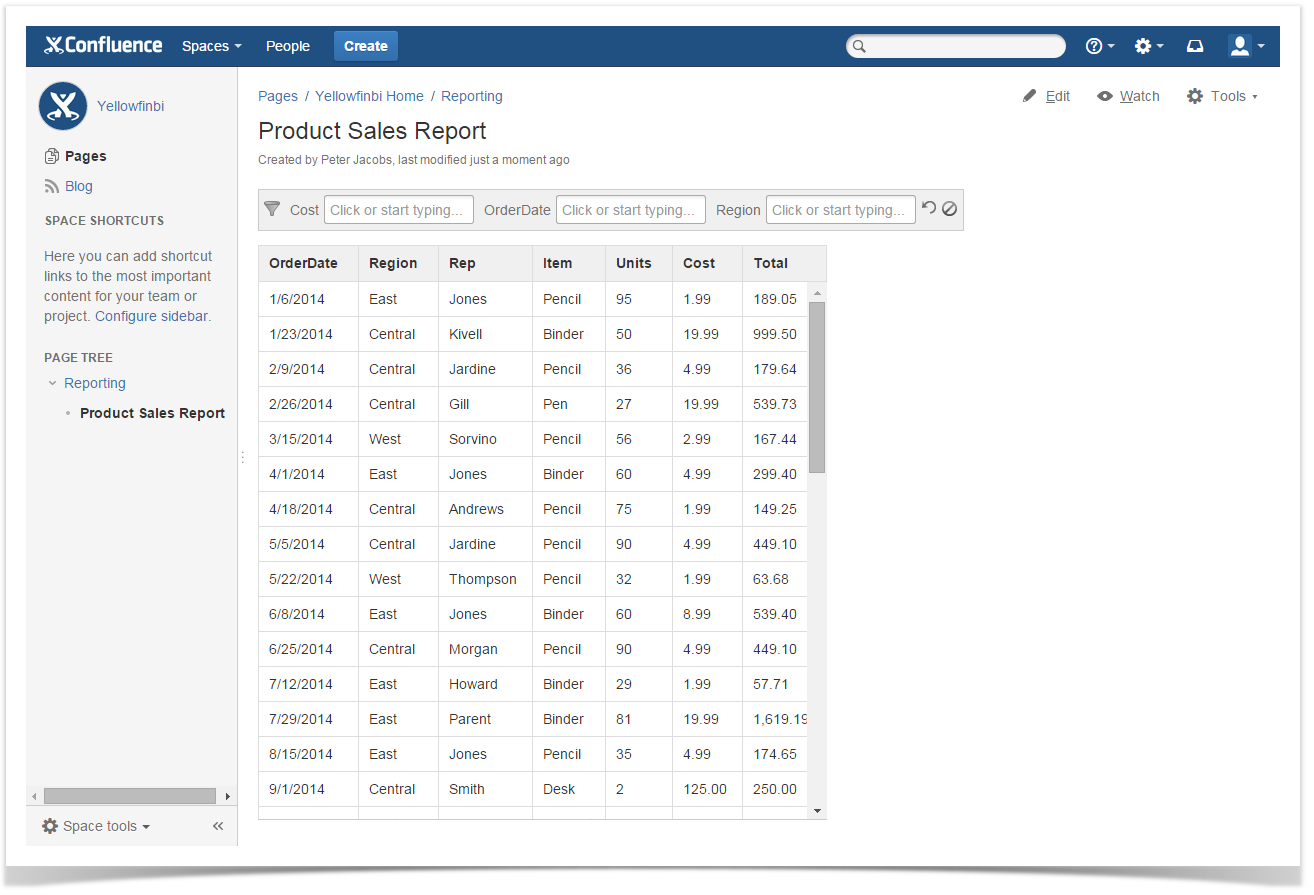
Hover over the funnel sign in the filter pane to see the number of filtered and total rows.
To make your work with long tables more comfortable, you can specify the number of top rows to show in the Show first N rows field. |
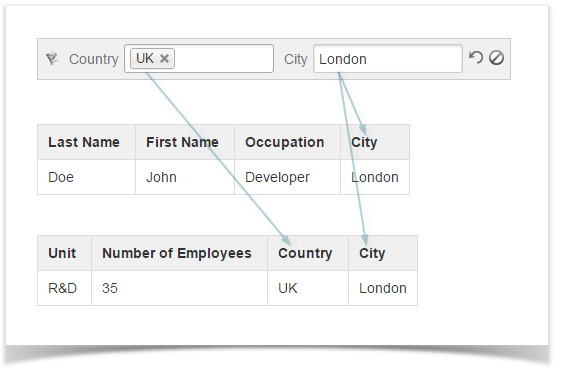
To filter two or more tables, place them inside the Table Filter macro. You can set up individual filters for tables (the Country filter in the example below) or filters that affect all tables (the City filter).
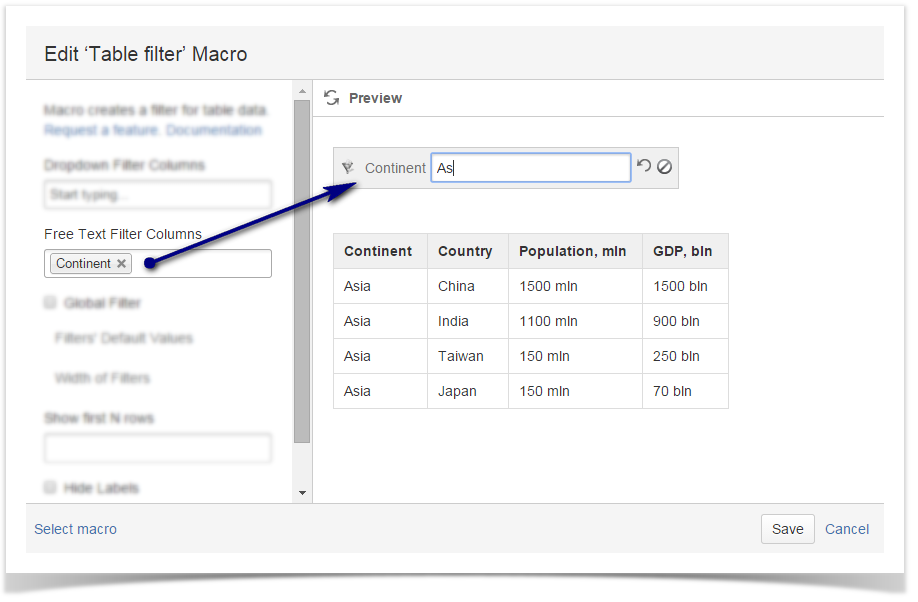
To add a textbox filter, enter the table header(s) in the User Filtered Columns field or choose them from the list.
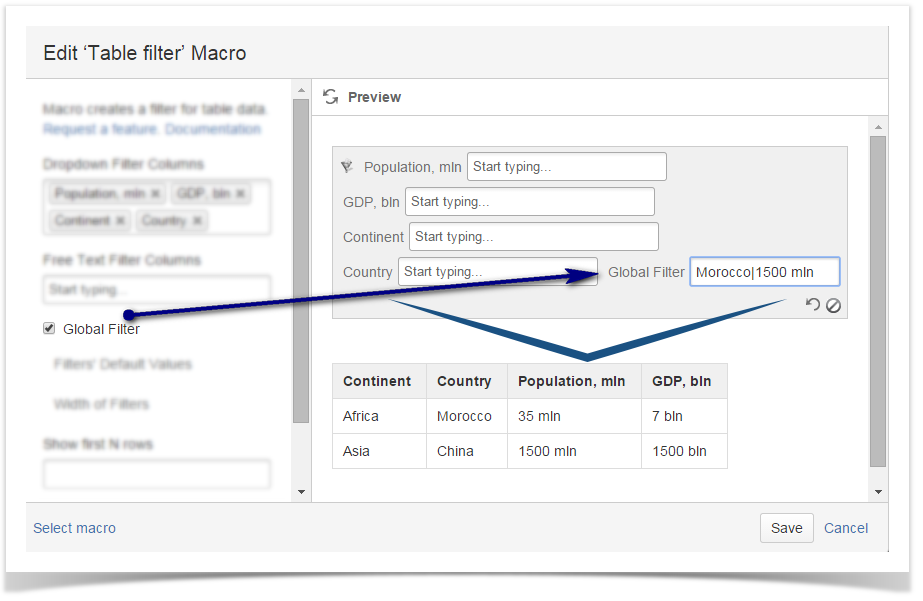
Select the Global Filter option to enable filtering by all columns. In the example below, a regular expression is used to filter all rows containing the snippets 'Morocco' or '1500 mln' in any columns.
The add-on allows you to filter rows with dates within the specific range.
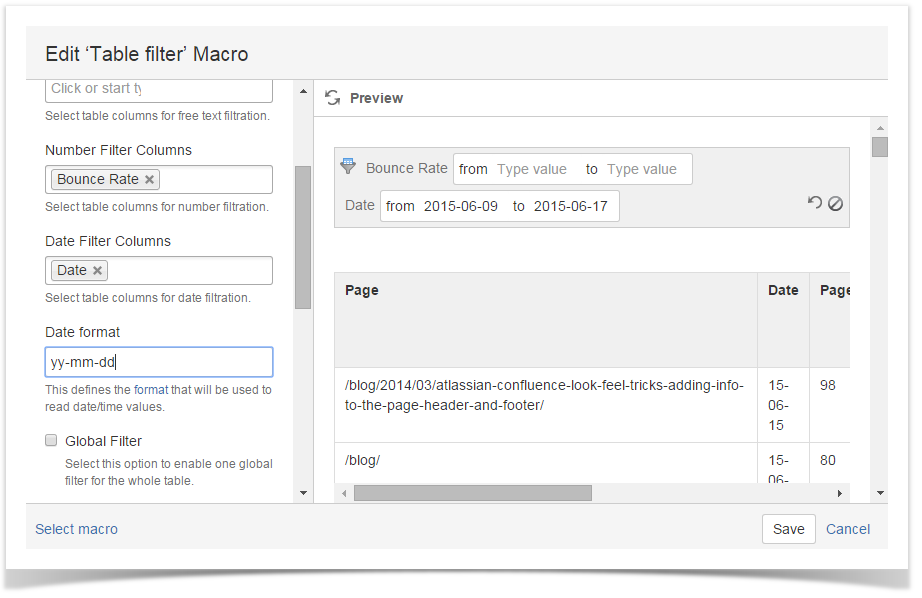
The date format can be specified and alternated depending on your table date. Use the following formats for specifying date:
For the details on date formats, see What date formats are supported? |
Starting from version 3.1.0 the add-on supports filtration of cells containing both date and time. Filtration occurs only by date, time value is skipped. |
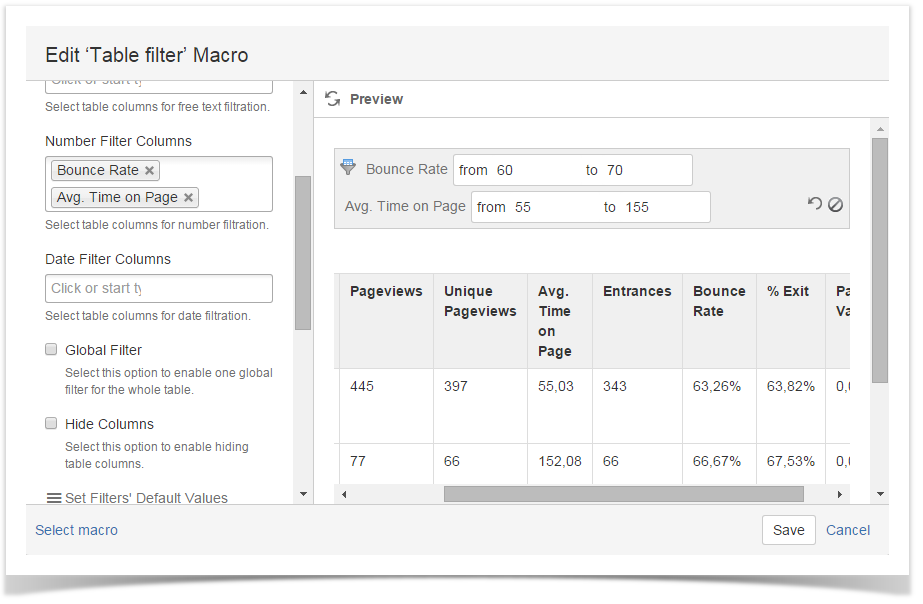
The add-on allows you to filter rows with numbers within the specific range.
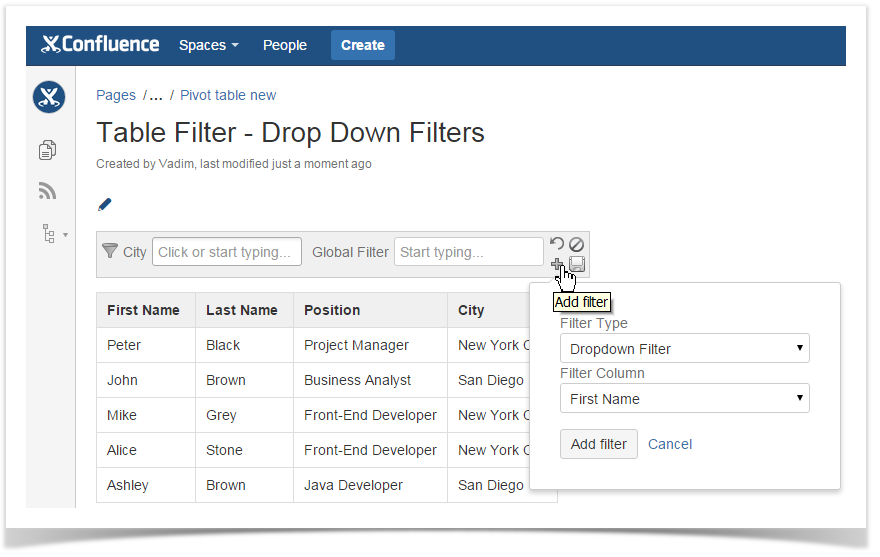
Starting from version 3.1.0 Table Filter add-on supports management of filters in the view page mode. In such a way, you can manage filters of all types, including the box for hiding specific columns of the table.
You can perform the following actions on filters:
You may encounter the four situations, as follows:
You have inserted the table into the Table filter macro, added filters and saved the page. In this case, you will see the screen similar to the one displayed. You can add new filters by clicking the Add filter icon.
| You have inserted the table into the Table filter macro and saved the page without any configuration. In this case, you will see the screen similar to the one displayed. You can add the required filters by clicking the Add filter icon.
|
You have inserted the table into the Table filter macro and enabled automatic row number or/and default sorting. In this case, no filtration pane will be displayed. You will have to switch the page to the edit mode and then configure settings of the Table Filter macro while editing it.
| You have not inserted the table into the Table filter macro. In this case, you will see the corresponding notification about the missing table in the macro body. You will have to swith the page to the edit mode and insert the table into the macro body. Then you can add the filters either when editing the page or viewing it.
|
If adding the number or date filters, additional configuration of the data format may be required. |
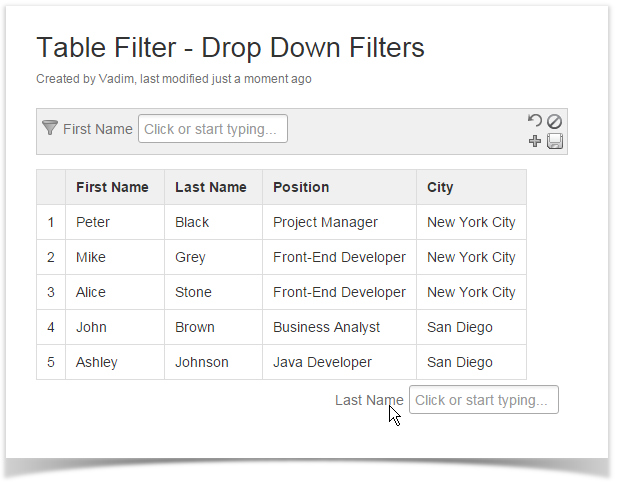
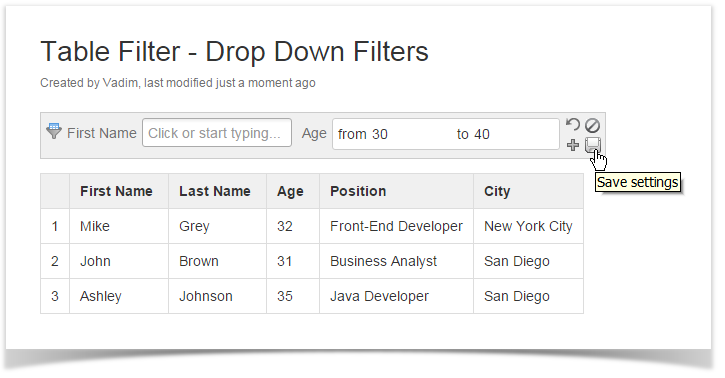
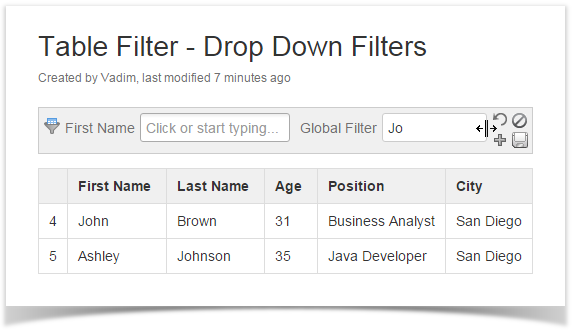
You can change the box width for the following filter types:
|
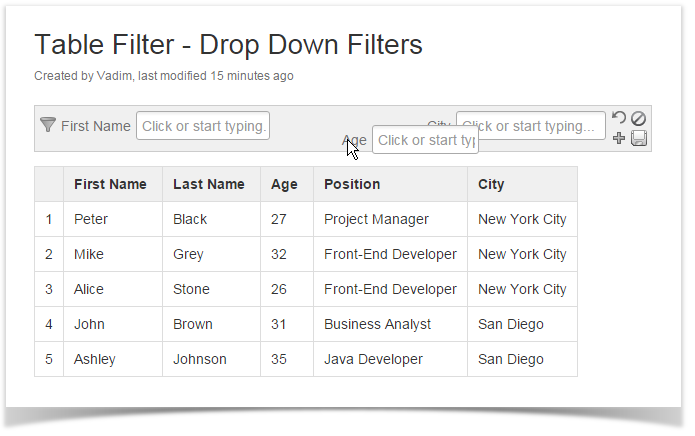
You can only change order of filter boxes of the same type on the filtration pane. For example, you cannot position the global filter between the two dropdown filters. |
You can use JavaScript-style regular expressions in textbox filters.
| Regular Expression | Matched Values |
|---|---|
| [Dd]oe | Doe, doe |
| colo(u)?r | color, colour |
| Developer|Scientist | Developer, Scientist |
The full list of regular expressions is available here.
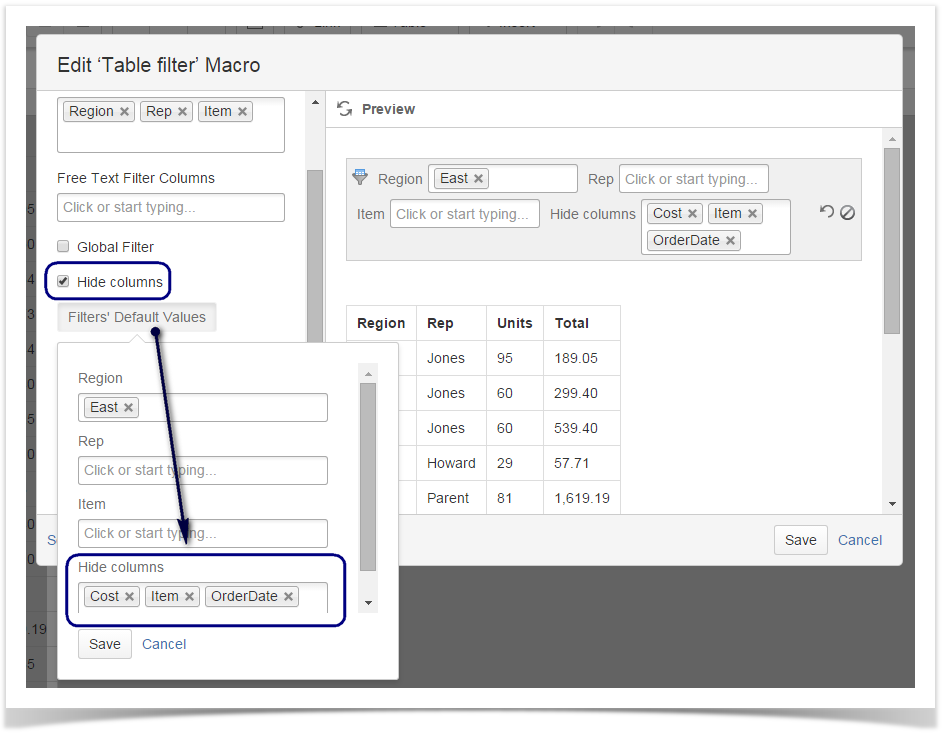
Open the macro and .point to the Filters' Default Values button and then click it. Select the appropriate value for the current dropdown filter.
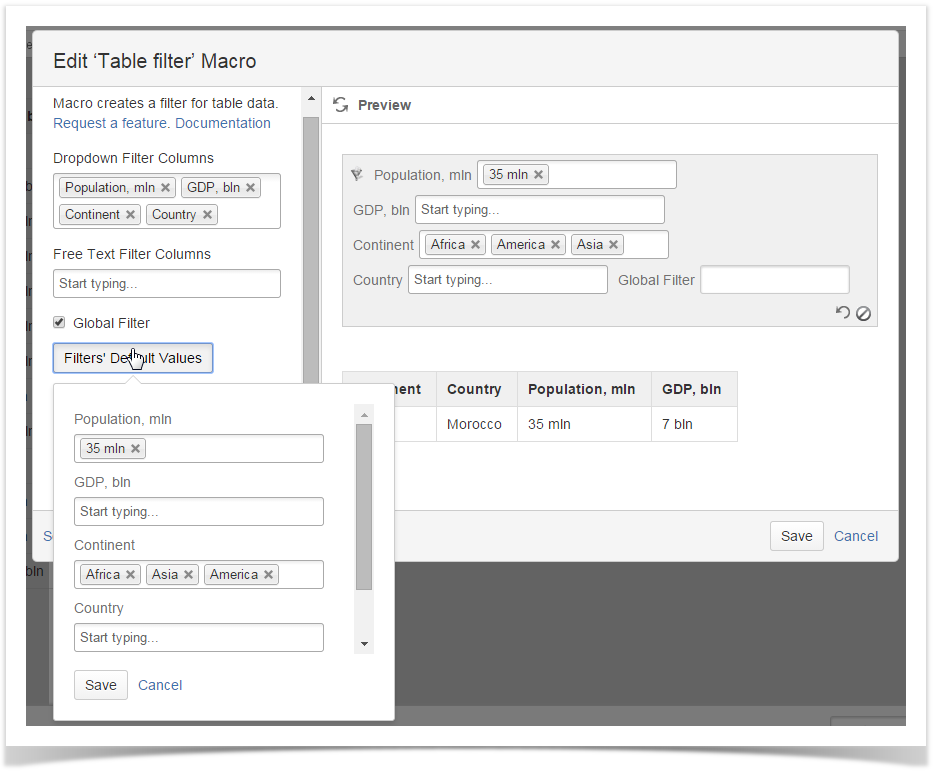
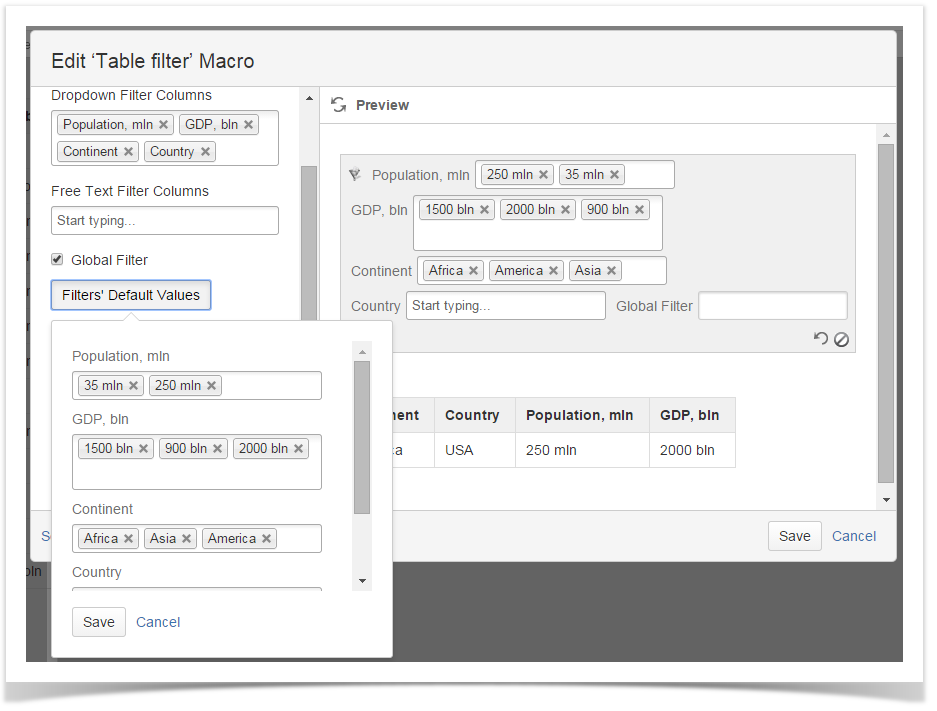
You can set multiple default values for each drop-down filter. You can delete the added default values by clicking the Close icon available on each value.
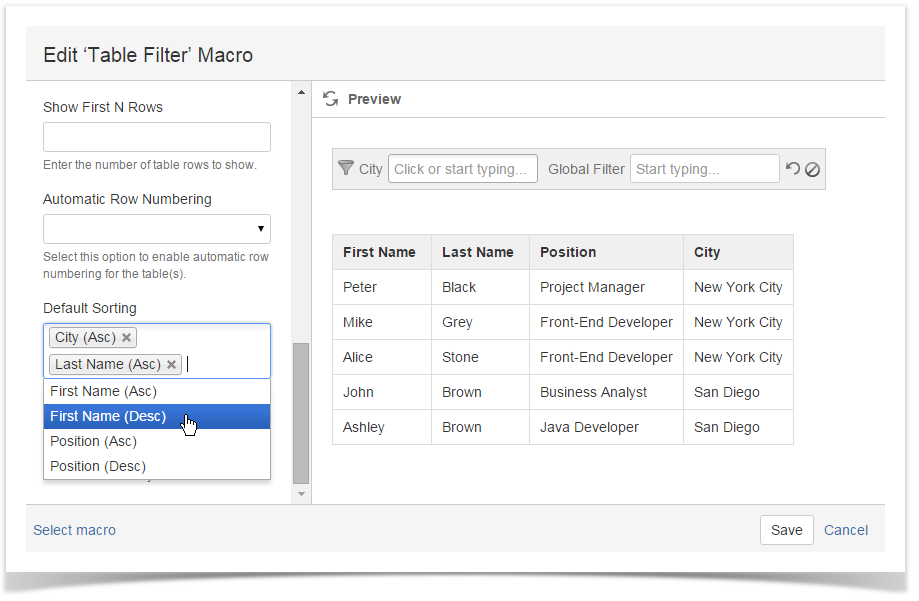
Starting from version 3.1.0 Table Filter add-on allows you to apply default sorting order to values in multiple columns.
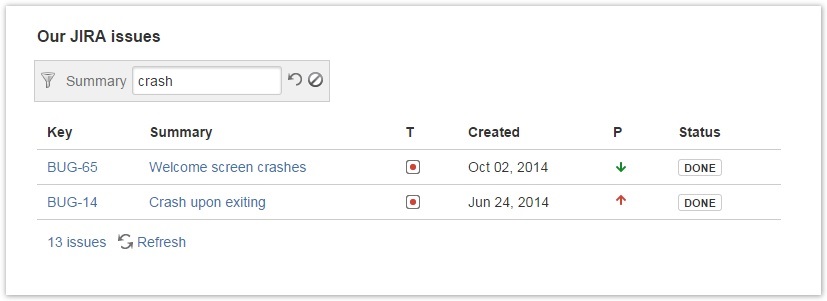
To filter tables produced by the JIRA Issues and Taks Report add-ons, put these macros inside the Table Filter macro.
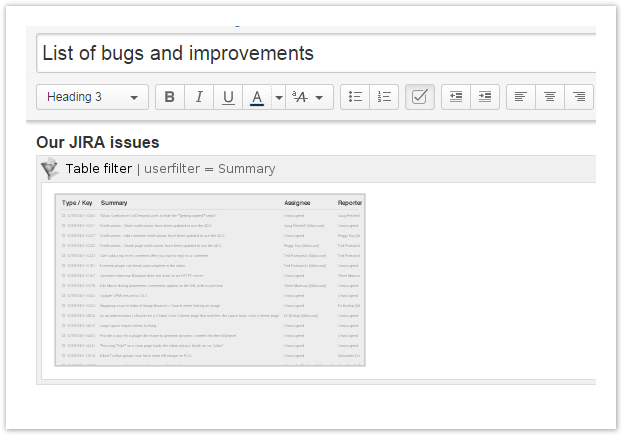
Set filters and use Table Filter as with an normal table.
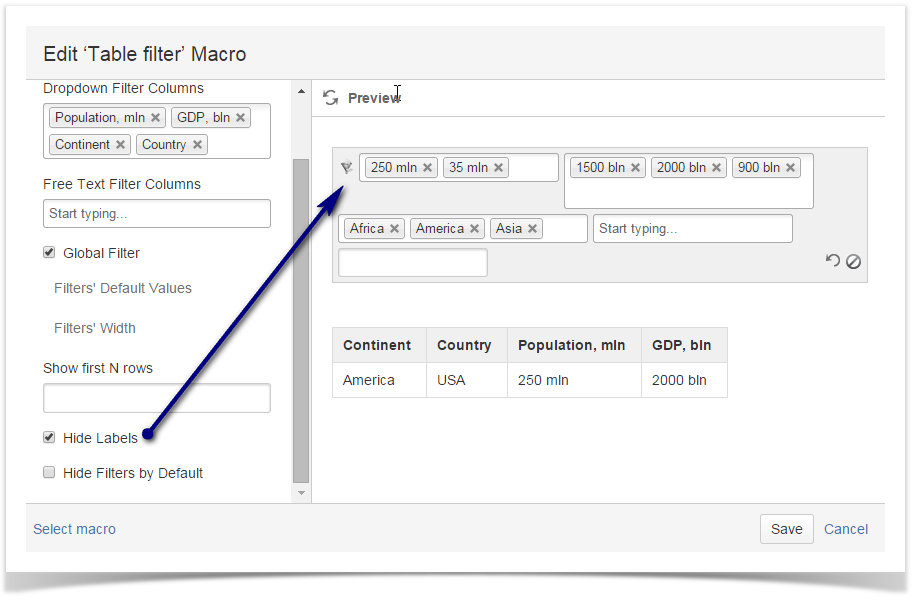
You can remove filter names from the Confluence page by selecting the Hide Labels box.
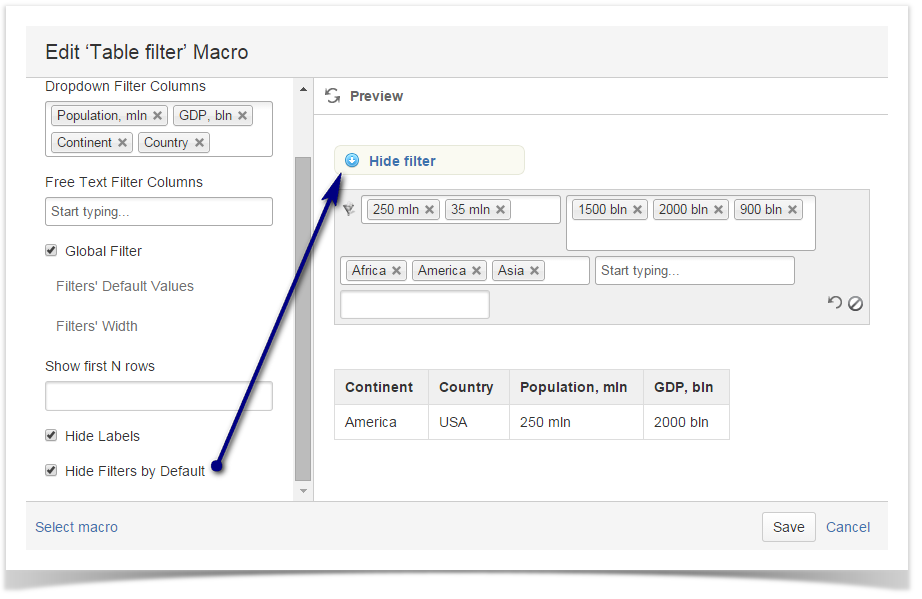
Selecting the Hide Filters by Default box will add the Show/Hide filter switch to the page, so that every user could control the visibility of the filter pane in the View mode.
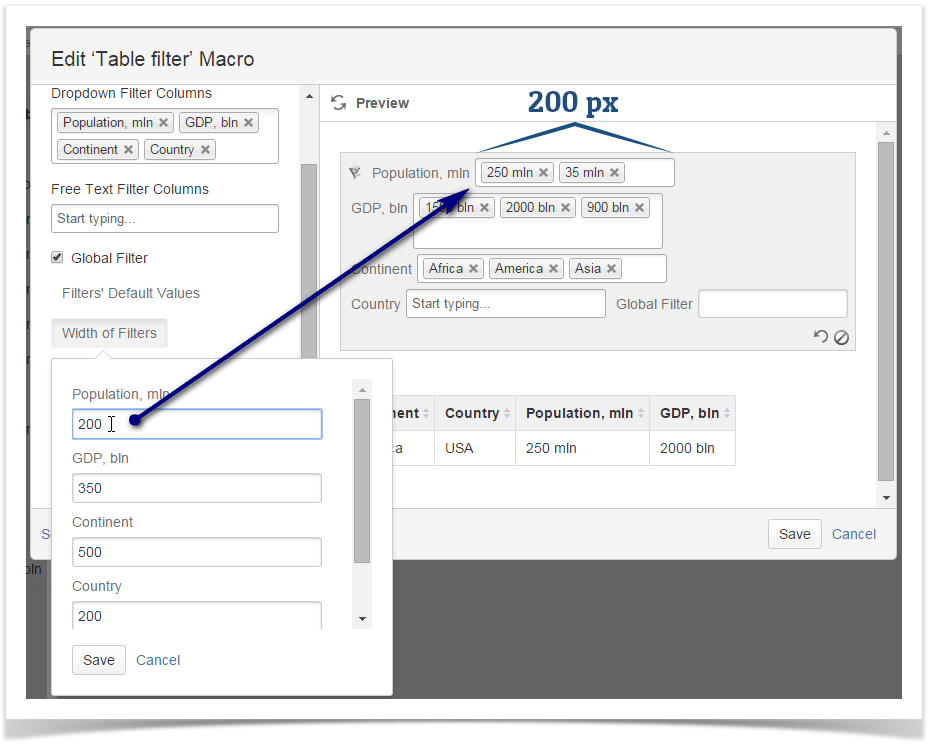
Click the Width of Filters button and enter the appropriate width (in pixels) for the filter fields. You can set width for each field.
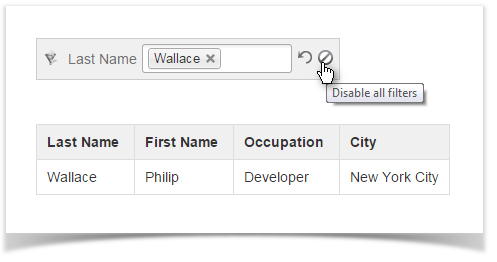
To temporarily disable filters, click the icon. All entered filter values will be restored when you enable filtering.
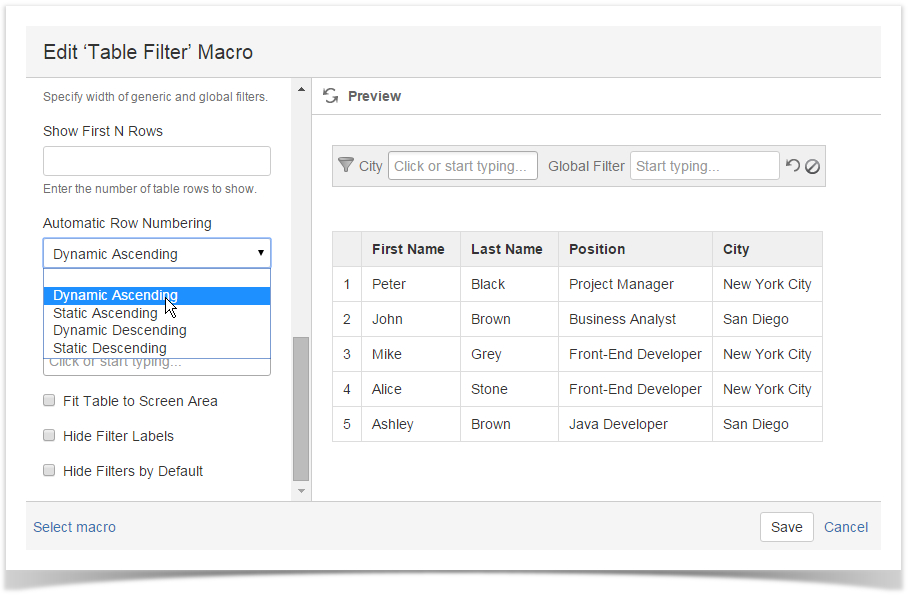
While editing the Table filter macro, select the Automatic row numbering option. You can choose among the following options:
This functionality is not available for Confluence Cloud version. |
While editing the Table filter macro, select the Limit table height option. The add-on will automatically limit height of your table to fit it to your screen.
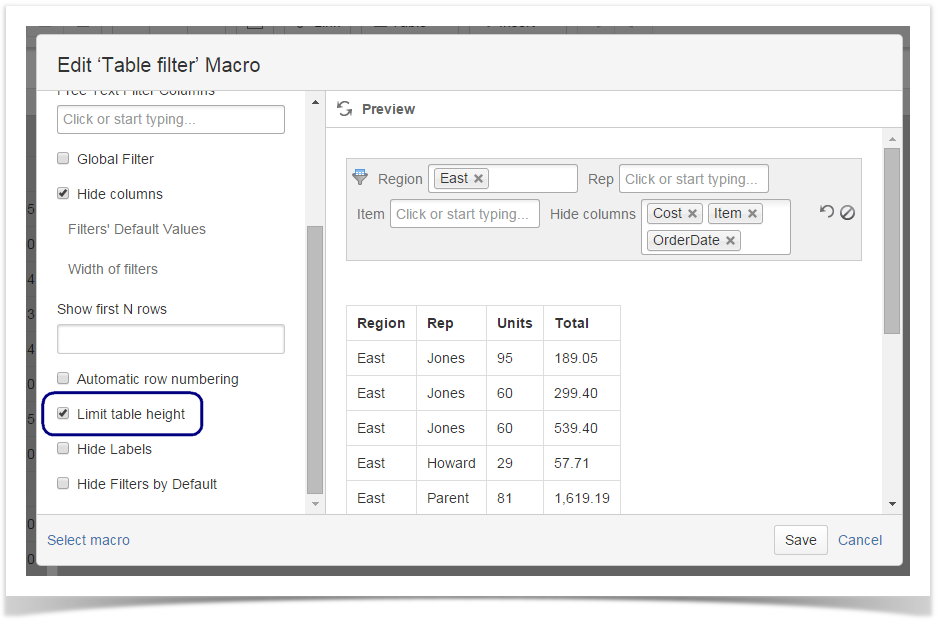
Once you have saved the page, the table will automatically fit the screen area.
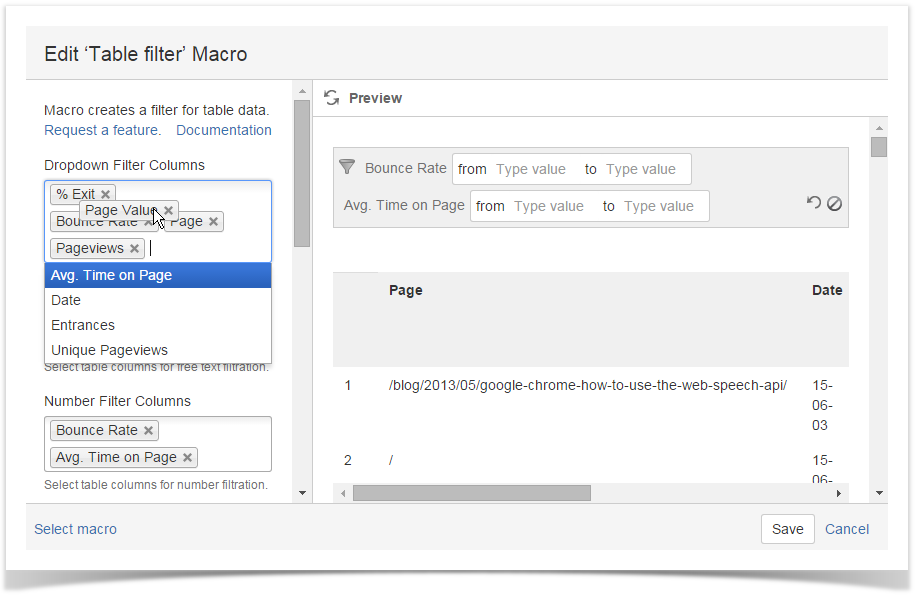
You can change order of filters by dragging the column label to the appropriate place in all filter boxes.
This functionality is not available for Confluence Cloud version. |