Download PDF
Download page Table Spreadsheet.
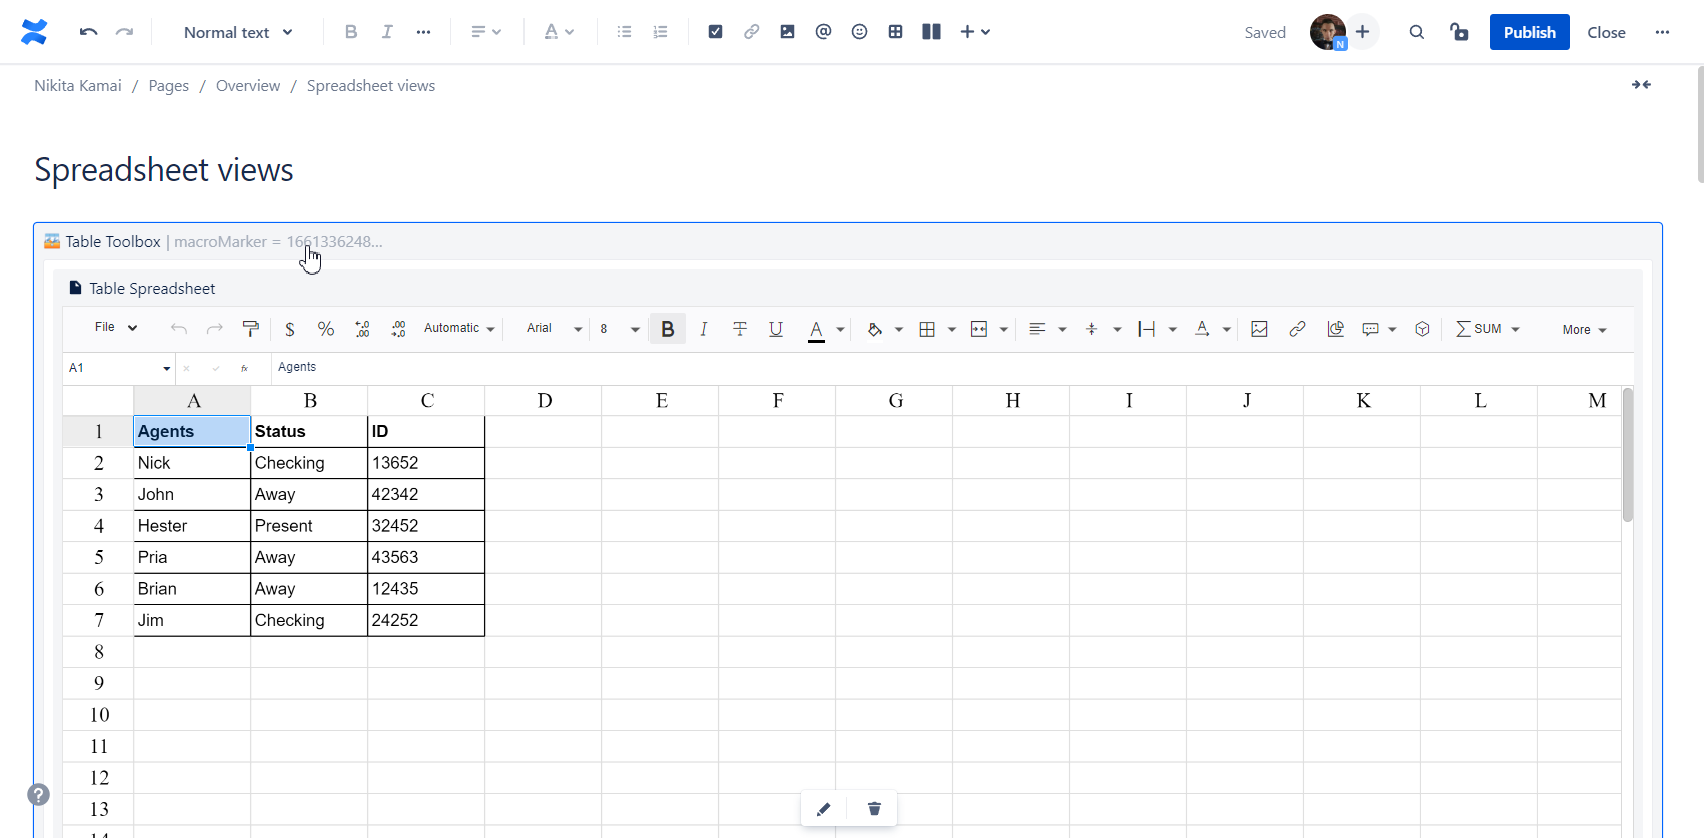
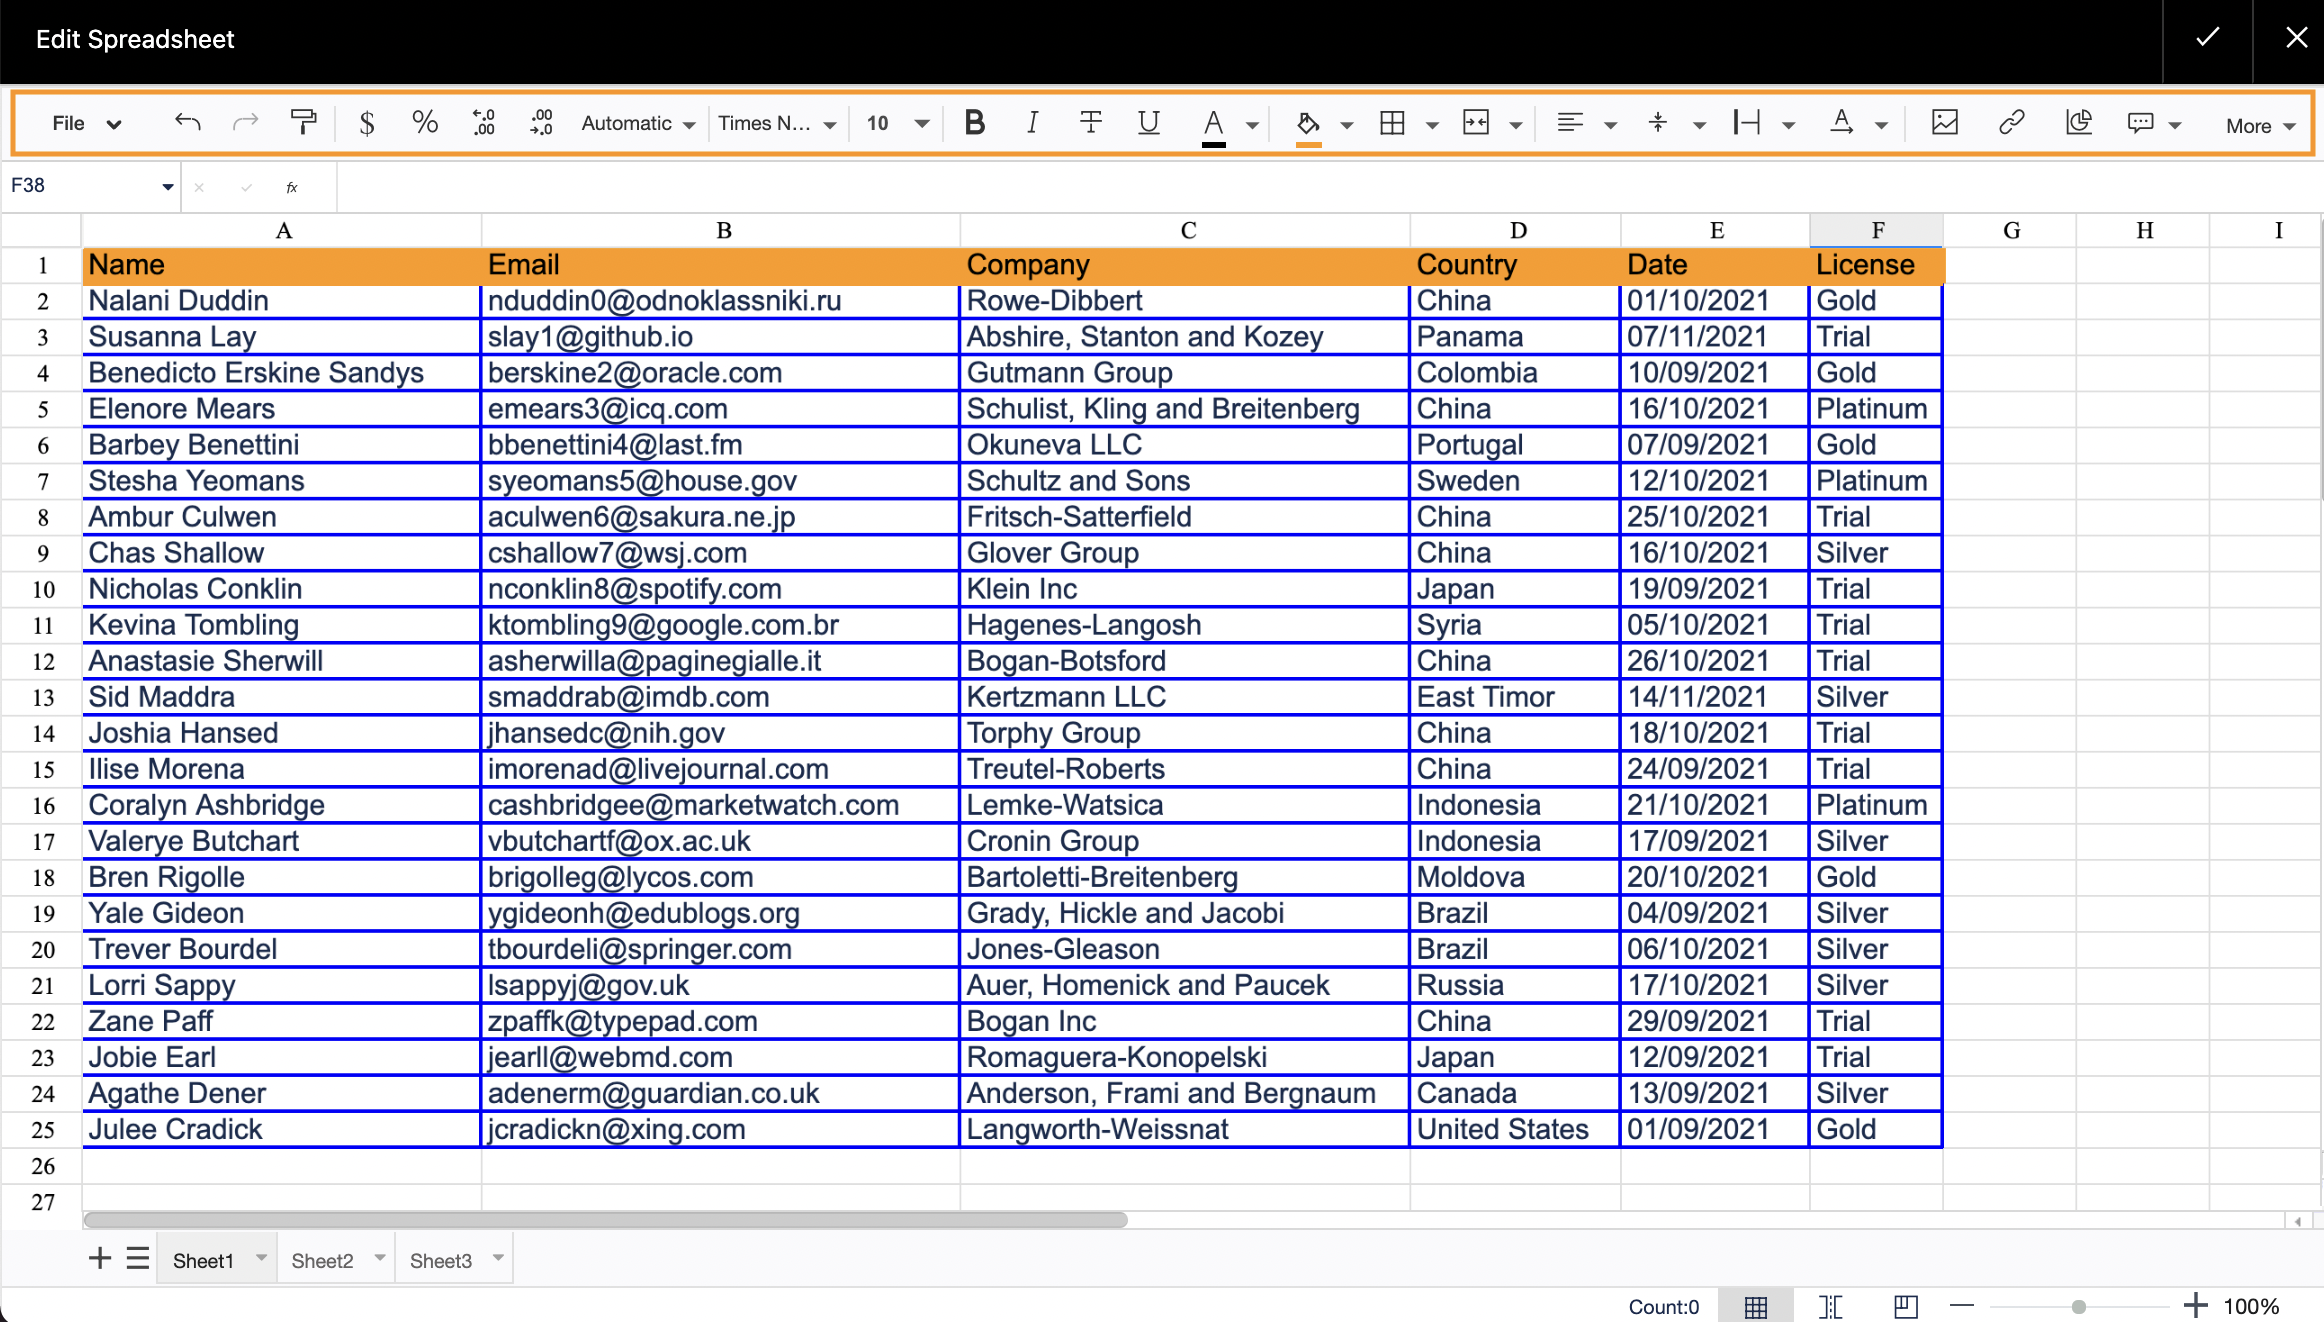
Table Spreadsheet
The Table Spreadsheet macro allows you to add an Excel-like spreadsheet. You can work with it both in the page view and page edit mode.
If you don't want to create your table from scratch or import it from other spreadsheets but need to turn your existing table (manually created or macro generated) in a spreadsheet, please use the Spreadsheet from Table macro.
Adding the Table Spreadsheet macro
To add macros in view mode:
Click the More actions (⋯) menu in the top-right corner of the page.
Go to Apps → Use Table Filter App Macros.
In edit mode, macros are added just like any other Confluence macros:
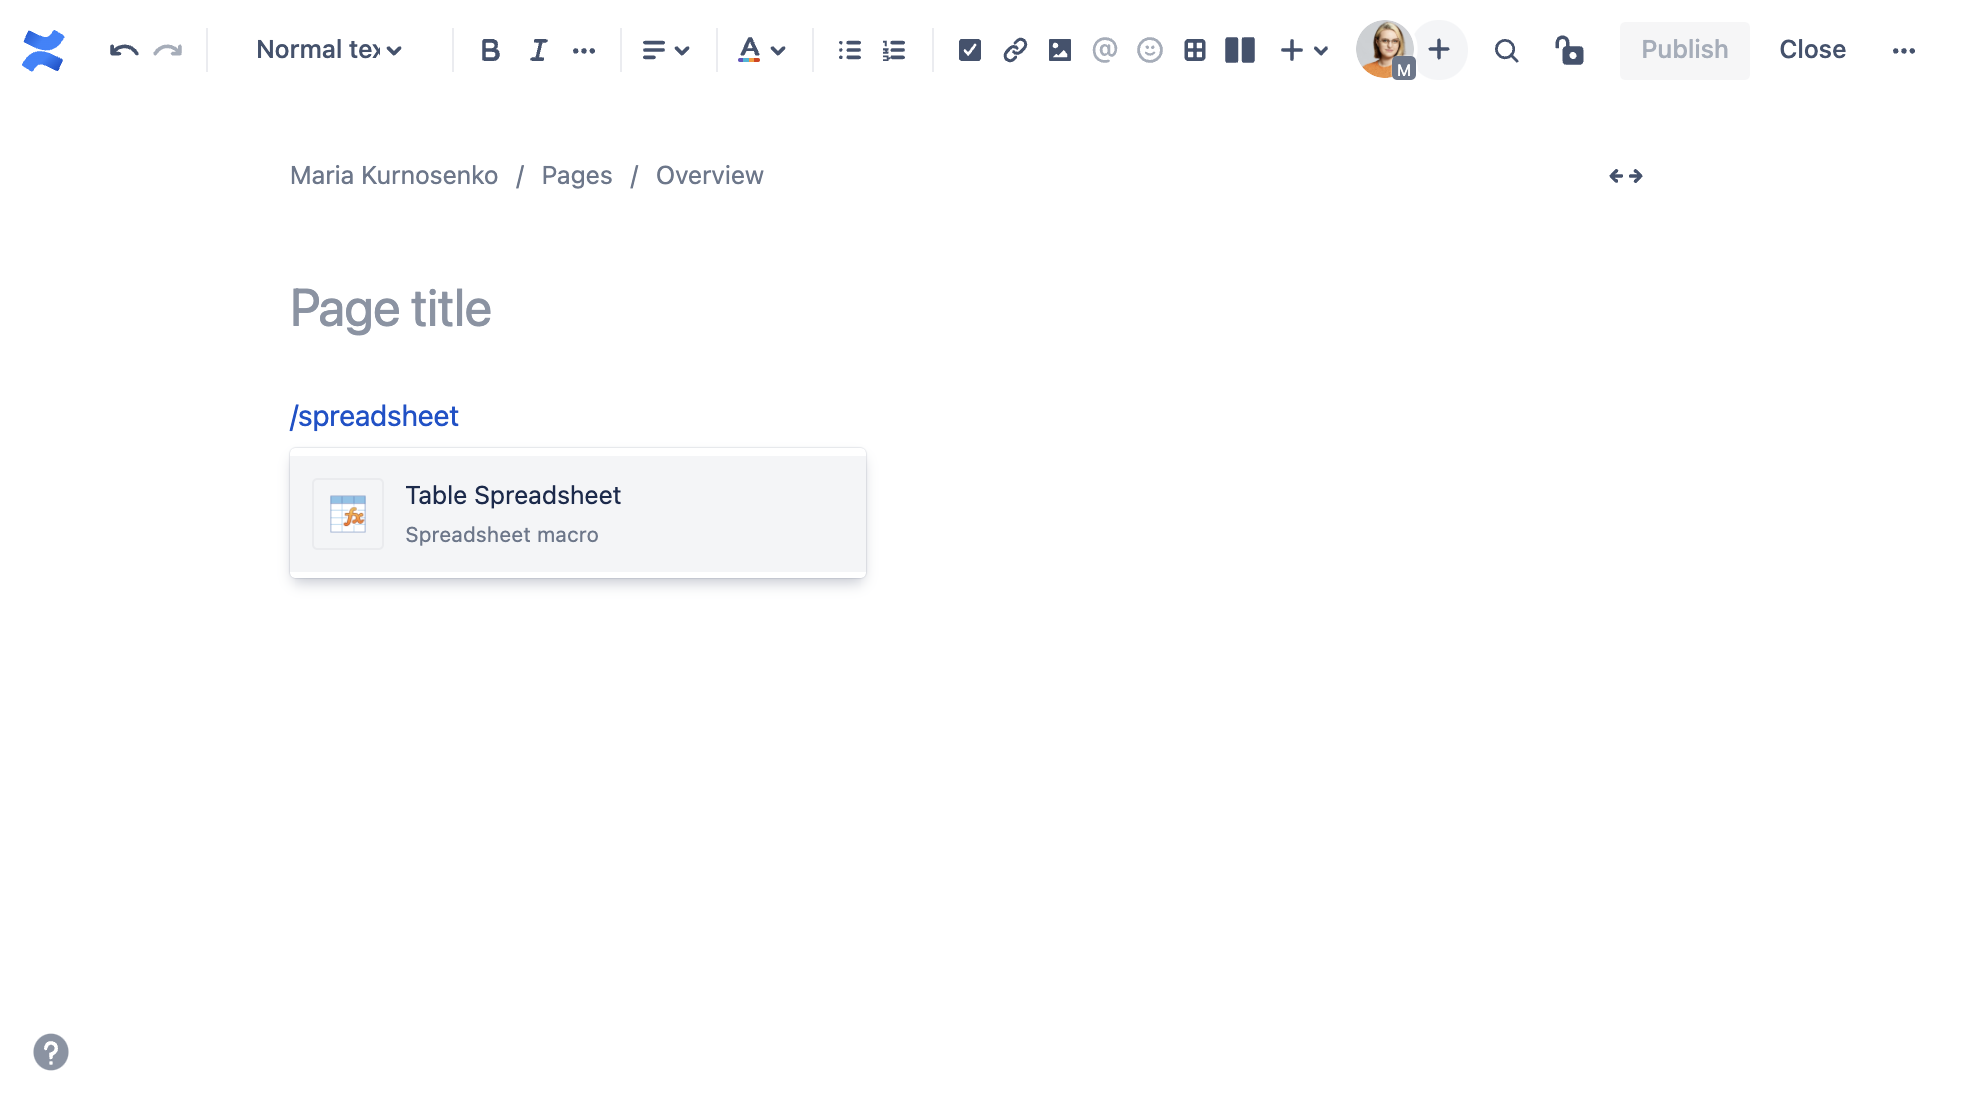
Start entering /Table Spreadsheet and select the macro.
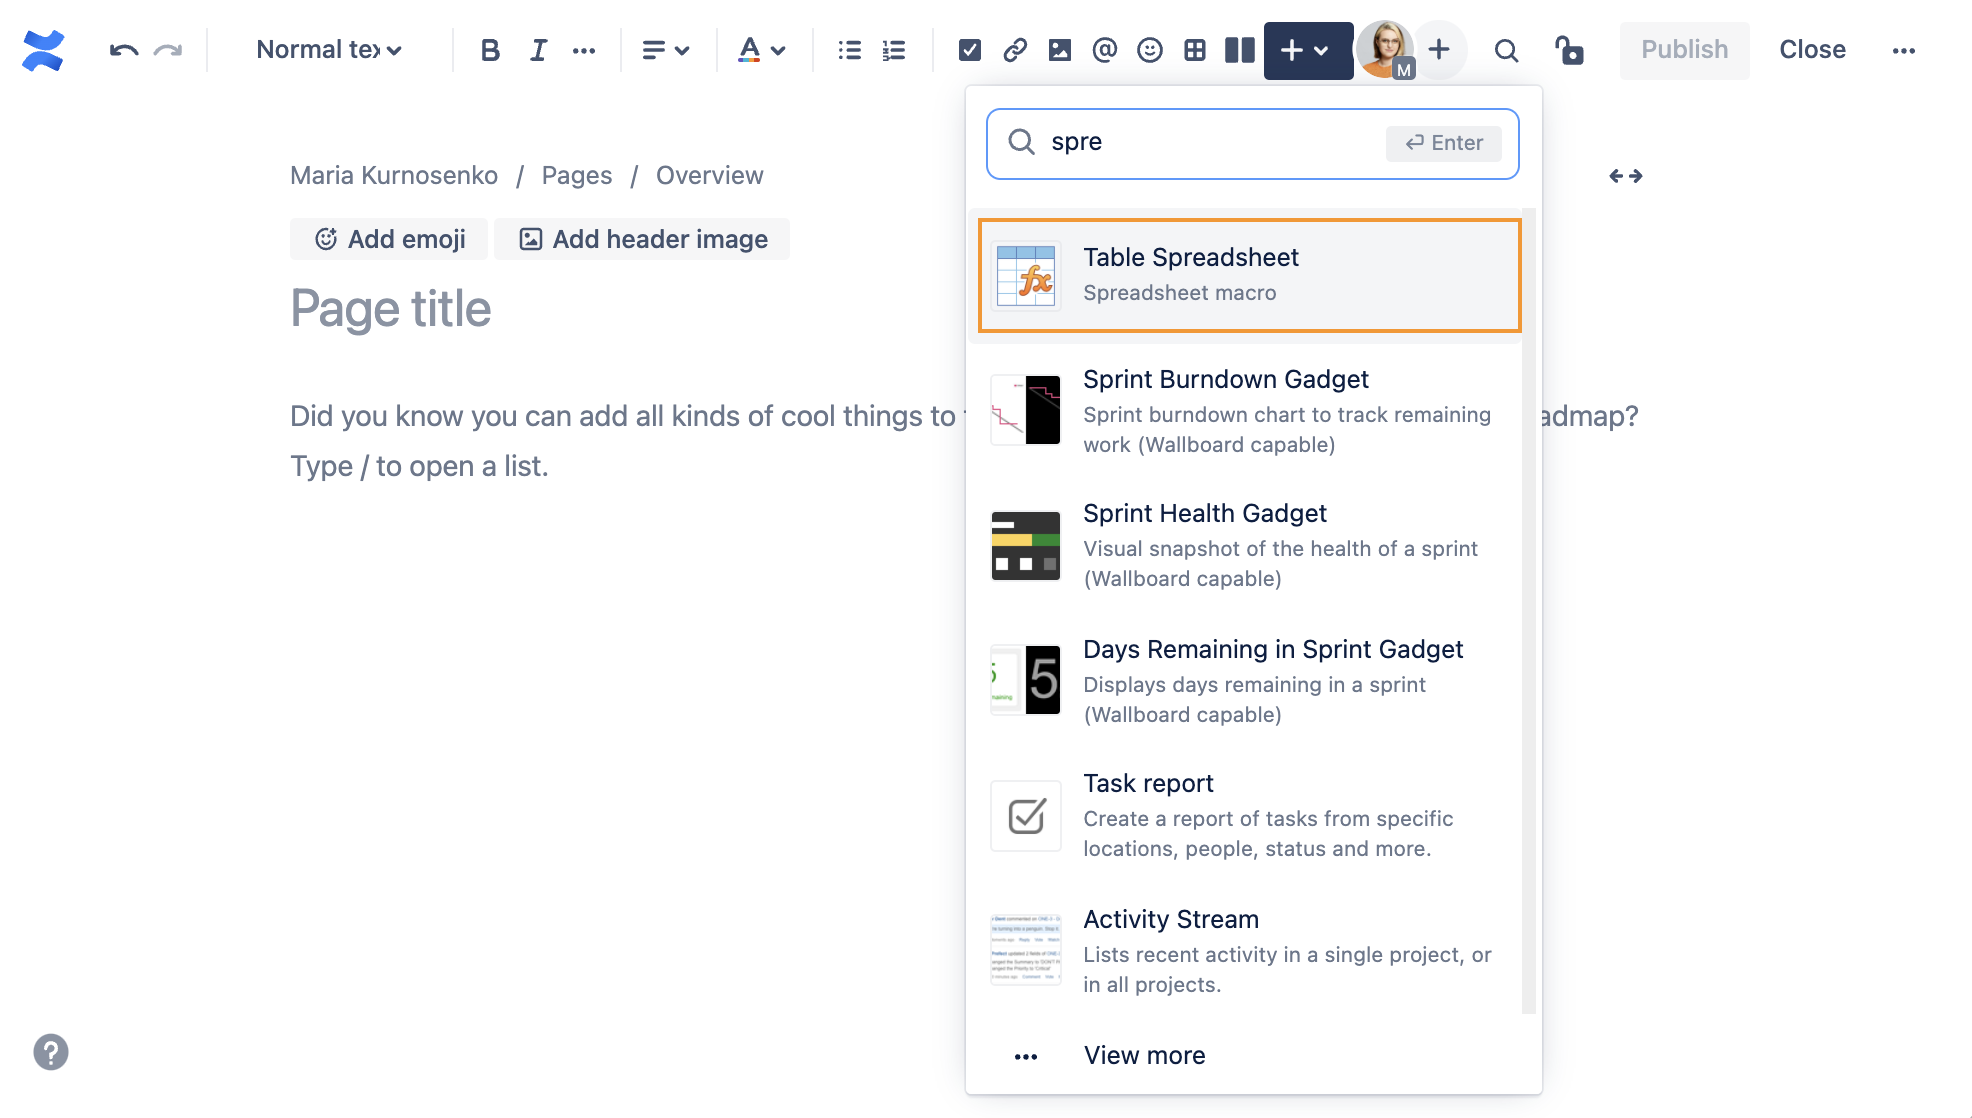
On the editor pane, click Insert -> View more, find the macro and insert it on the page.
The page stores your spreadsheet as an attachment. You can find more information about the attachment or download the file in the page settings.
The last 10 versions of a spreadsheet are saved by default. You can retain all spreadsheet revisions.
Main functions of the Table Spreadsheet macro
- Cell format
- Text settings (font, size, type, color)
- Cell color
- Border style and color
- Alignment and text placement
- Merging cells
- Freezing rows
- Automatic functions
- Multiple sheets
- Export to CSV
- Export to XLSX
- Import of Excel (xlsx, csv, ods formats)
The following info regarding the import formats should be noted:
- xlsx format partially supports formatting;
- charts, pivot tables and conditional formatting are not supported to import from Excel currently.
Utilize the benefits of Excel-like spreadsheets right on your Confluence pages. Try spreadsheets for Confluence now!
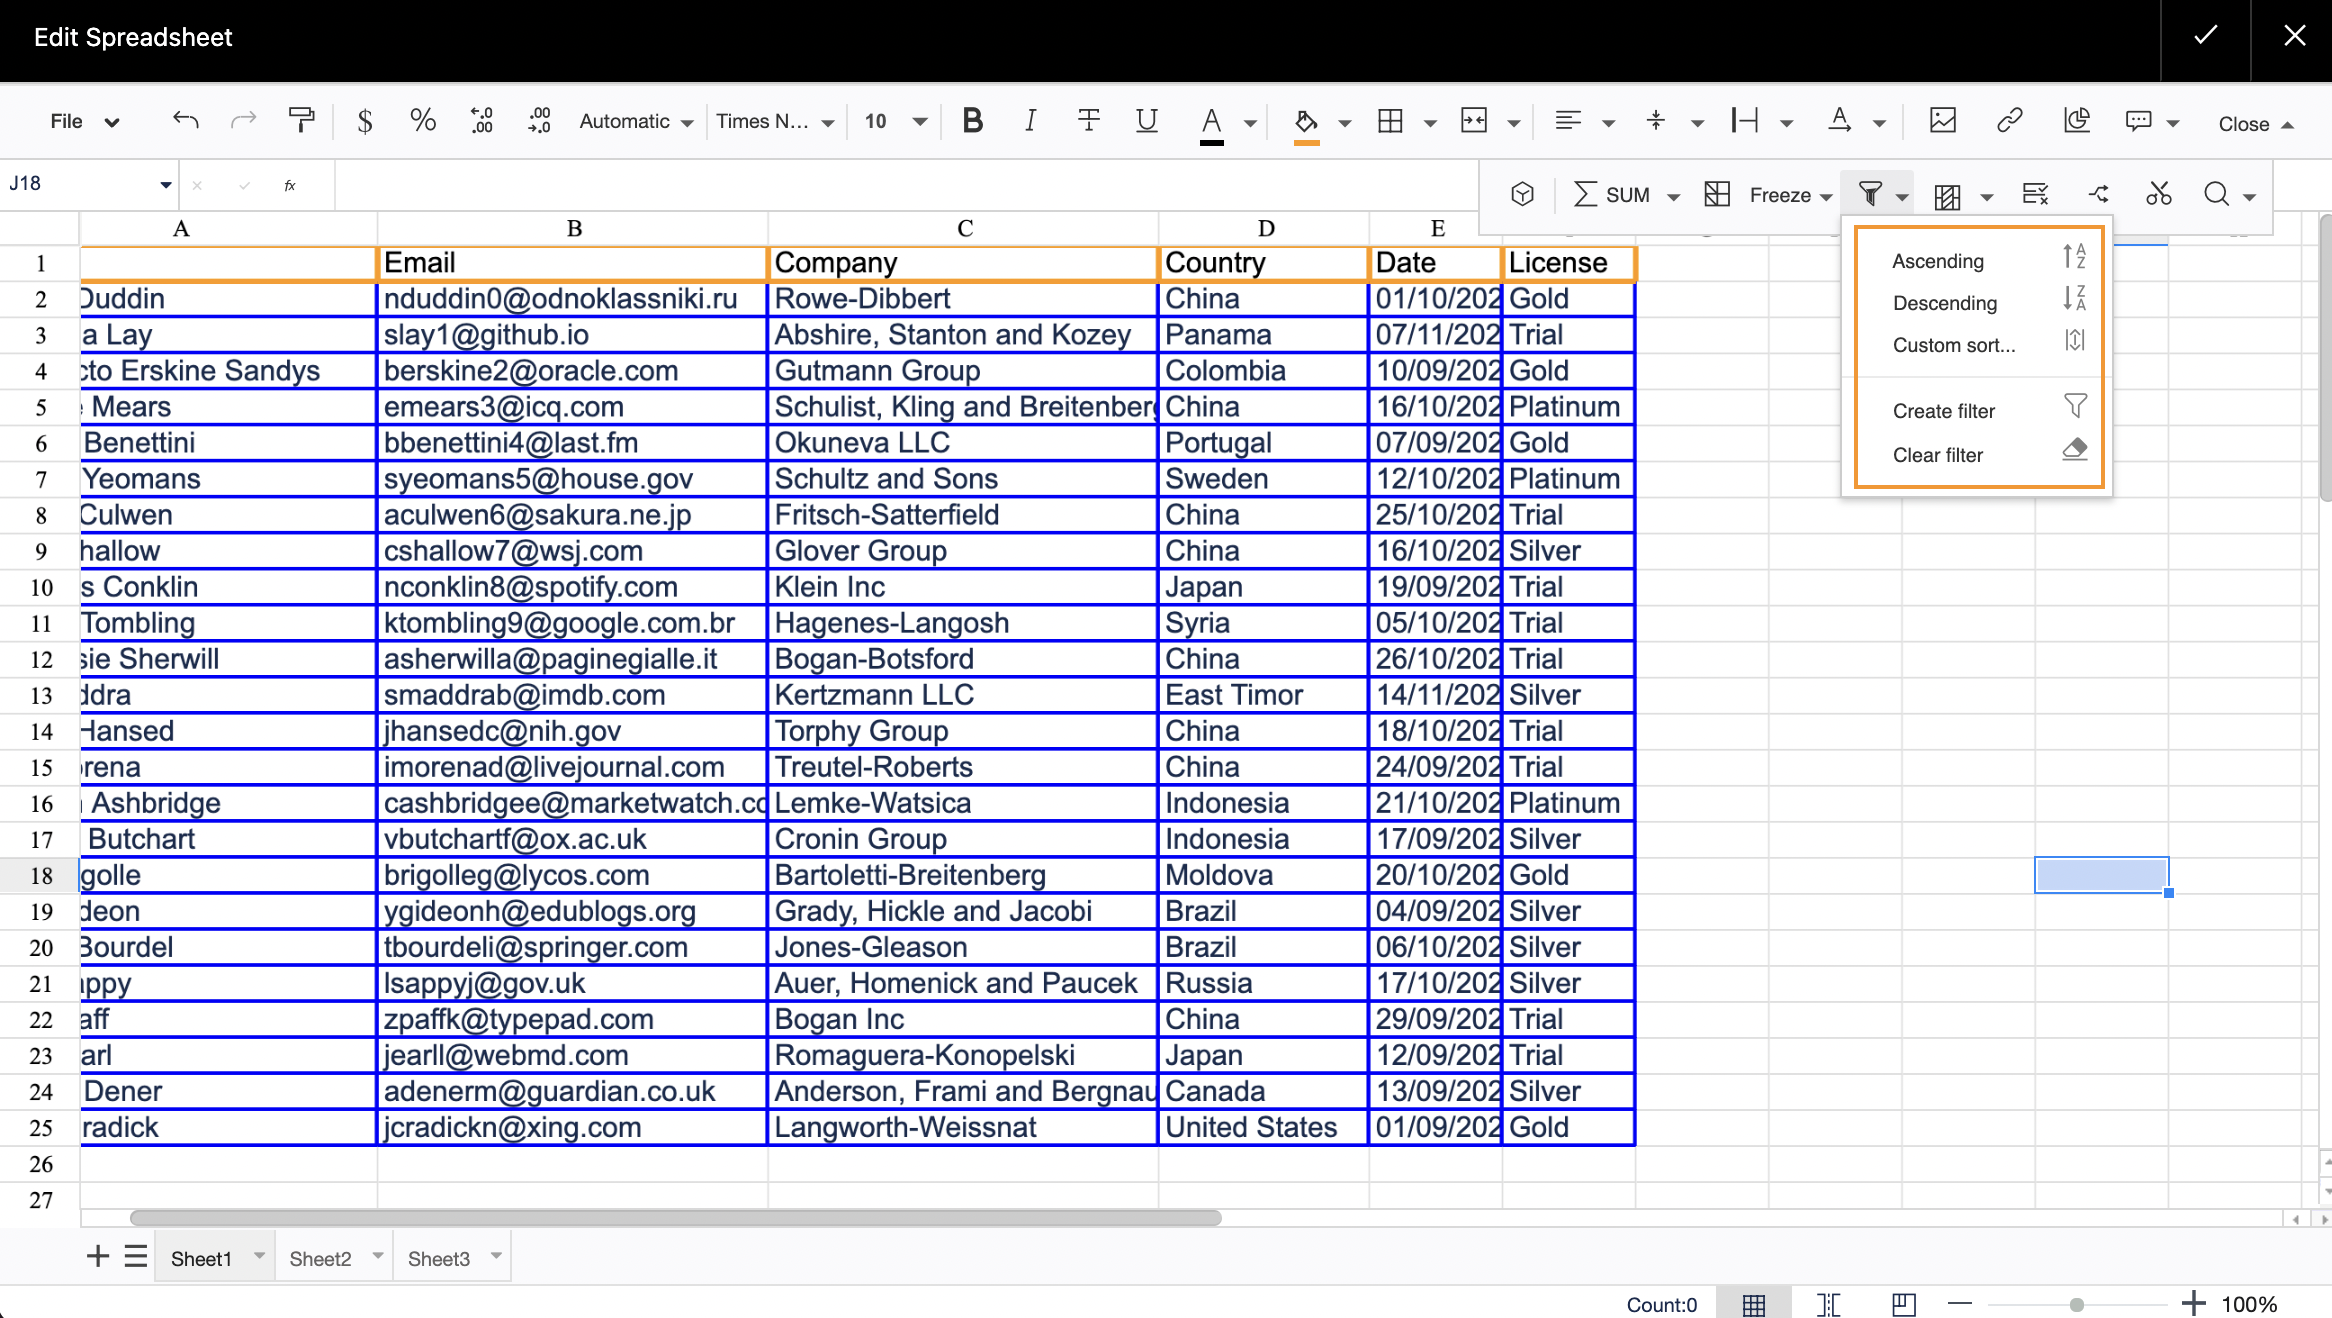
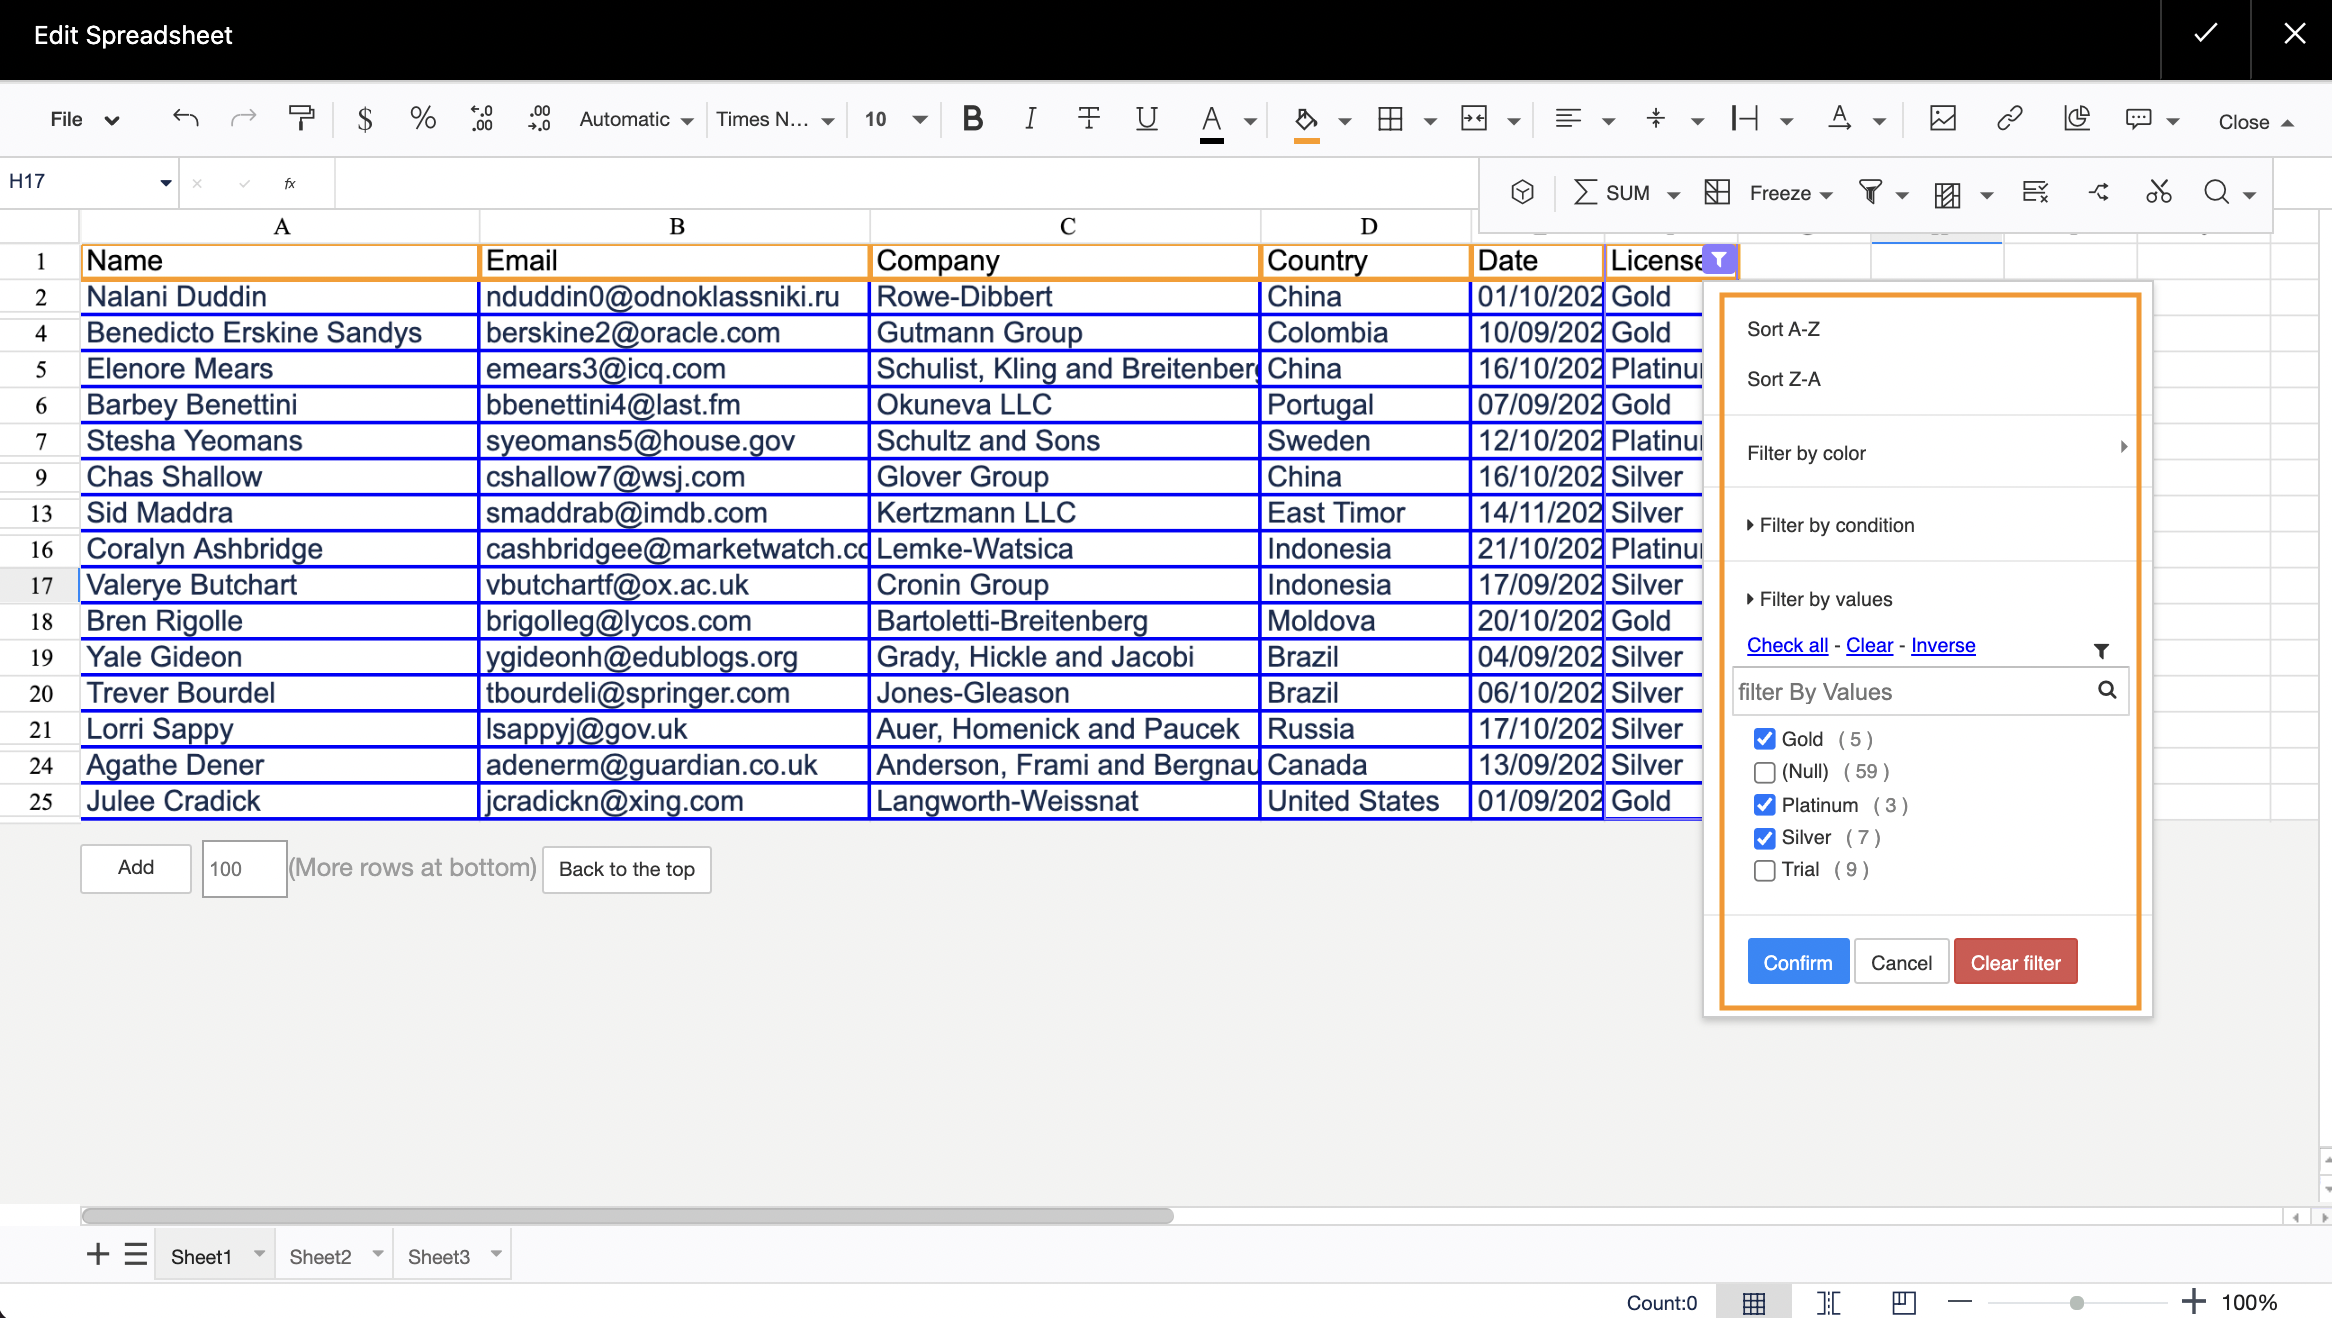
Filtering the spreadsheet
- Click the funnel icon on the editor pane
- To sort the spreadsheet, choose the sorting type
- To filter the spreadsheet, select a column and click Create filter
- Choose a condition to filter the column by
- Confirm the settings or clear the filter, if no longer needed
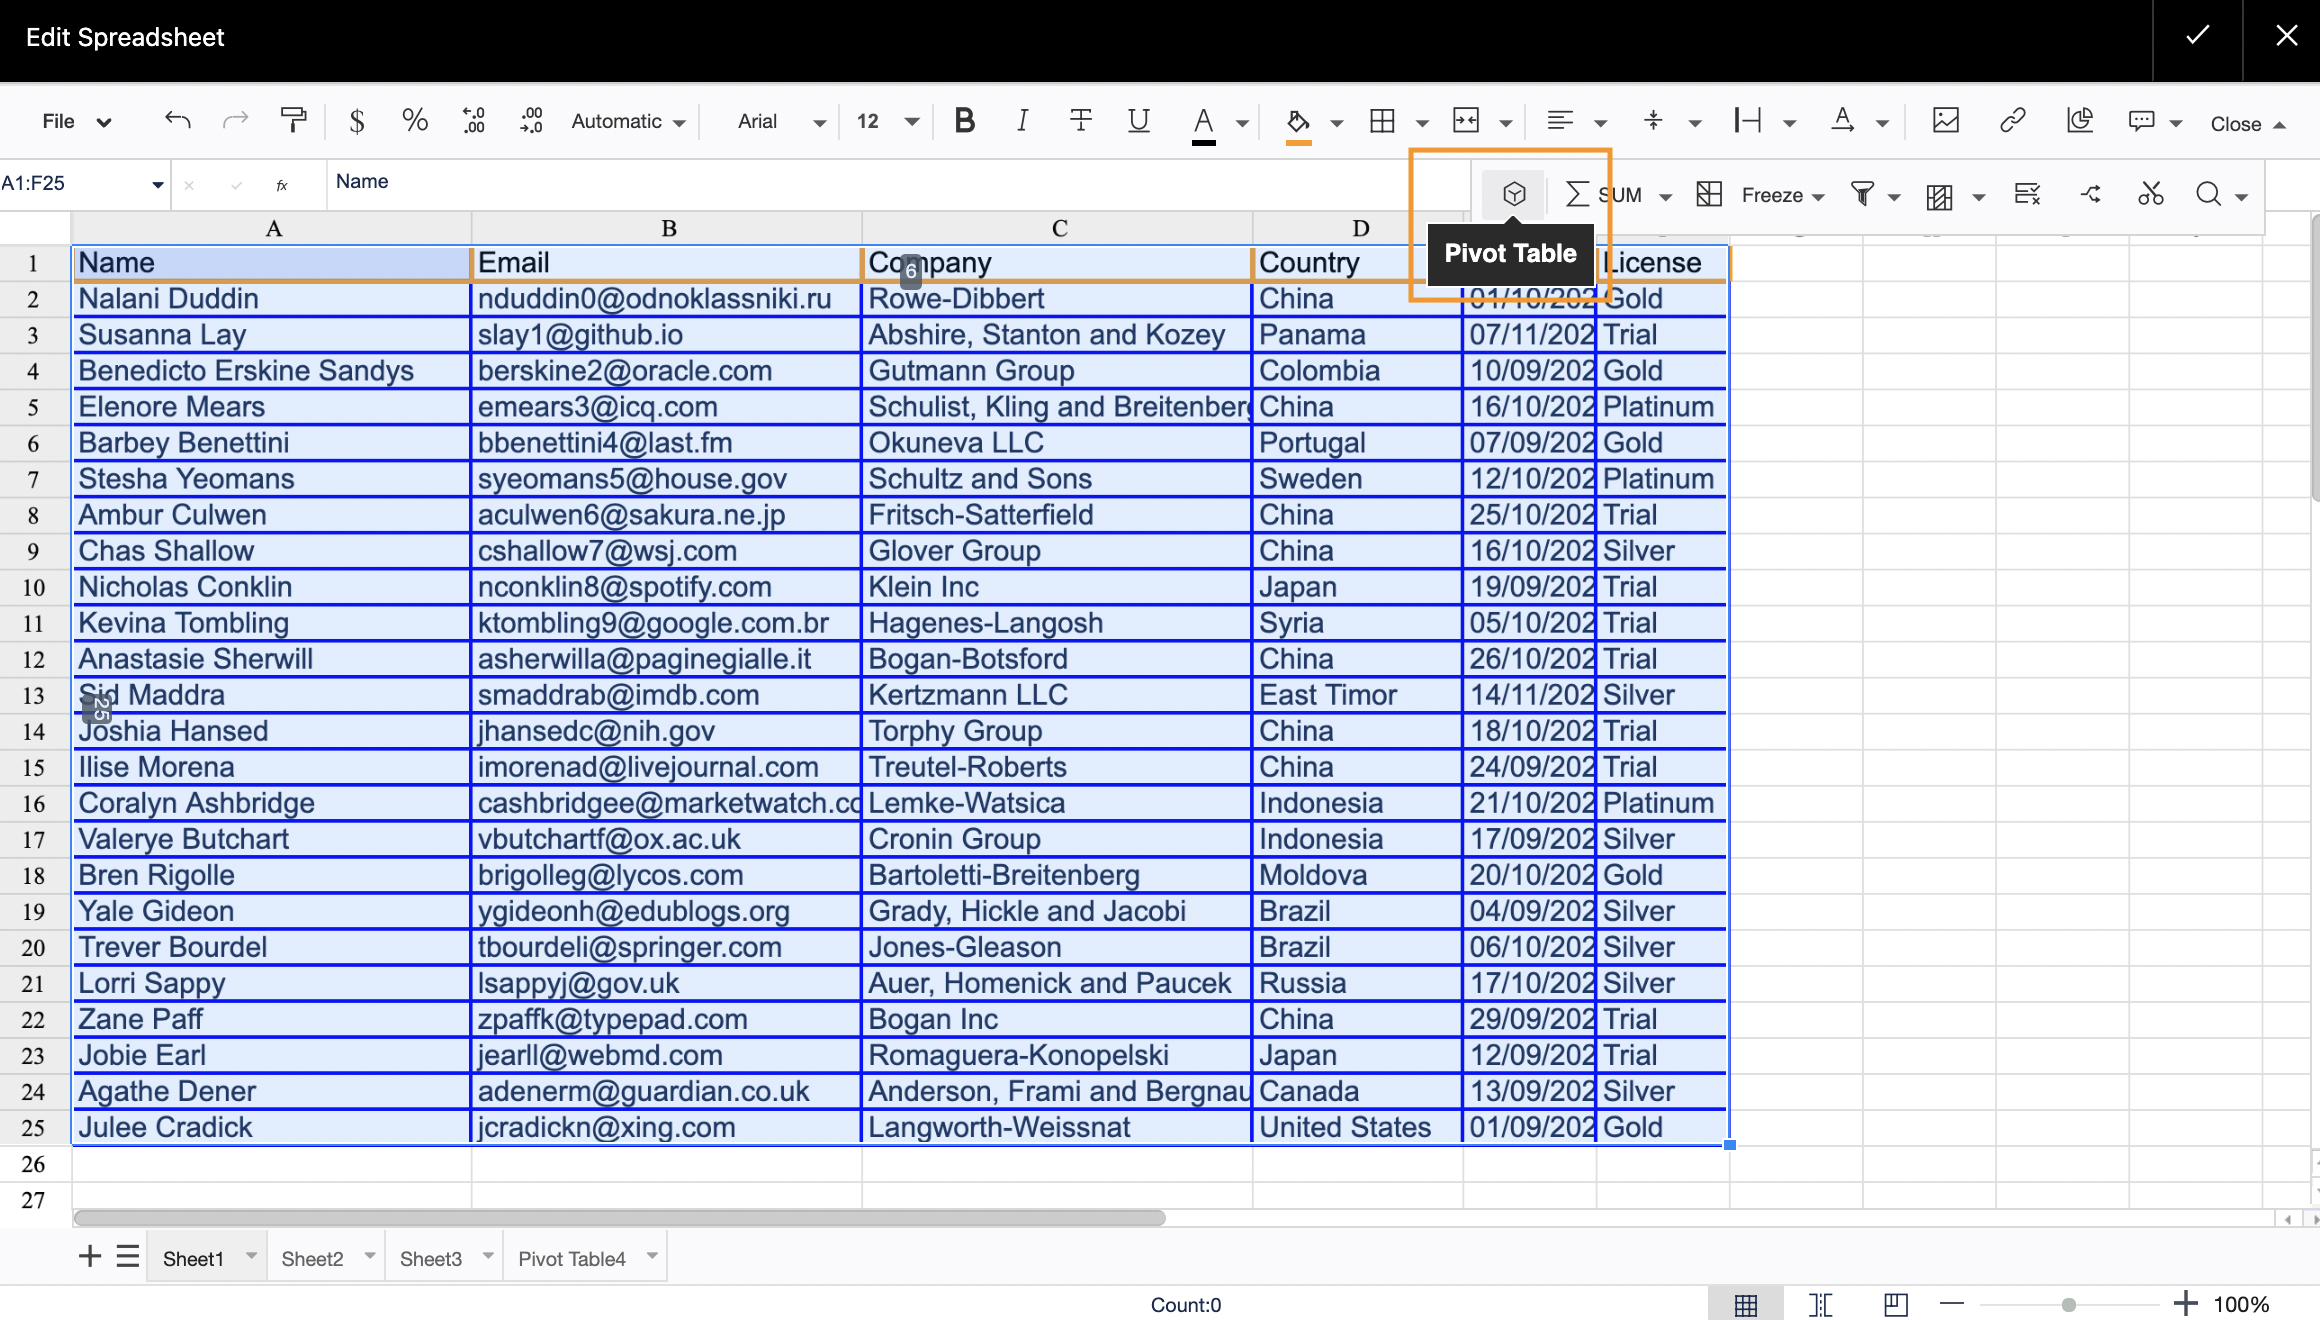
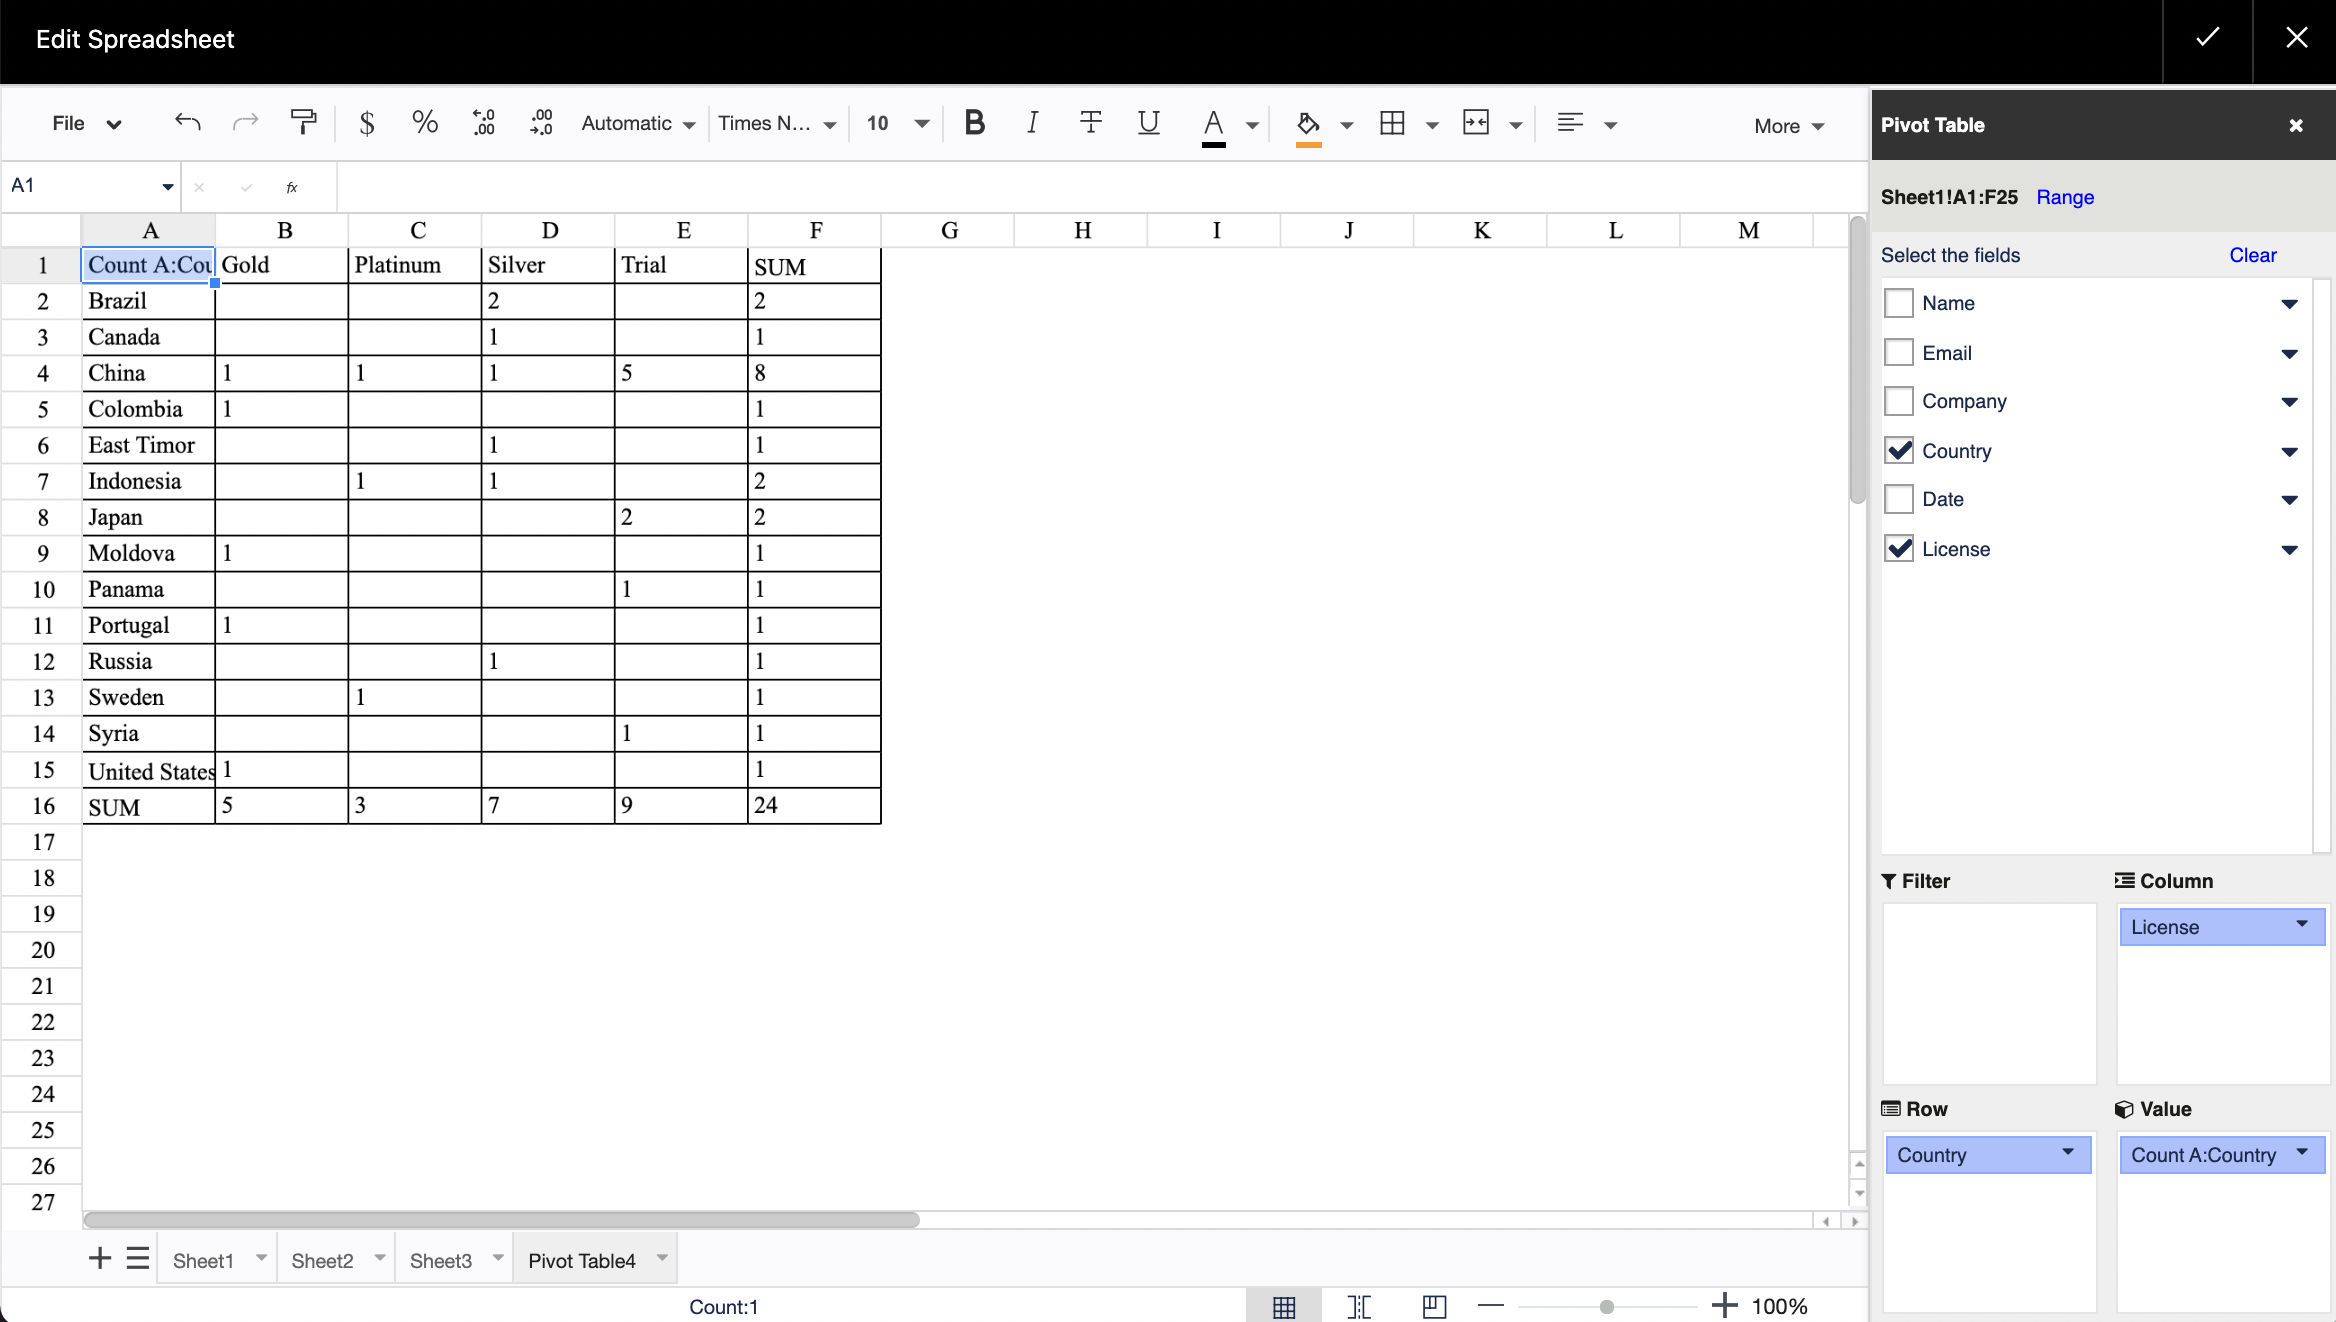
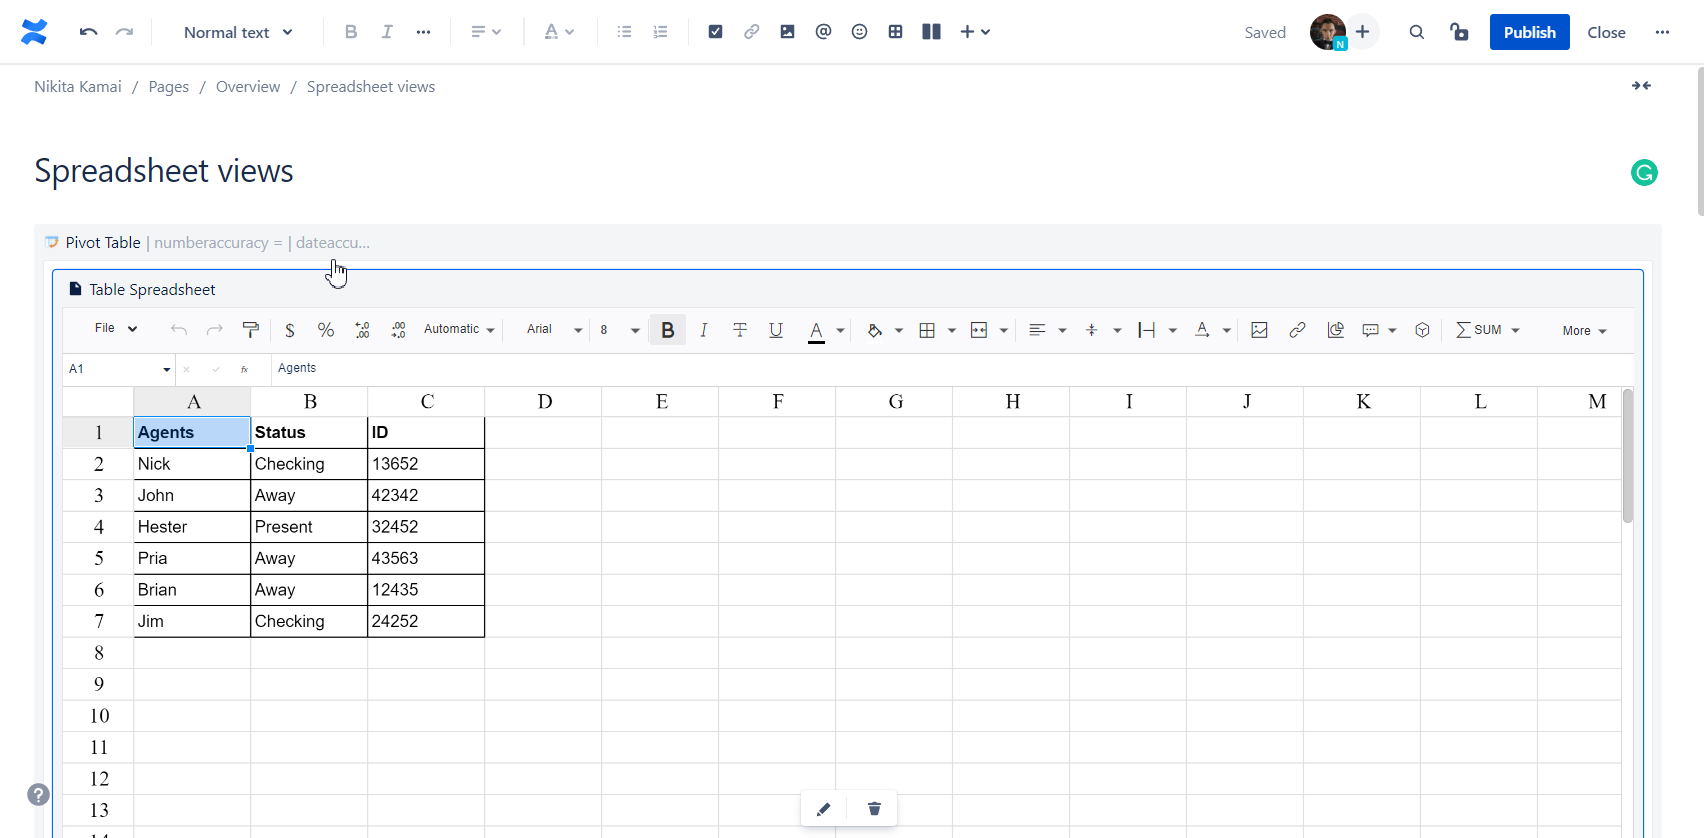
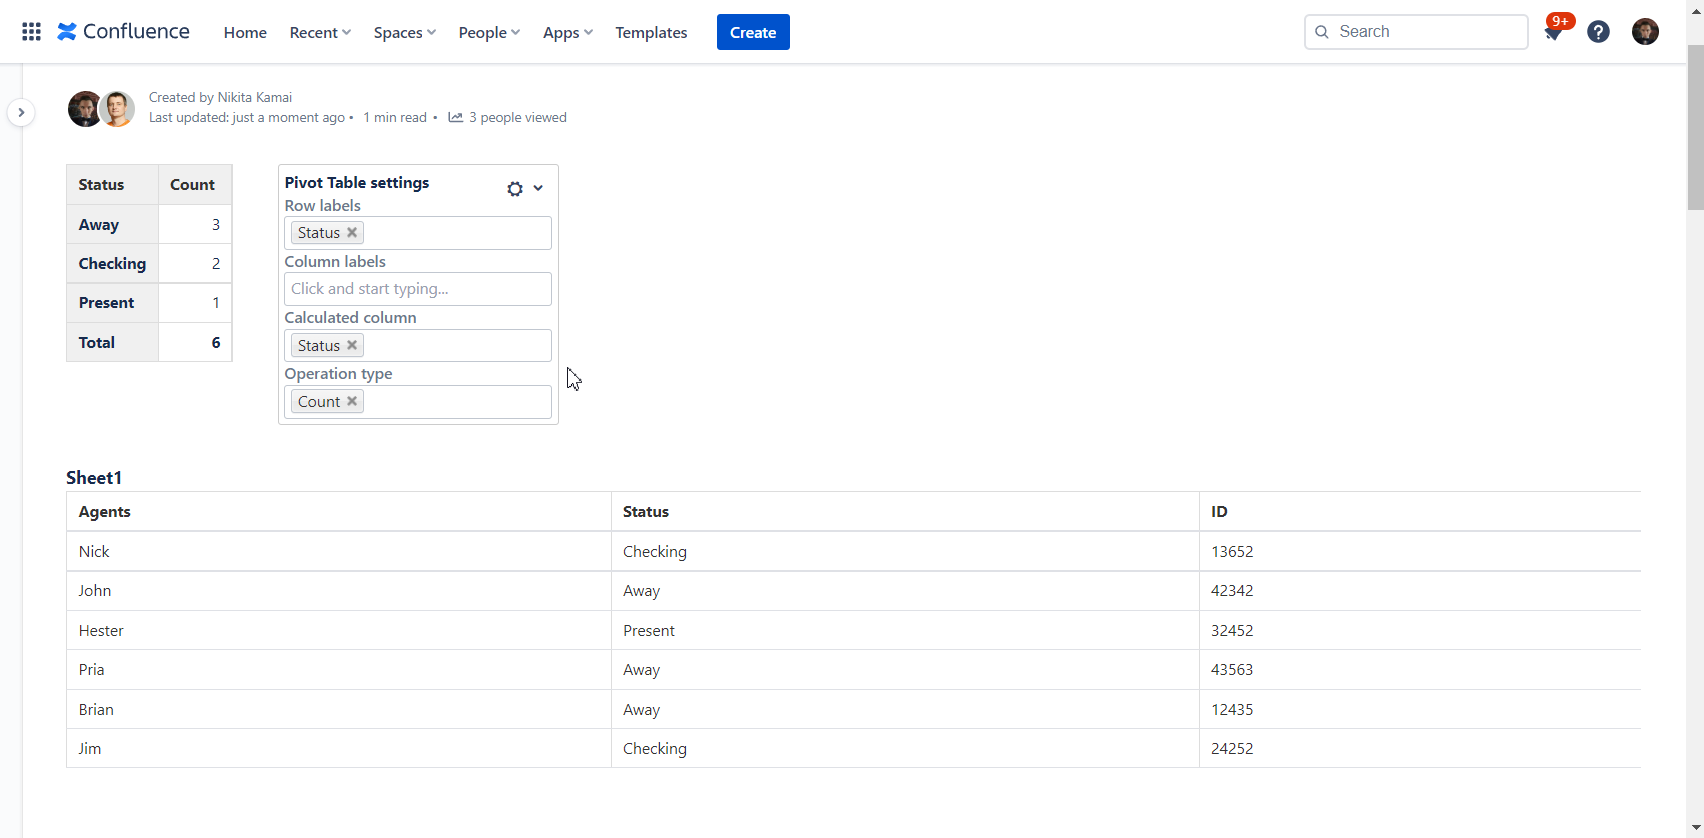
Adding a pivot table
- Select the pivot table macro on the editor pane
- On a new sheet, choose the settings
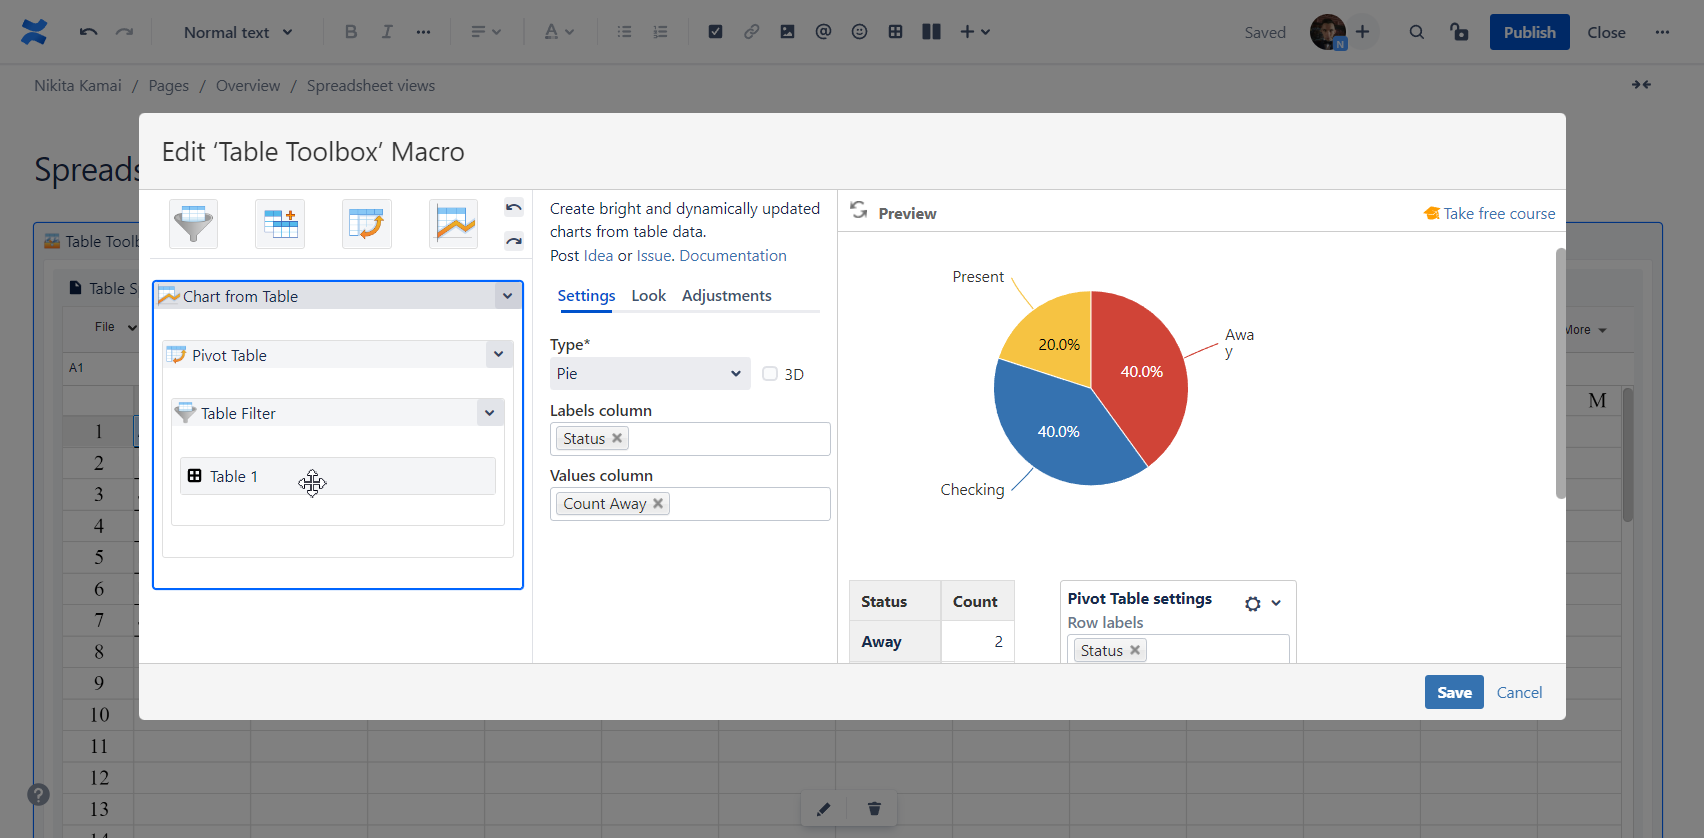
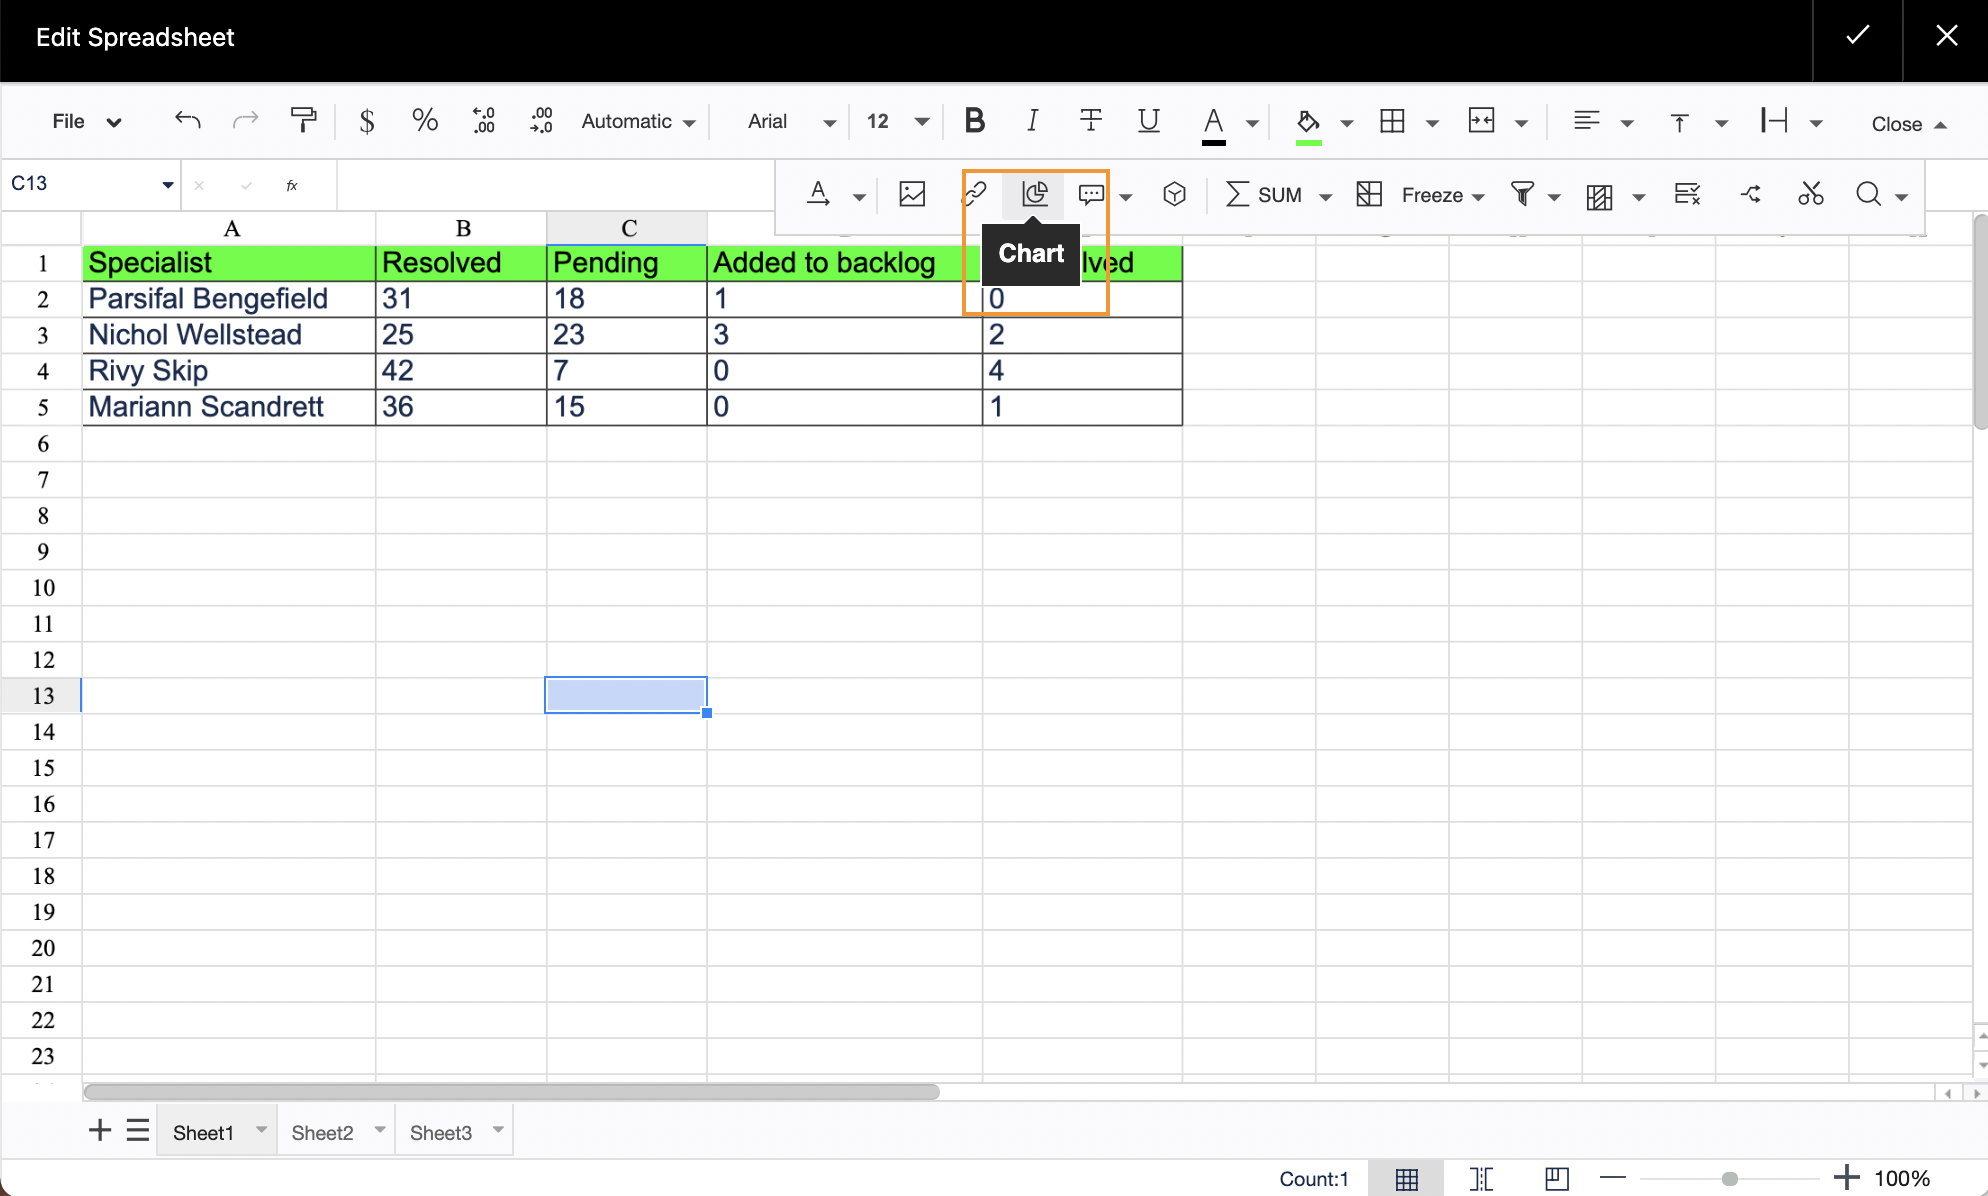
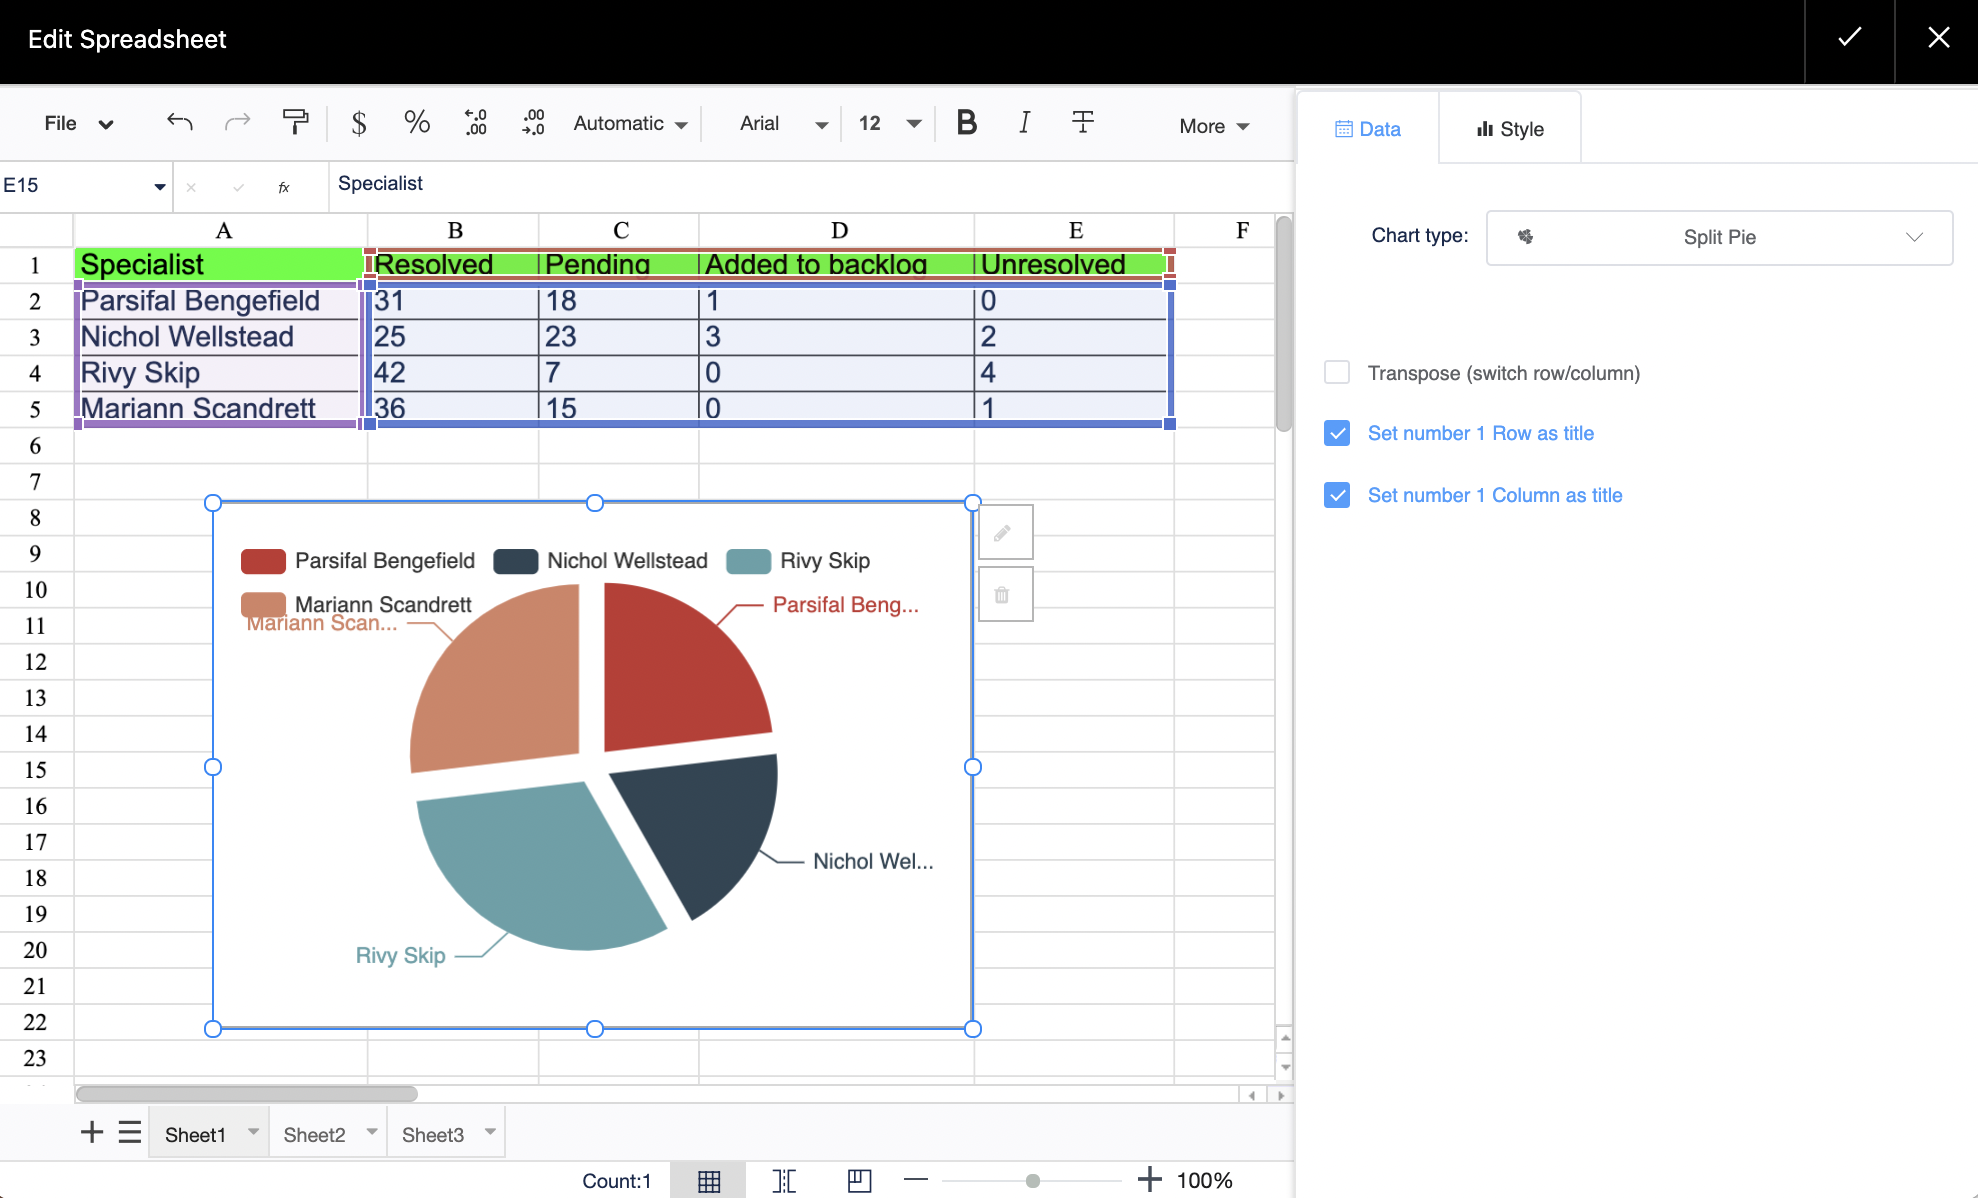
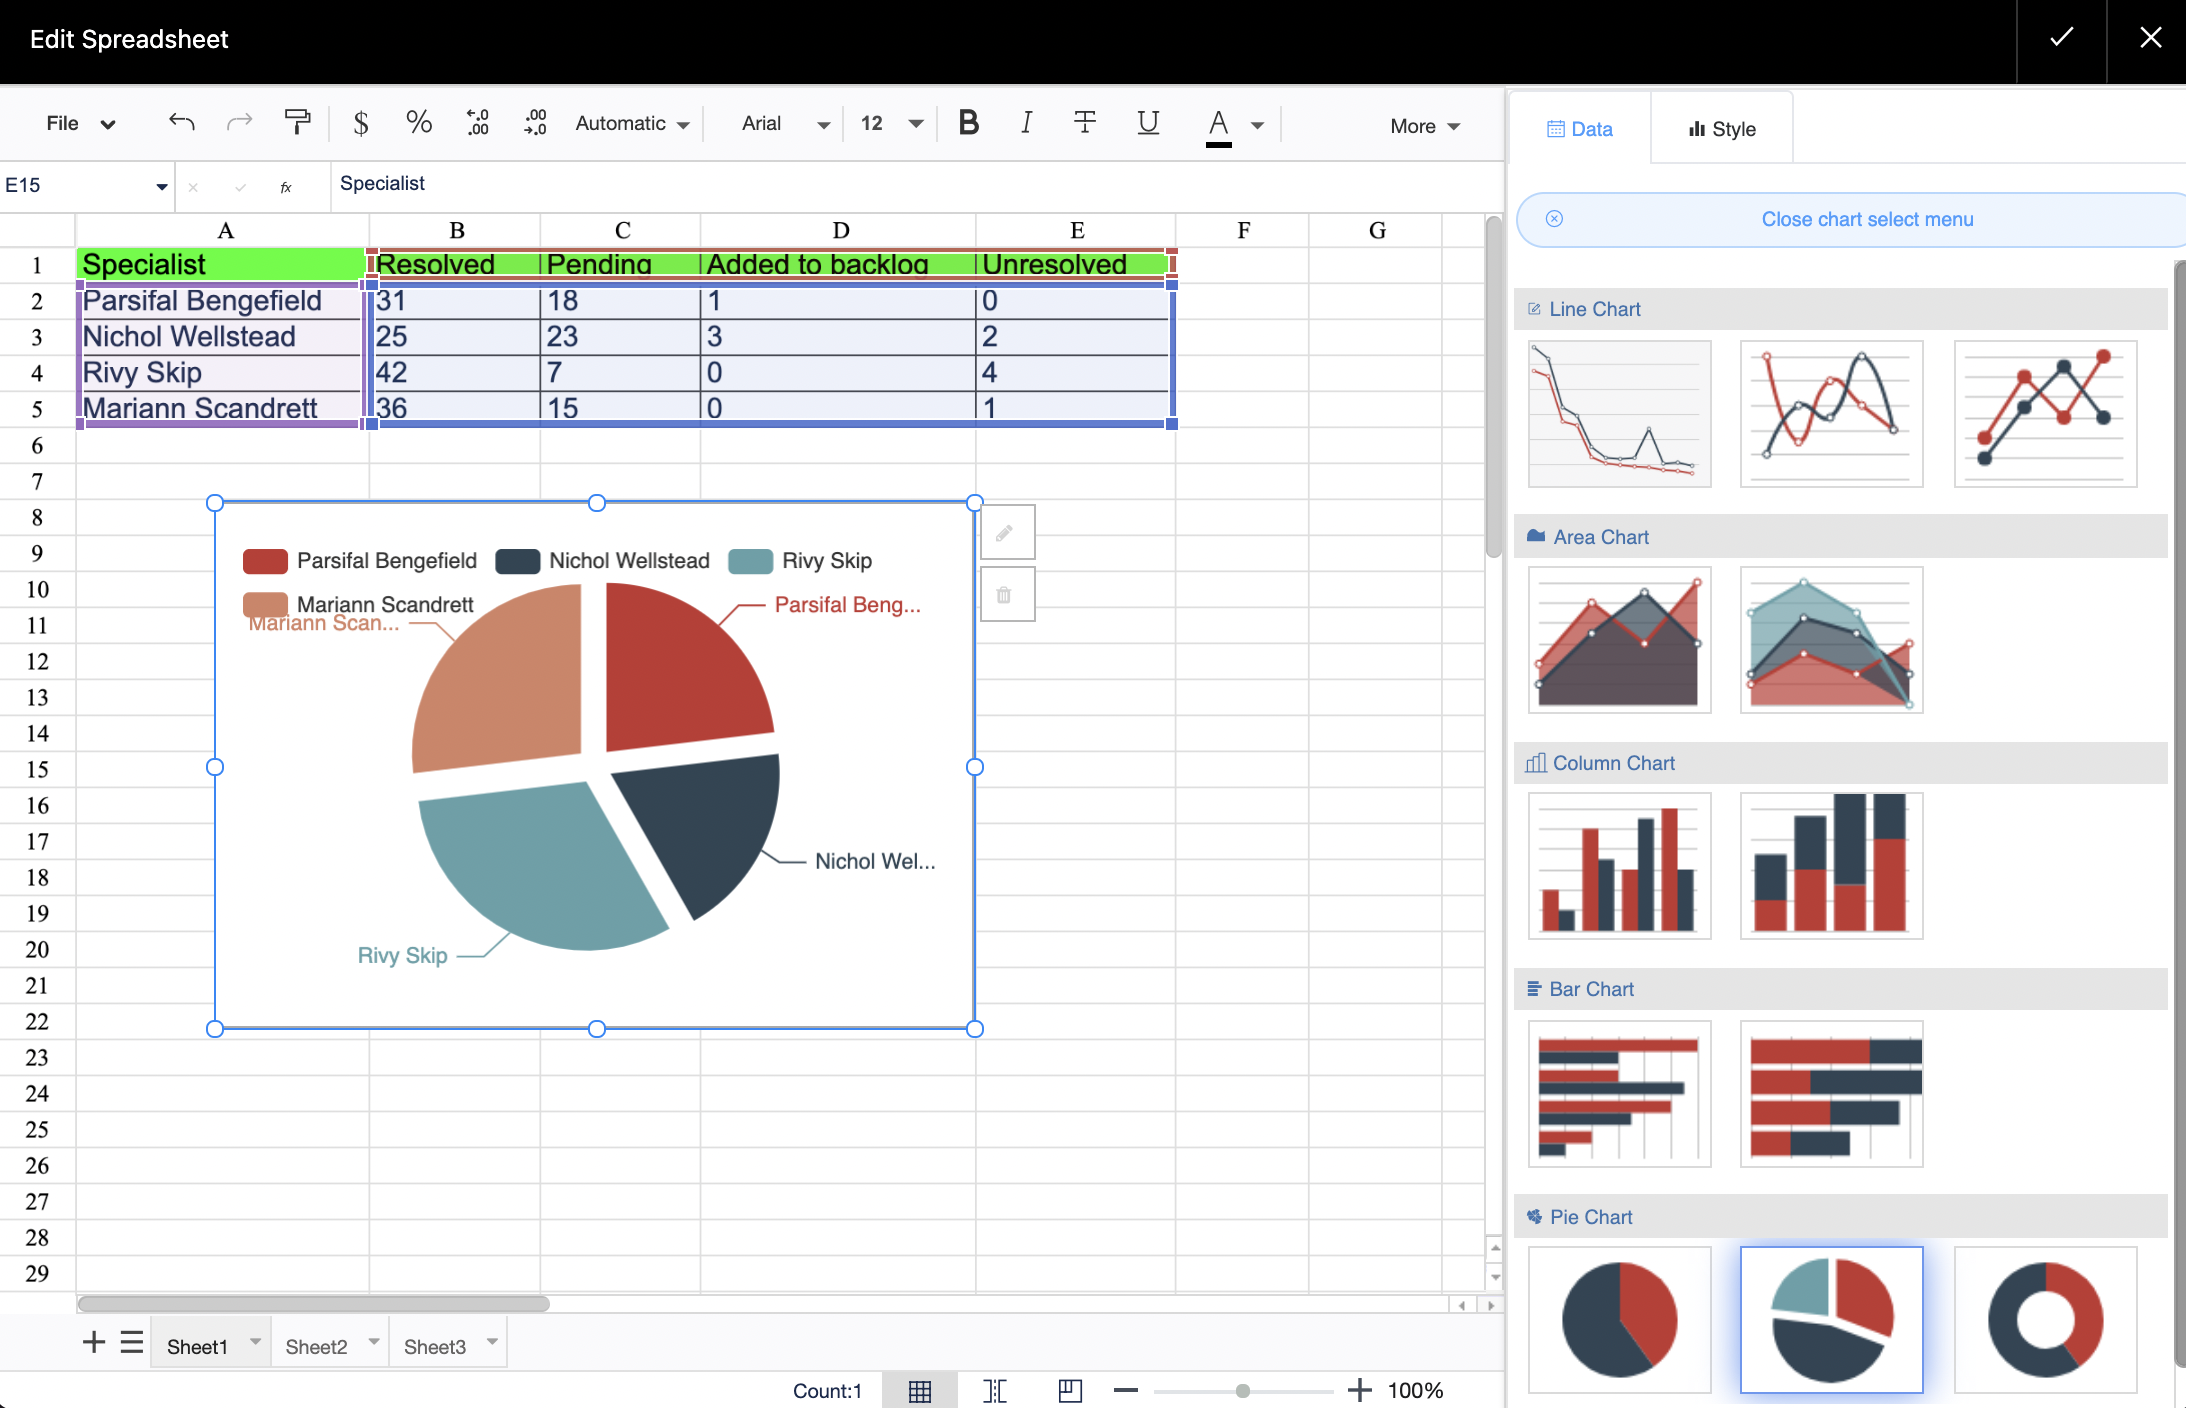
Adding a chart
- Select the chart macro on the editor pane
- Choose chart settings
The following chart types are available:
- Line chart
- Area chart
- Column chart
- Bar chart
- Pie chart
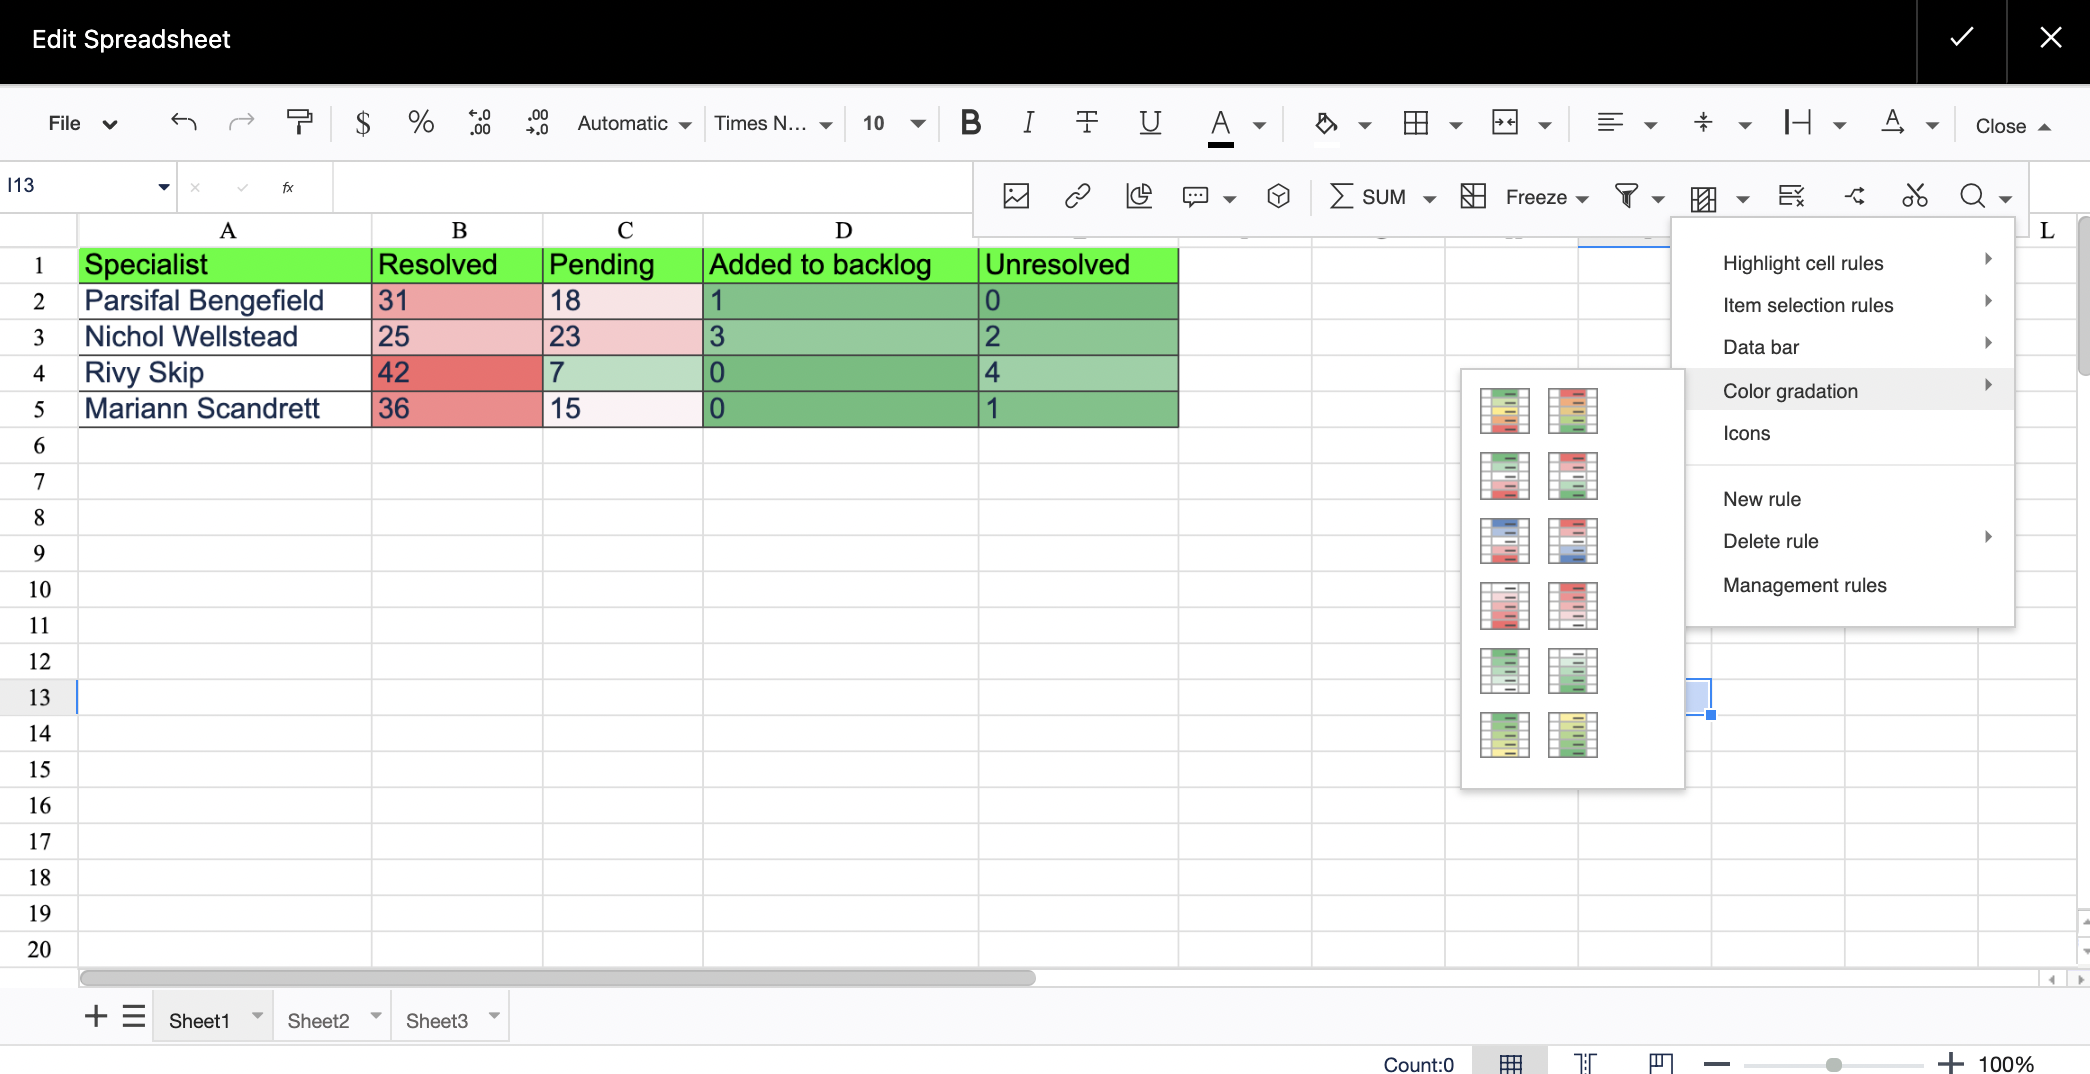
Conditional formatting
- Select a table
- Choose Conditional formatting on the editor pane
- Select a suitable formatting preset or set your own rule
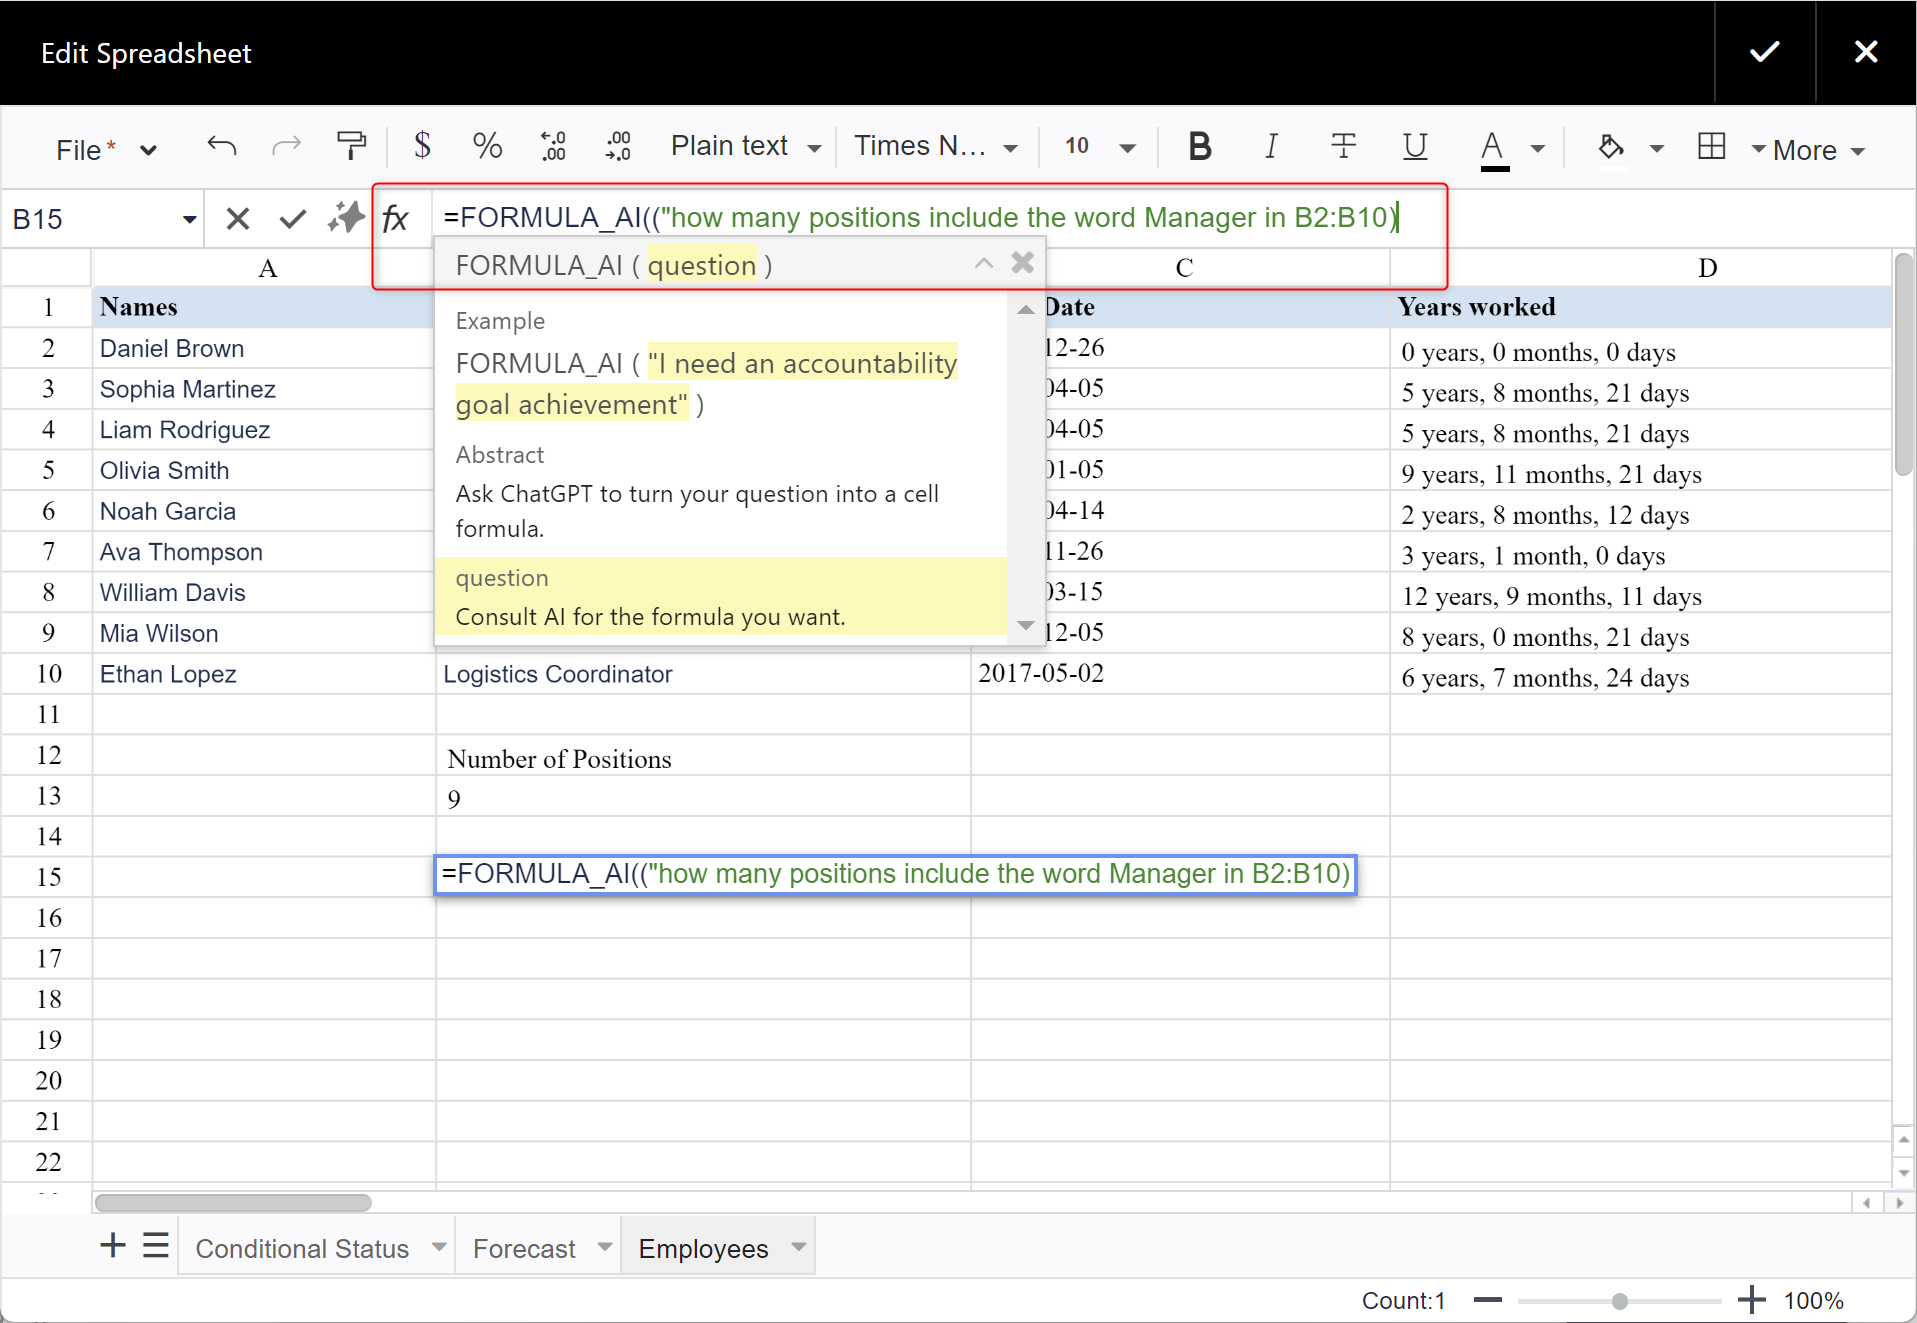
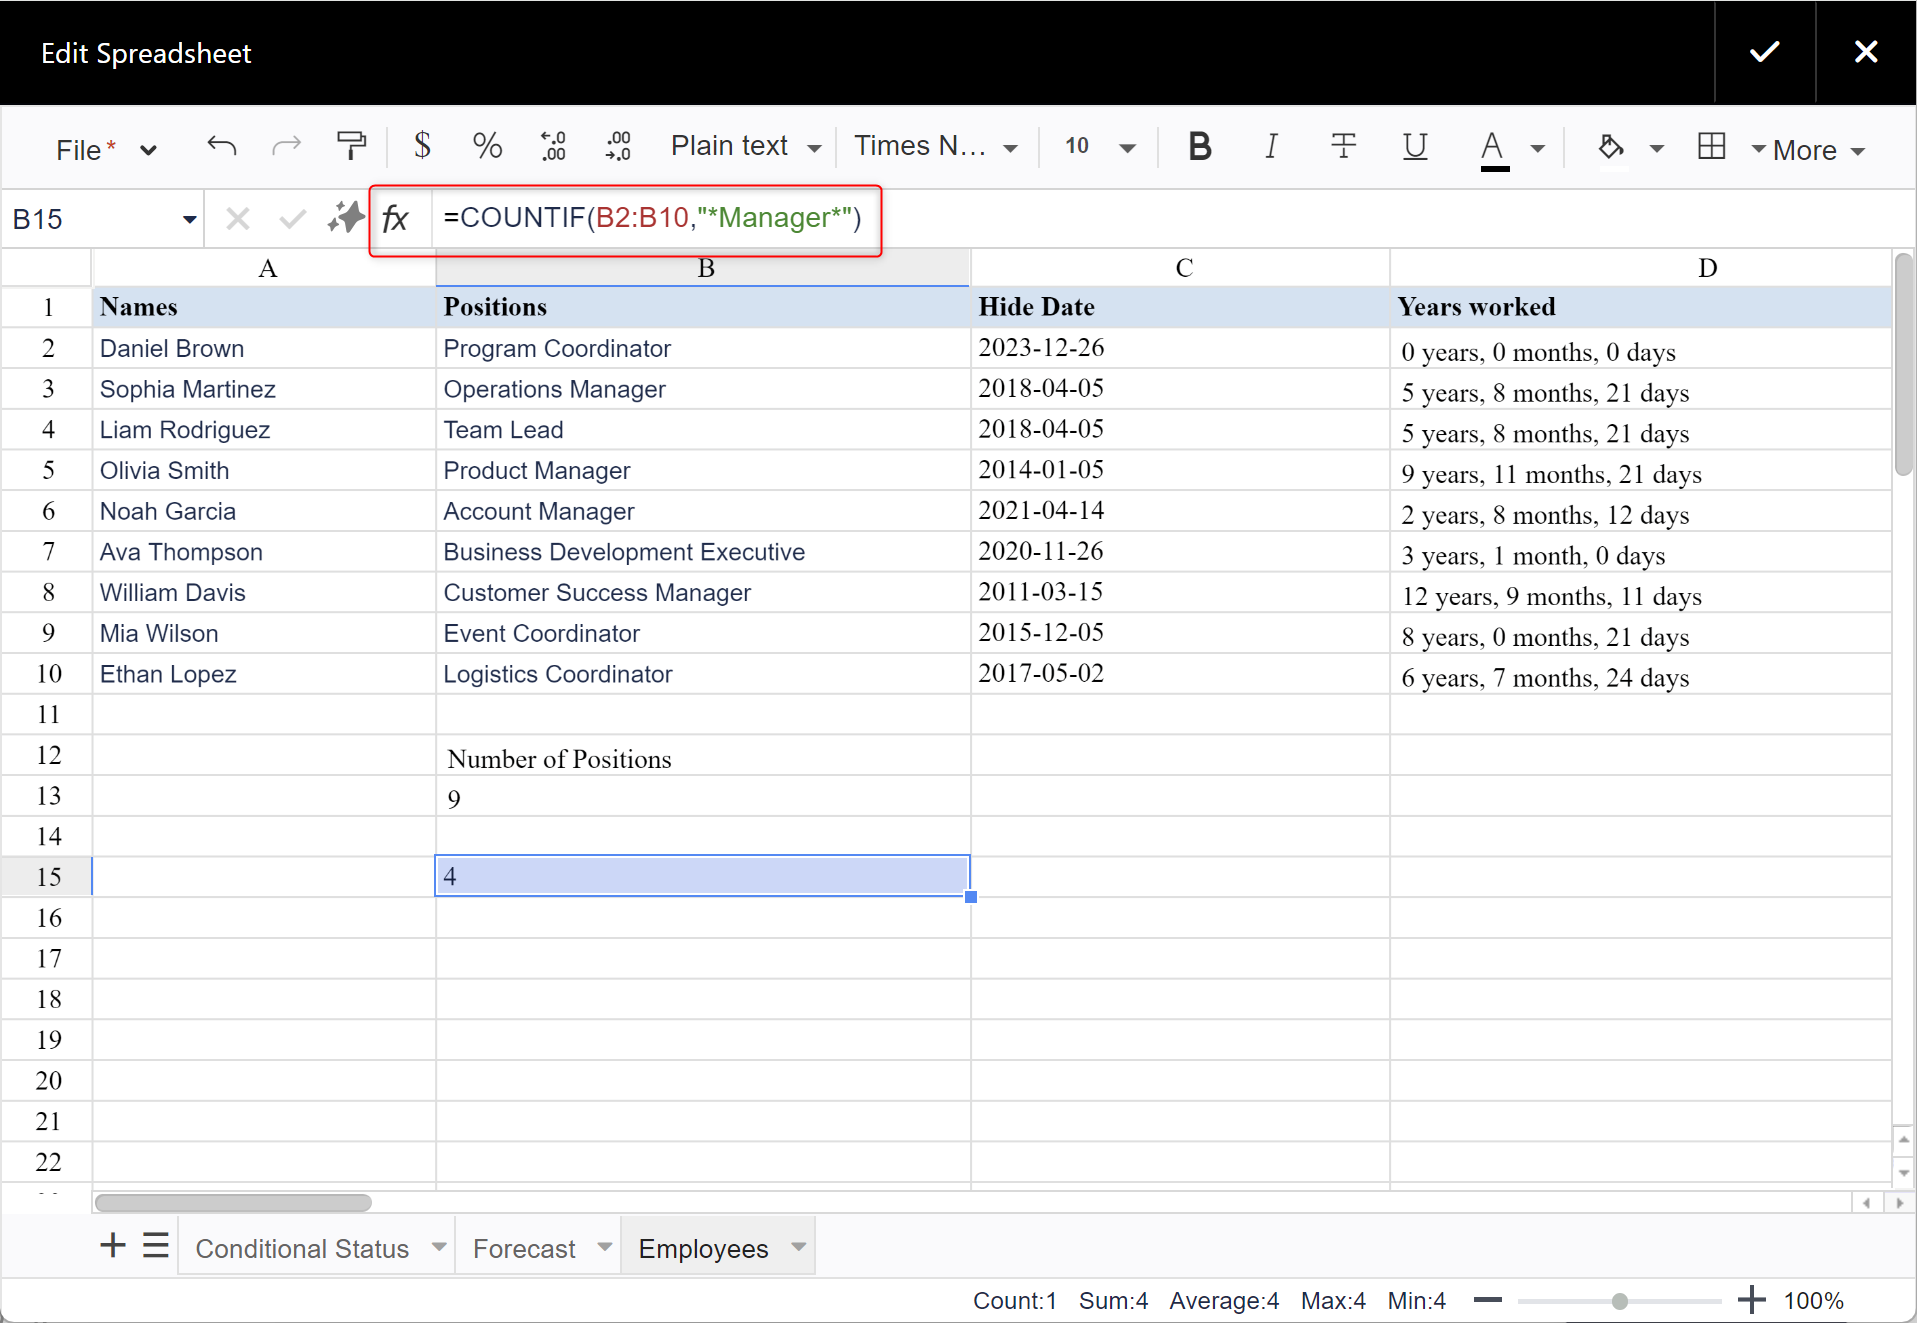
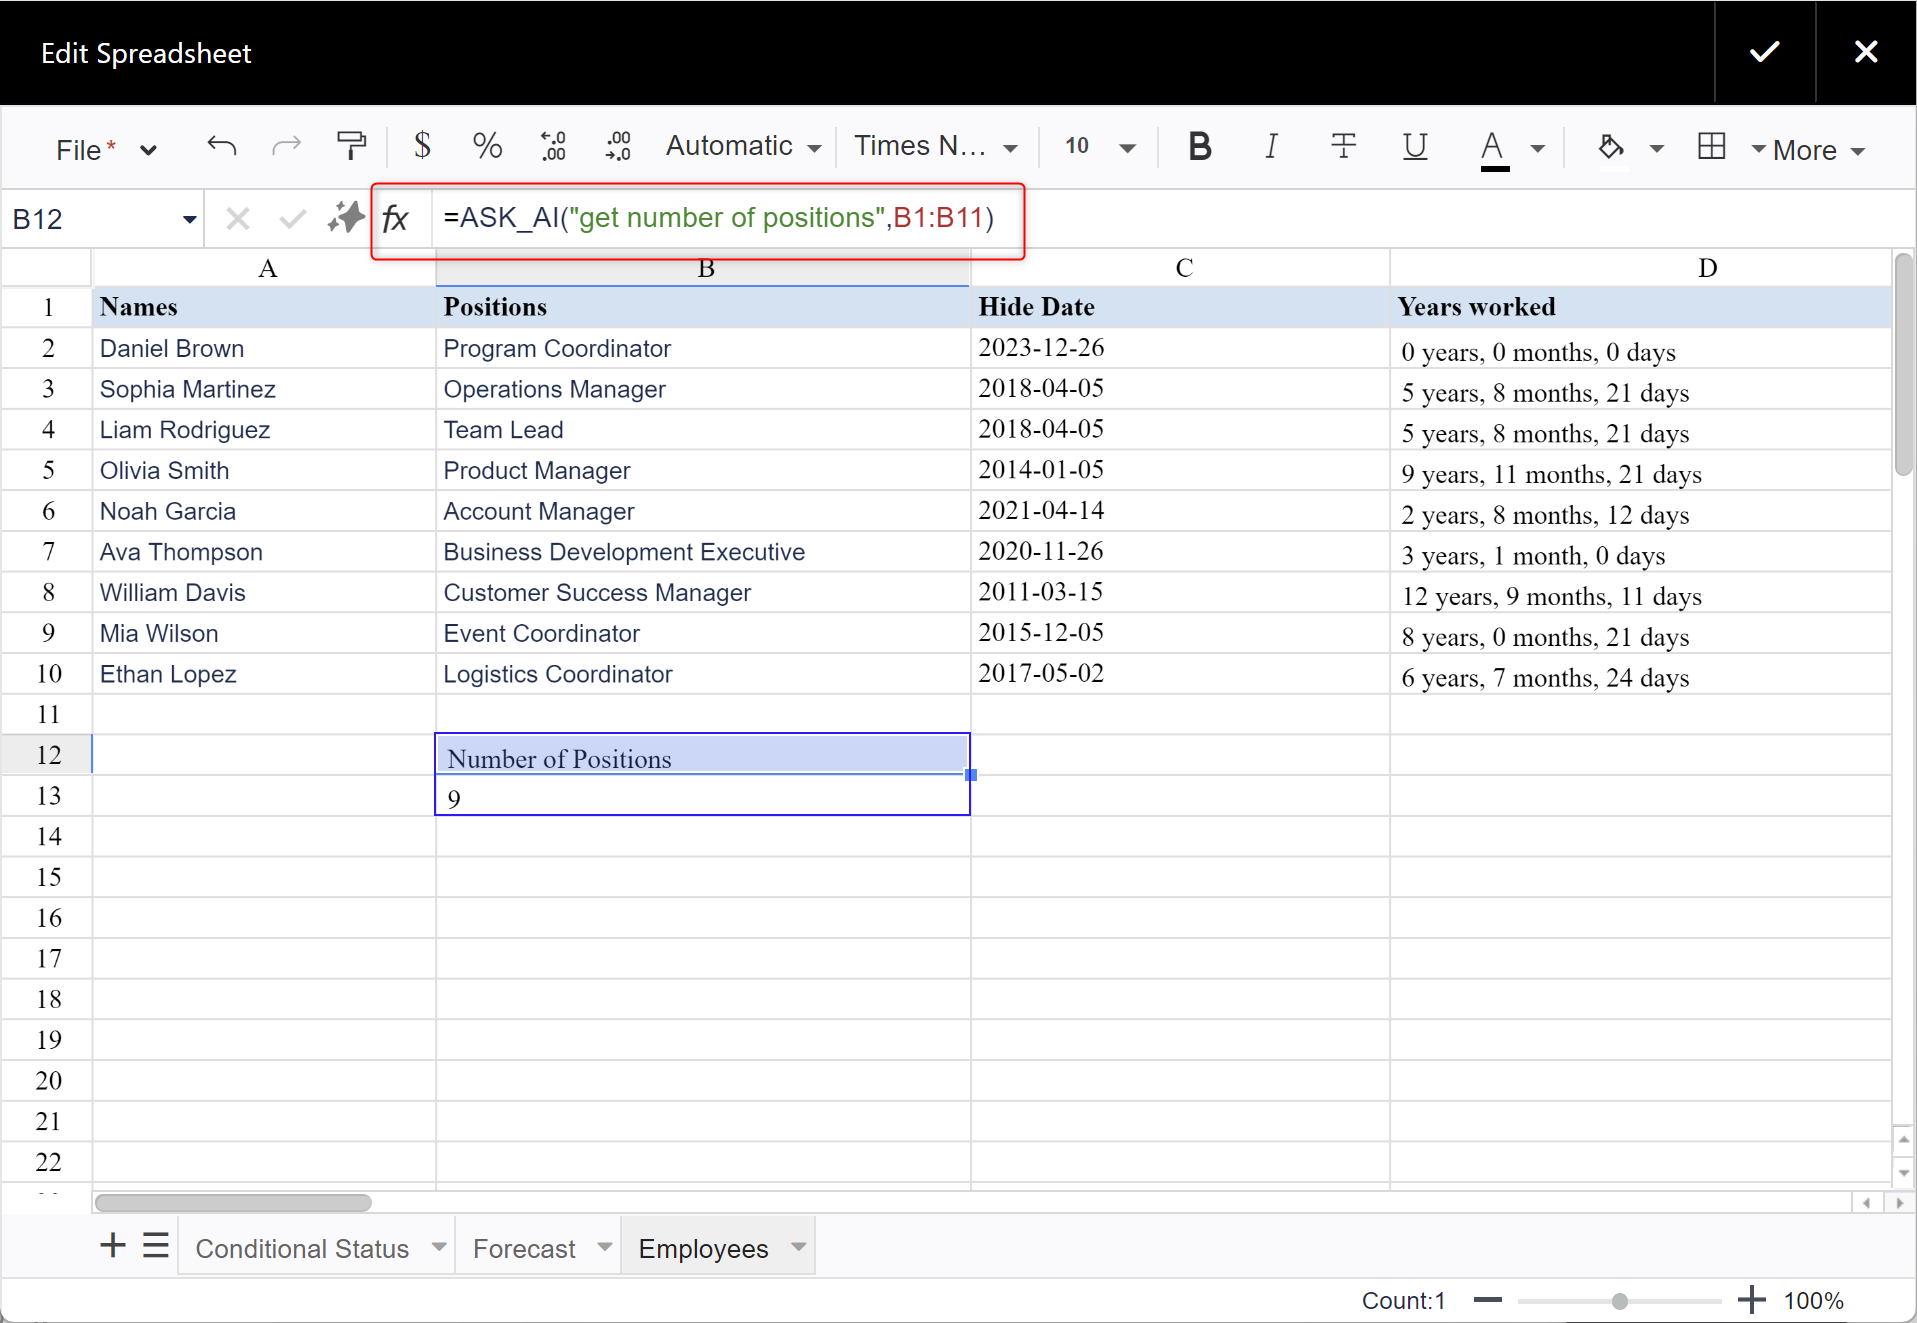
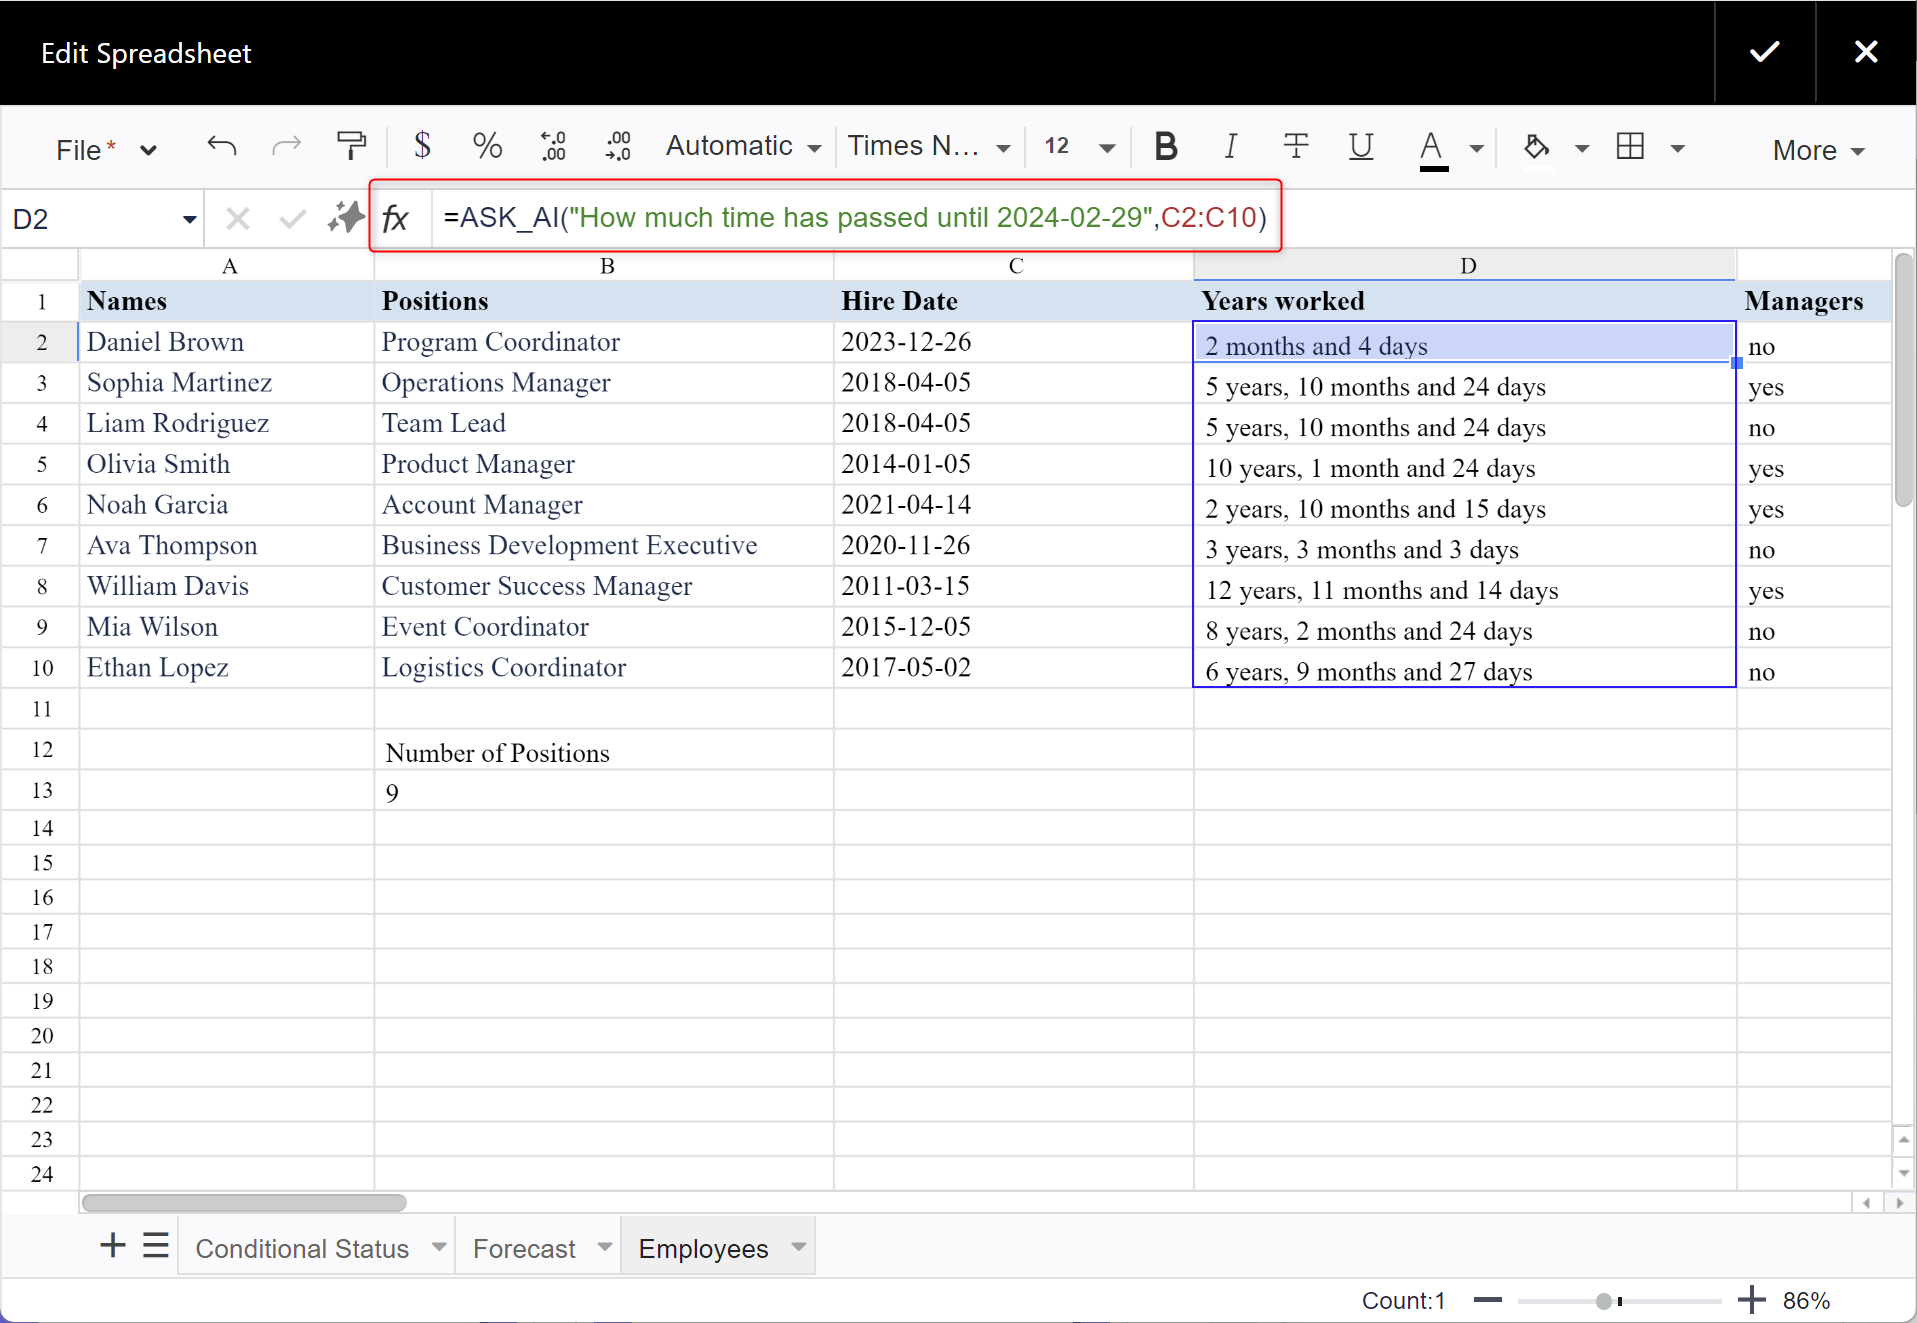
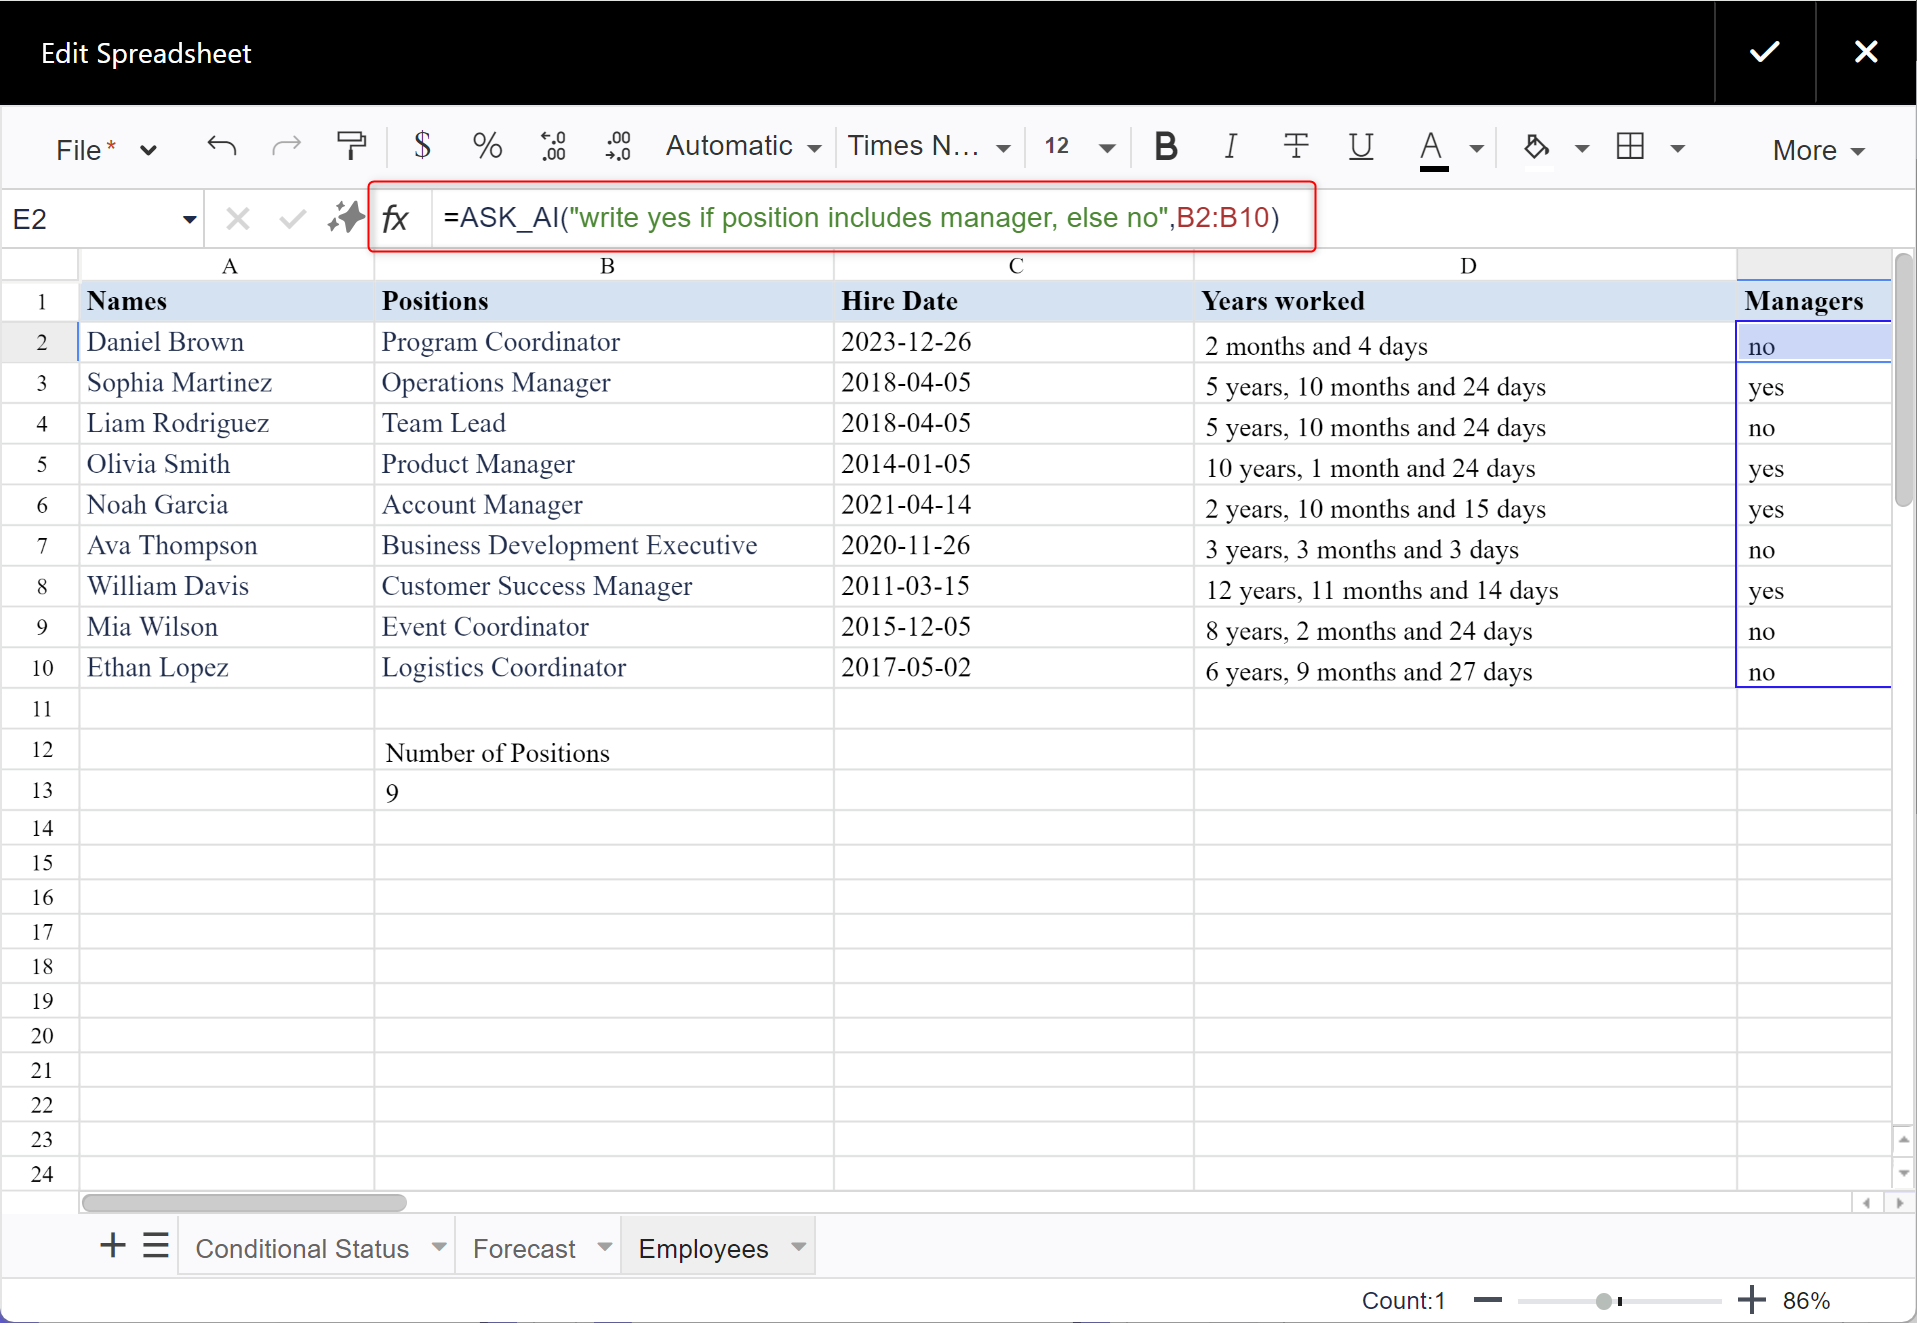
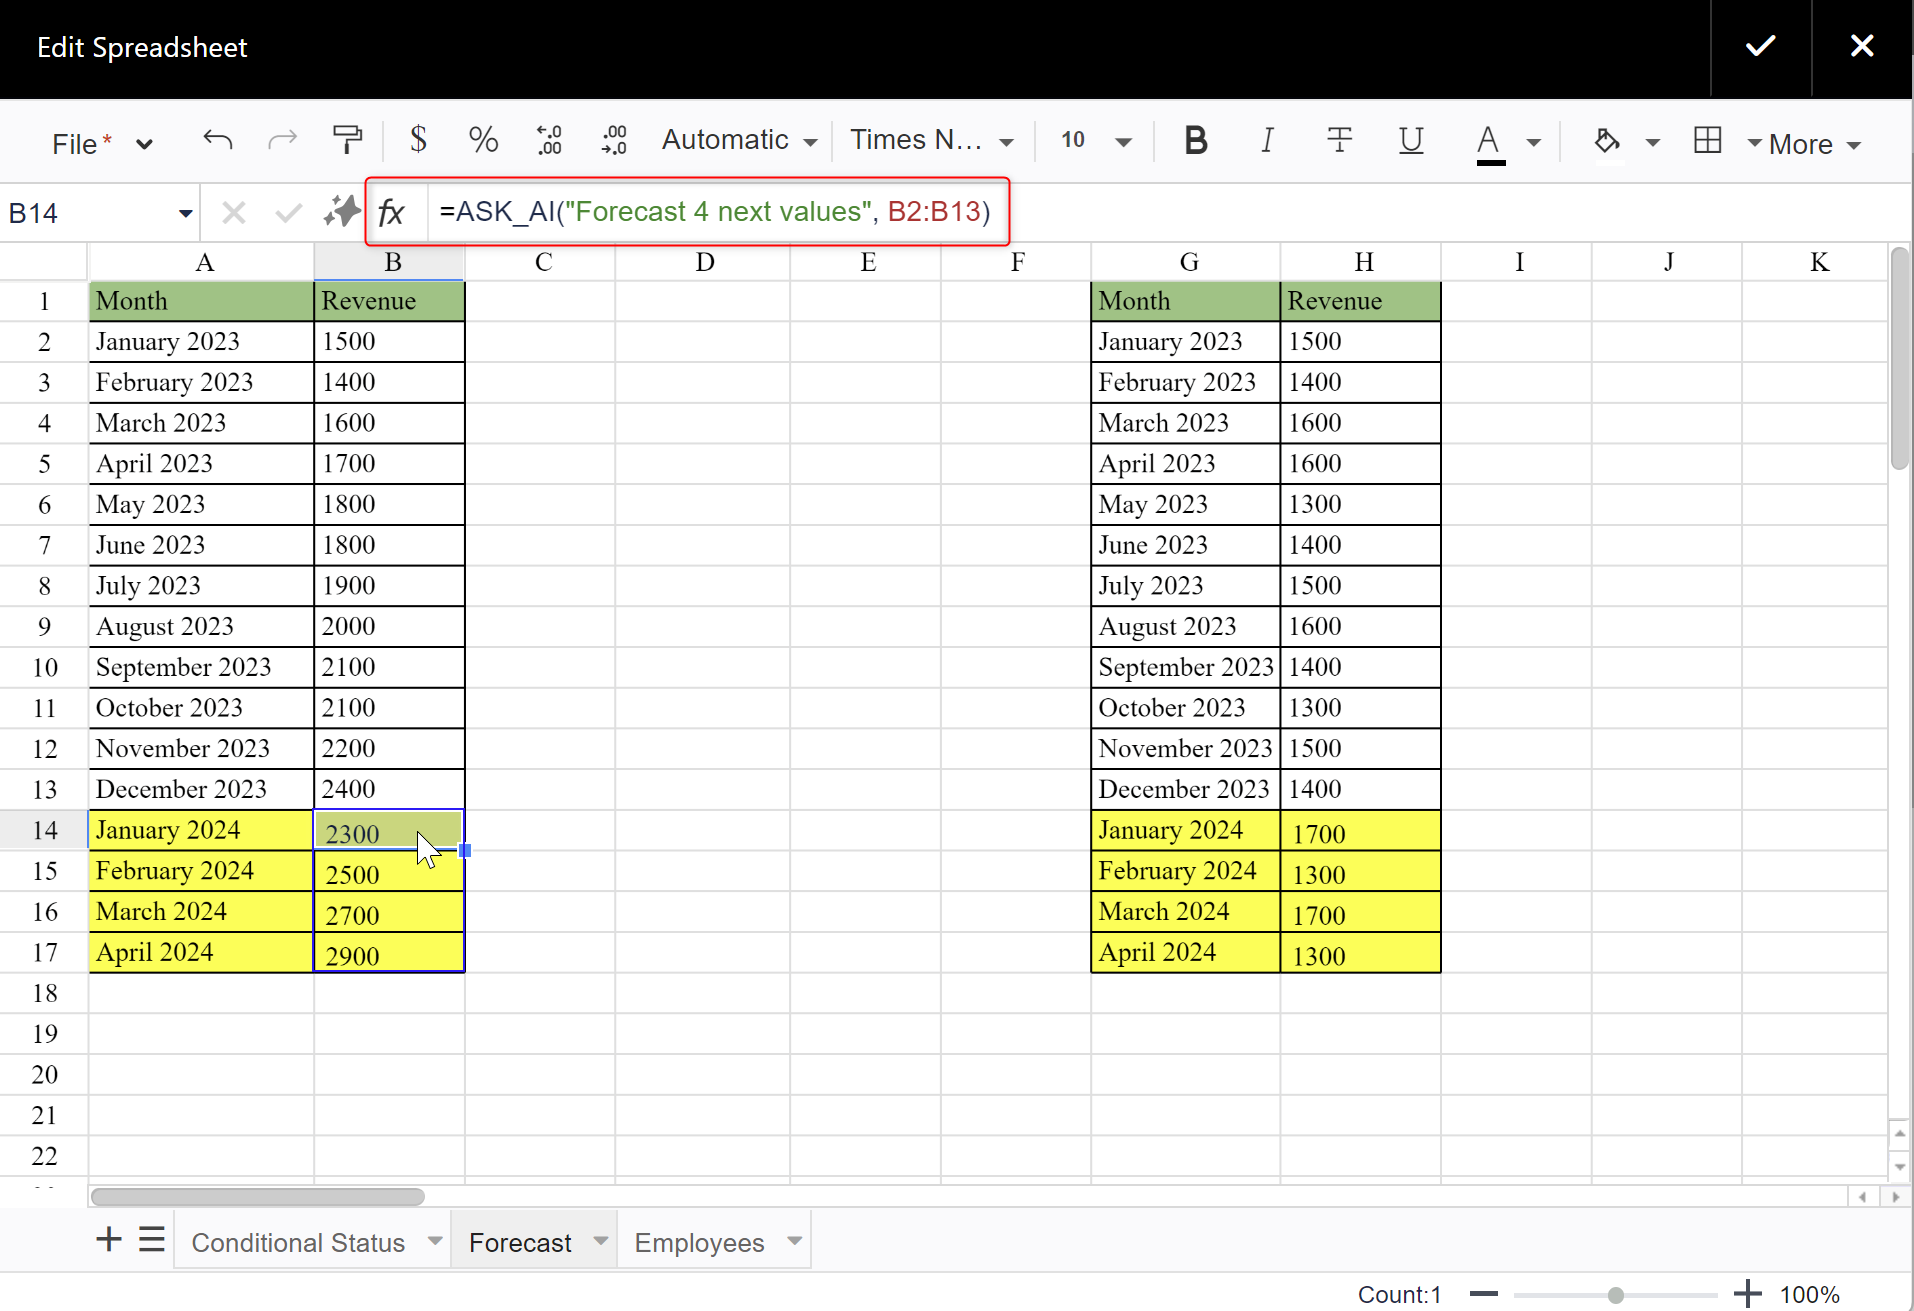
Using AI assistant
- Start entering =FORMULA_AI to ask ChatGPT for help to write the correct formula
- Start entering =ASK_AI to request any info from ChatGPT
Find here how to enable/disable the AI assistant feature.
Reusing of the Table Spreadsheet macro
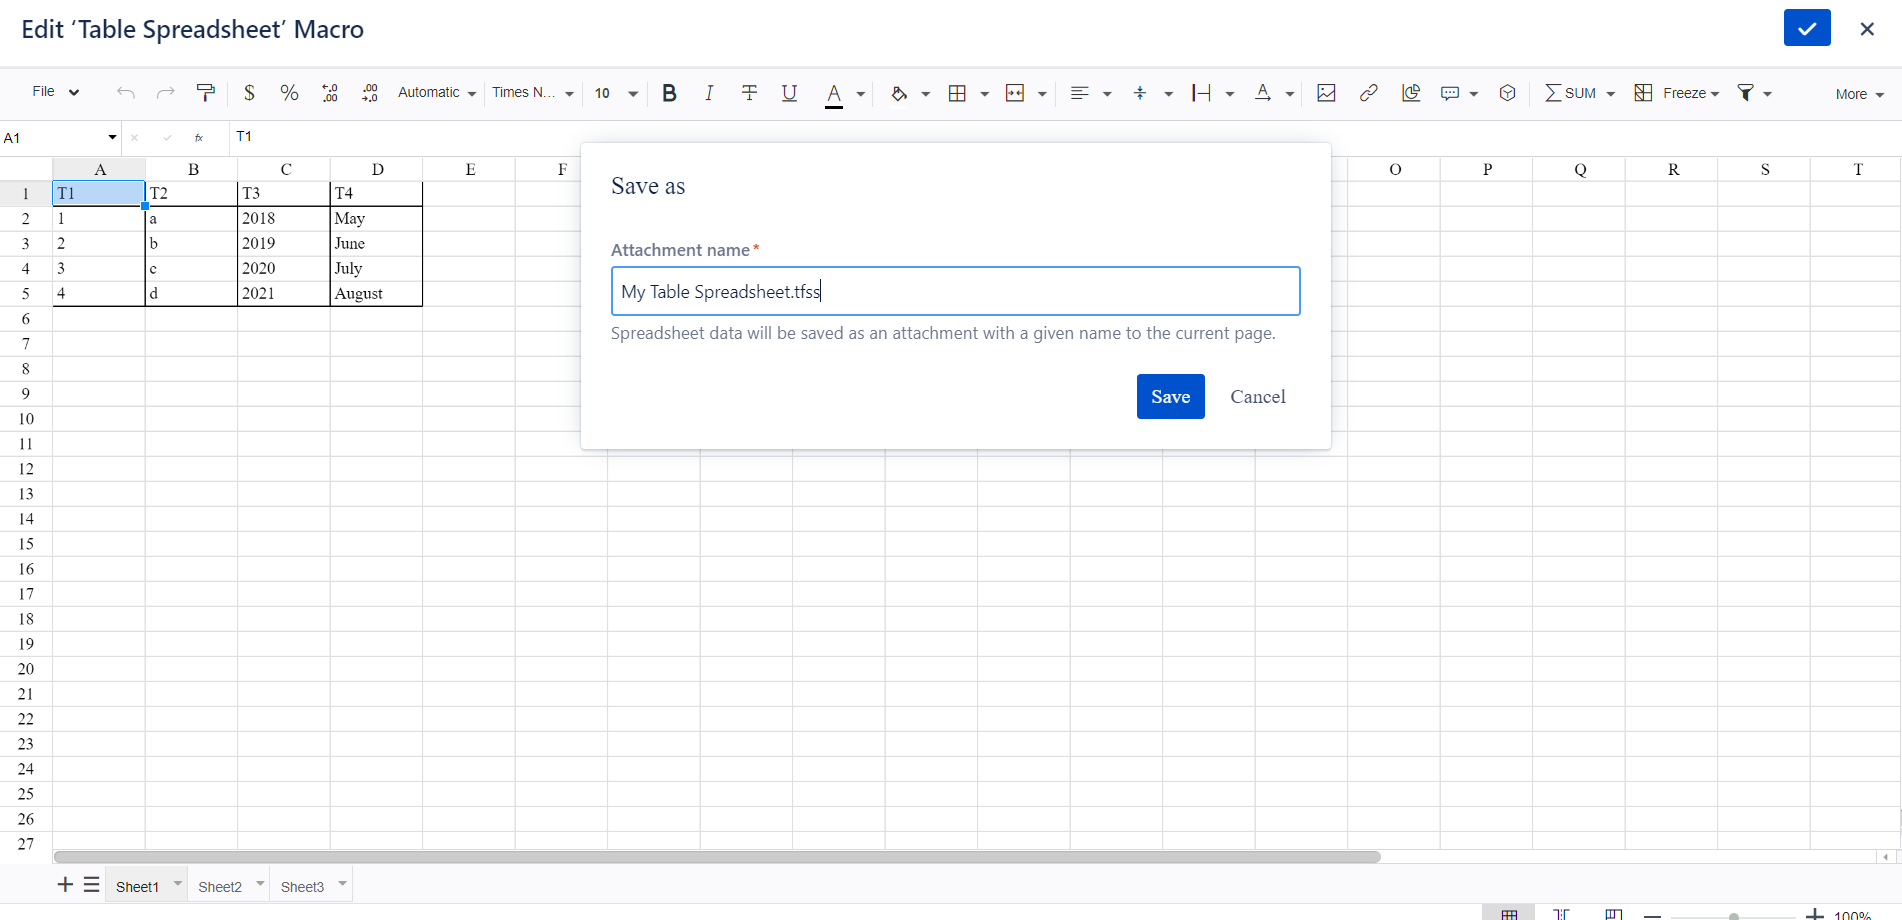
- Save data in the Table Spreadsheet macro via File->Save (to have a generated name) or via File->Save As (to name it yourself).
- Get to the page you wish for the spreadsheet's new location. Open the page in the edit mode and insert the Table Spreadsheet macro. Open the spreadsheet created earlier via File->Open->type your spreadsheet's name.
Once any changes on the page are added and saved, it will affect all the spreadsheets, treated as the same spreadsheet. The attachment, however, will be placed only on the source page where the spreadsheet was originally created and saved.
To make an independent copy of the spreadsheet to work with it further on, i.e. add it as an attachment of the selected page and reform it without affecting the original one, save the spreadsheet on the page with another name via File->Save As->type your name->Save

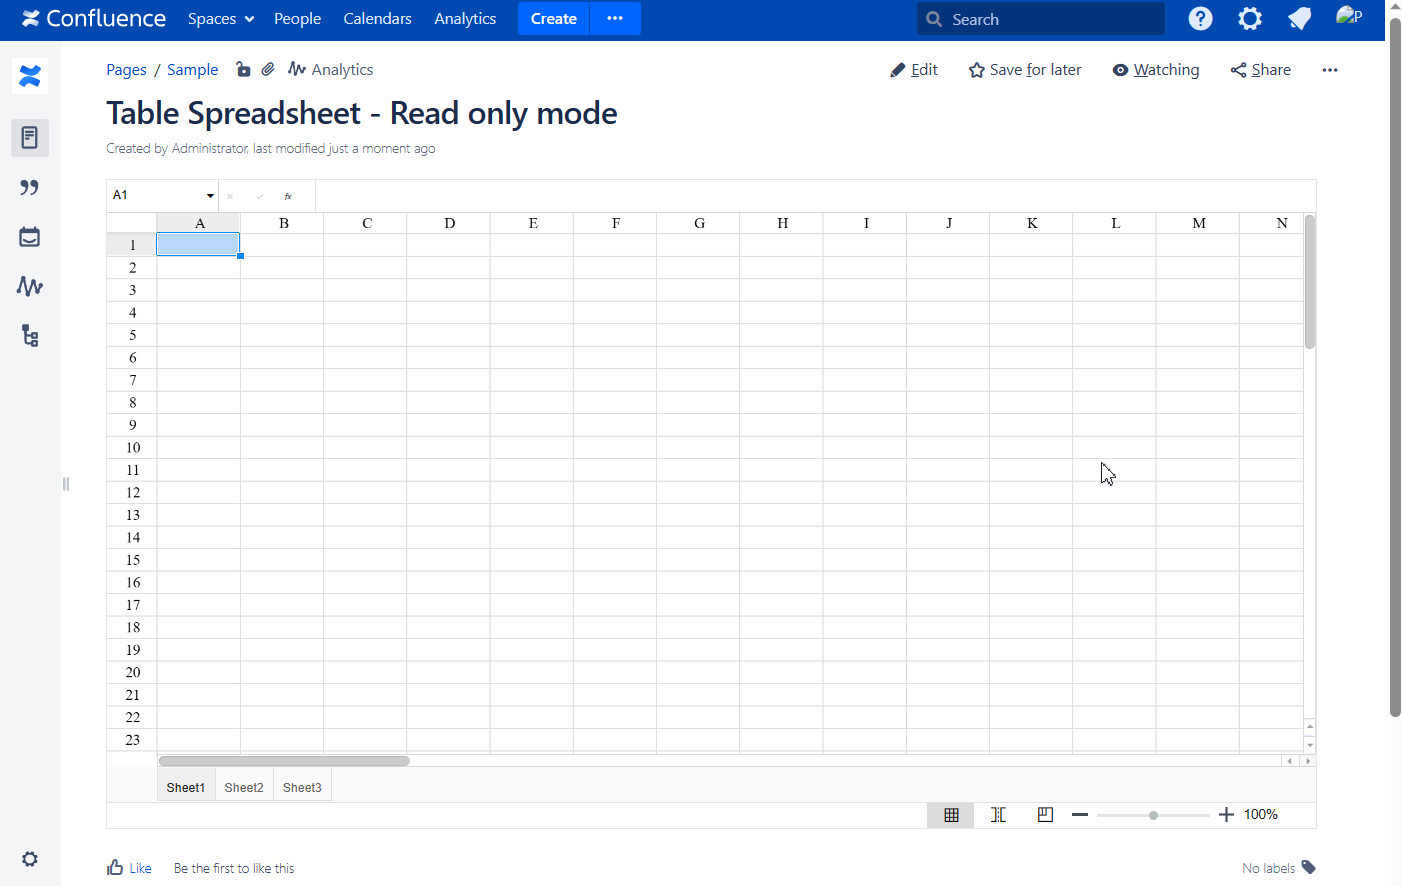
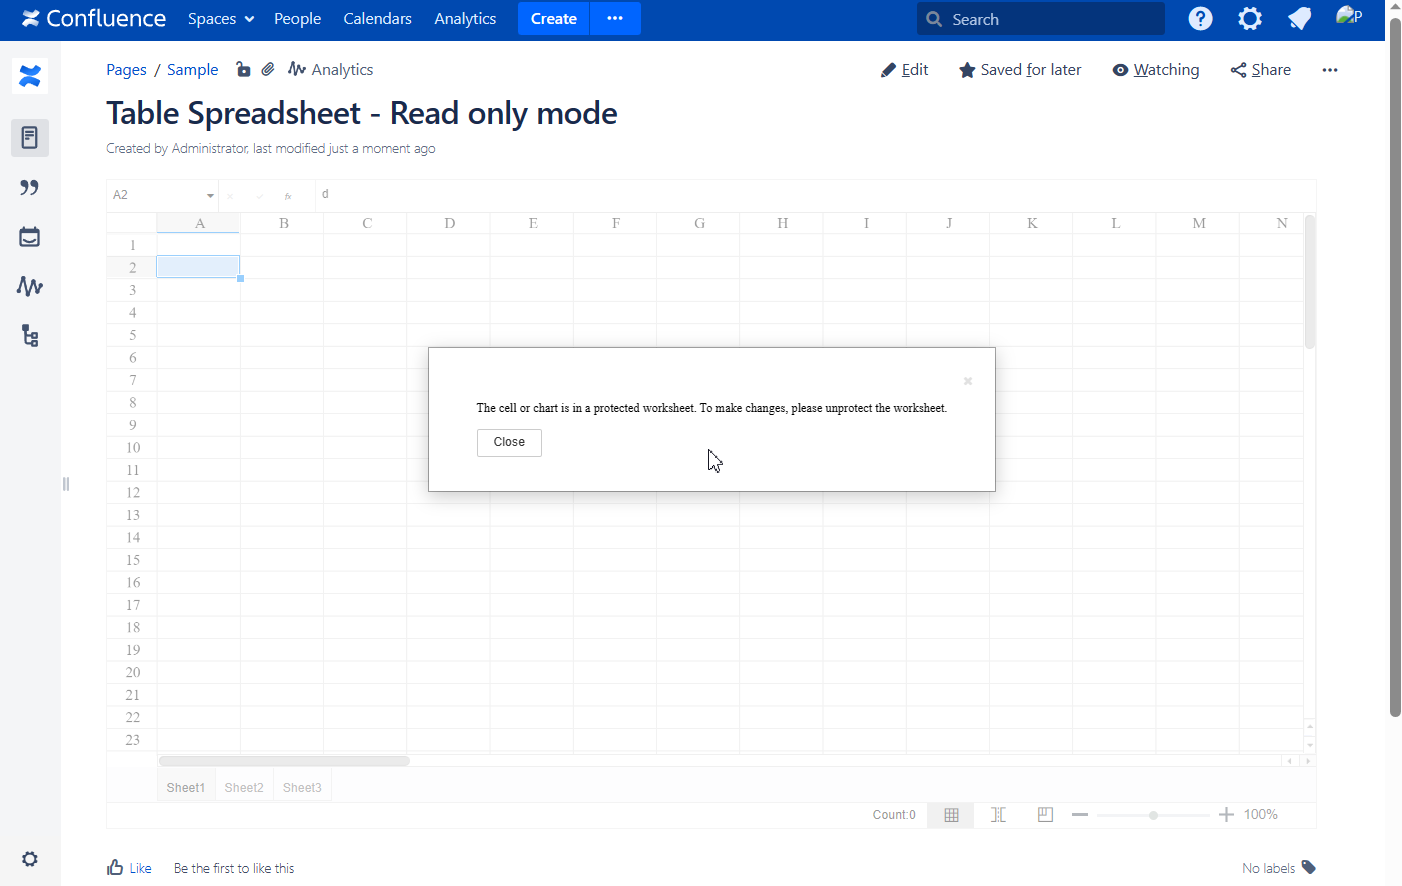
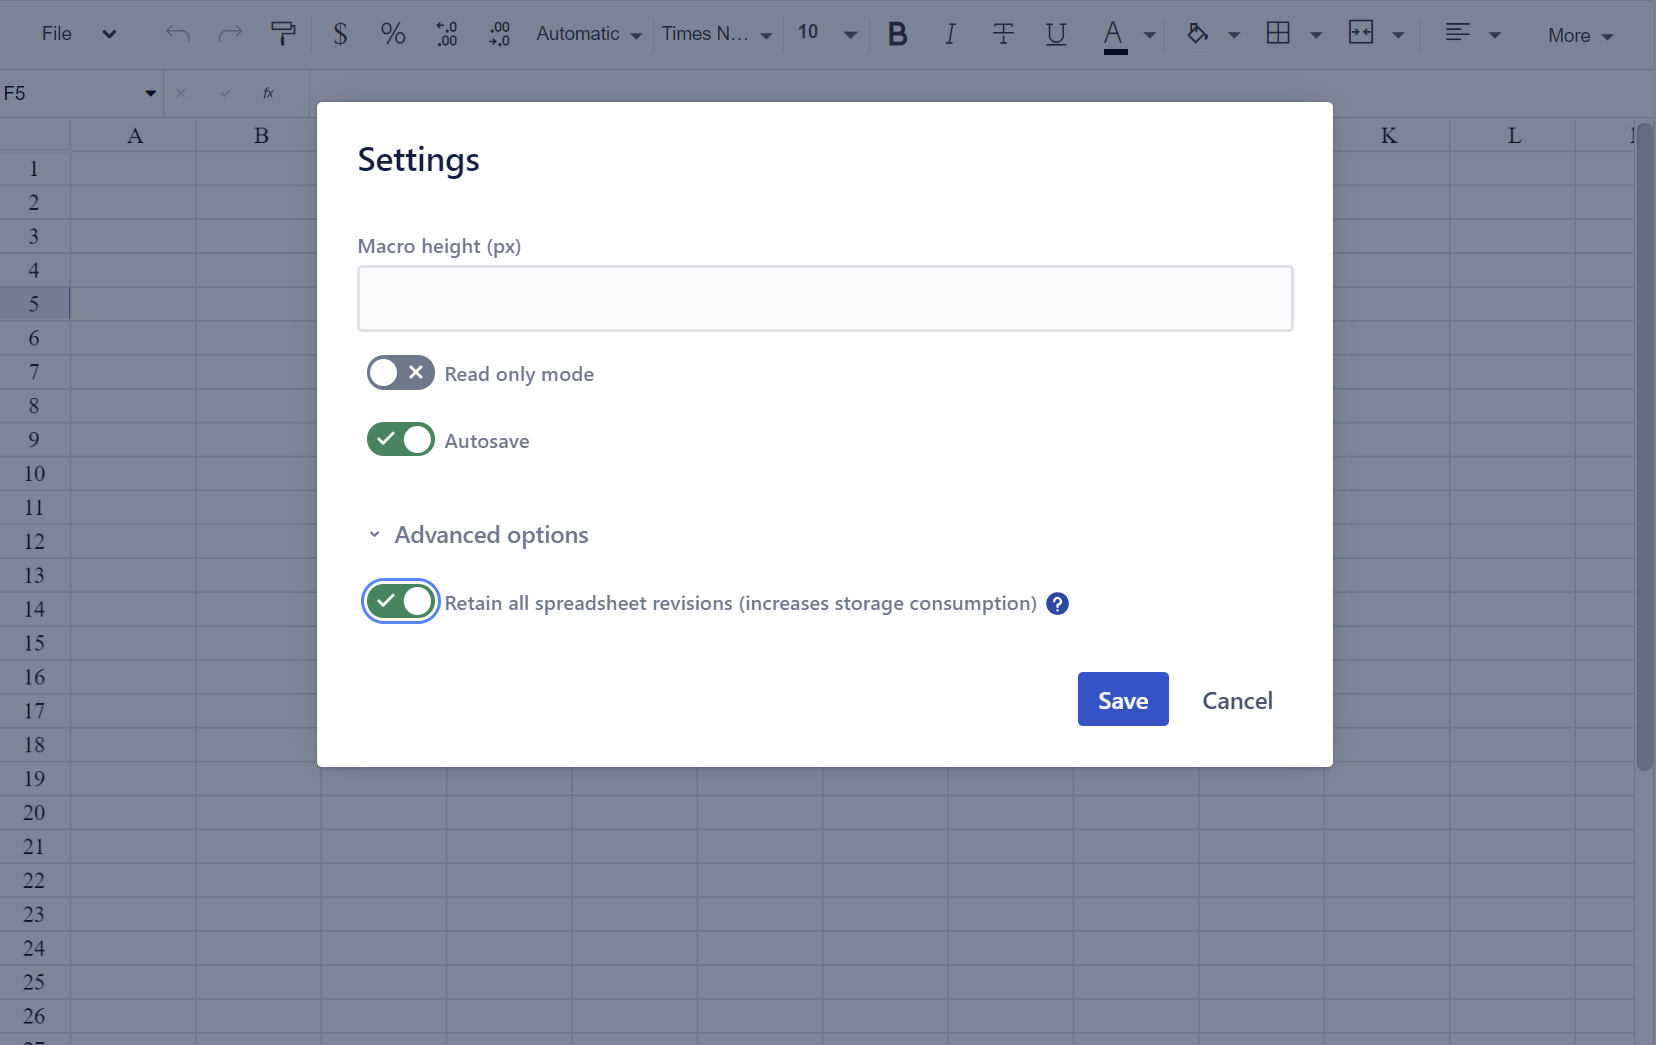
Read only mode in Table Spreadsheet
Enable Read only mode if you wish no content of your Table Spreadsheet to be adjusted beyond the page edit mode.
- Insert the macro on a page or open the existing Table Spreadsheet.
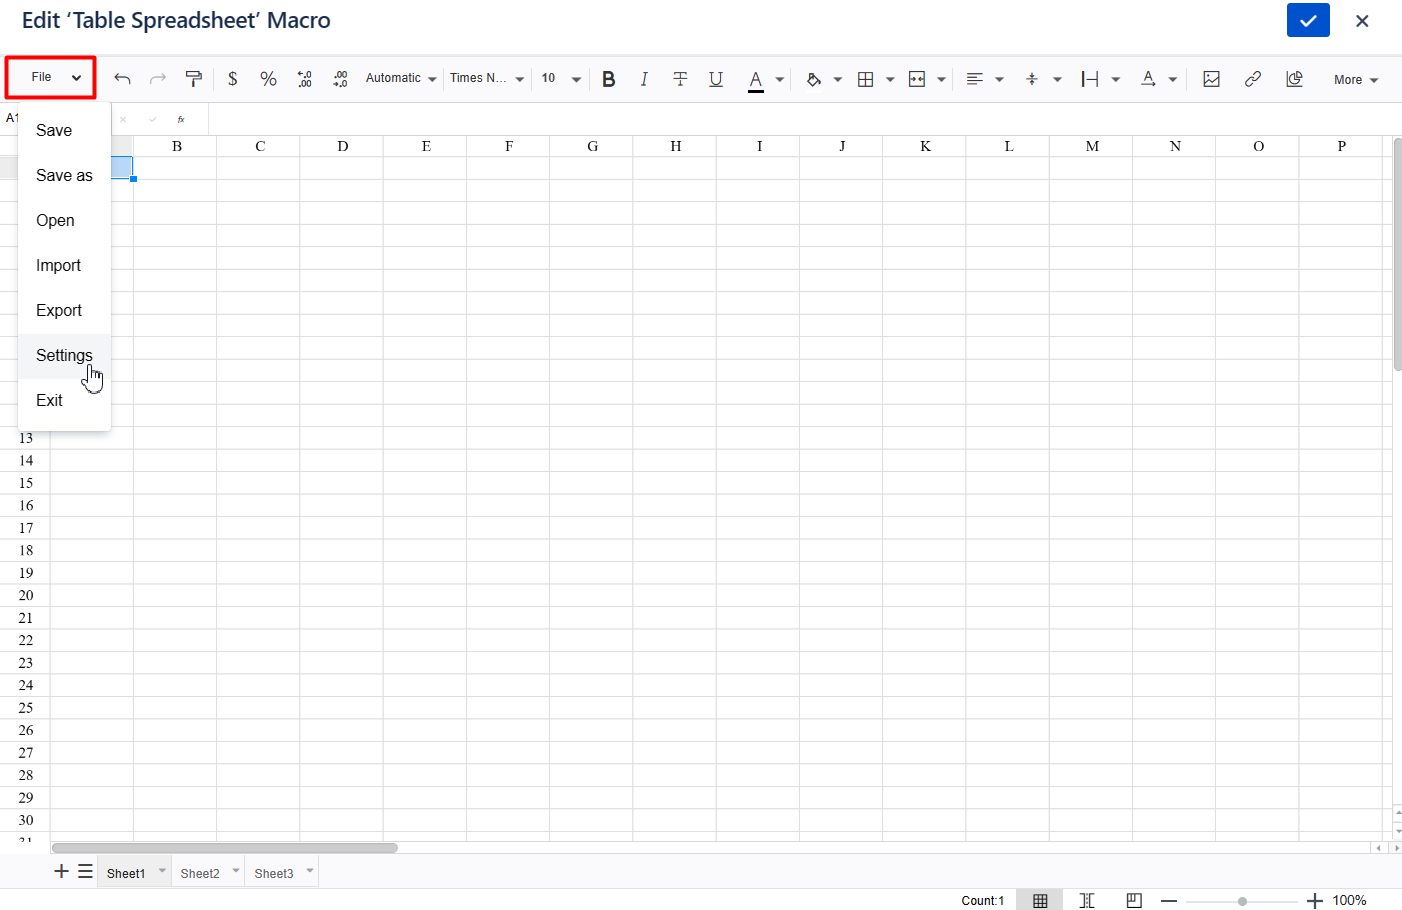
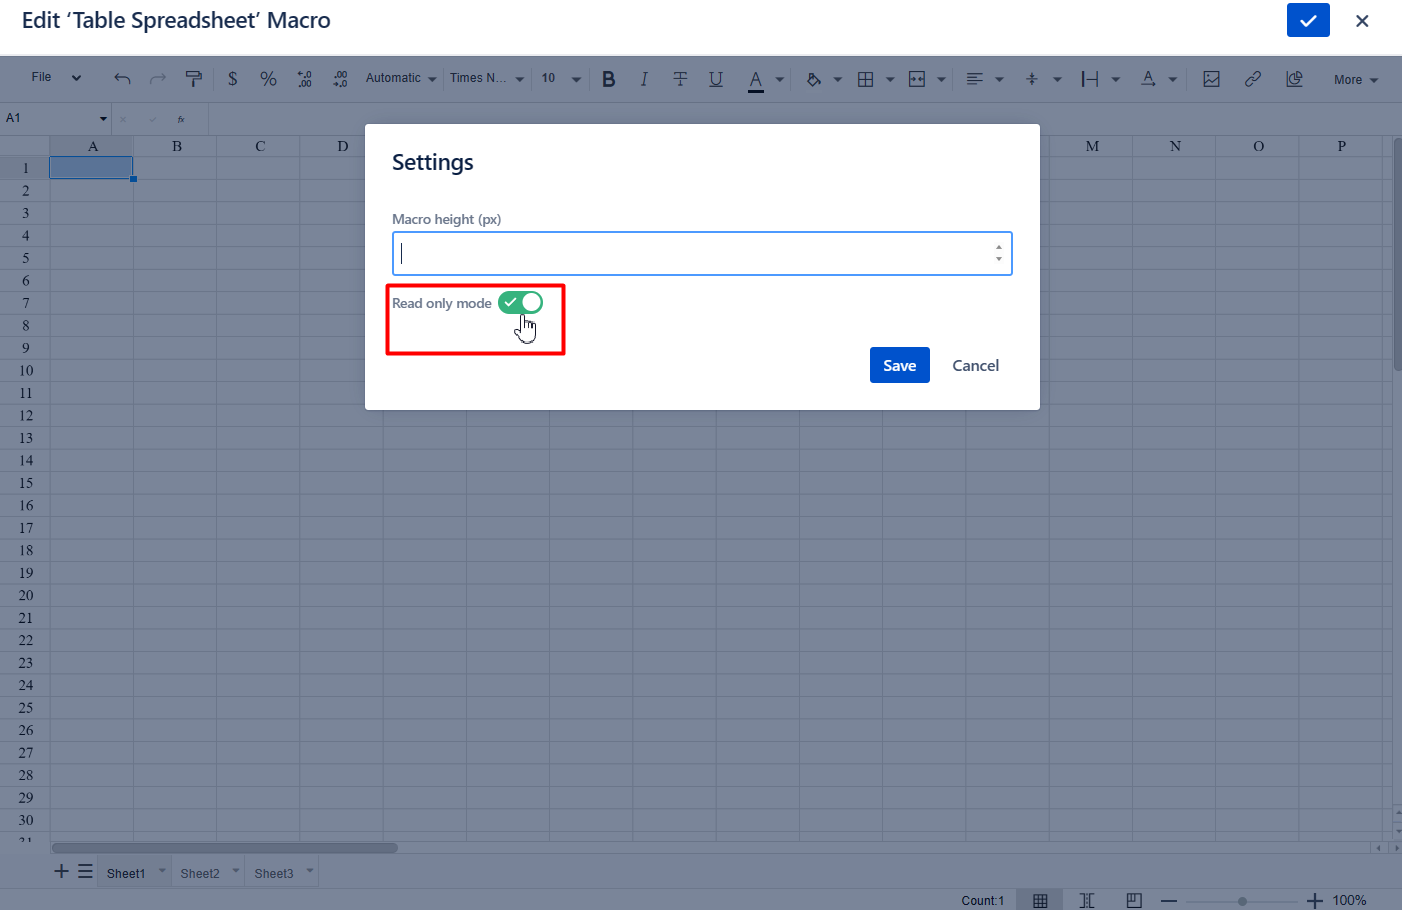
- Navigate to File -> Settings.
- Check the option Read only mode.
- Save Table Spreadsheet.
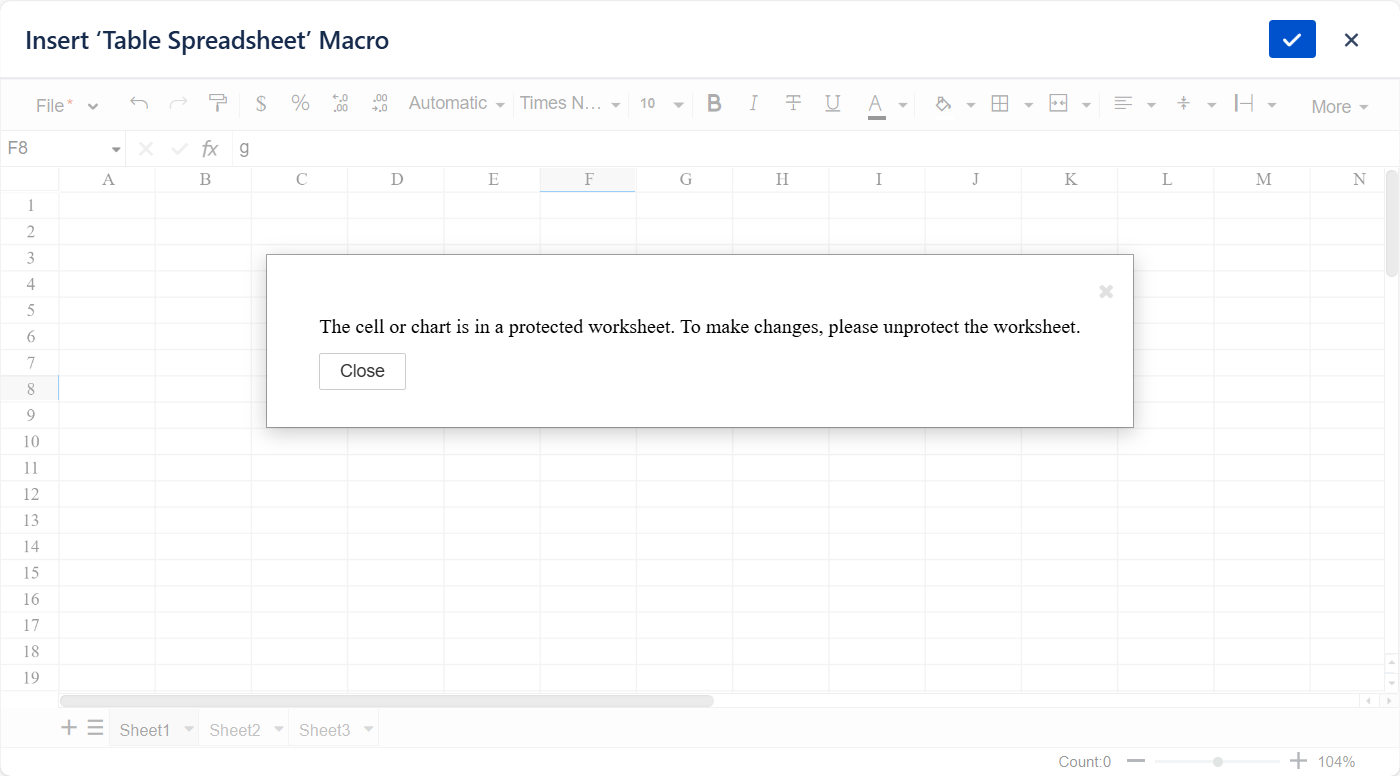
Enabling the Read only mode option covers the toolbar of a spreadsheet and automatically protects its content to prevent editing in the view mode.
Saving a spreadsheet manually
![]() To learn how to enable the Autosave option, please visit the next section.
To learn how to enable the Autosave option, please visit the next section.
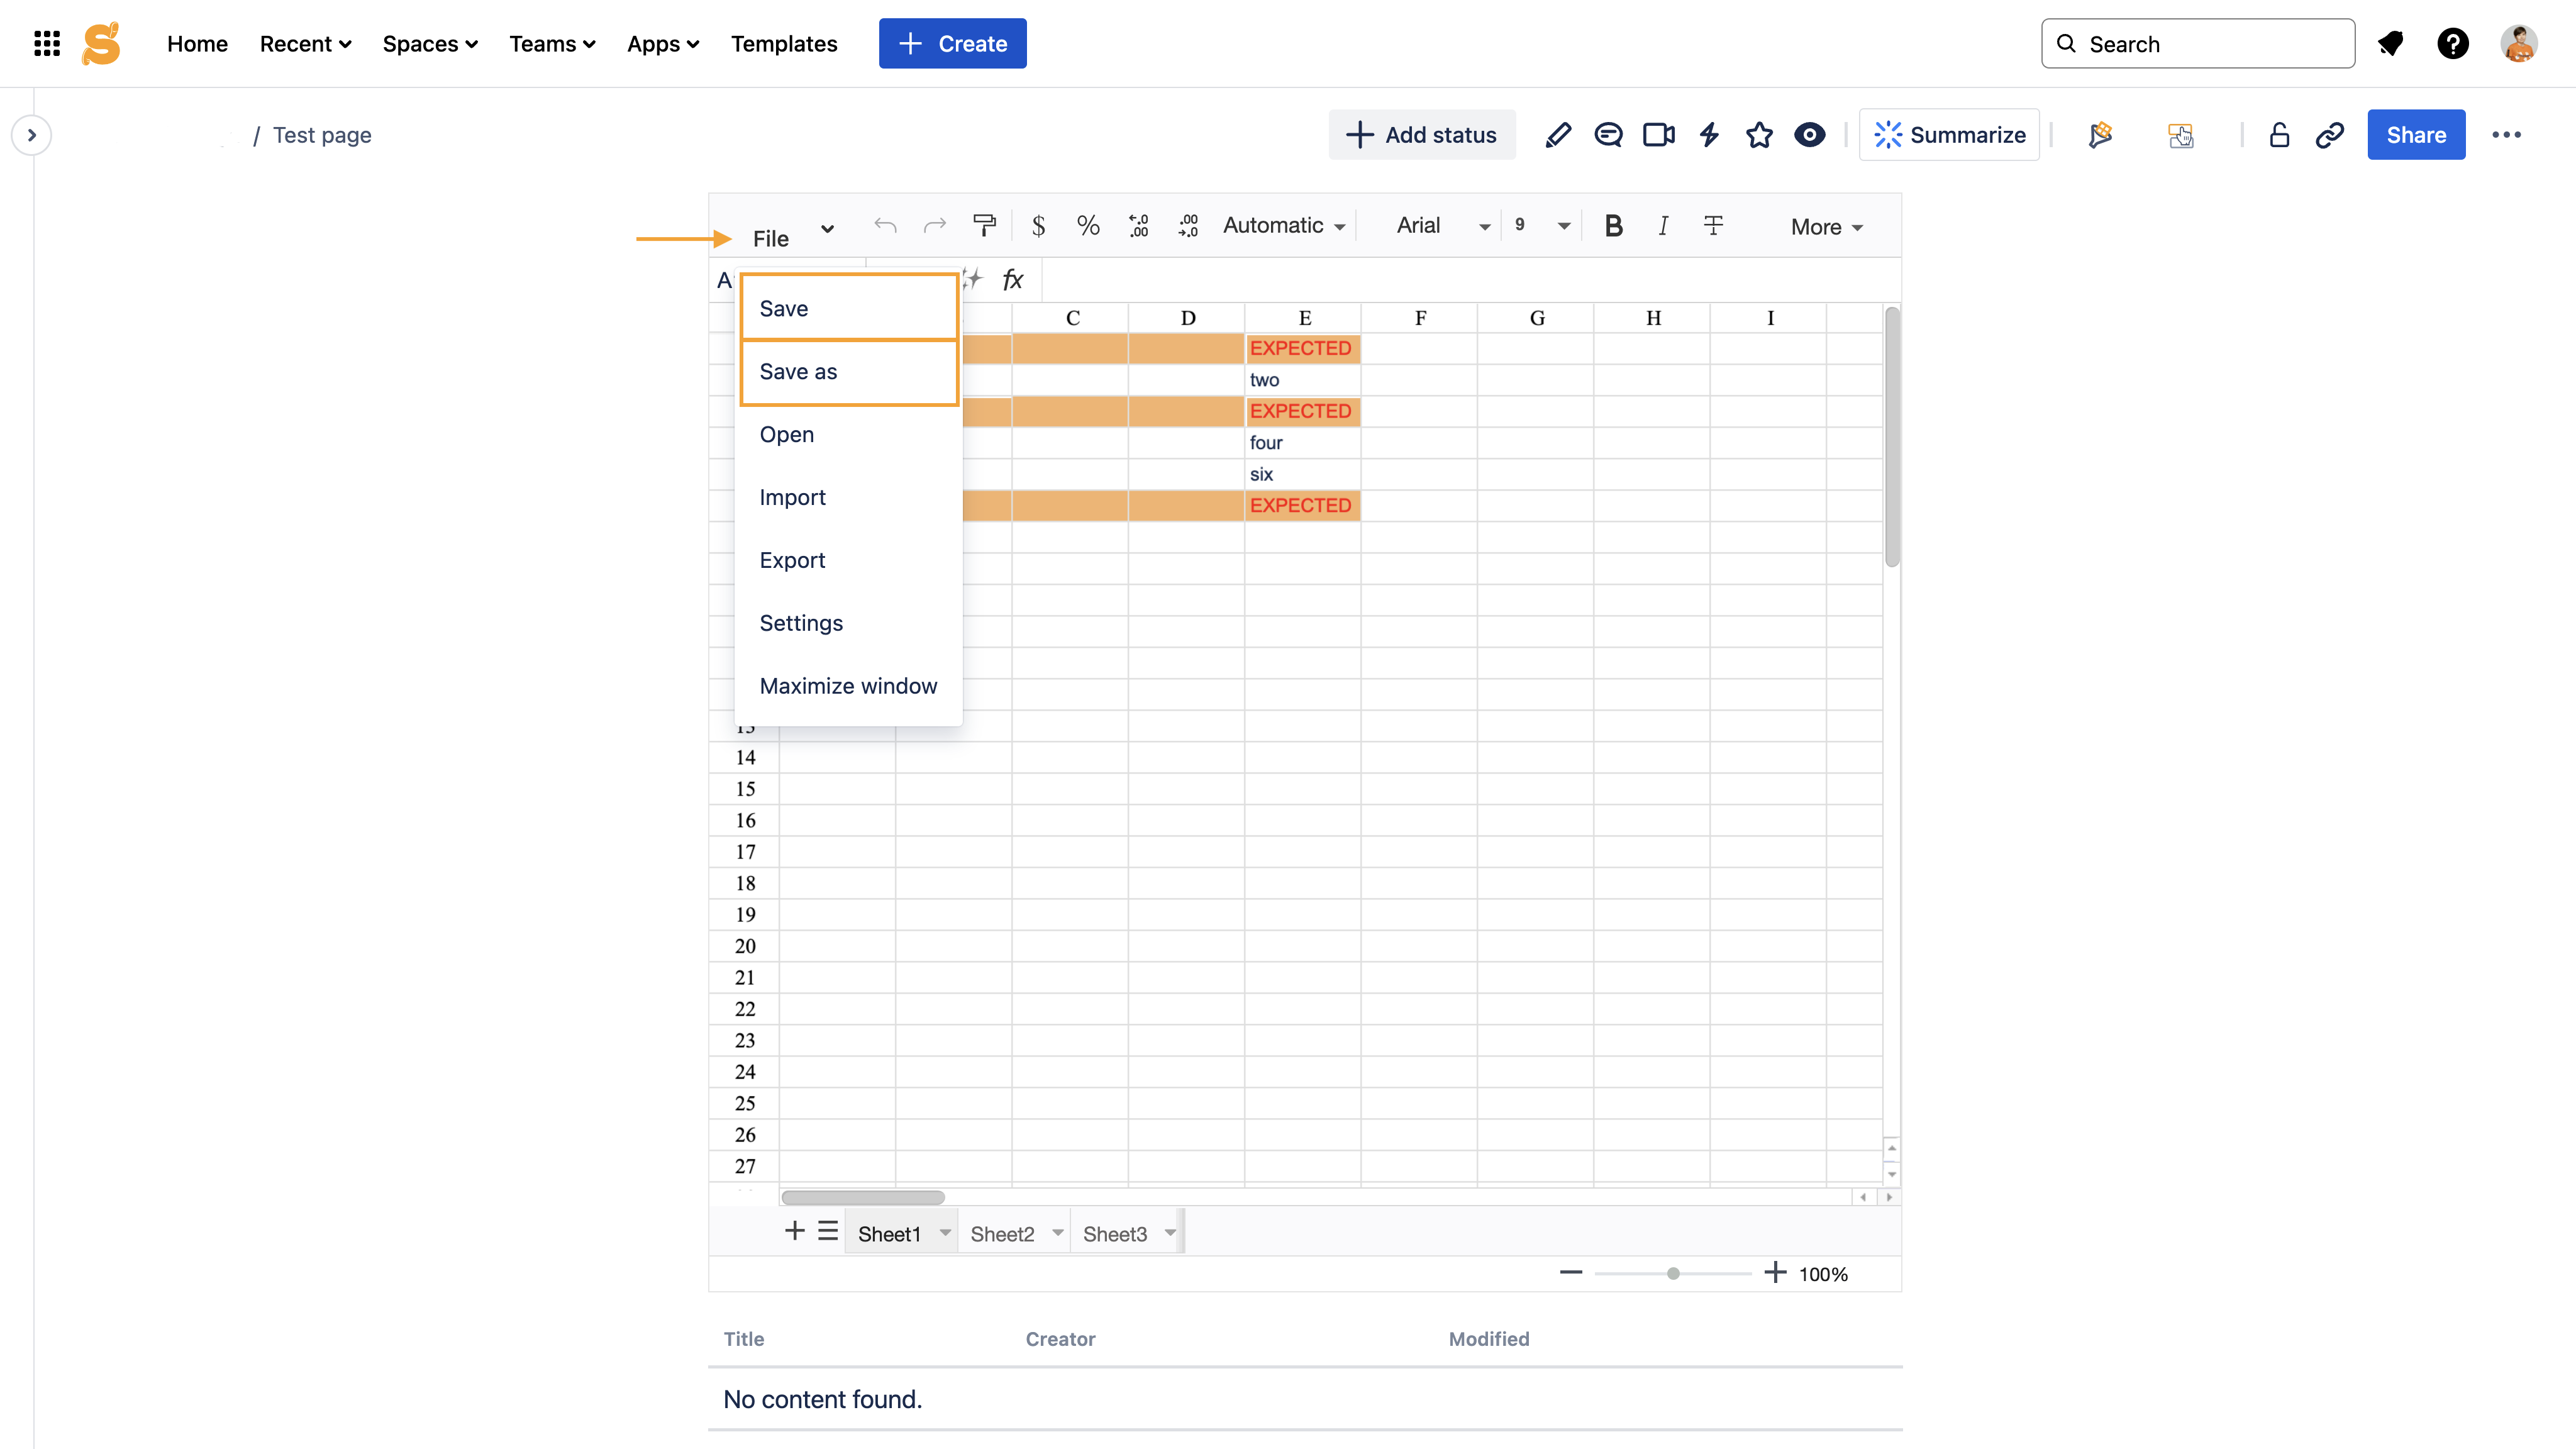
In the page view mode (regular macro window):
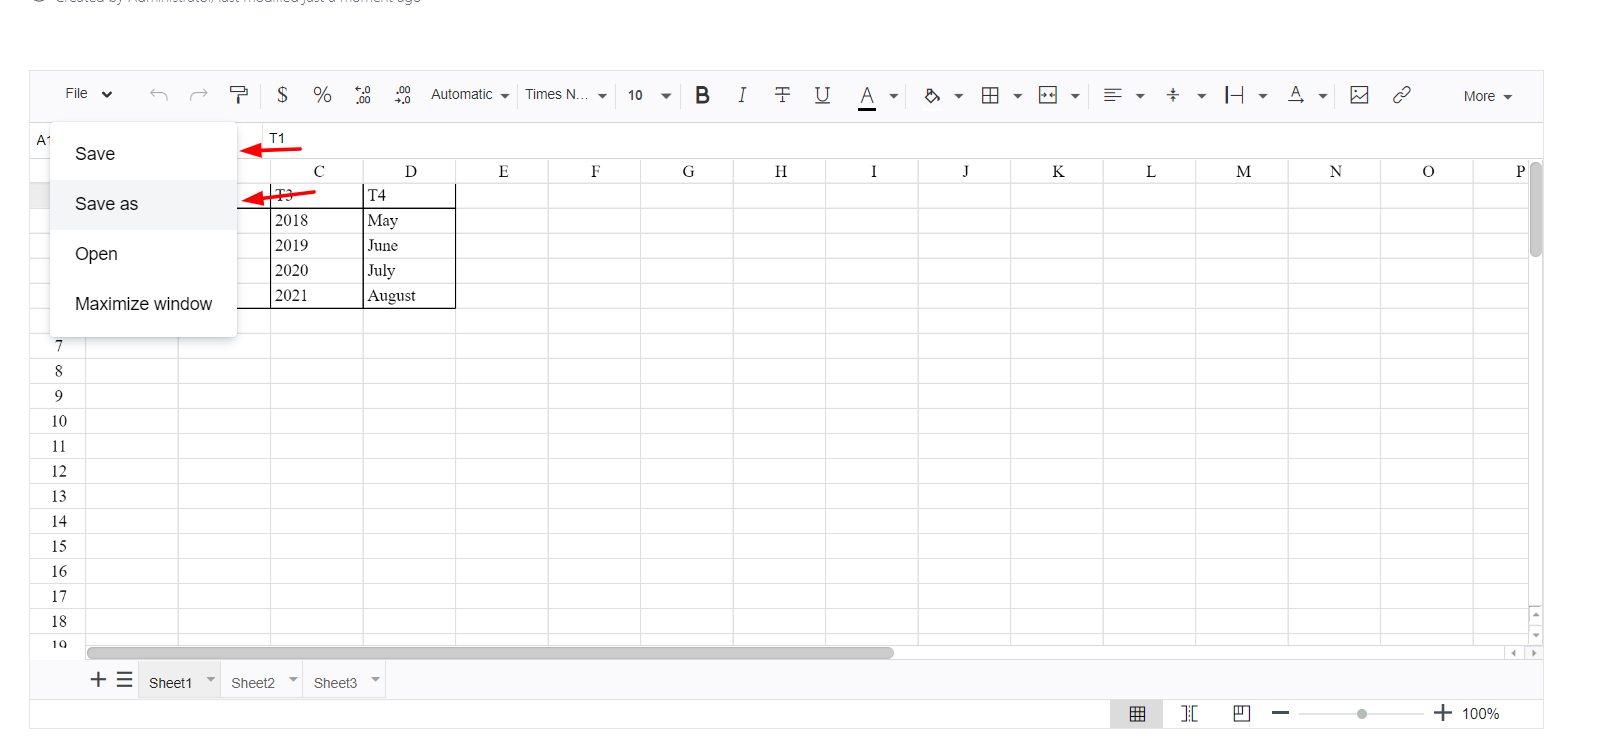
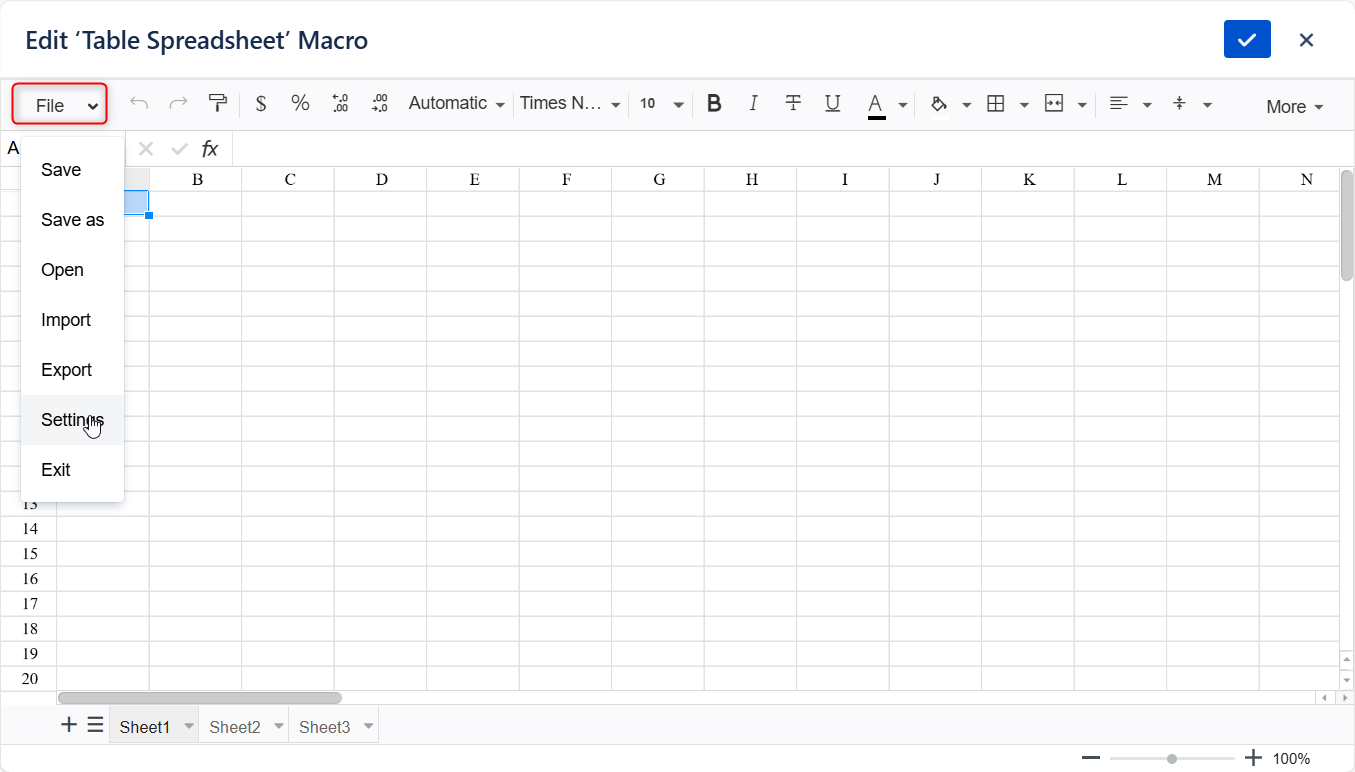
- Navigate to the File menu
- Choose Save/Save as option
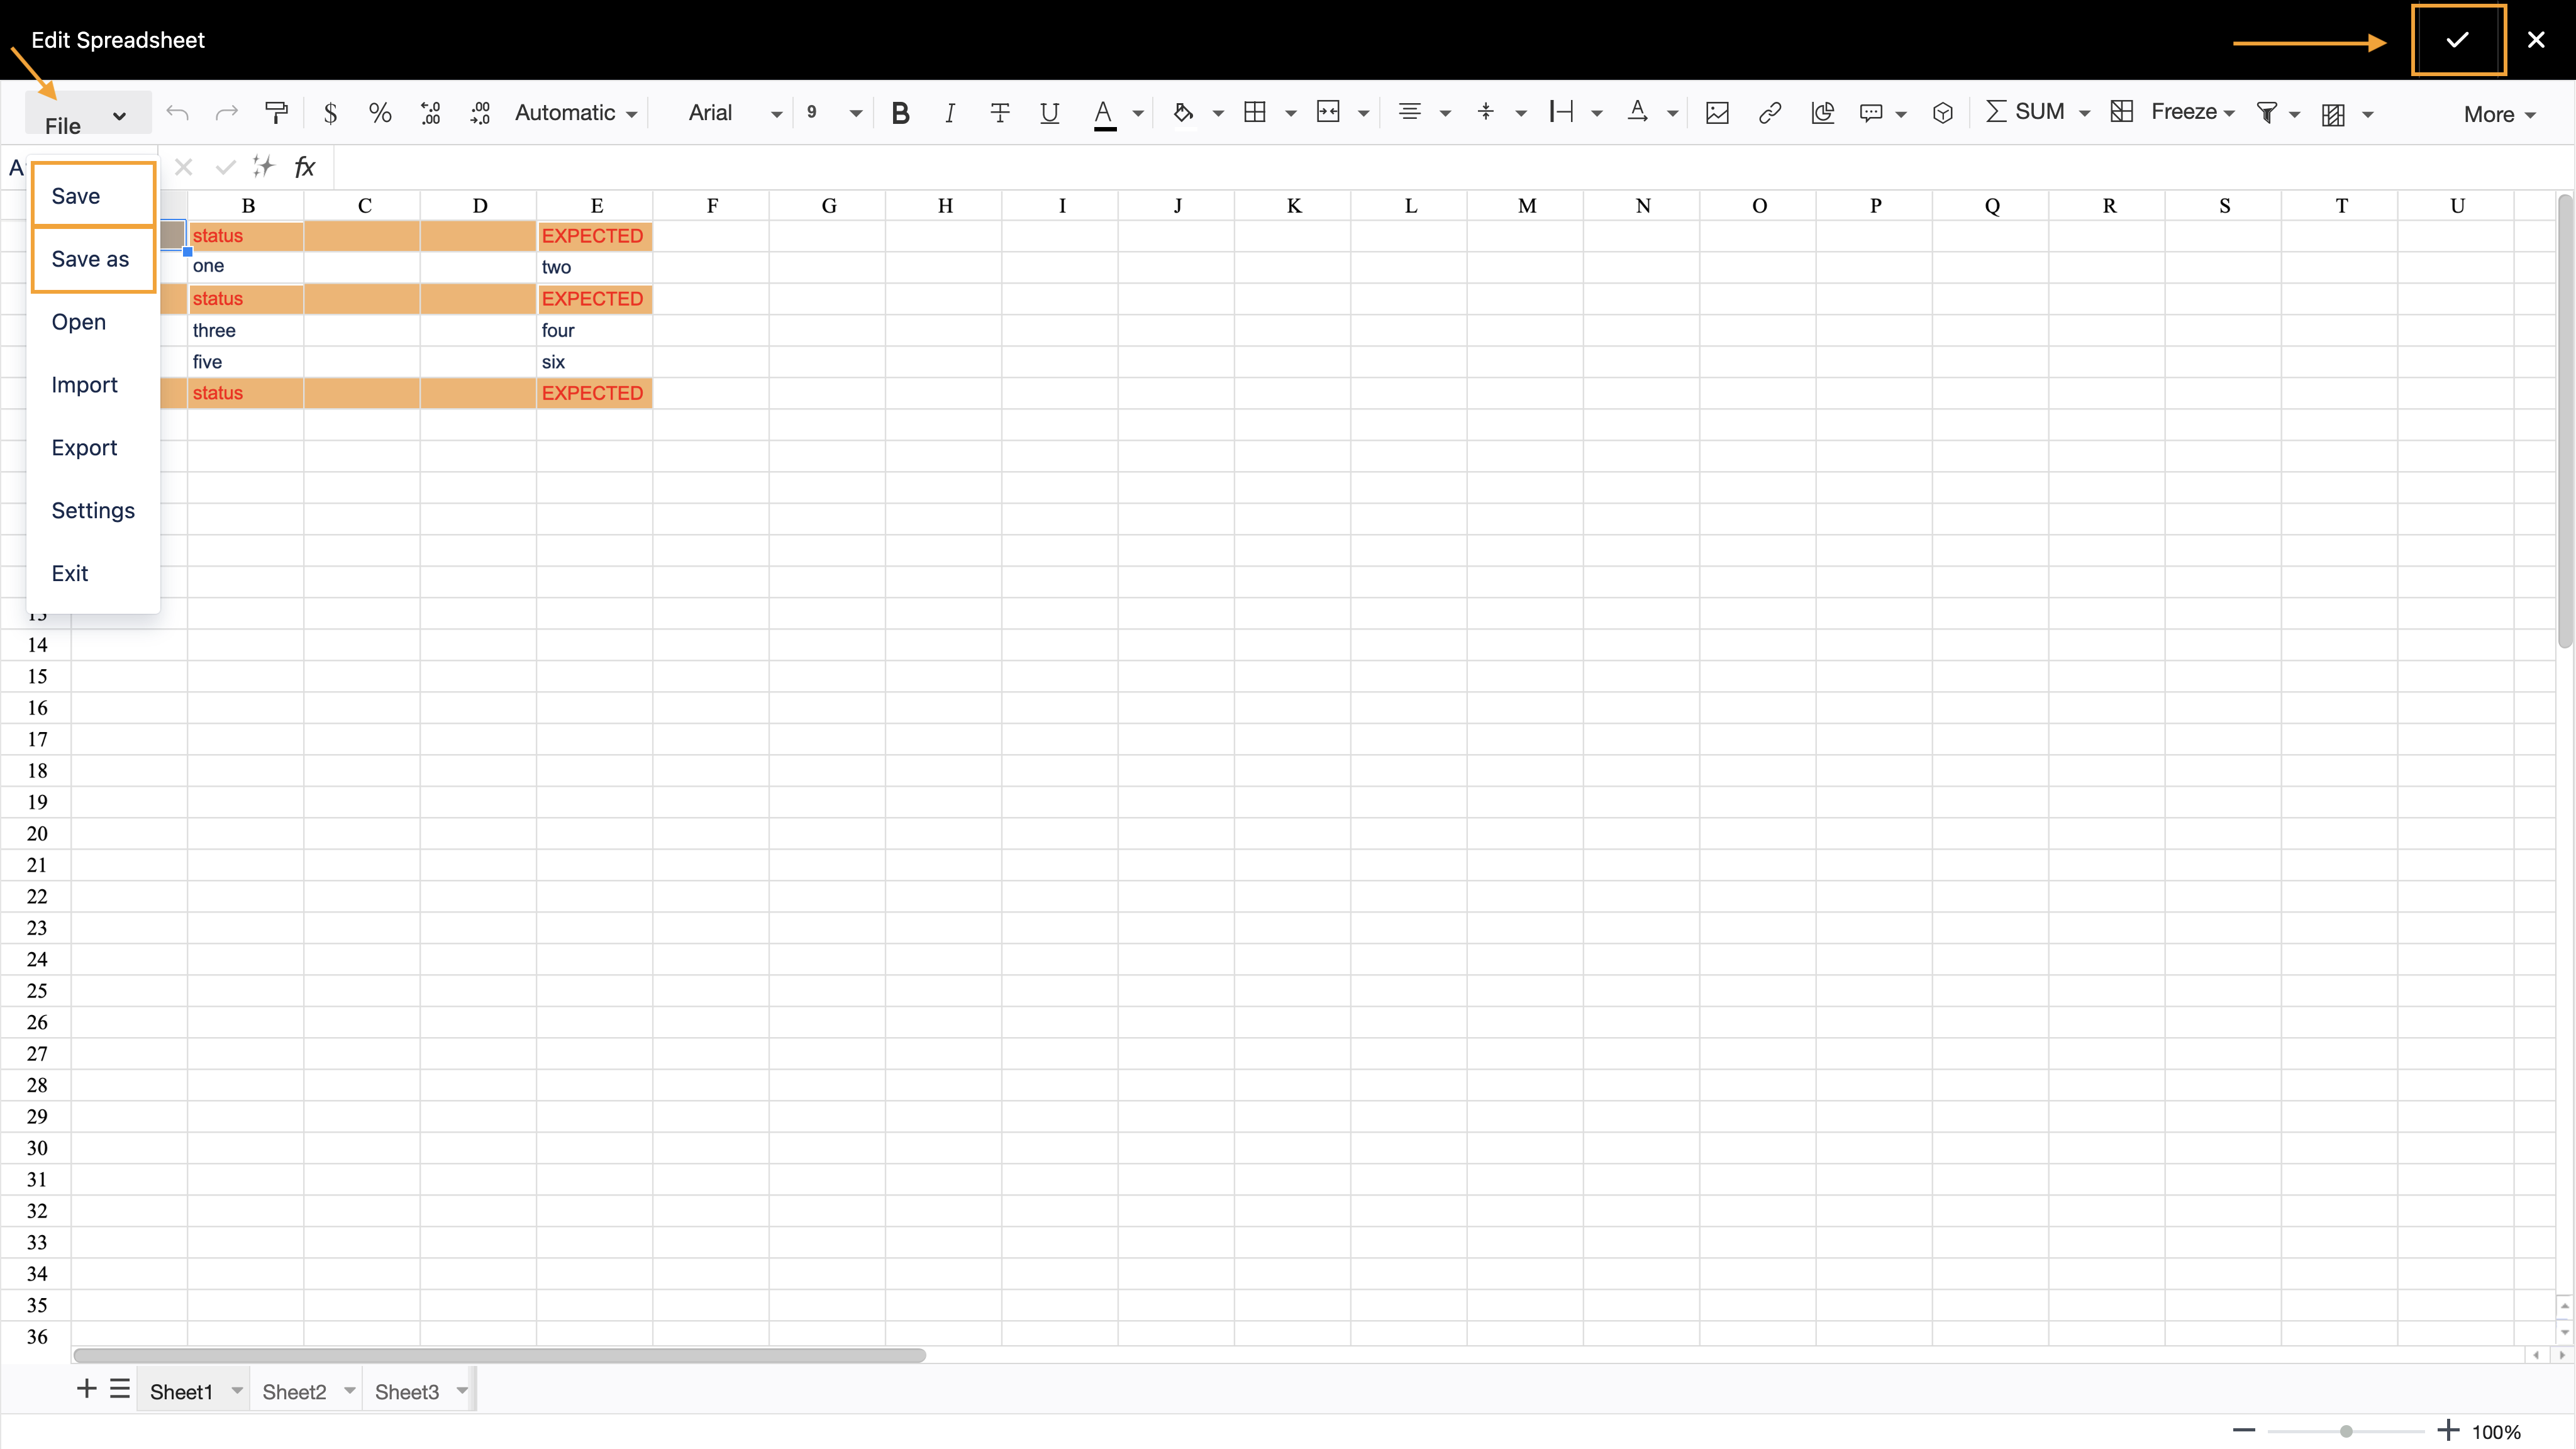
In the page view mode (maximized macro window):
- Variant 1: Navigate to the File menu and choose Save/Save as option
- Variant 2: Navigate to the right top side of the macro and click on the check
 button
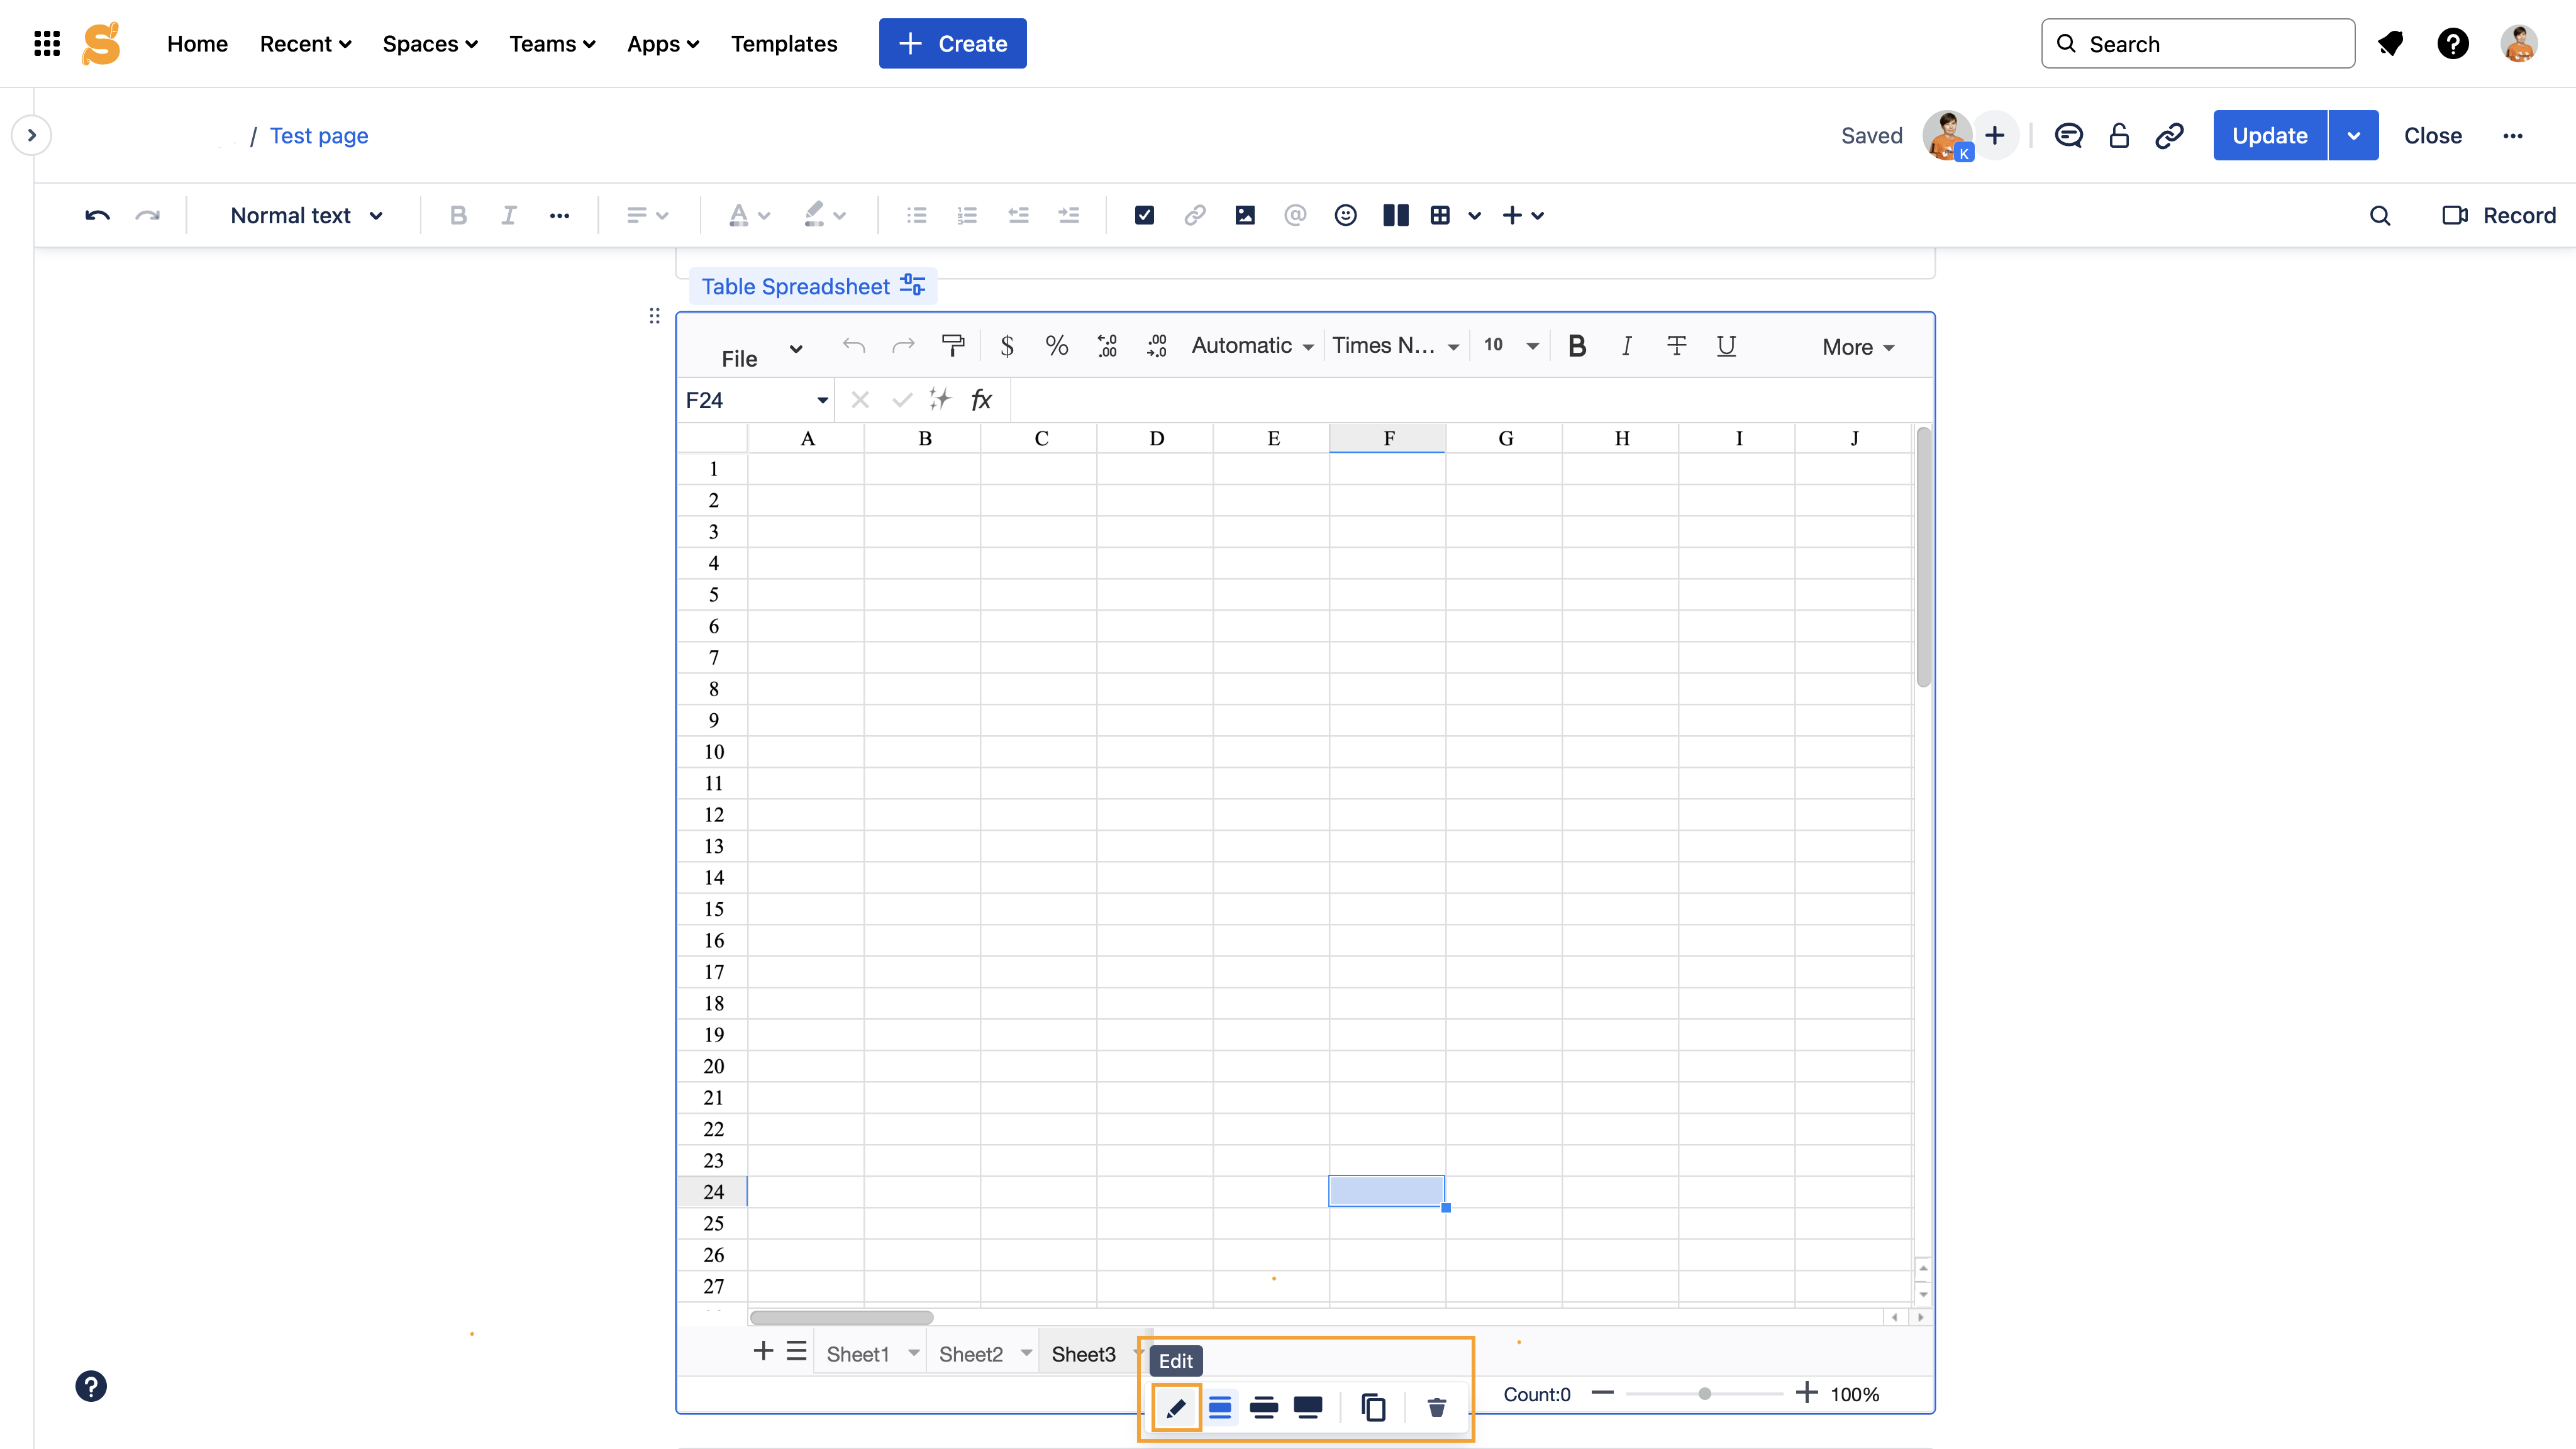
In the page edit mode:
- Switch your page to the edit mode
- Locate the macro settings toolbar and choose to Edit the macro
- Variant 1: Navigate to the File menu and choose Save/Save as option
Variant 2: Navigate to the right top side of the macro and click on the checkbutton
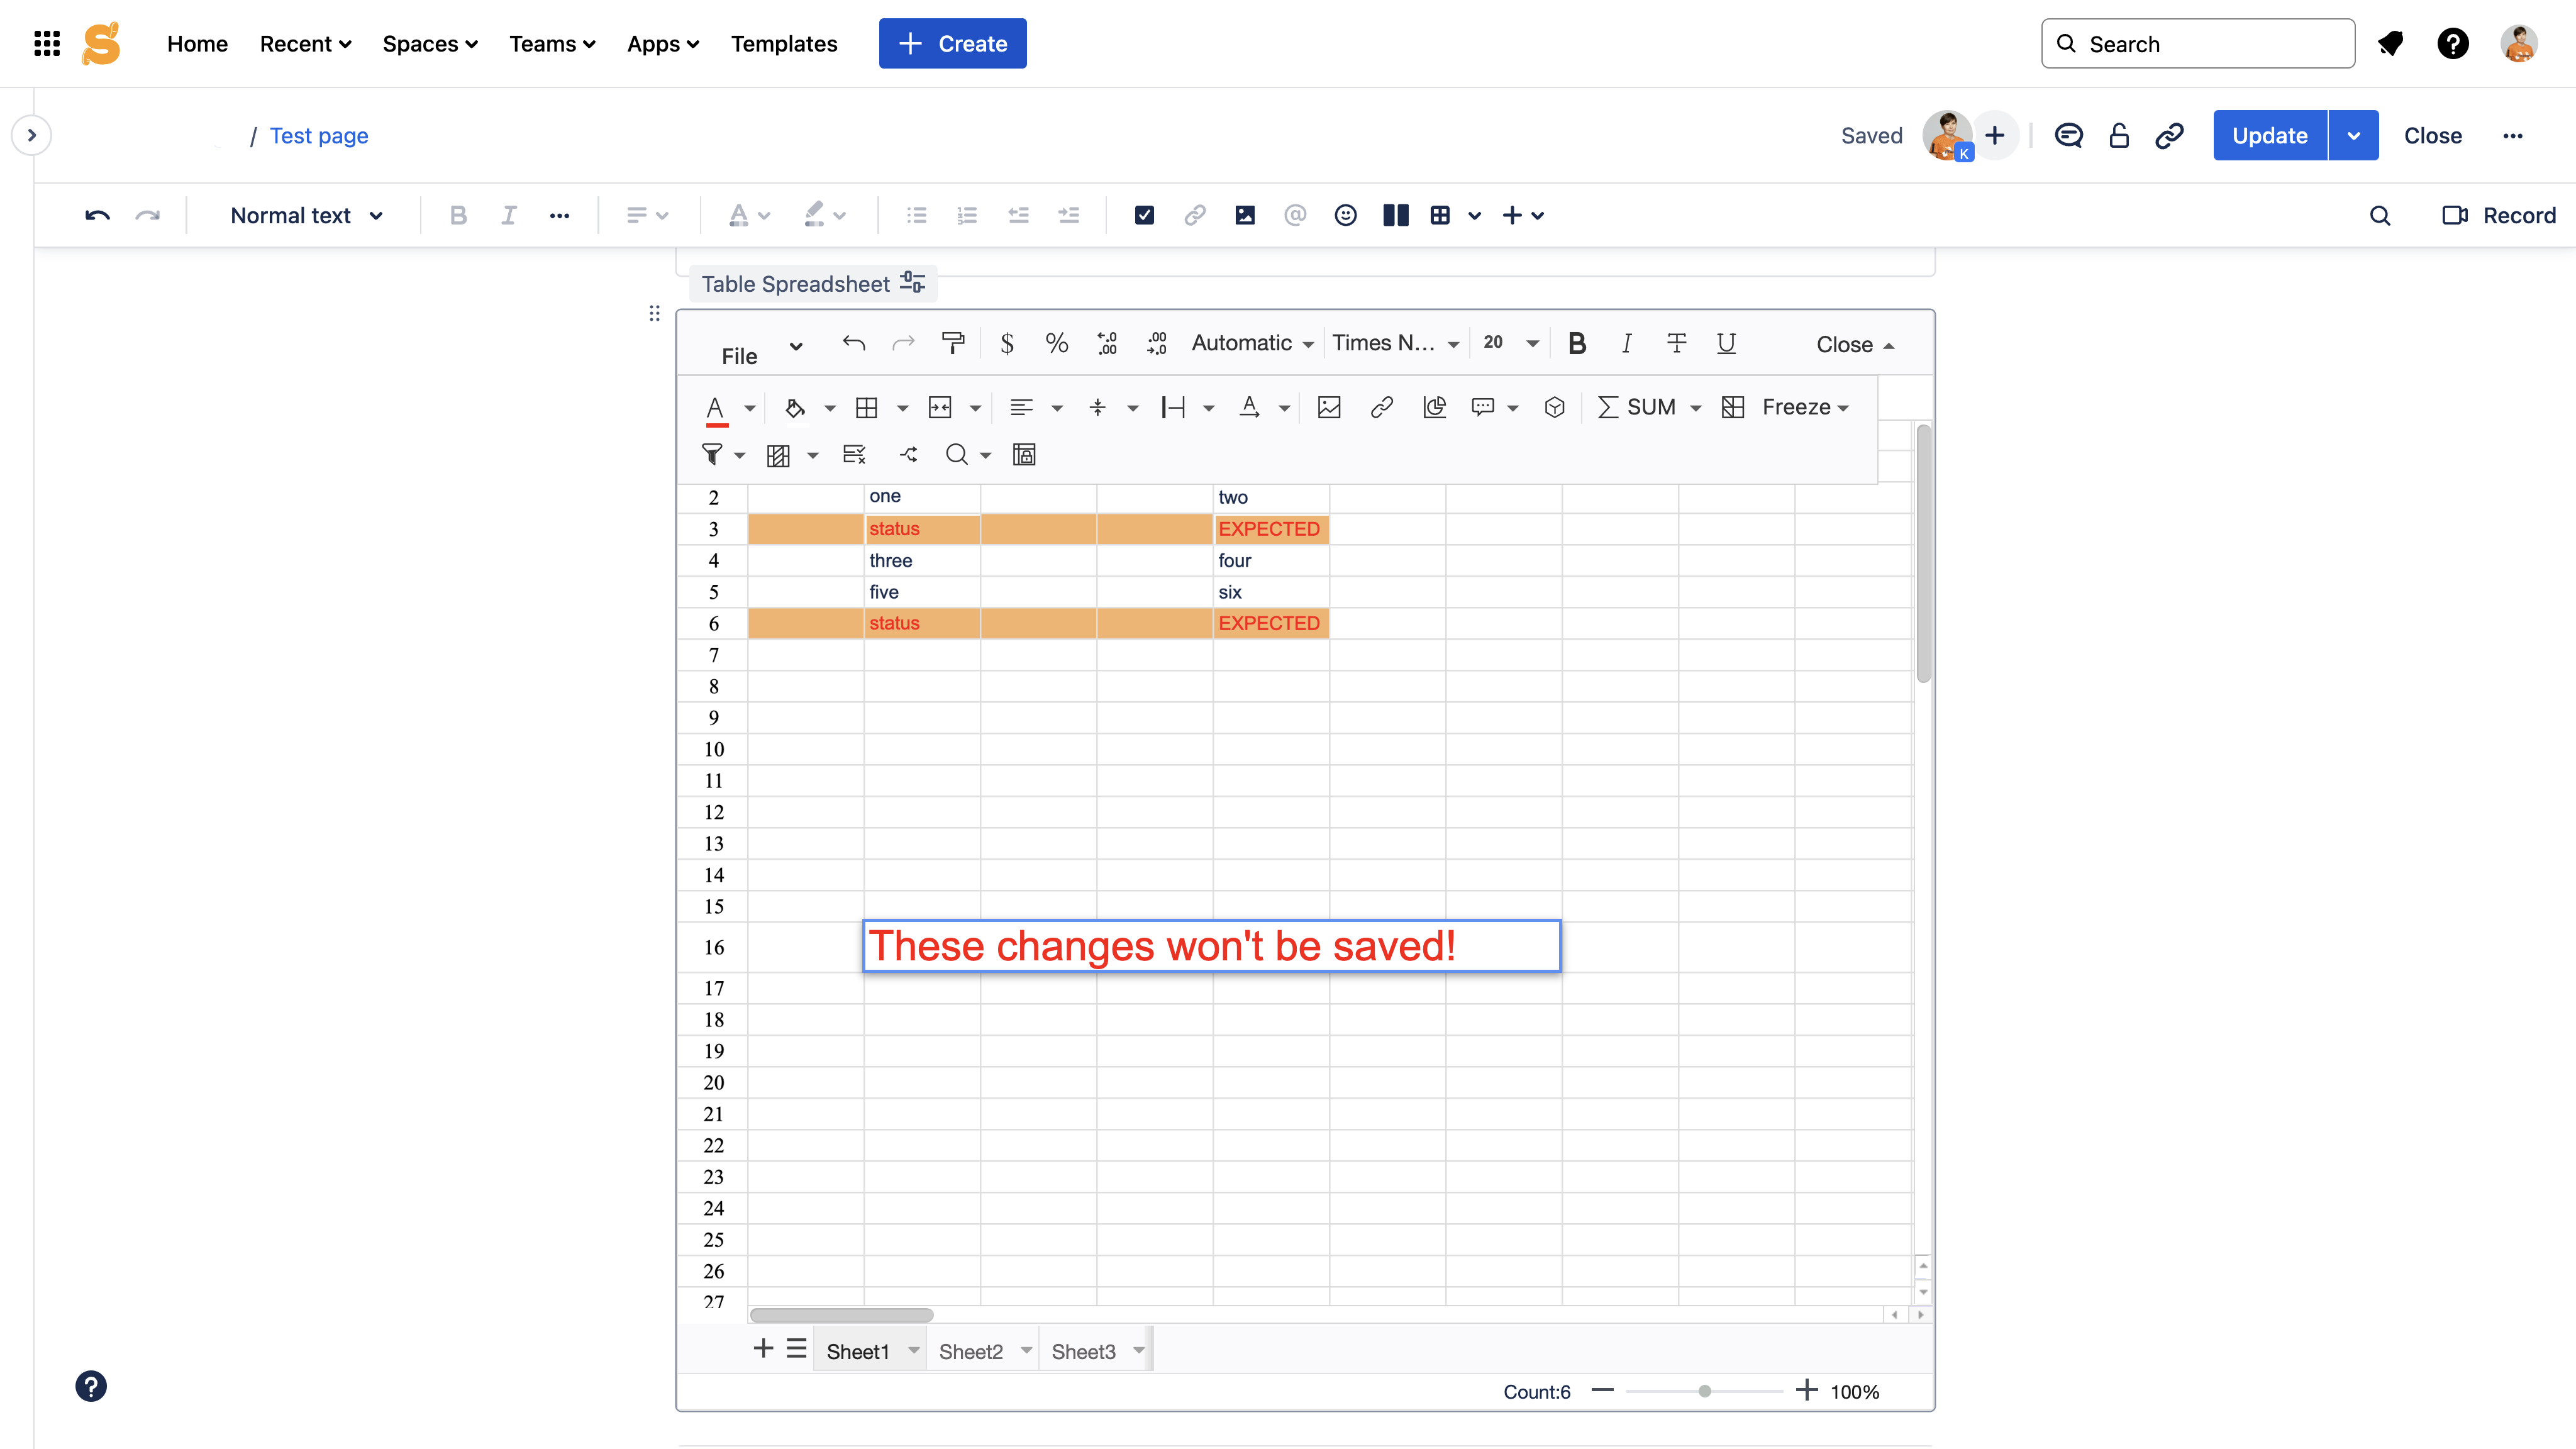
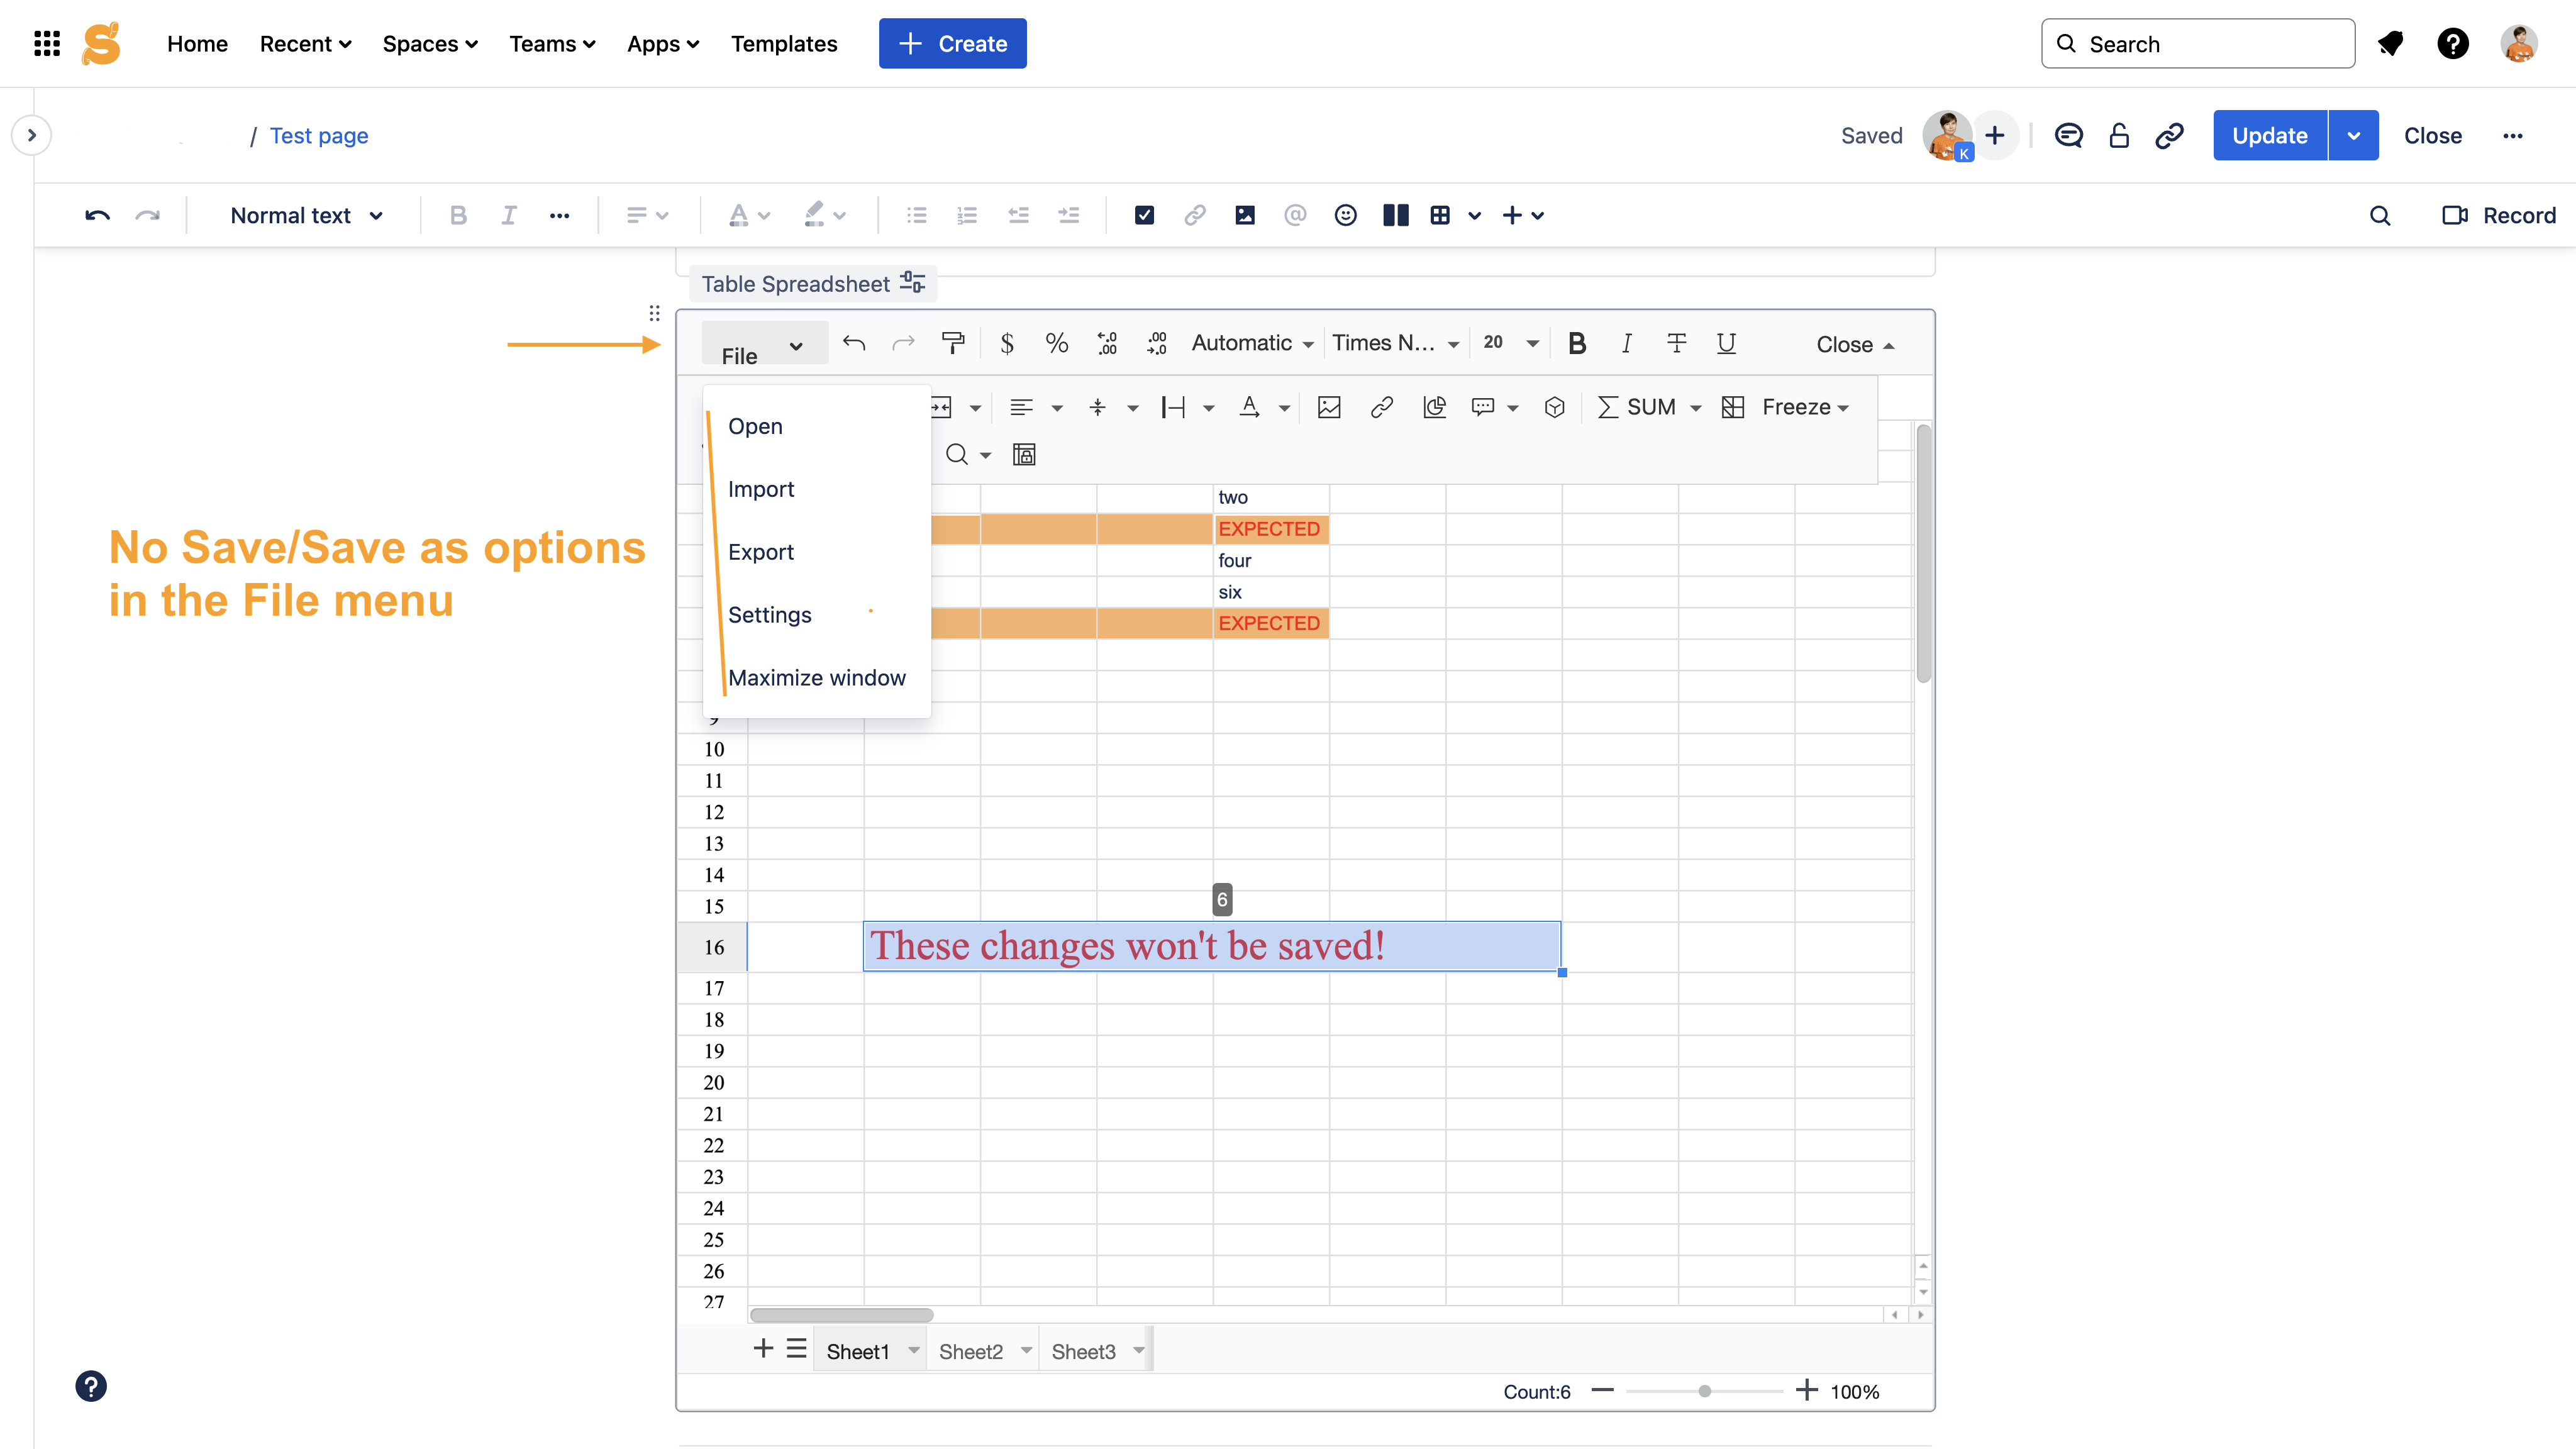
Note that you should always really edit the Table Spreadsheet macro to save changes. For example, if you begin to type in something in the macro preview that is rendered after switching to the page edit mode, these changes won't be saved. You may even visit the File menu and make sure that there are no Save/Save as options. So, don't forget to go to the macro settings toolbar and choose to Edit the macro firsthand.
Using spreadsheet Autosave
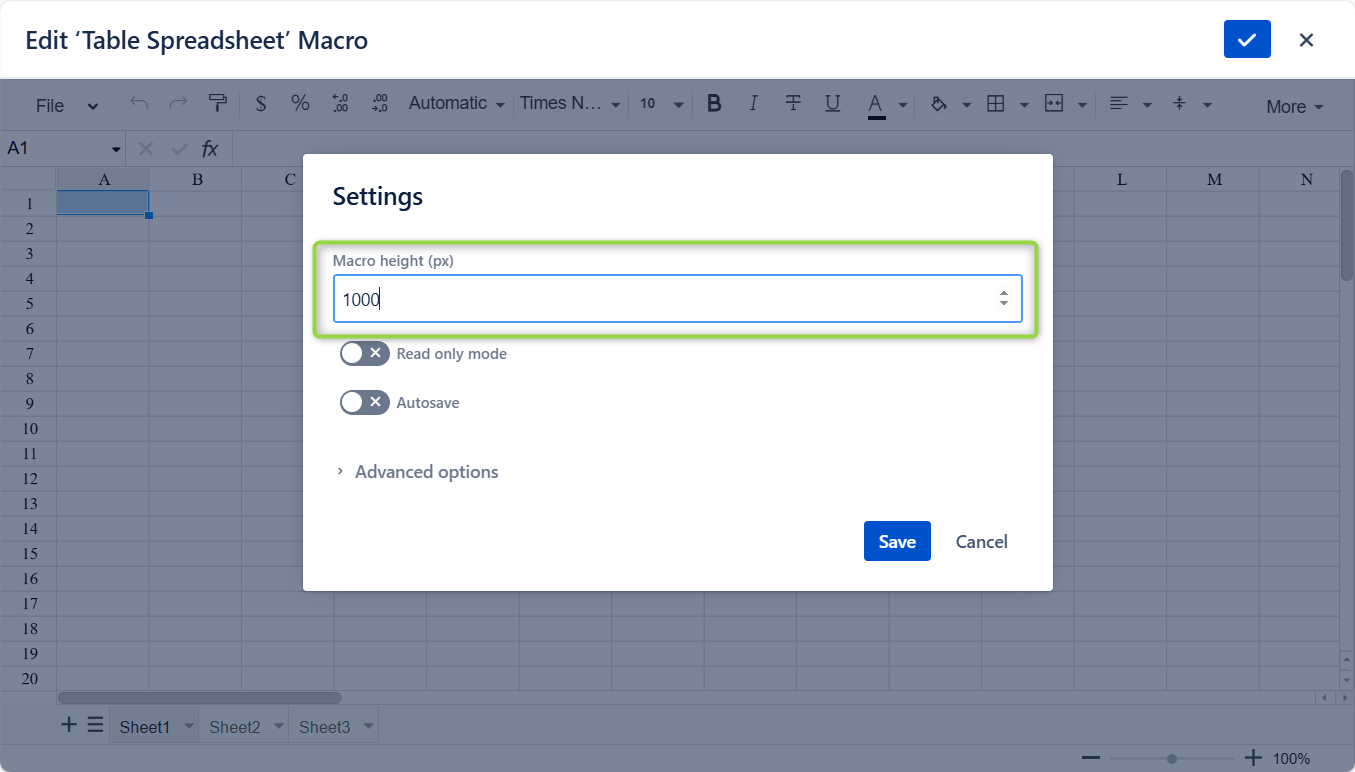
- Navigate to File -> Settings
- Tick Autosave
The Autosave option automatically saves changes to your spreadsheet, ensuring your work is preserved without extra effort. However, only the 10 most recent versions are retained.
Keep in mind: if users aren't space admins, older spreadsheet versions (stored as attachments) won’t be removed during updates. In this case, the 10-version limit may be exceeded.

Spreadsheet Macro height
- Navigate to File -> Settings
- Locate the Macro height field
- Set the necessary value in pixels(px)
- Save the setting as well as the Spreadsheet macro.
The Macro height setting requires the minimum value of 400px being the Table Spreadsheet's default macro height or higher, meaning the values below this threshold cannot be entered.
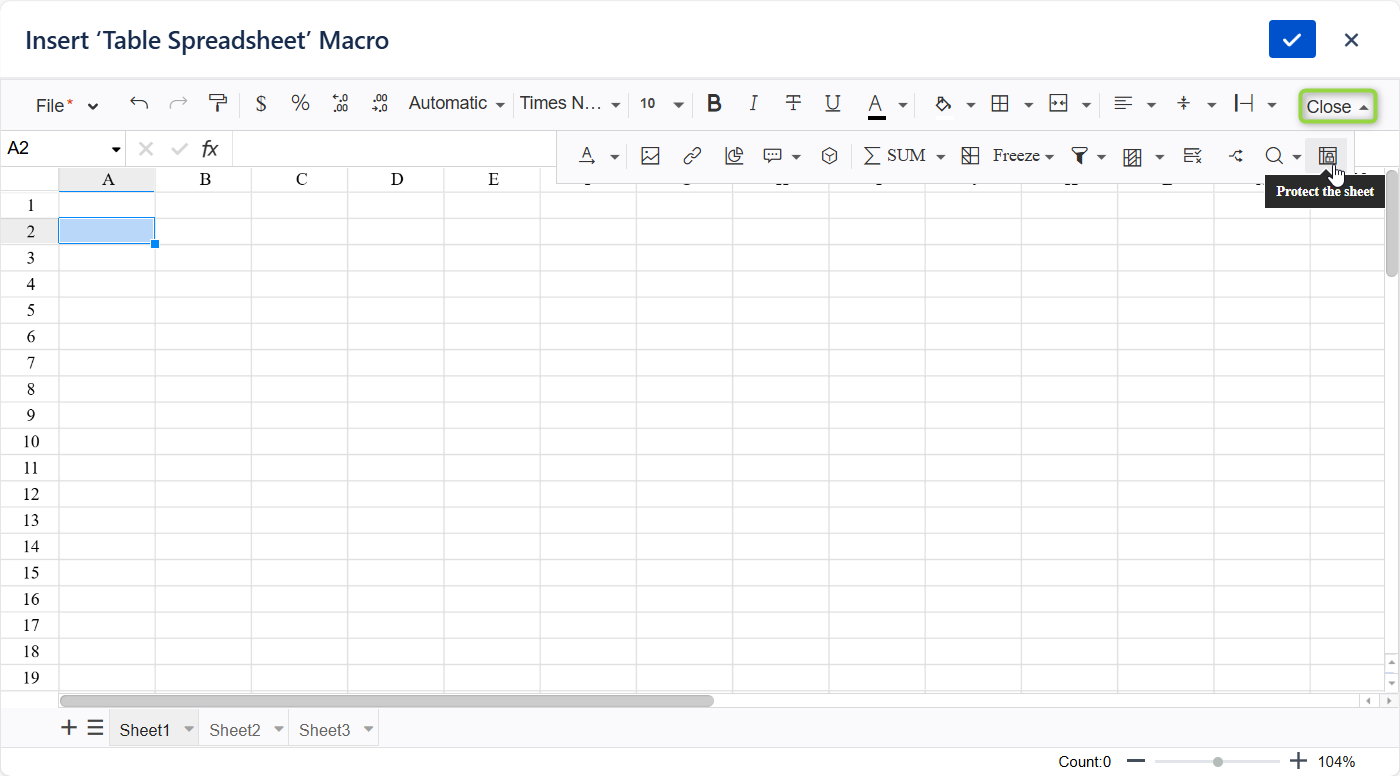
Protecting the sheet
- Select a sheet to protect
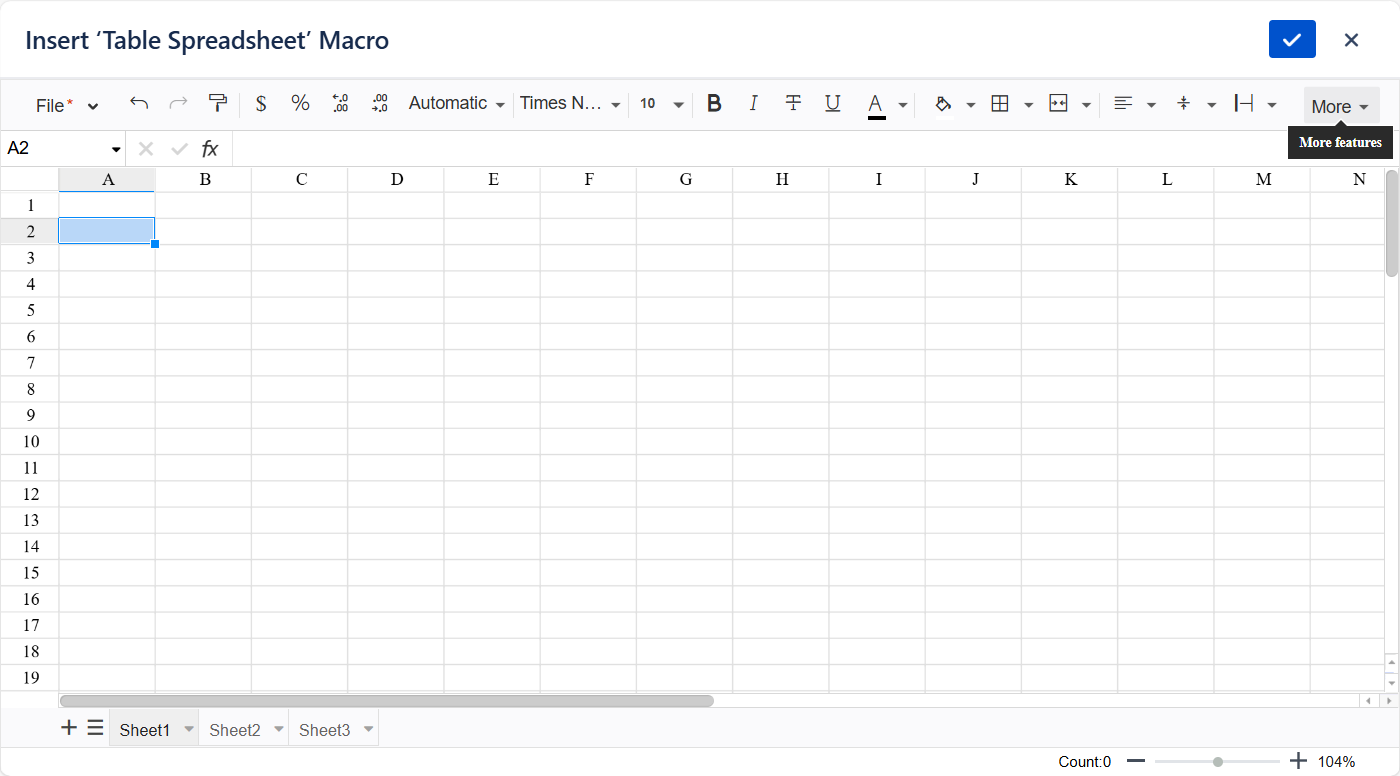
- Navigate to the More▾ section on the editor pane
- Choose Protect the sheet

- Check the Protect the sheet and contents of locked cells setting to enable protection
- Check all necessary parameters in the allowed actions list
- Save the setting and the macro.

Restoring the previous version of the spreadsheet
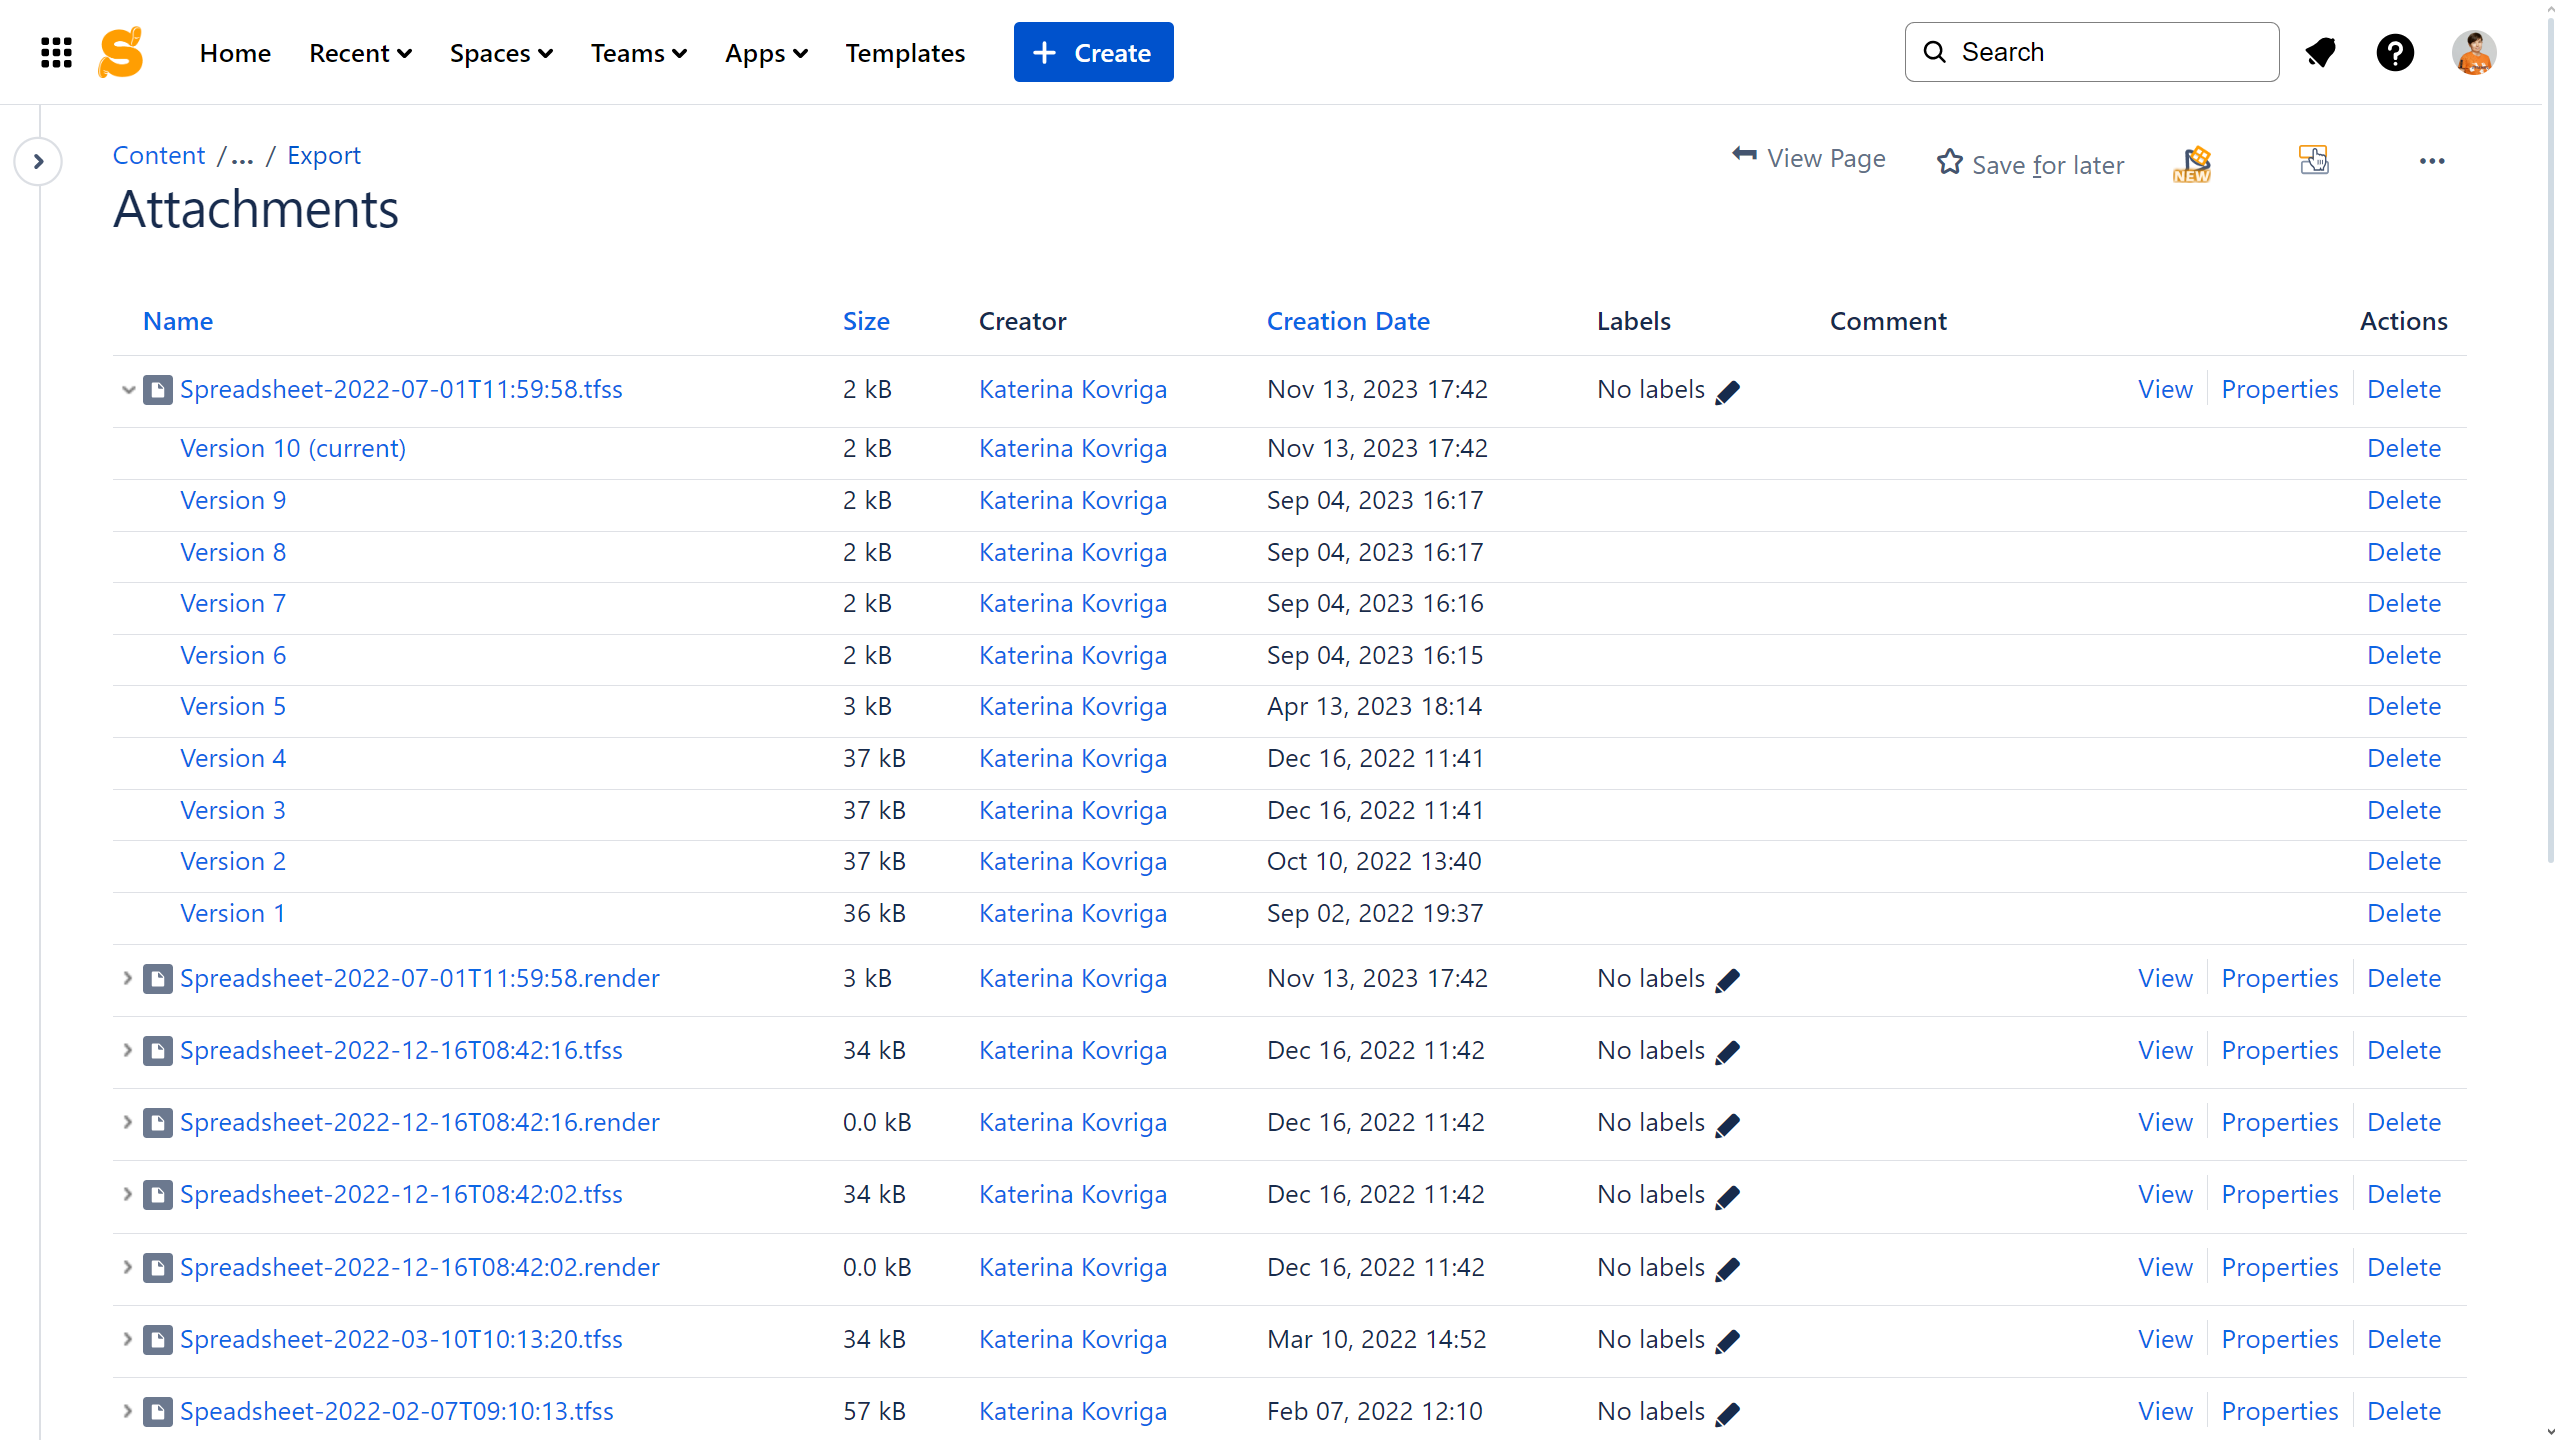
To find all saved versions of the spreadsheets, navigate to the page's attachments.
Expand the row with the .tfss file, download the required version, and import it into Table Spreadsheet.
Note that the last 10 versions of a spreadsheet are saved by default. But you can retain all spreadsheet revisions - please check the abstract below.
Retain all spreadsheet revisions
- Navigate to File -> Settings
- Tick Retain all spreadsheet revisions in the Advanced options section
Enabling the Retain all spreadsheet revisions option will result in higher storage usage. This means that each version or change made to a spreadsheet will be saved and take up storage space.
Nesting Table Spreadsheet inside other Table Filter, Charts & Spreadsheets macros
Table Spreadsheet supports nesting inside the following macros within the Table Filter, Charts & Spreadsheets app: Table Filter, Pivot Table, Table Transformer, Chart from Table, Table Excerpt and Table Toolbox.
- Locate the page with the Table Spreadsheet macro.
- Switch the page to the edit mode.
- Add one of the Table Filter, Charts & Spreadsheets macros to be further combined with your Table Spreadsheet.
- Wrap your Table Spreadsheet with the added macro.
- Configure the macro to fit your needs.
- Save the macro and the page.

To combine your Table Spreadsheet with multiple Table Filter, Charts & Spreadsheets macros in the Cloud version wrap it with the Table Toolbox macro .