Awesome Graphs shows statistics based on the emails contributors used when committing changes to the repository. Sometimes one contributor can use different emails which can lead to inconsistent and incomplete data shown by Awesome Graphs.
Below on the page, we'll describe different ways to address this problem. For easier navigation, use the Table of Contents at the top-right of the page.
Awesome Graphs is not case-sensitive for user emails.
Use .mailmap in the repository
You can use the .mailmap file in your repository to merge several emails for one user. However, it affects only the contributions made after you added or edited the .mailmap file.
Use aliases in the user profile settings
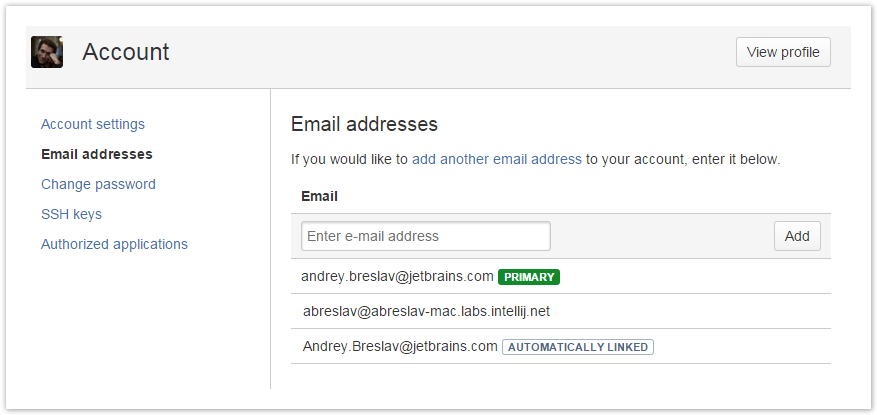
To join the contributions made by the same person under multiple emails before the .mailmap was edited or added, you need to add the missing e-mails in Manage Account → Email addresses for each user.
The easiest way to understand what emails should be added is to find identically named users in the Contributors tab, hover over their names, and see an email in a pop-up tip.

You can add as many emails as you want unless they are used by other Bitbucket Server / Data Center accounts.

The emails in the list are marked as follows:
| Note | Description | Can be deleted |
|---|
| Primary | The default user email in Bitbucket Server. | No |
| Automatically Linked | Counterparts of already existing emails differing only in case. | No |
| Unmarked | Emails manually added by the user. | Yes |
Email aliases are shown on the Contributions page:

Use aliases on the Administration page
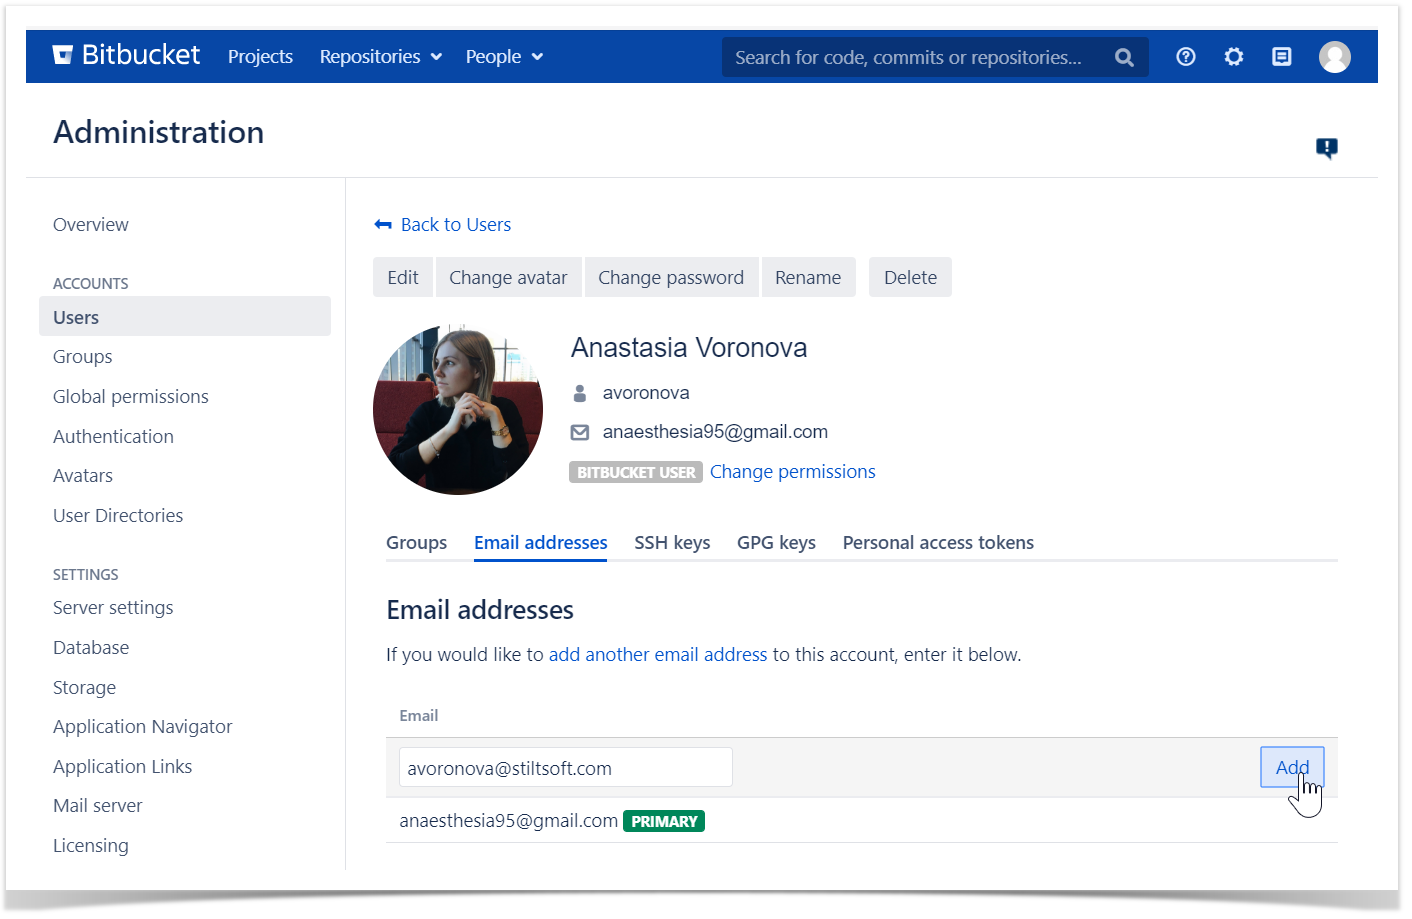
Bitbucket administrators can manage email aliases of all Bitbucket users.
To add an email alias to a user profile, the Bitbucket administrator needs to:
- Navigate to Administration → Users.
- Click the username of the user to which profile you want to add an email alias.
- Choose the Email addresses tab.
- Type an email address in the field below and click Add.

Use REST API
You can also manage email aliases via REST API. To learn more about it, please read Managing emails via REST API.