Awesome Graphs lets you control who can access selected app features in Bitbucket Data Center. By default, all Awesome Graphs features are available to all users who already have access to the relevant Bitbucket pages. If you add one or more Bitbucket users or groups to a feature, that feature becomes restricted and is available only to the selected users and members of the selected groups.
Below on the page, you'll find:
- an explanation of how the access logic works
- instructions on how to configure permissions
- an overview of the features you can restrict
For easier navigation, use the Table of Contents at the top-right of the page.
How the access logic works
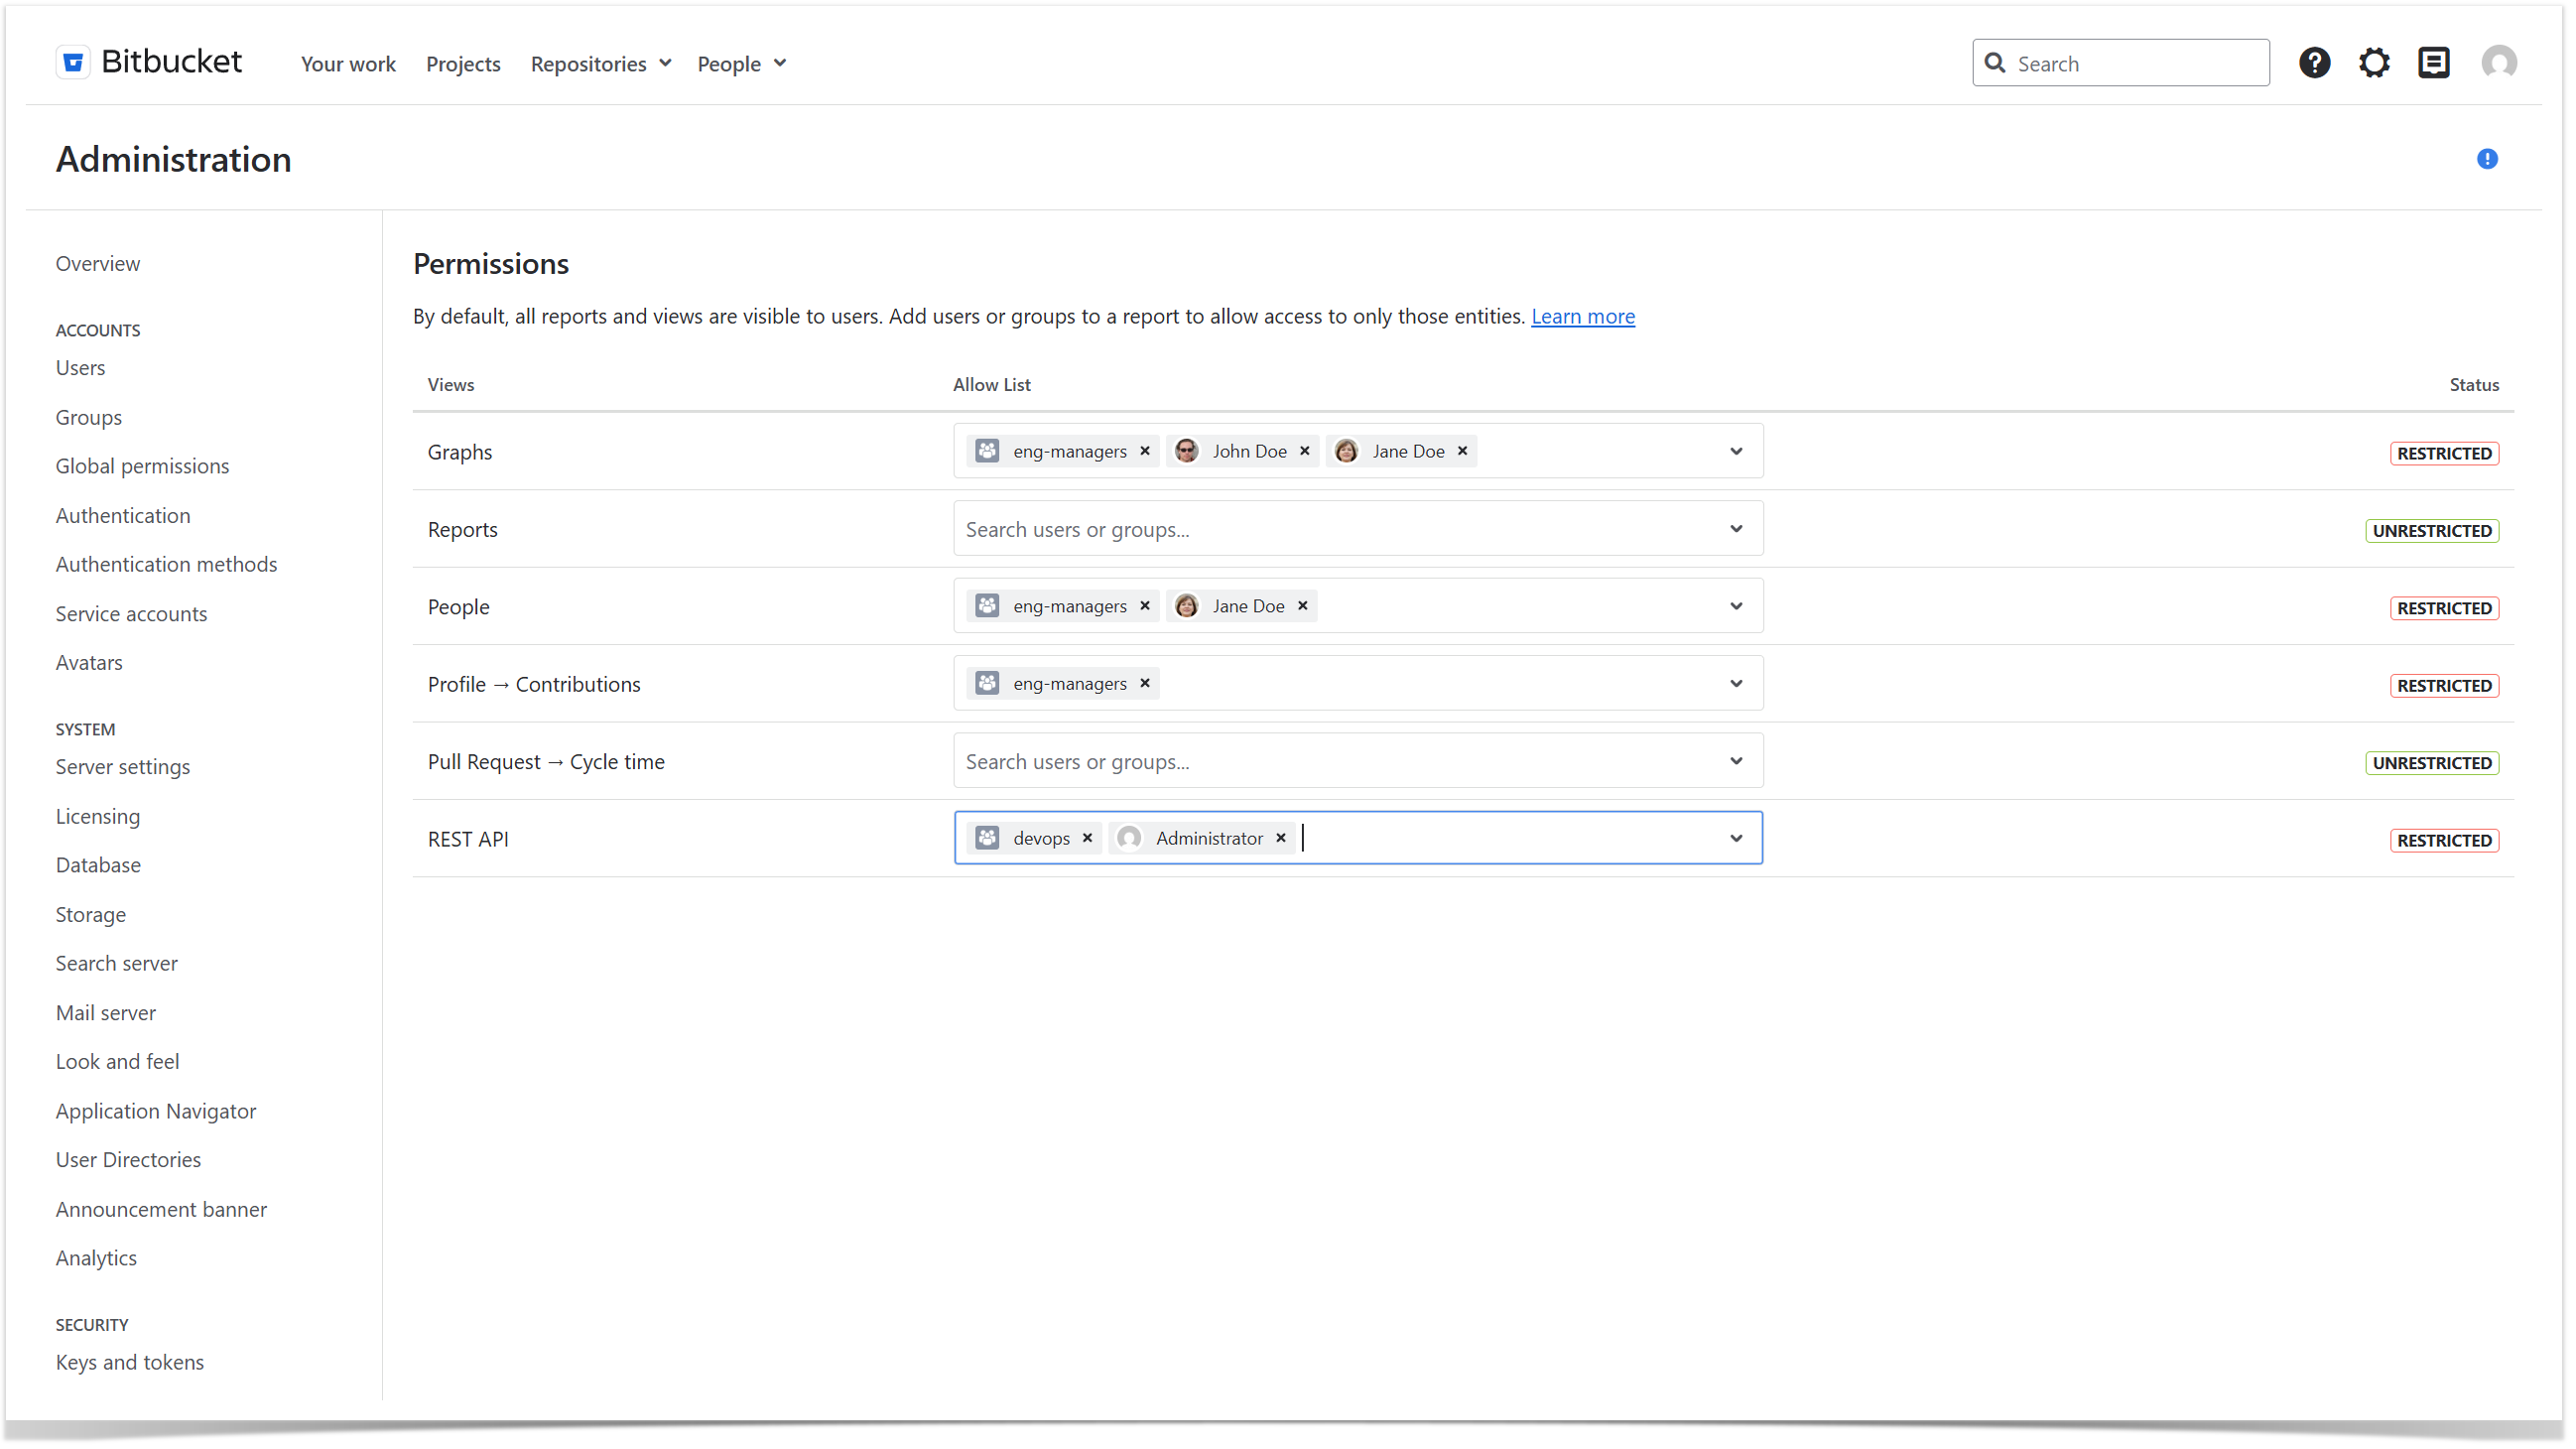
By default, all Awesome Graphs features are unrestricted. The Permissions page uses an allow-list model.
| Status | Meaning |
|---|
| Unrestricted | The feature is available to all users who already have access to the relevant Bitbucket page. |
| Restricted | The feature is available only to explicitly selected users and members of selected groups. |
A user can access a restricted feature if at least one of the following is true:
- the user is added directly to the feature allow-list
- the user belongs to a group added to the feature allow-list
When a feature is restricted, Awesome Graphs limits its visibility in the UI and on supported feature pages. If a user does not have access to a feature, Awesome Graphs hides the corresponding tabs, buttons, links, or menu items from the UI where applicable.
These settings apply to Awesome Graphs feature visibility and supported access points. They do not replace Bitbucket's native permission model. Users still need the corresponding Bitbucket access to the project, repository, pull request, or profile page.
Permissions can be configured globally on the Administration page. Only System Admins can manage these settings.
To restrict access to an Awesome Graphs feature:
1. Navigate to the Permissions tab on the Administration page.
2. Find the feature you want to configure.
3. Start typing a Bitbucket user's or a group's name.
4. Choose the name you want to add from the list of suggestions or press Enter when the necessary user or group is displayed.
5. Repeat these steps to add more users or groups if needed.
Once at least one user or group is added, the feature status changes to Restricted.
To make a feature available to everyone again, remove all selected users and groups from that feature. When no users or groups are specified, the feature status changes to Unrestricted.
Features controlled on this page
You can configure permissions for the following Awesome Graphs features:
| Feature | What is affected |
|---|
| Graphs | Graphs pages on the project and repository levels |
| Reports | Reports pages on the project and repository levels |
| People | The global People page |
| Pull Requests → Cycle Time | The Cycle Time column and related details on Pull Requests pages |
| Profile → Contributions | The Contributions tab in Bitbucket user profiles |
| REST API | Awesome Graphs REST API entry points and related UI controls |
Please note that the People section in the header combines entry points from more than one Awesome Graphs feature, so to hide the People section completely, restrict access to both of the following features:
- People
- Profile → Contributions
If access to both features is restricted, the People section is hidden from the header. If only one of these features is restricted, the section will remain visible, but only the available entry points will be shown.