Customize the spreadsheet output
You can choose the output of Issue Spreadsheet so that you have the view you need.
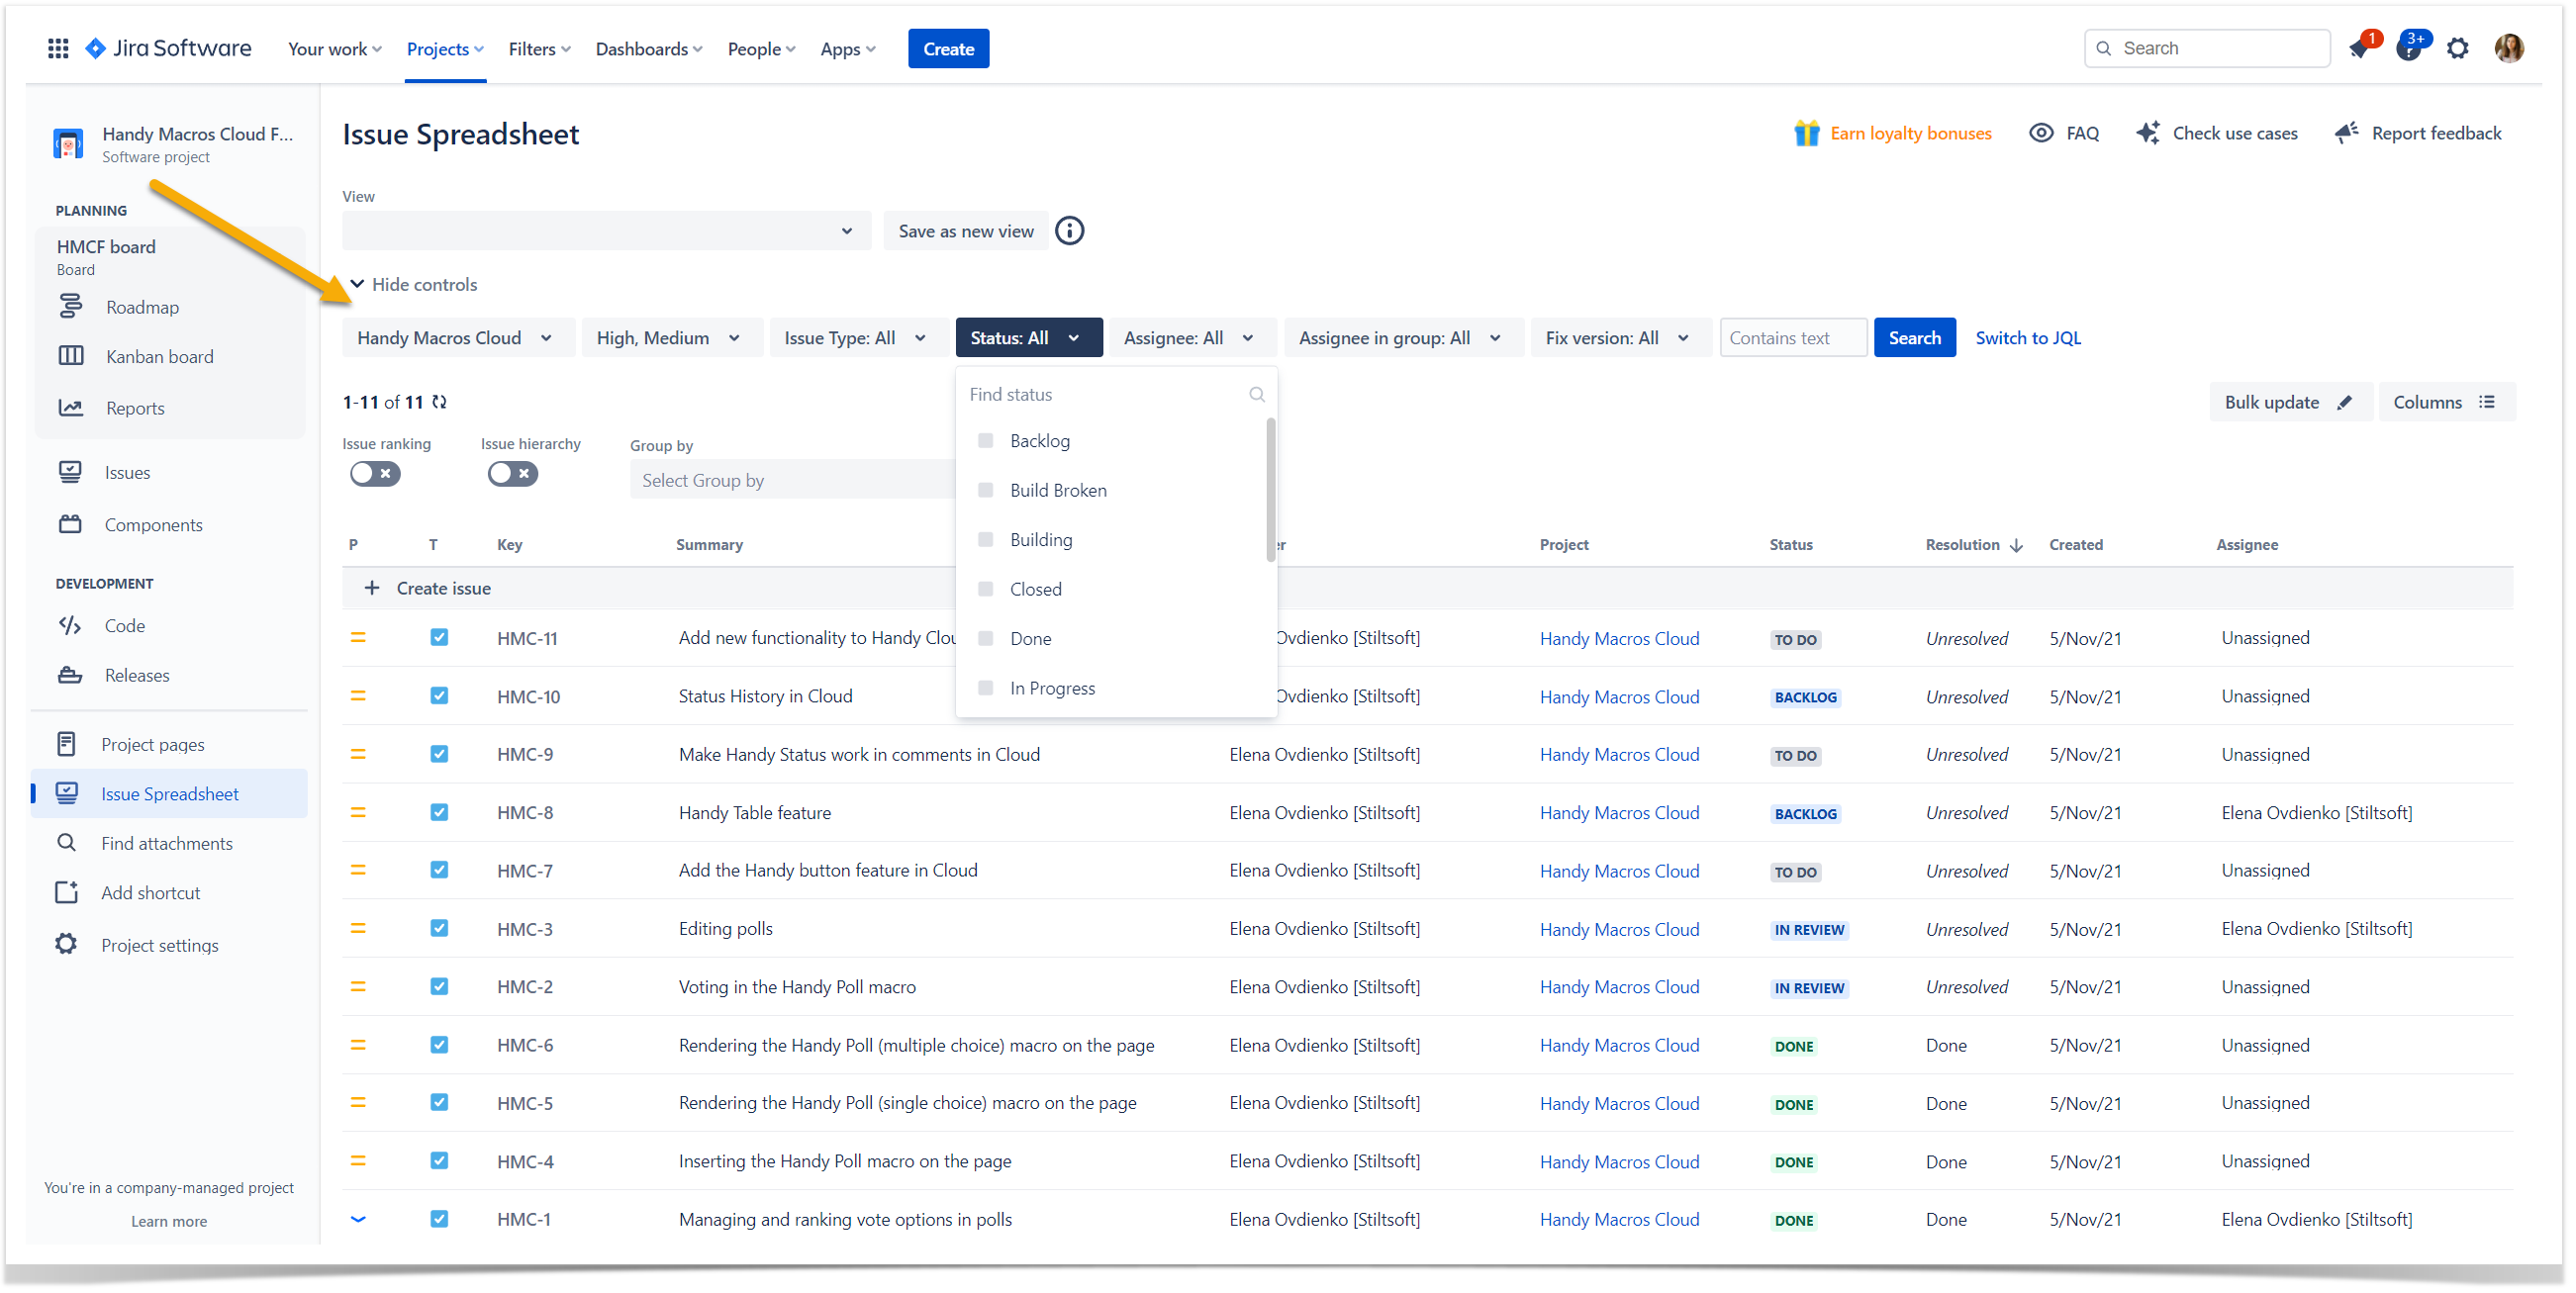
Use the app controls to customize Issue Spreadsheet
- Open Issue Spreadsheet.
- Choose the required settings using the app controls.
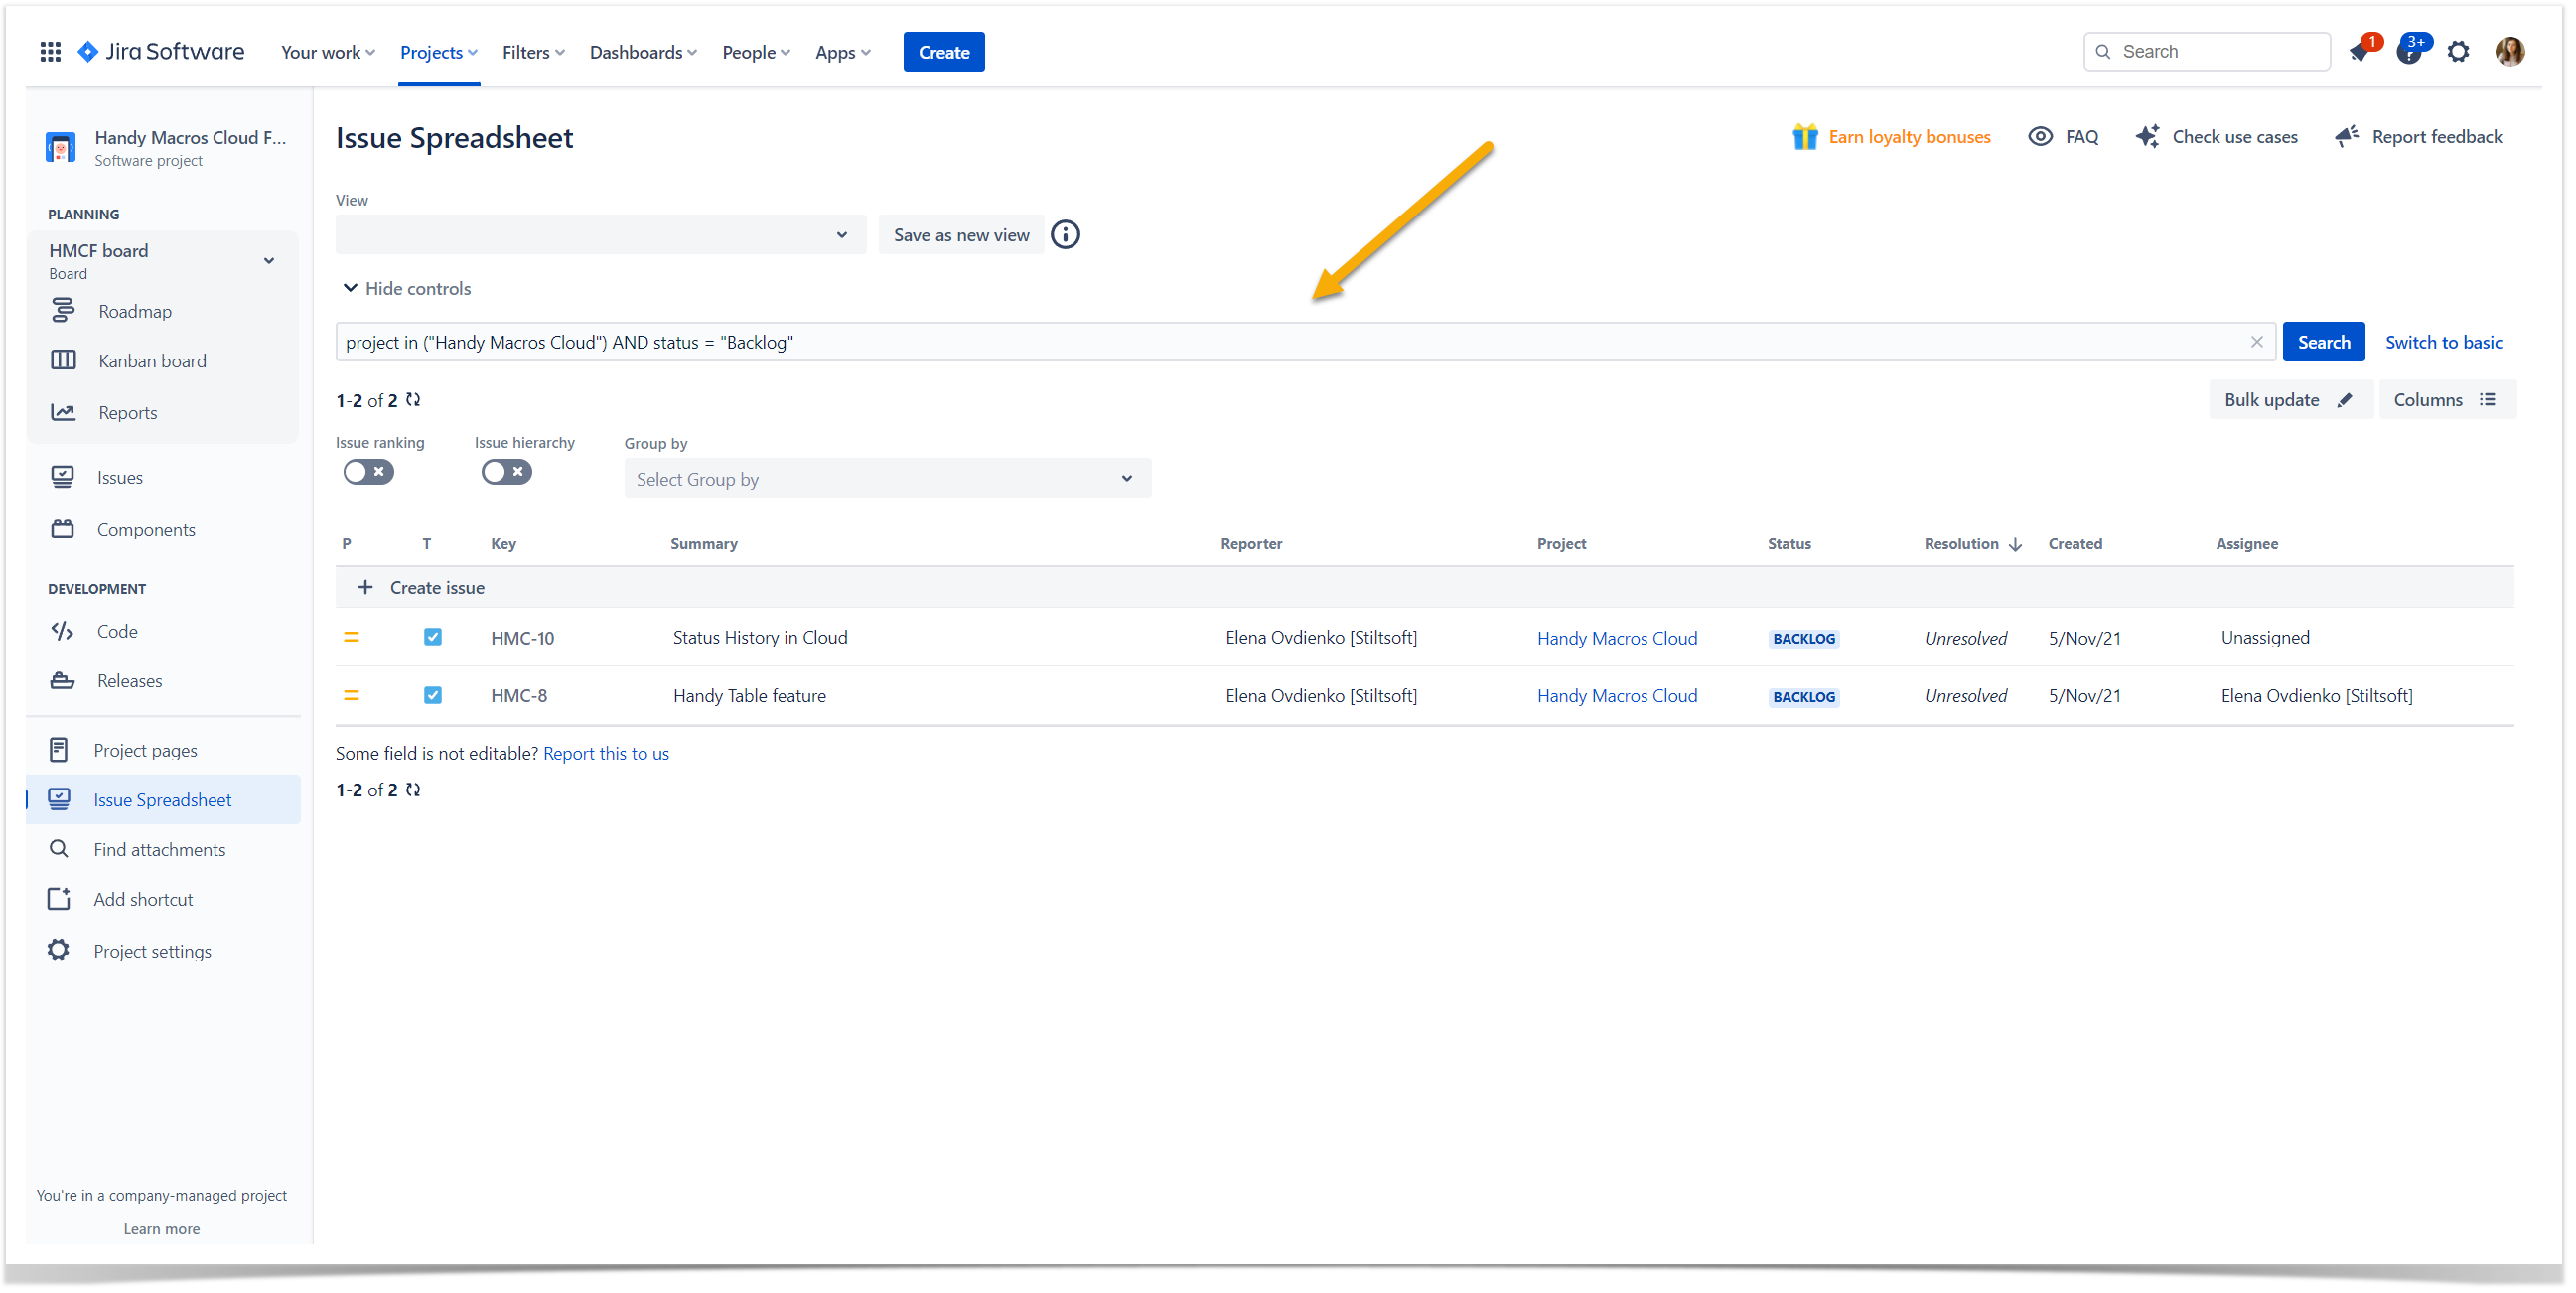
Use JQL to customize Issue Spreadsheet
- Open Issue Spreadsheet.
- Click Switch to JQL.
- In the JQL query box, enter the JQL query using JQL.
- Press Enter or click Search.
Select the columns for Issue Spreadsheet
- Open Issue Spreadsheet.
- Click Columns on the top right.
- Customize the order or delete the existing columns of Issue Spreadsheet on the Column order tab.
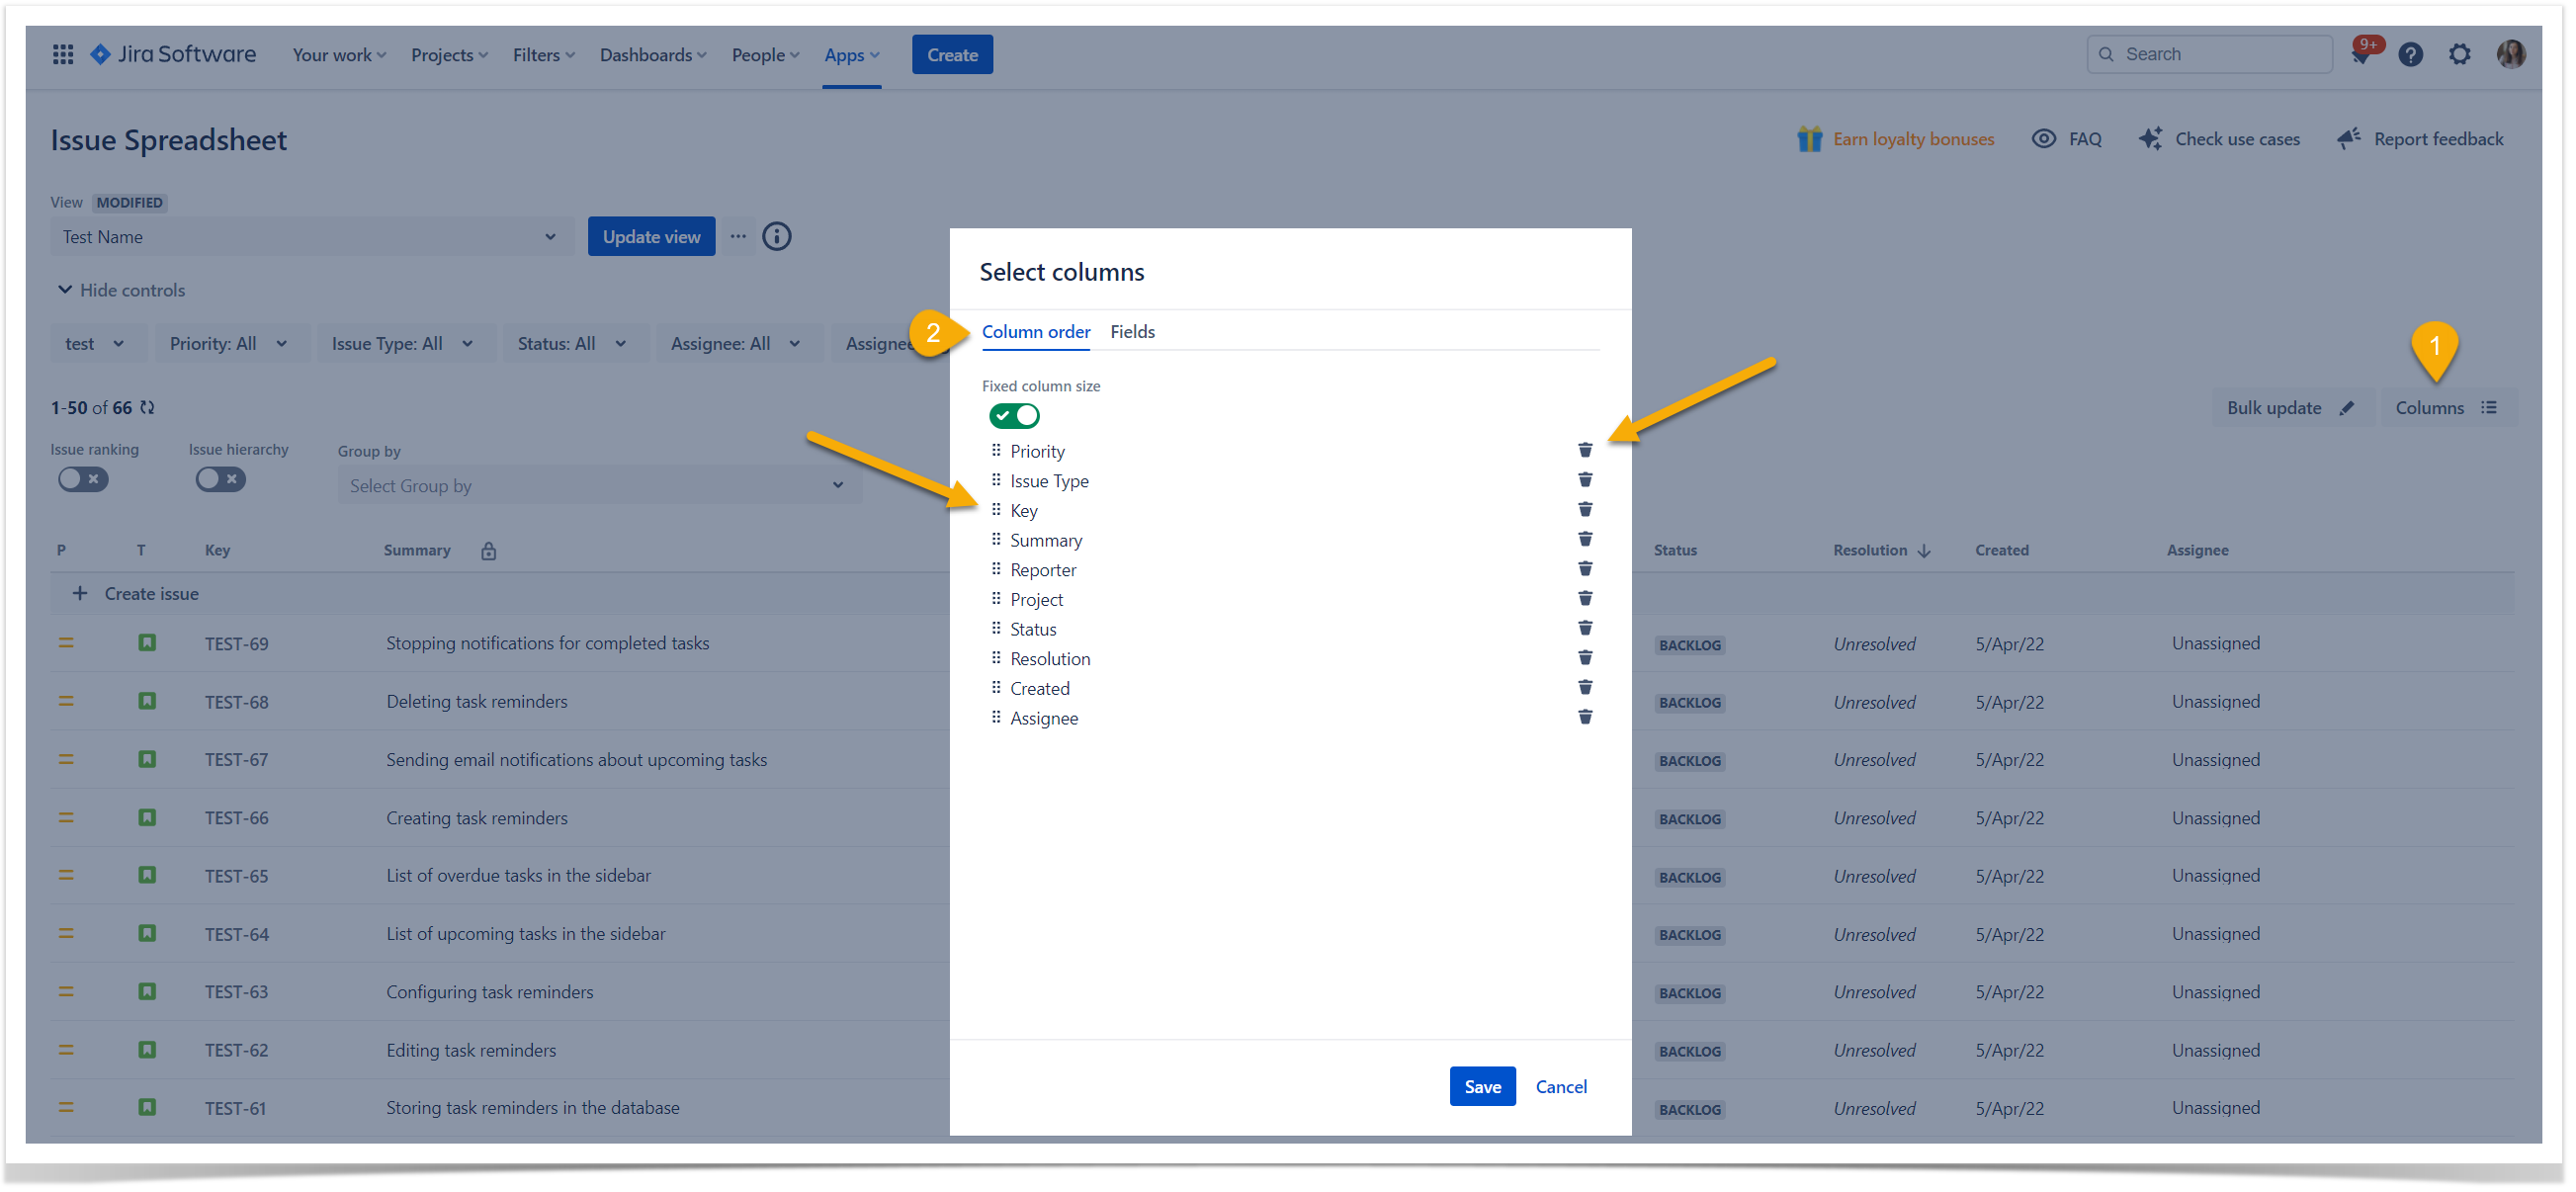
- Select the fields from Jira issues to be displayed in Issue Spreadsheet on the Fields tab.
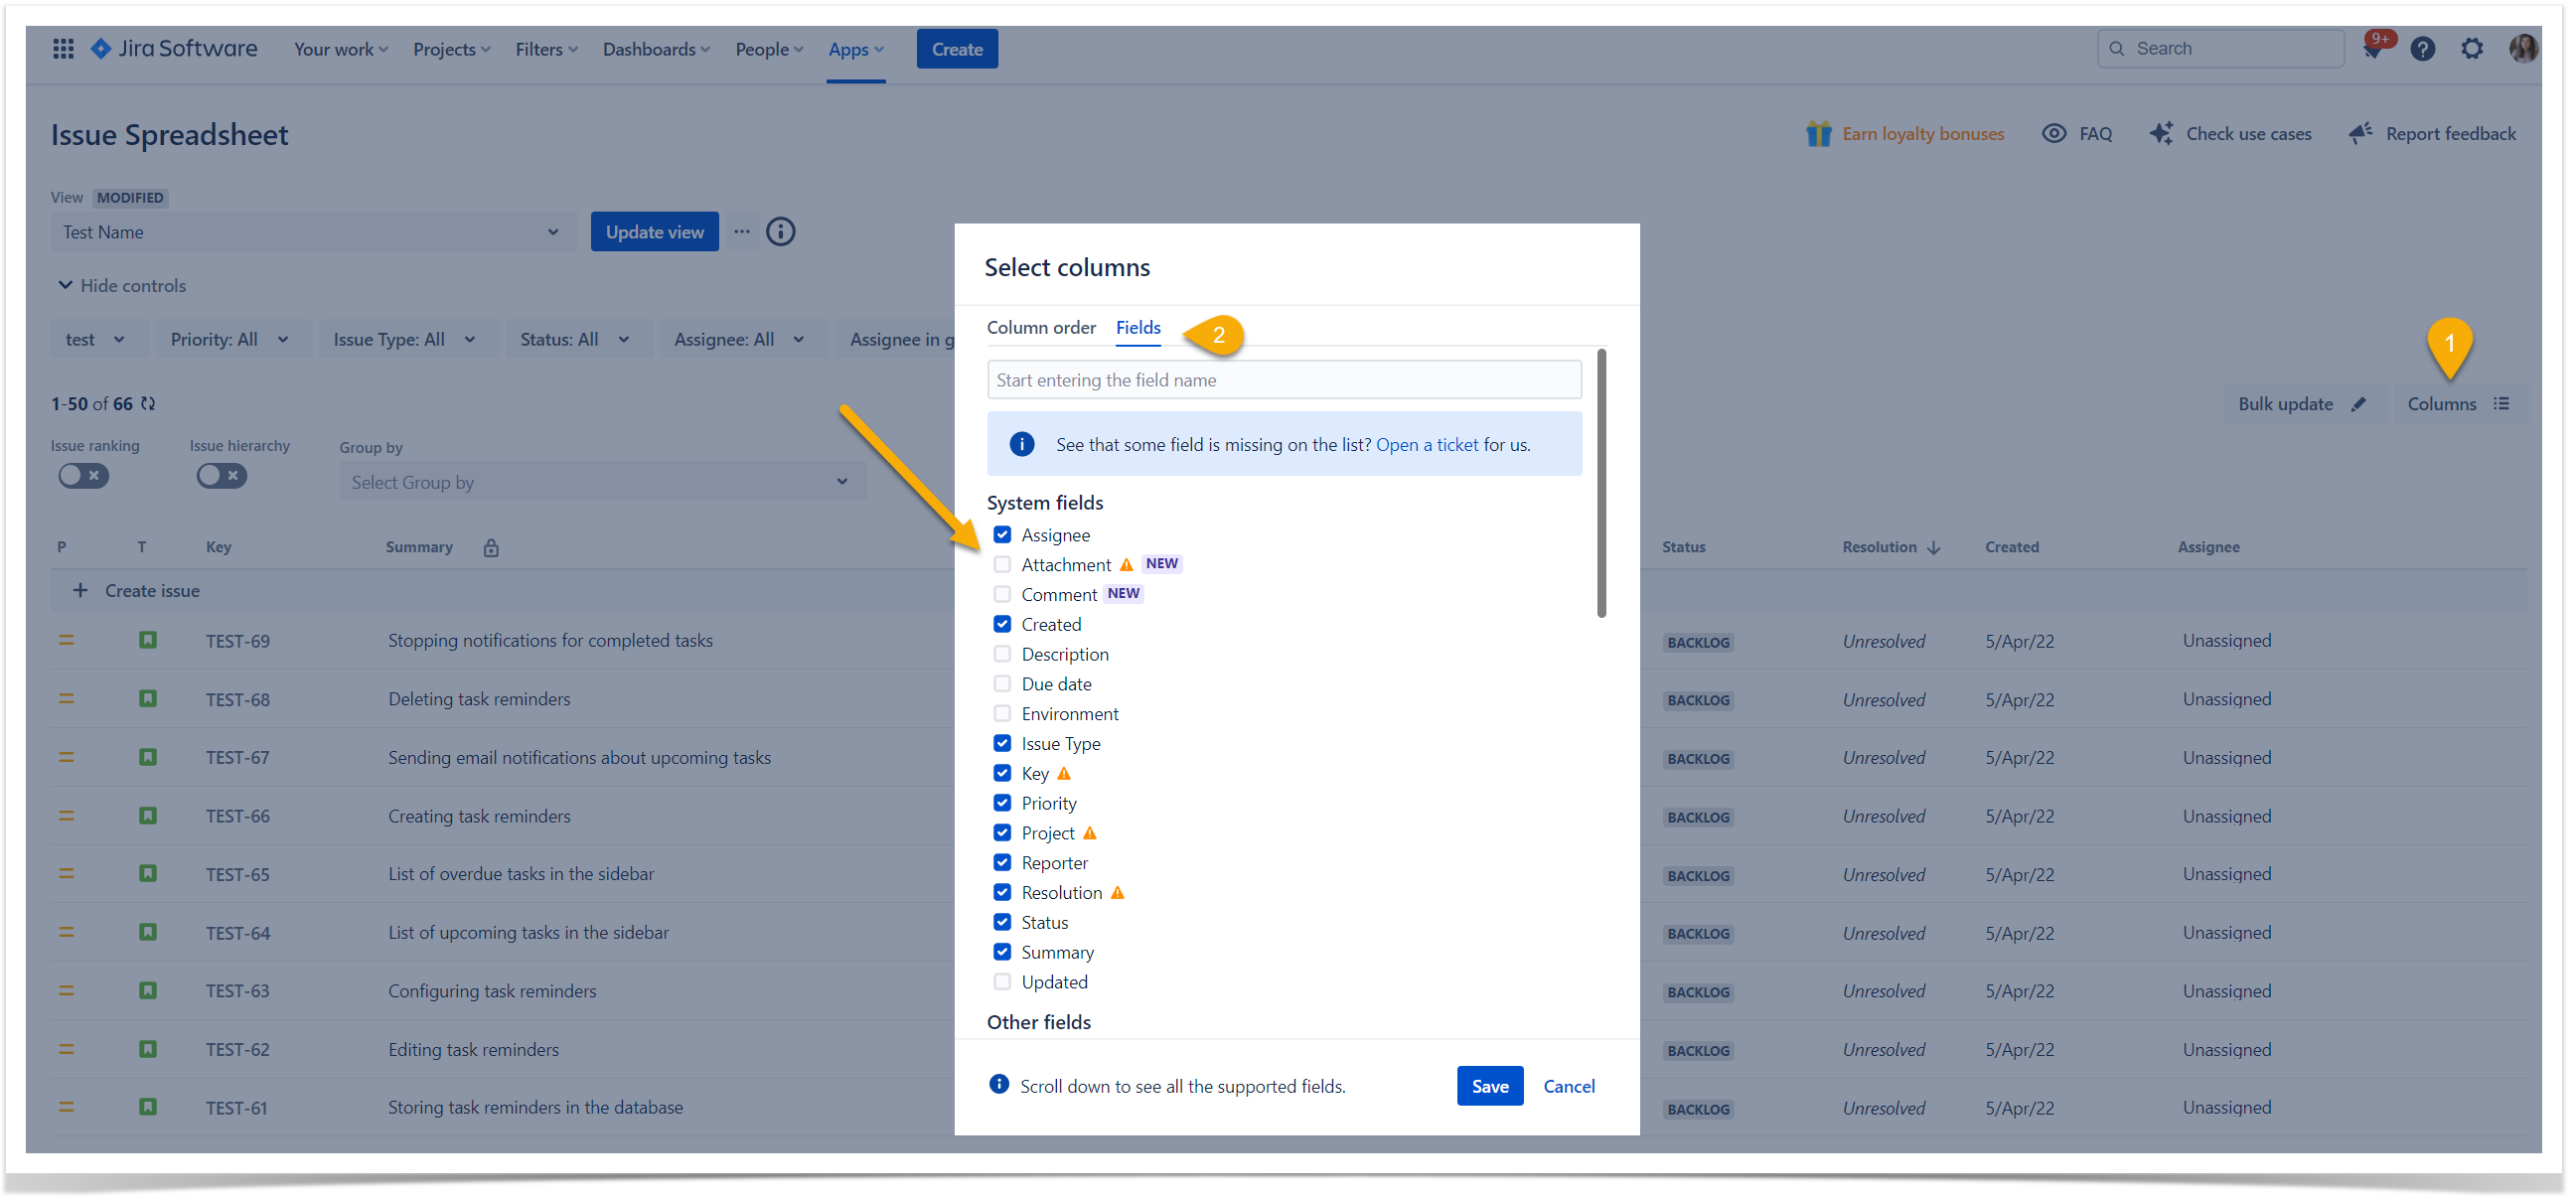
The list of supported fields
Currently, you can select the fields below to show in Issue Spreadsheet. Contact us if you need more.
System fields
- Assignee
- Attachment
- Comment
- Created
- Description
- Due date
- Environment
- Issue Type
- Key
- Priority
- Project
- Reporter
- Resolution
- Status
- Summary
- Updated
Other fields
- Date of First Response
- Actual end
- Actual start
- Approvers
- Change reason
- Change risk
- Change type
- Components
- Confidence
- Creator
- Ease
- Epic Link
- Epic Name
- Epic Status
- Fix versions
- Flagged
- Impact
- Labels
- Last Viewed
- Linked Issues
- Original estimate
- Parent
- Remaining Estimate
- Request Type
- Resolved
- Sprint
- Start date
- Status Category Changed
- Story point estimate
- Story Points
- Target end
- Target start
- Time Spent
- Time tracking
Manage the Issue Spreadsheet view
You can use issue ranking, grouping, or apply a hierarchy view.
Apply issue ranking
- Open Issue Spreadsheet and choose the required settings.
- Switch the
 toggle to activate the Issue ranking function.
 - After that, you can rank issues in the spreadsheet. Grab and drop an issue to a new position on the list if needed.
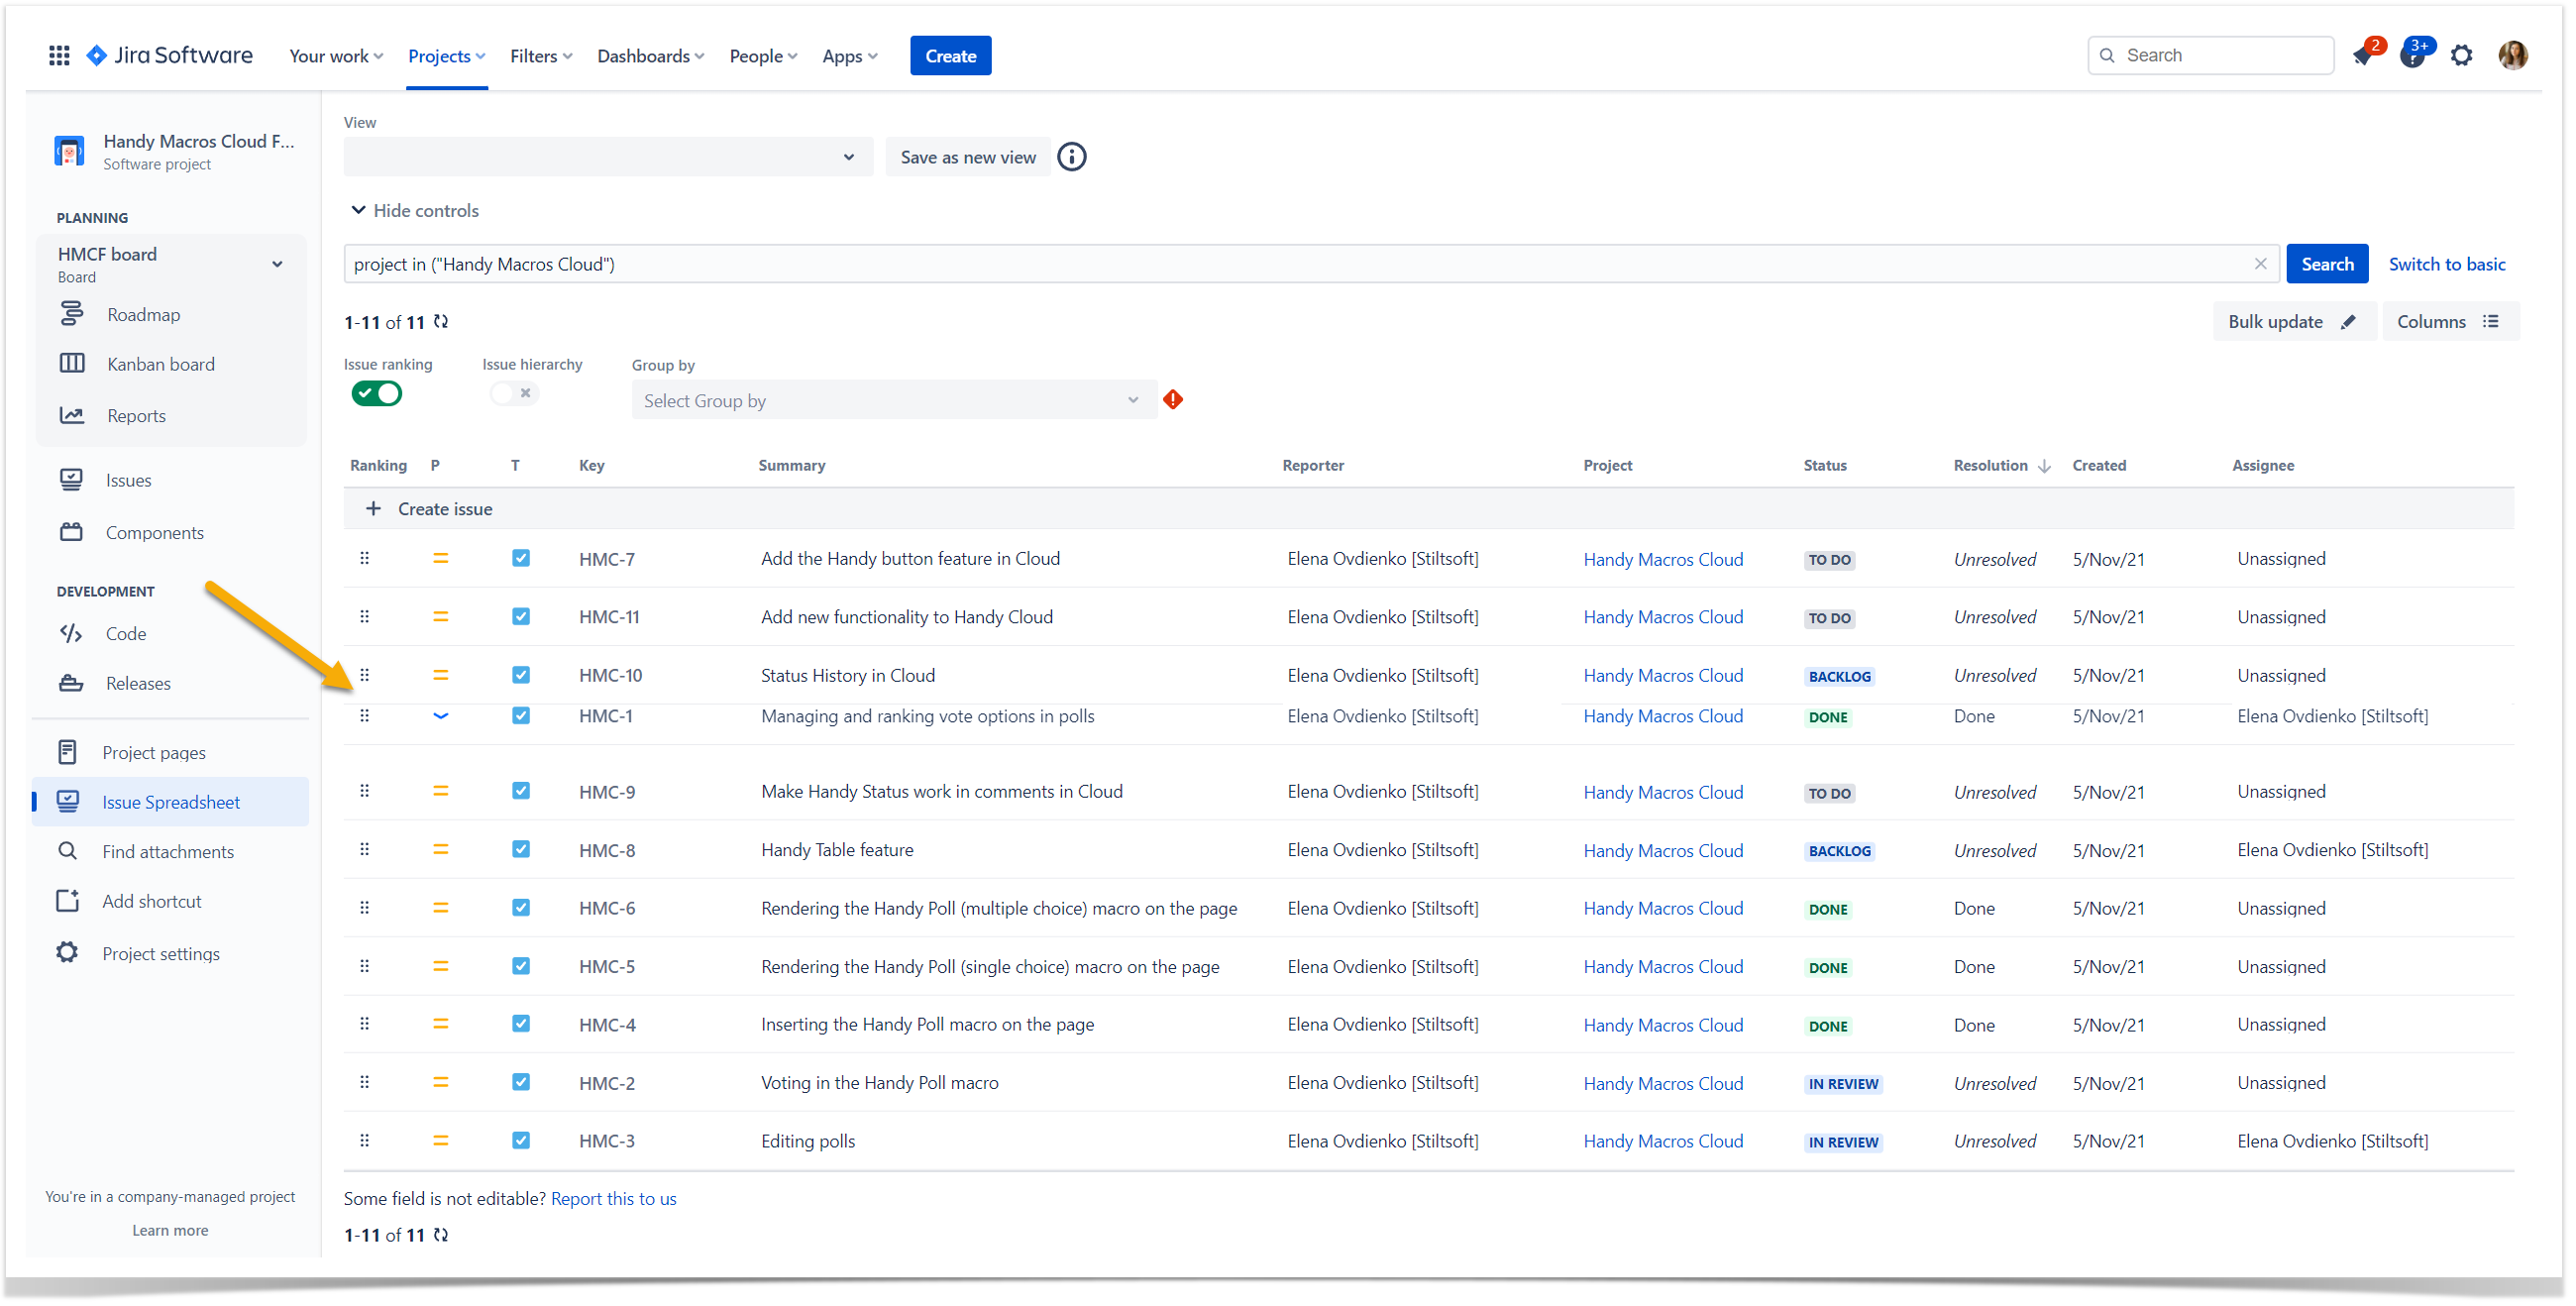
Note that the Issue hierarchy and Group by fields are deactivated when the Issue ranking function is on.
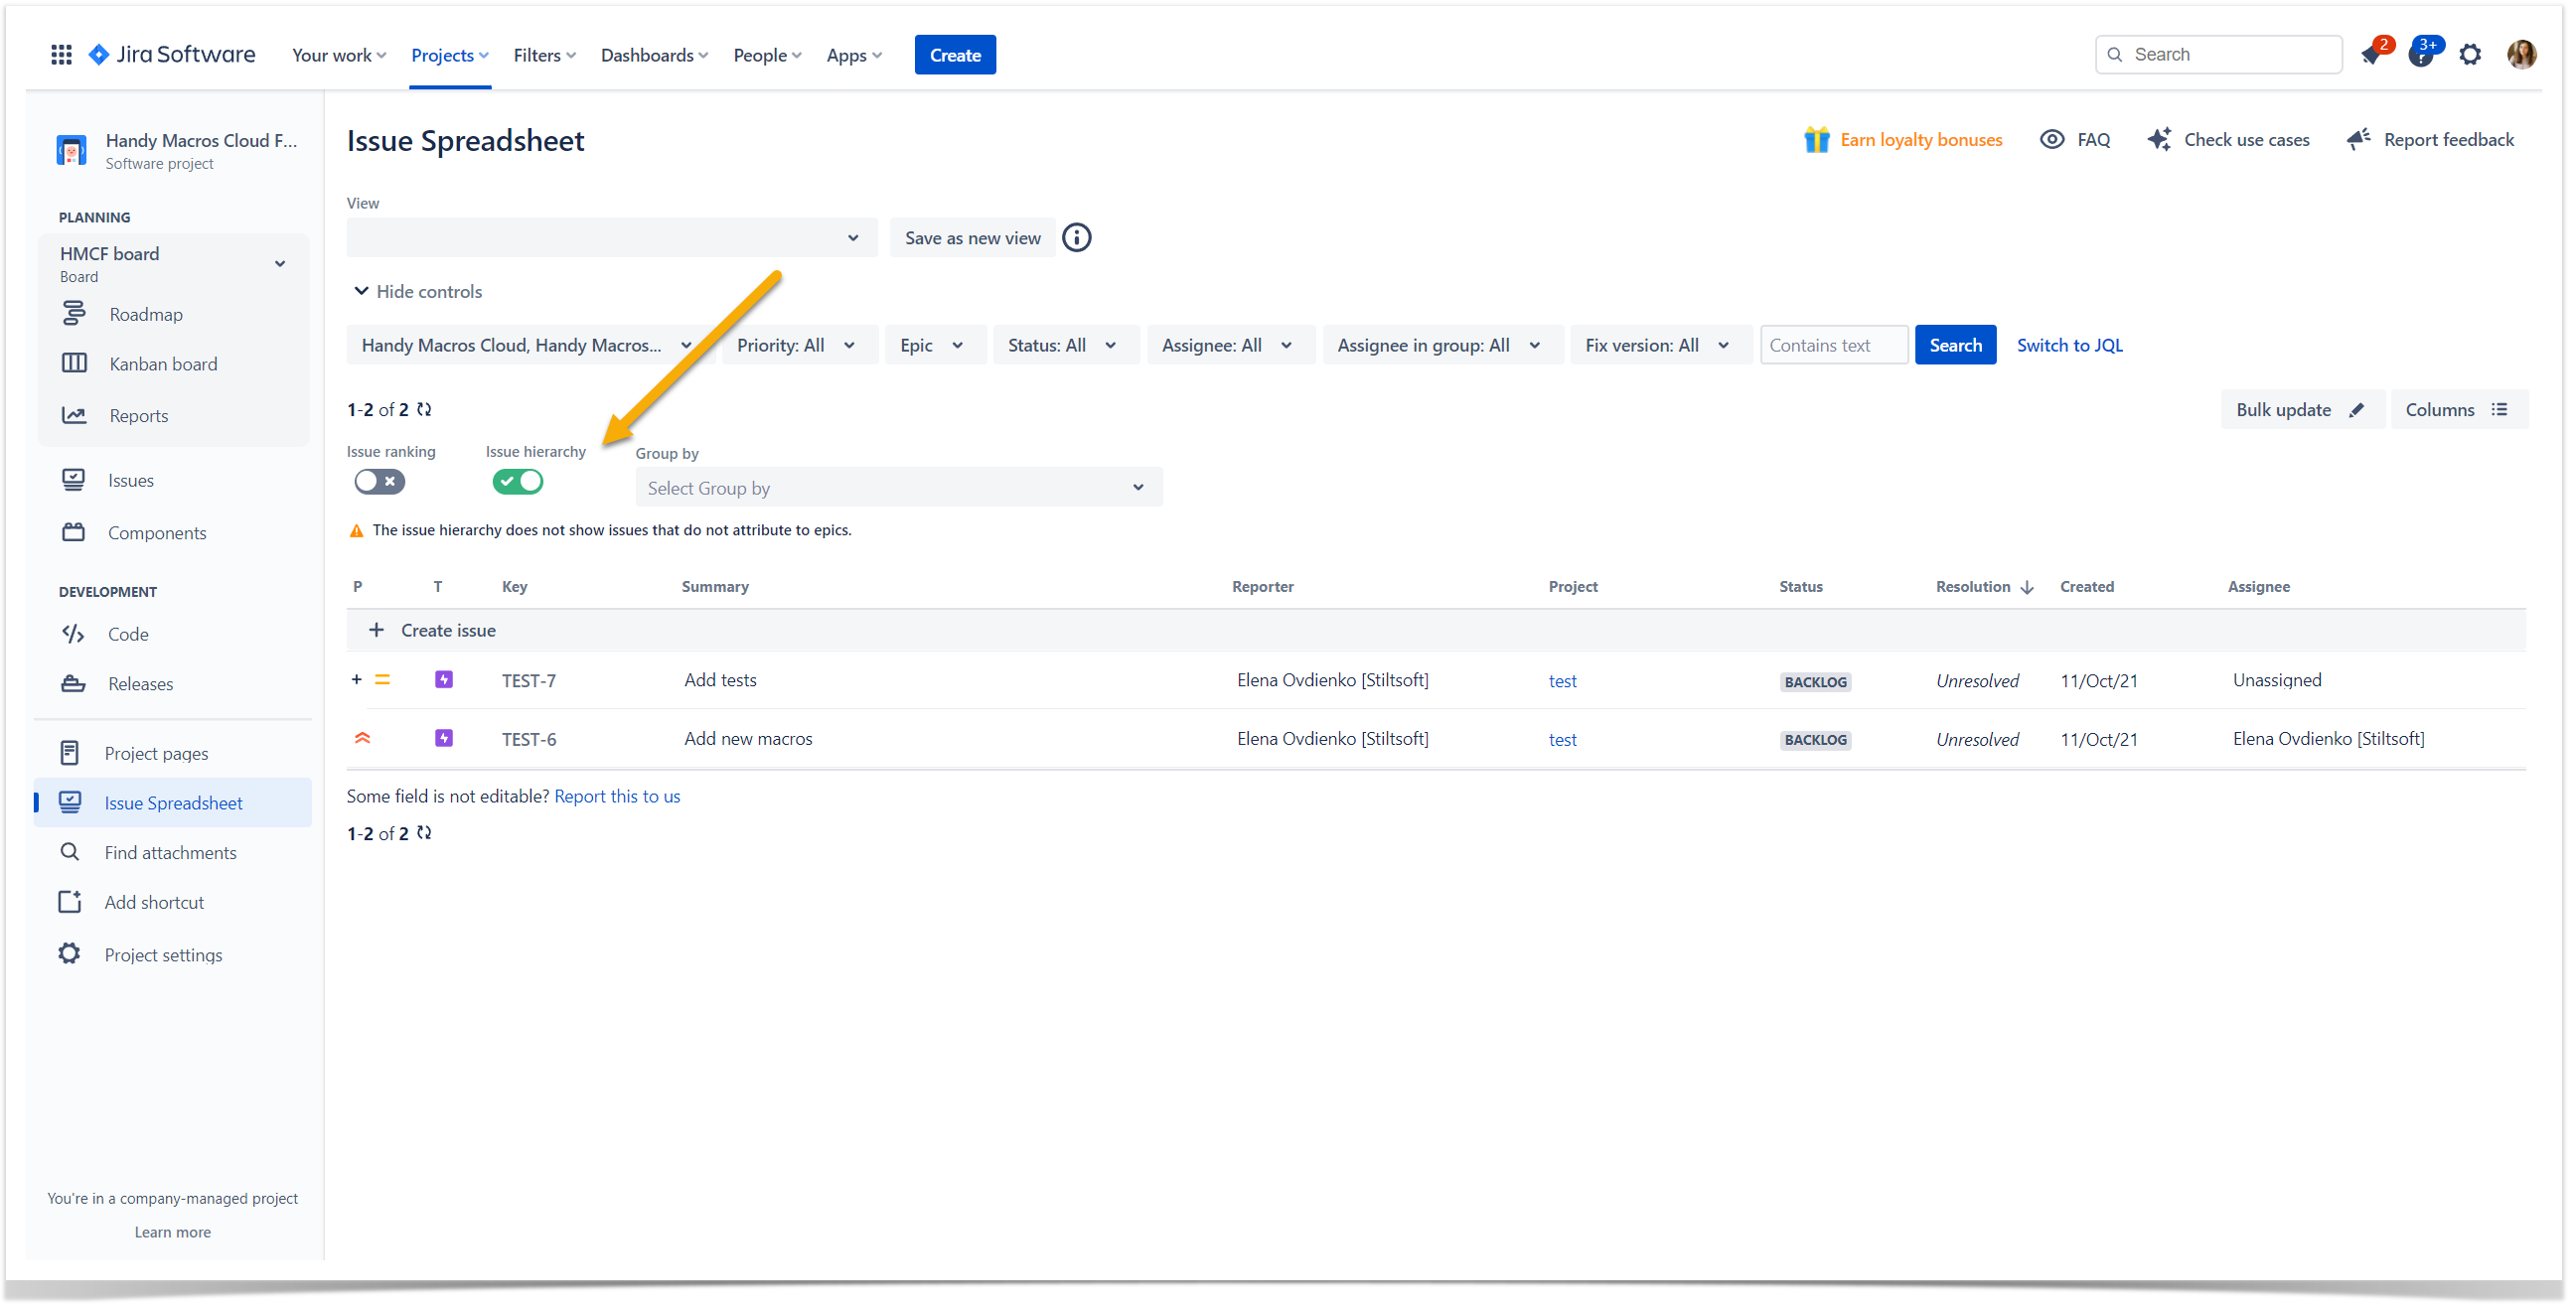
Apply issue hierarchy
- Open Issue Spreadsheet and choose the required settings.
- Switch the toggle to activate the Issue hierarchy function.
- After that, the hierarchy view is applied in the spreadsheet.
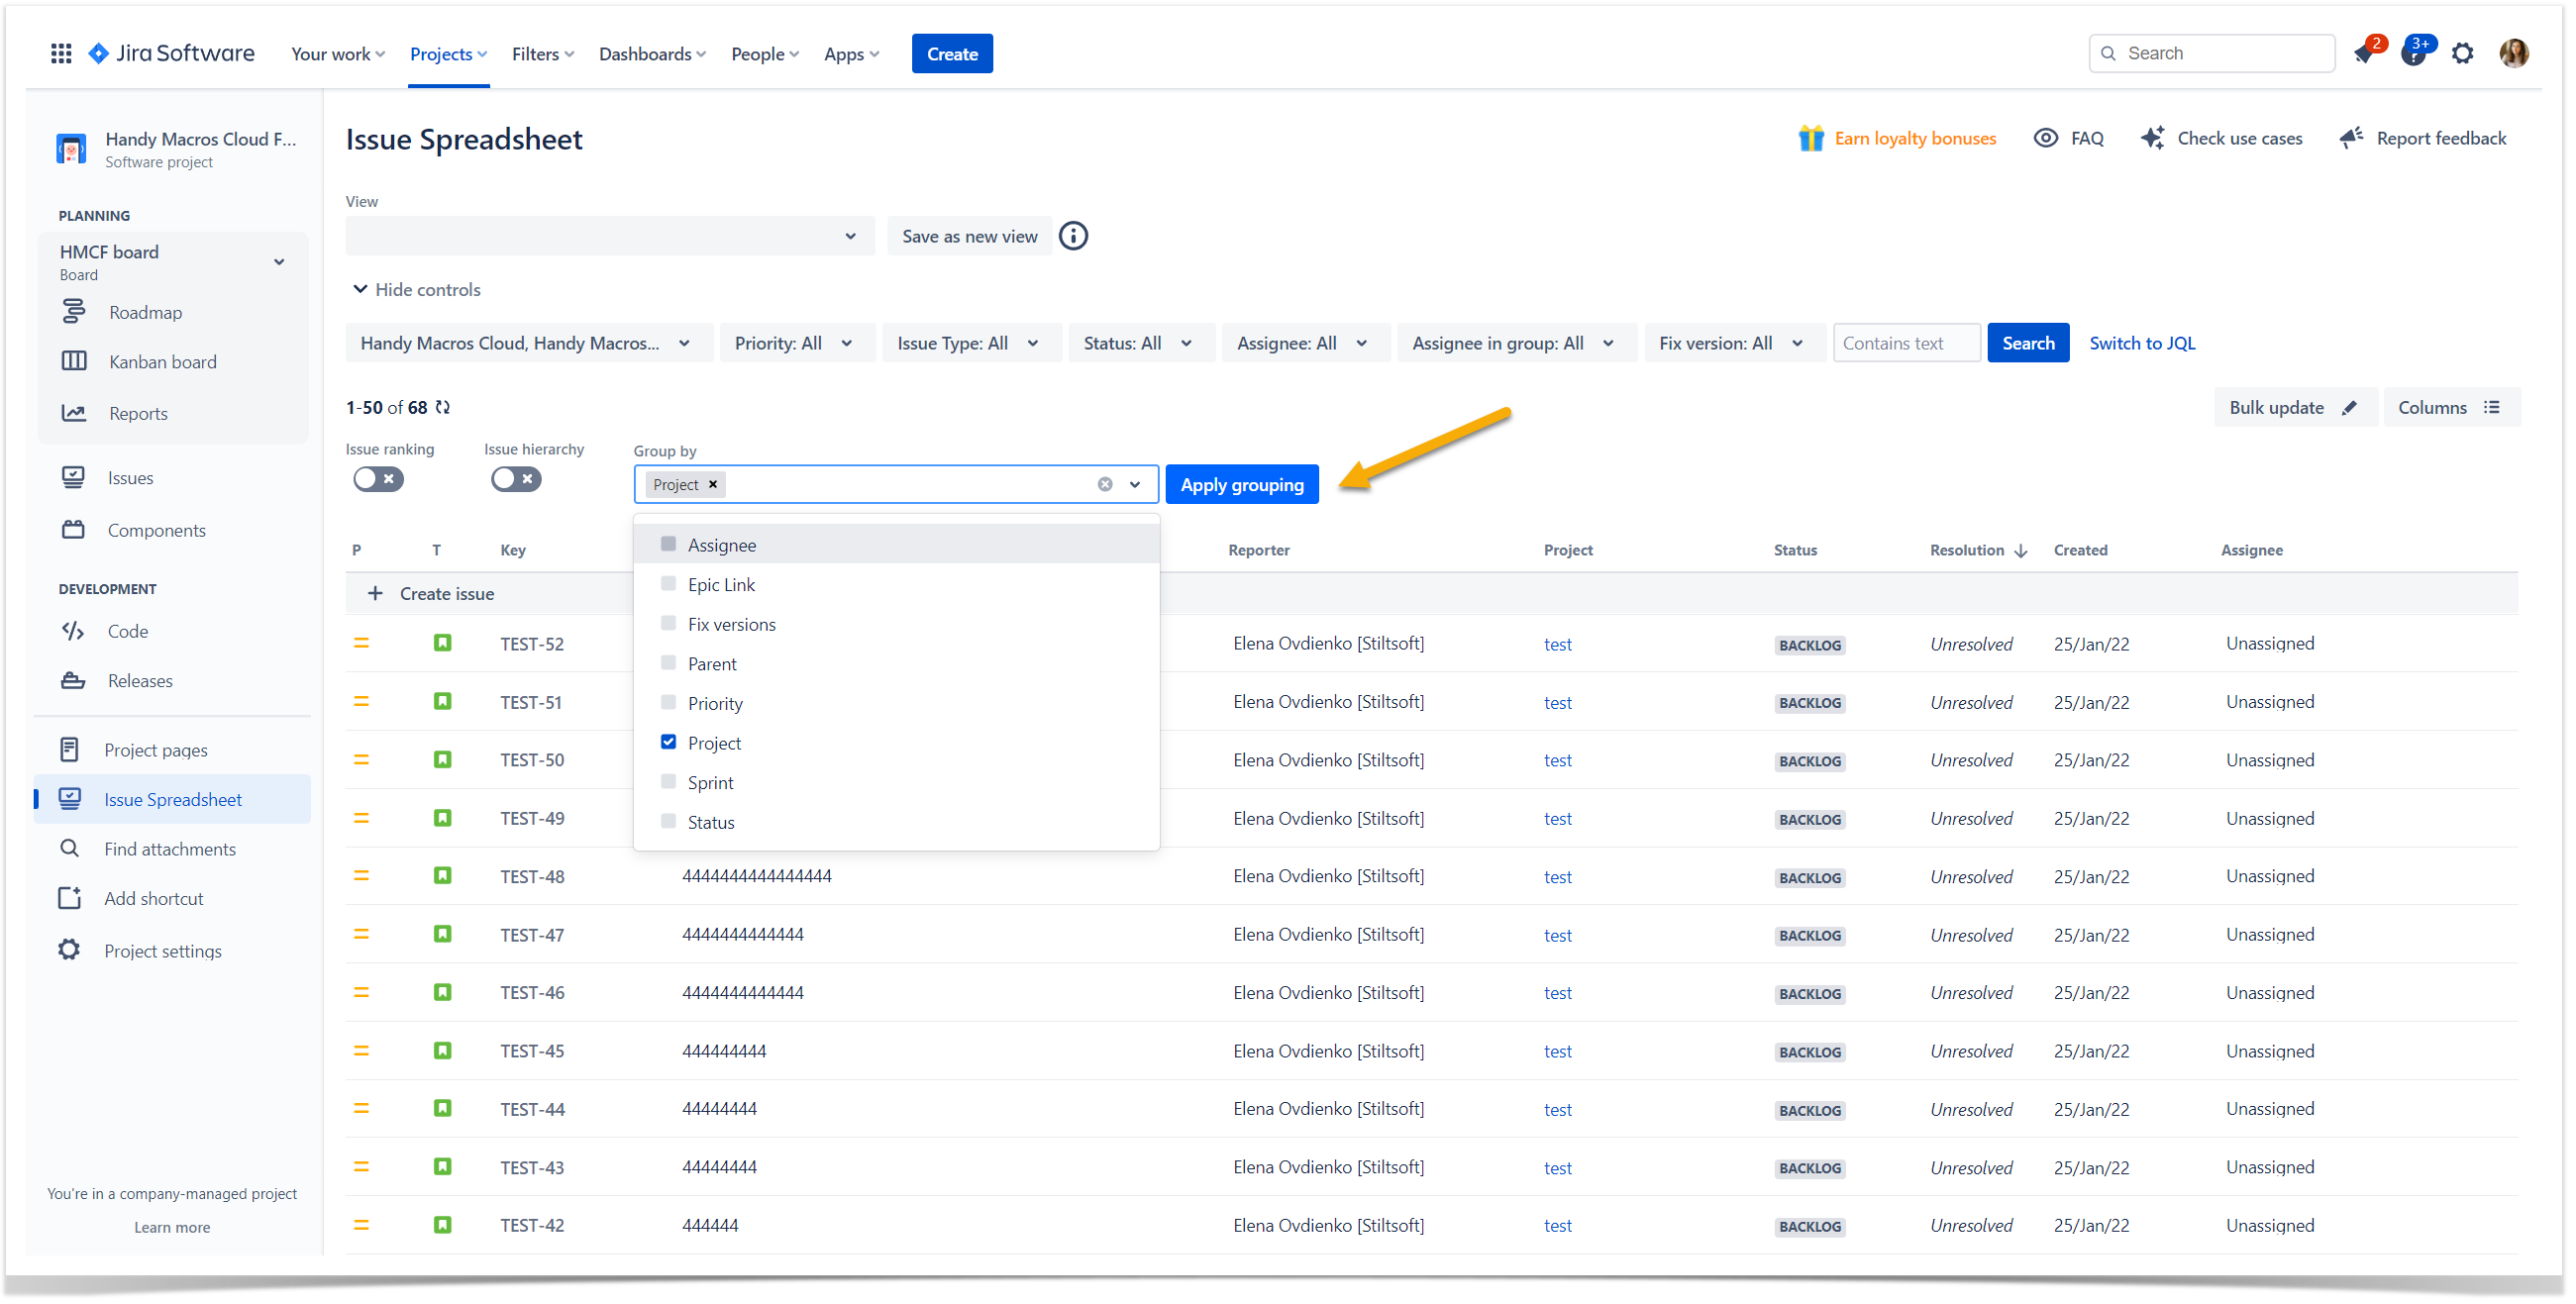
Apply issue grouping
- Open Issue Spreadsheet and choose the required settings.
- Open the dropdown menu under the Group by function.
- Check the boxes with the required grouping criteria from the dropdown menu.
- Click Apply grouping when done.
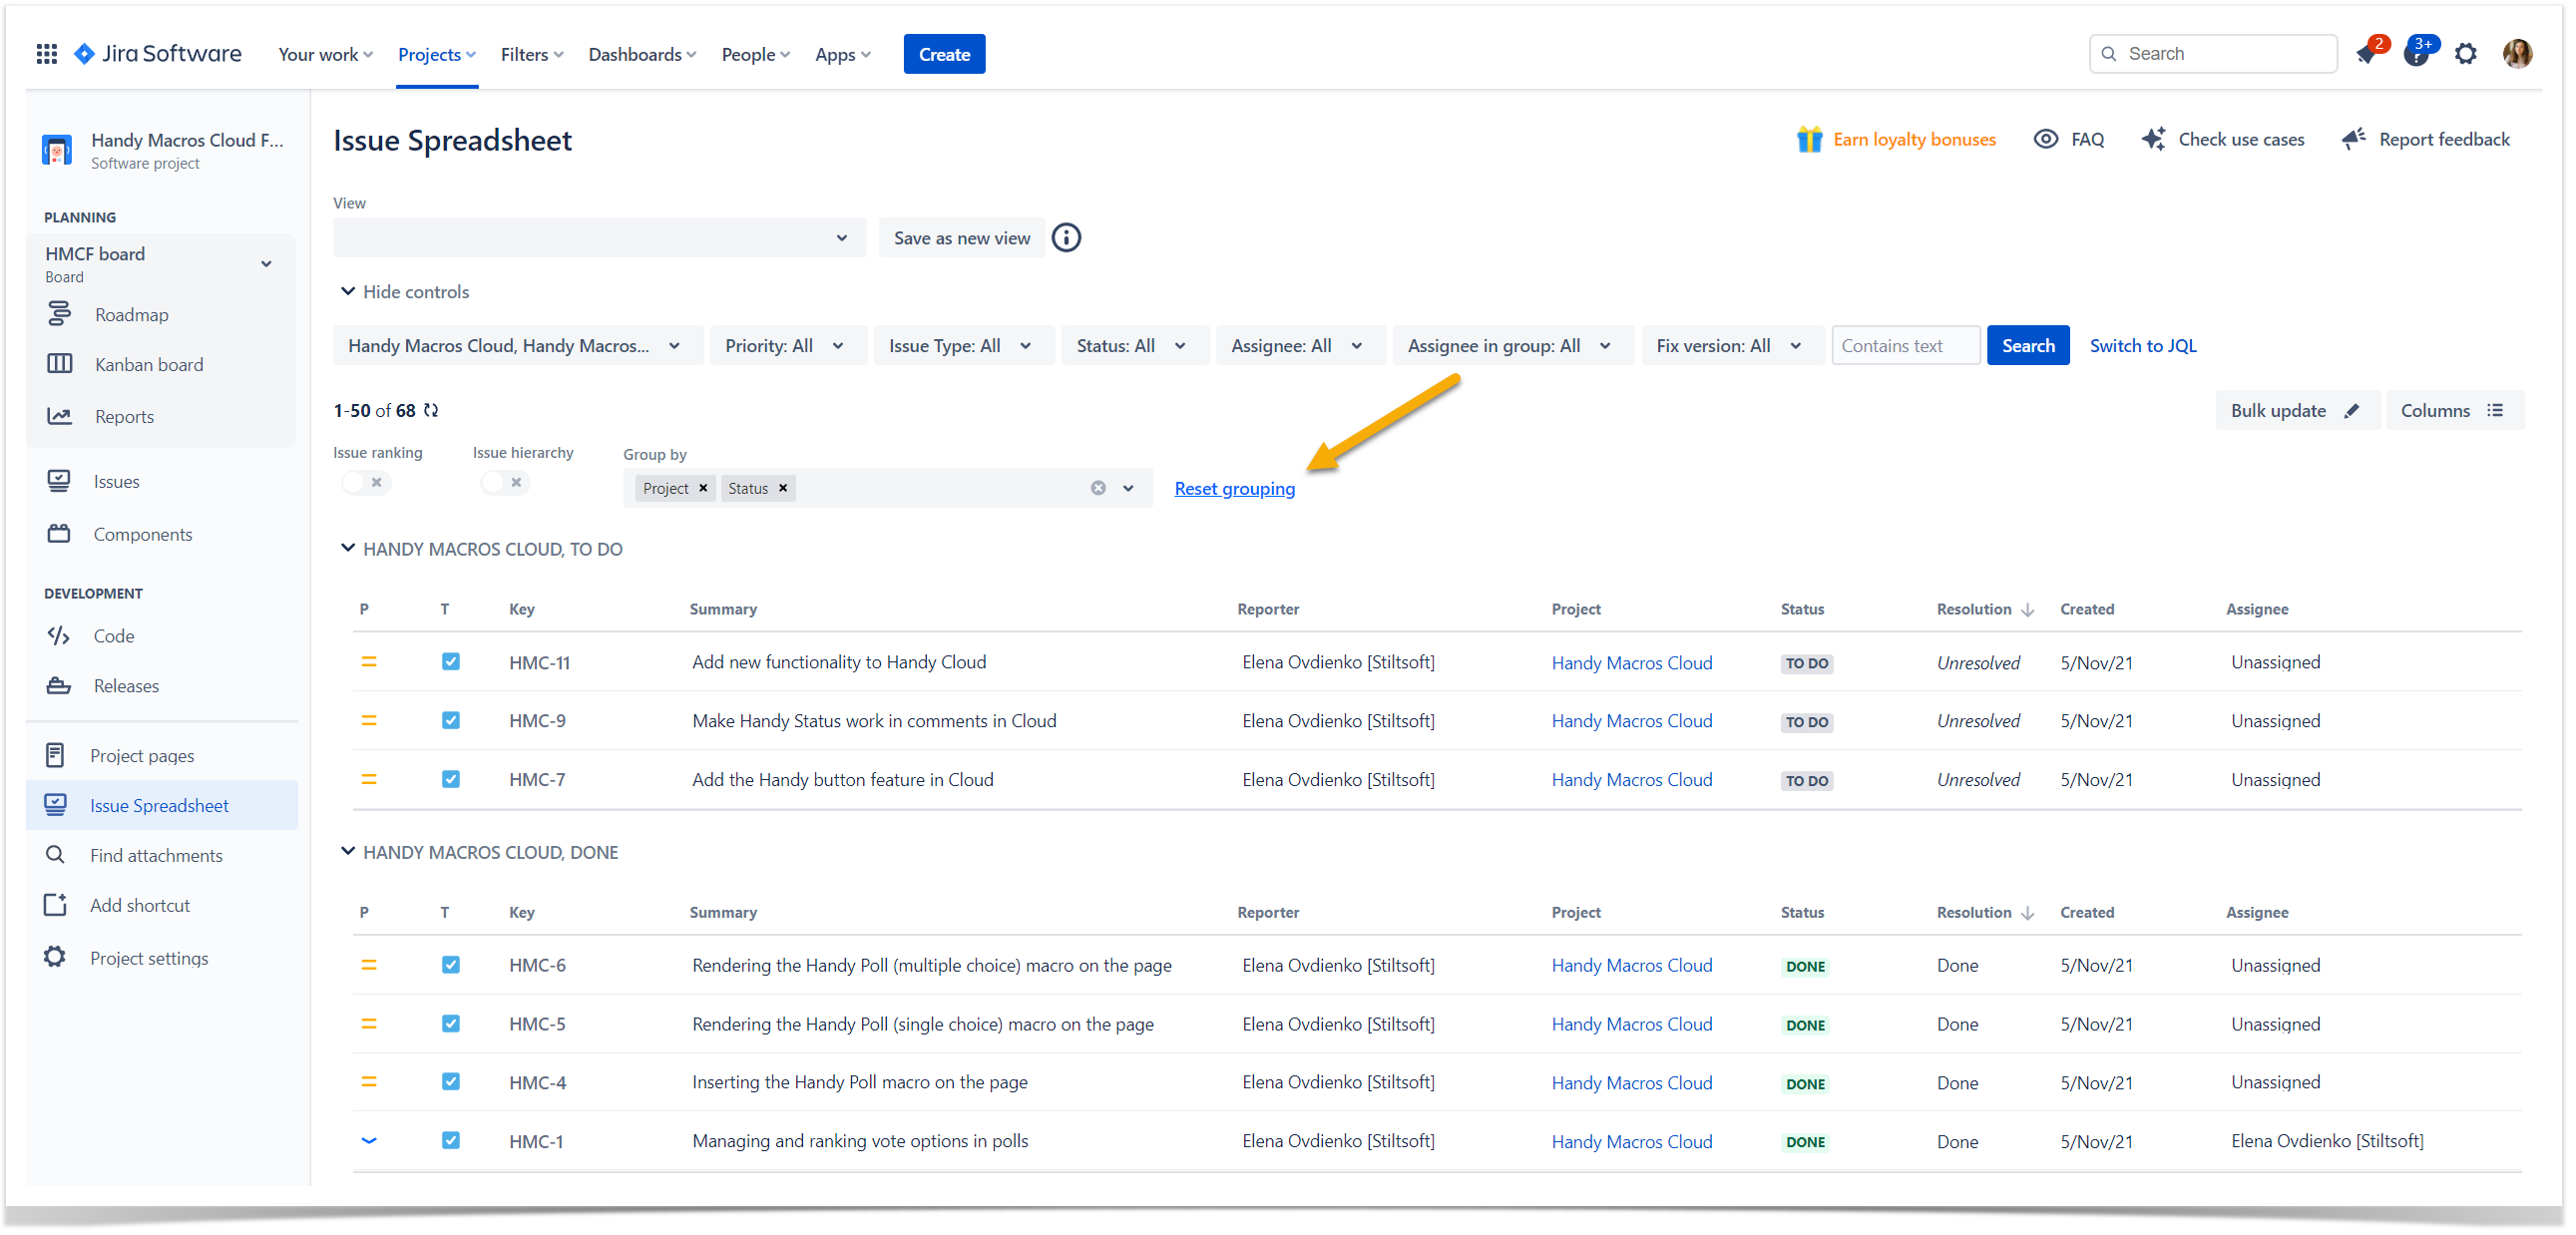
You can always change issue grouping in the app.
- Open the Issue Spreadsheet where the Group by function is activated.
- Click Reset grouping.
- All the settings of issue grouping will be reset.
Save the Issue Spreadsheet view
You can save any Issue Spreadsheet view to reuse it later.
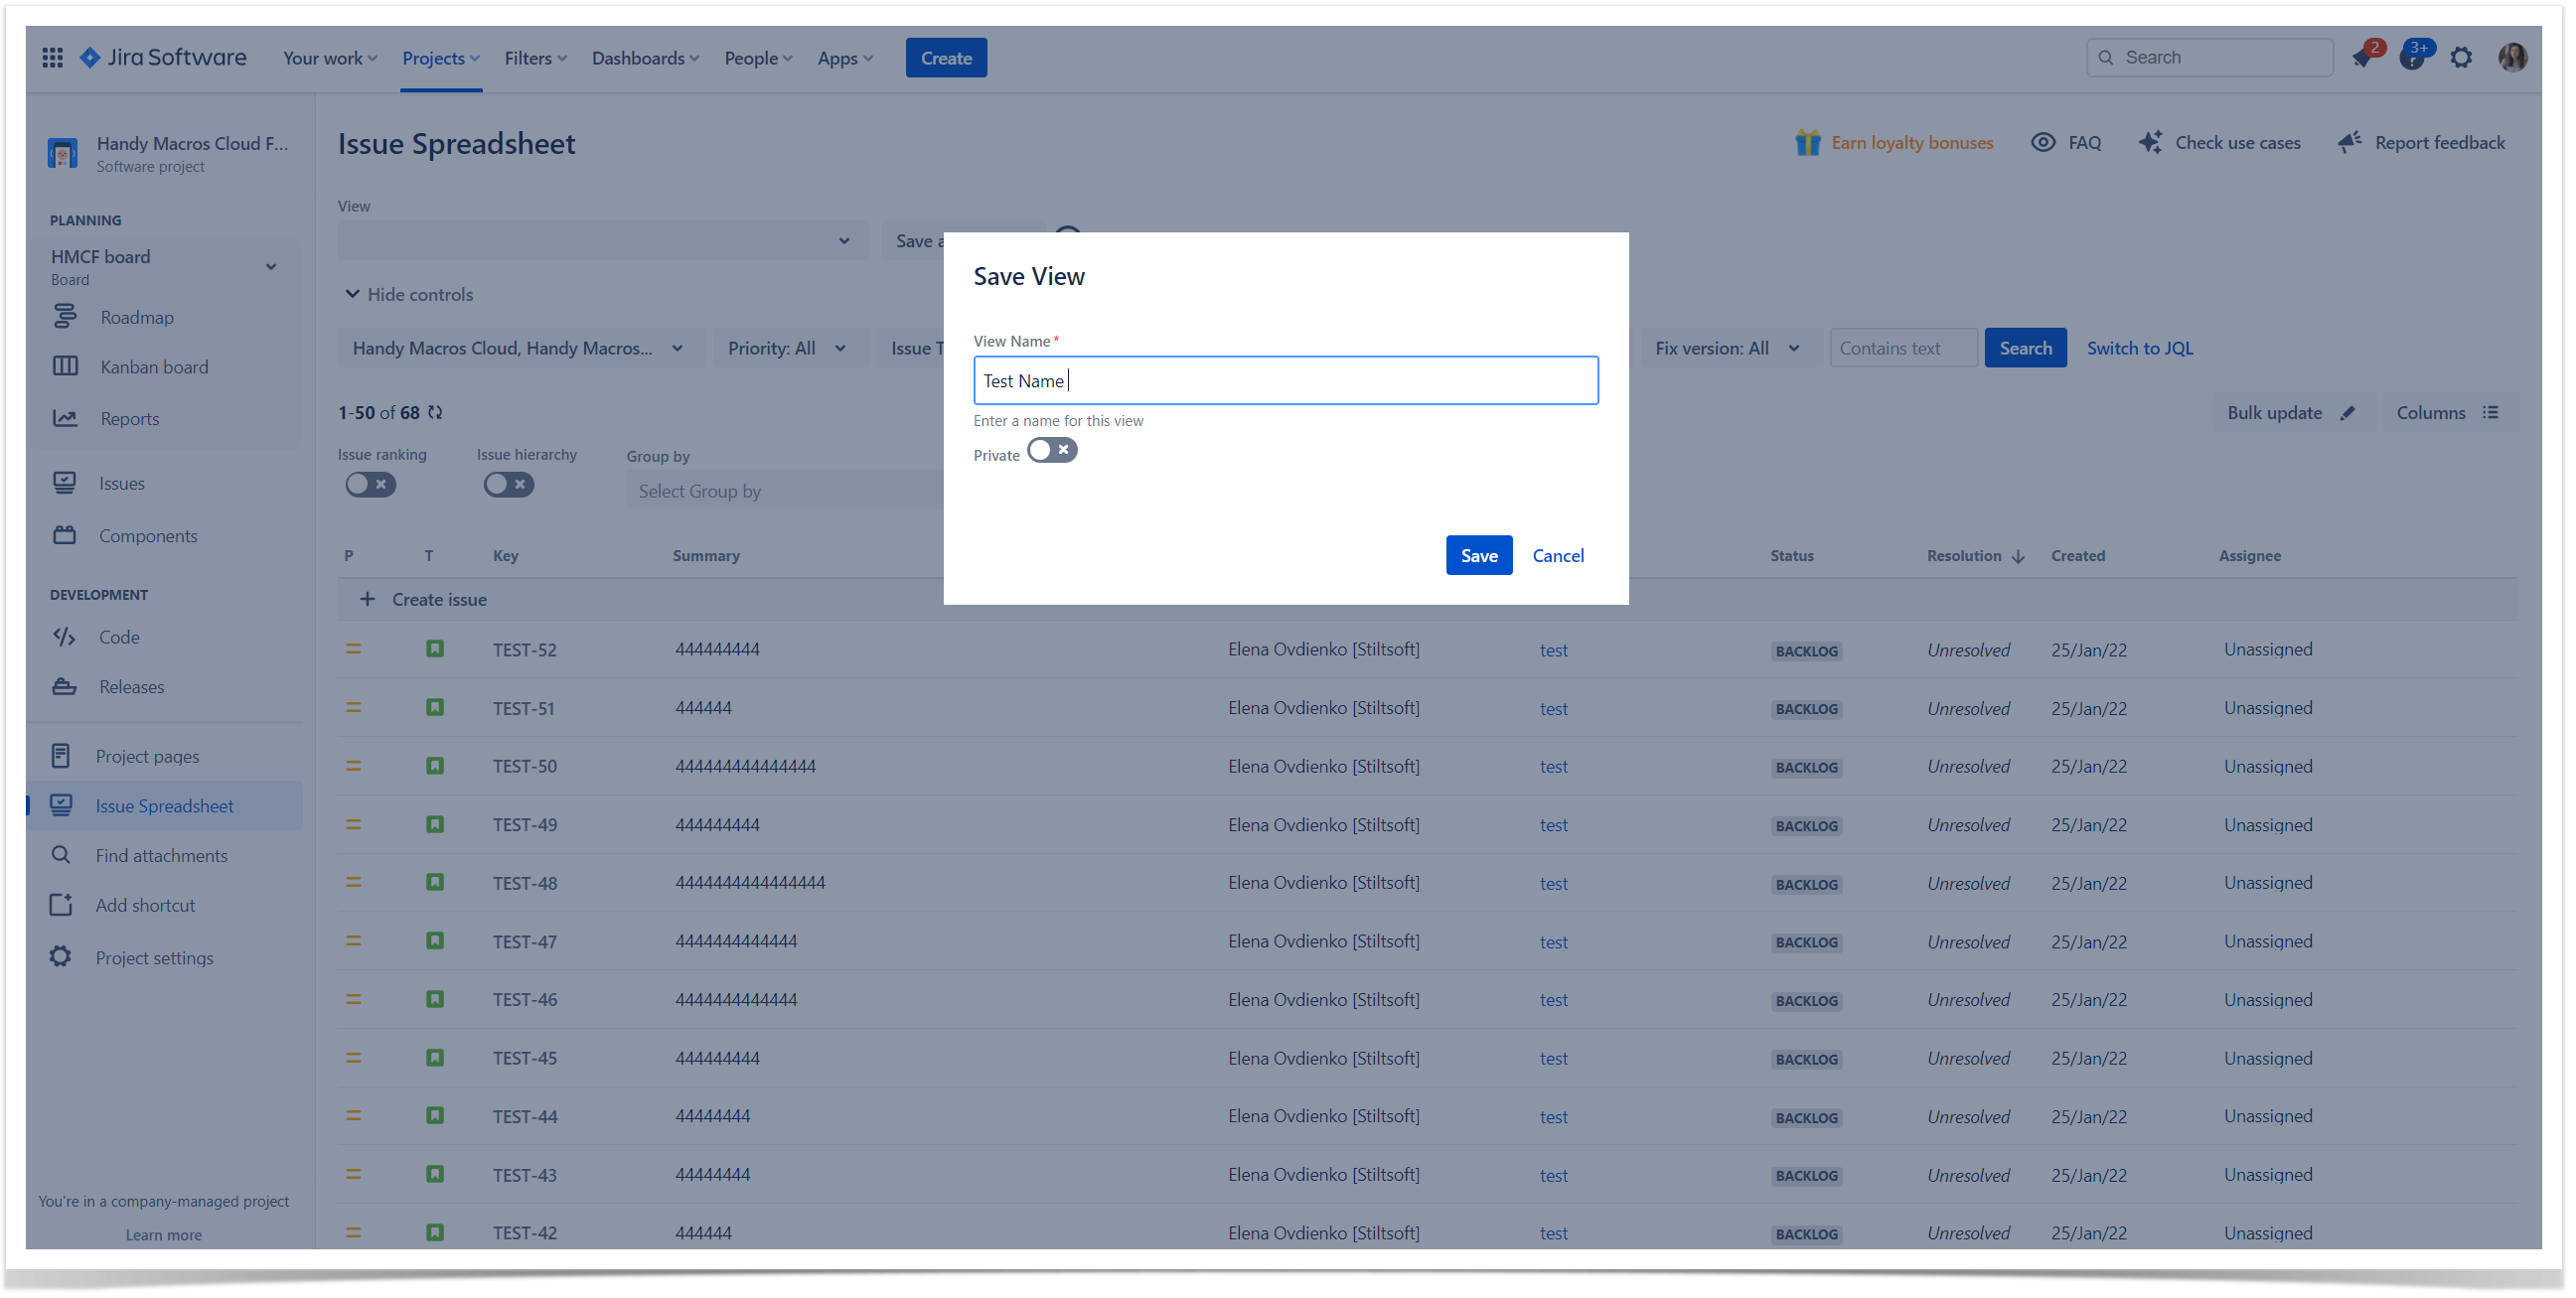
- Open Issue Spreadsheet and choose the required settings.
- Locate the View section.
- Click the Save as new view button
- Enter View Name.
- Turn on the toggle to make this view private.
- Click the Save button.
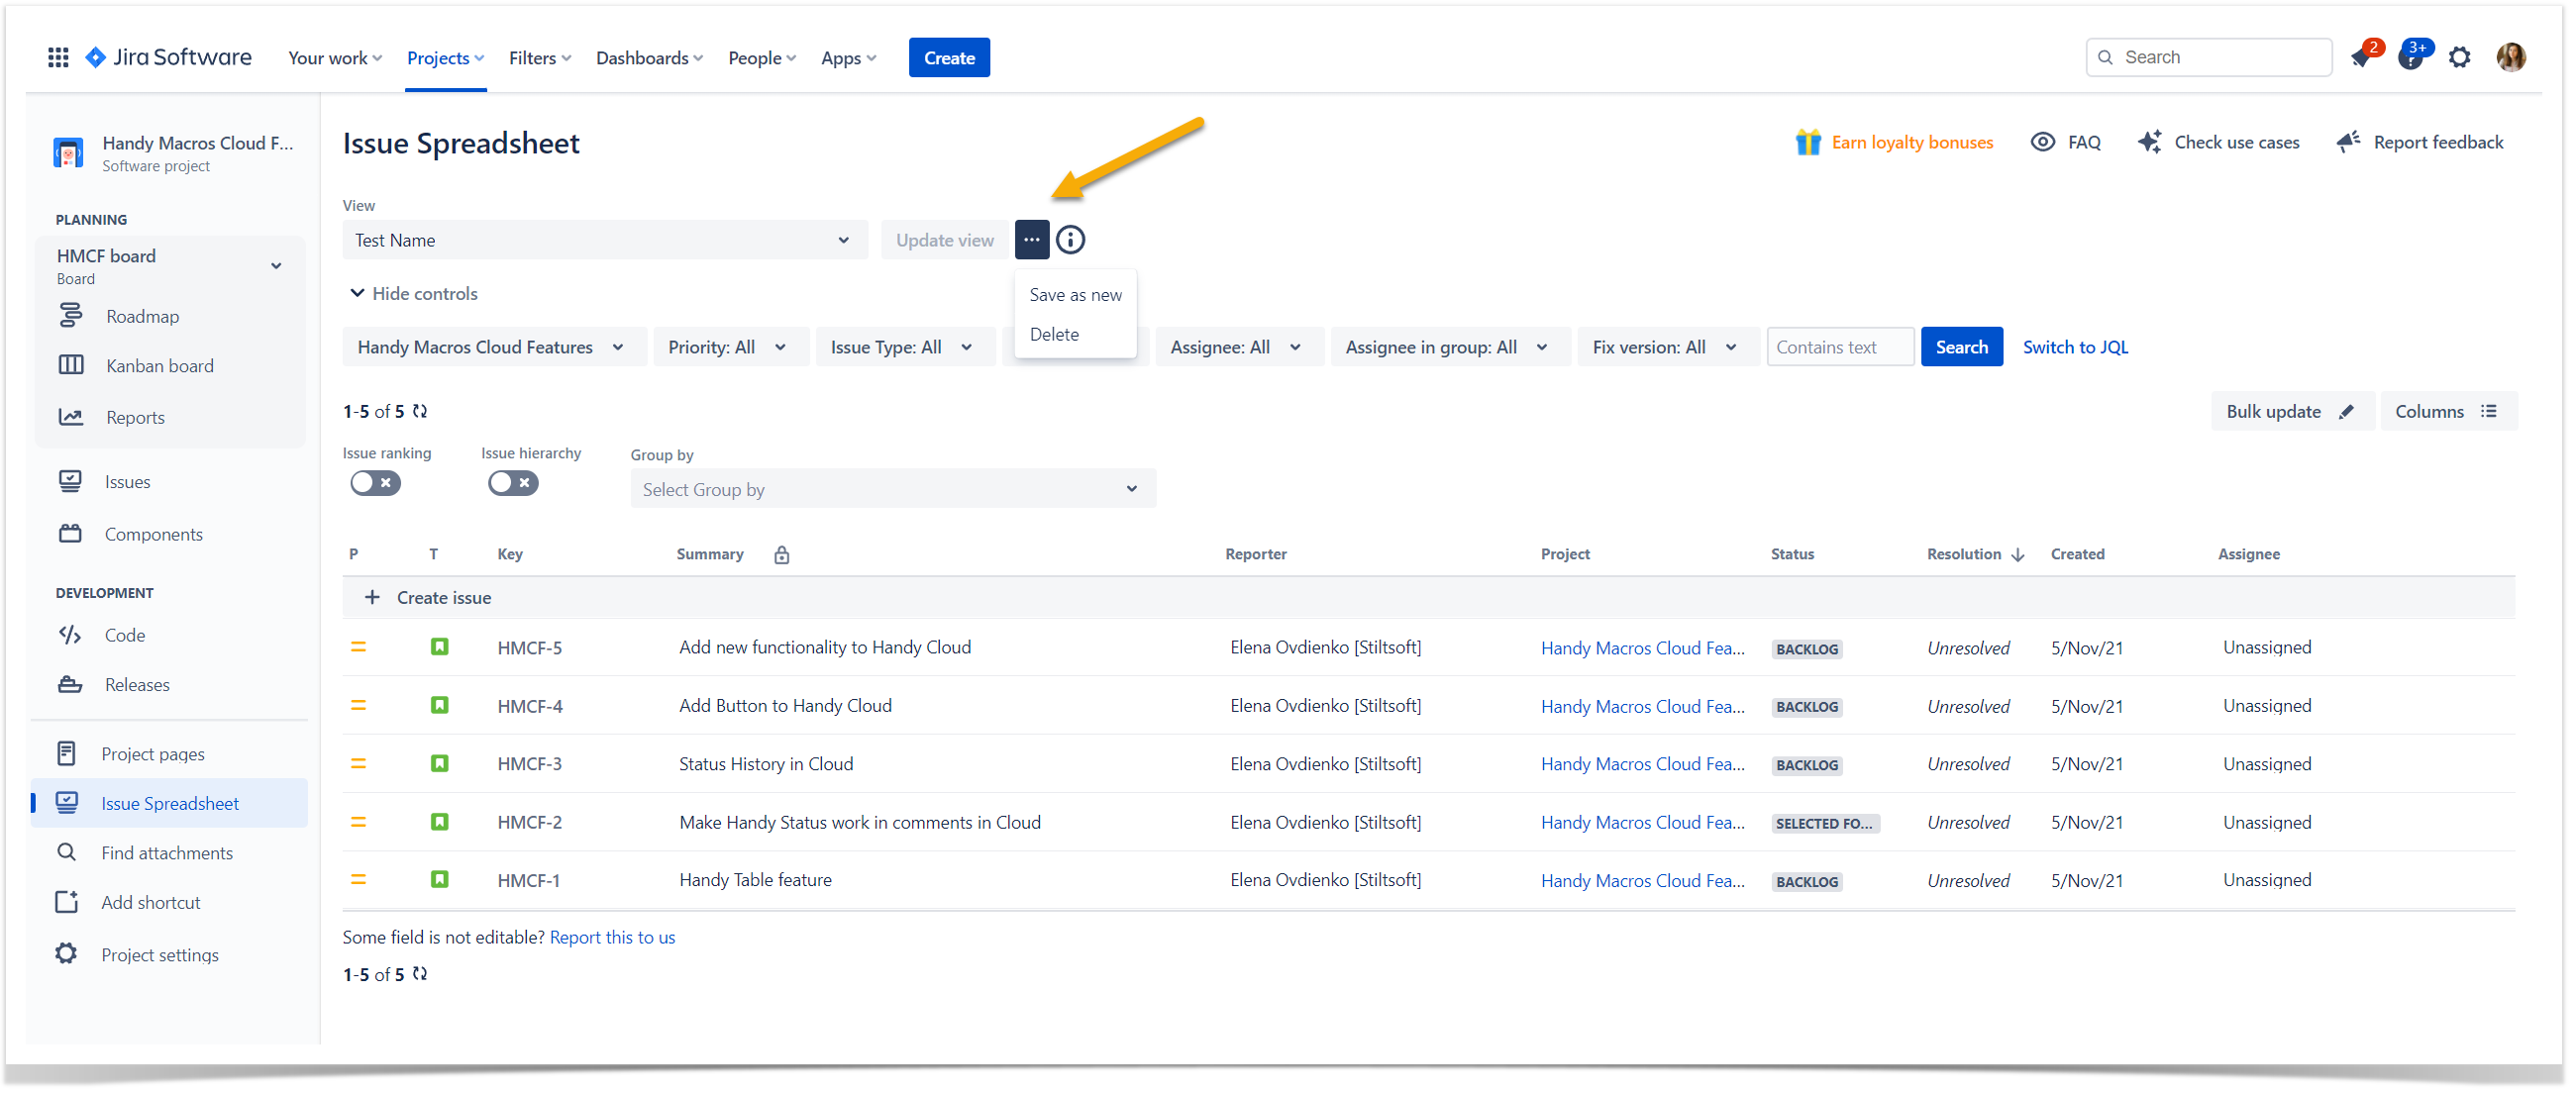
Manage the saved view
- Open Issue Spreadsheet.
- Locate the View section.
- Click the
 menu button.
 - Choose the required option
- Save as new
- Delete
Modify the saved view
- Open Issue Spreadsheet.
- Locate the View section.
- Select the required view.
- Make the changes you need in Issue Spreadsheet.
- The view is marked as Modified.
- Click the Update view button to save changes in the view settings.

Export Issue Spreadsheet
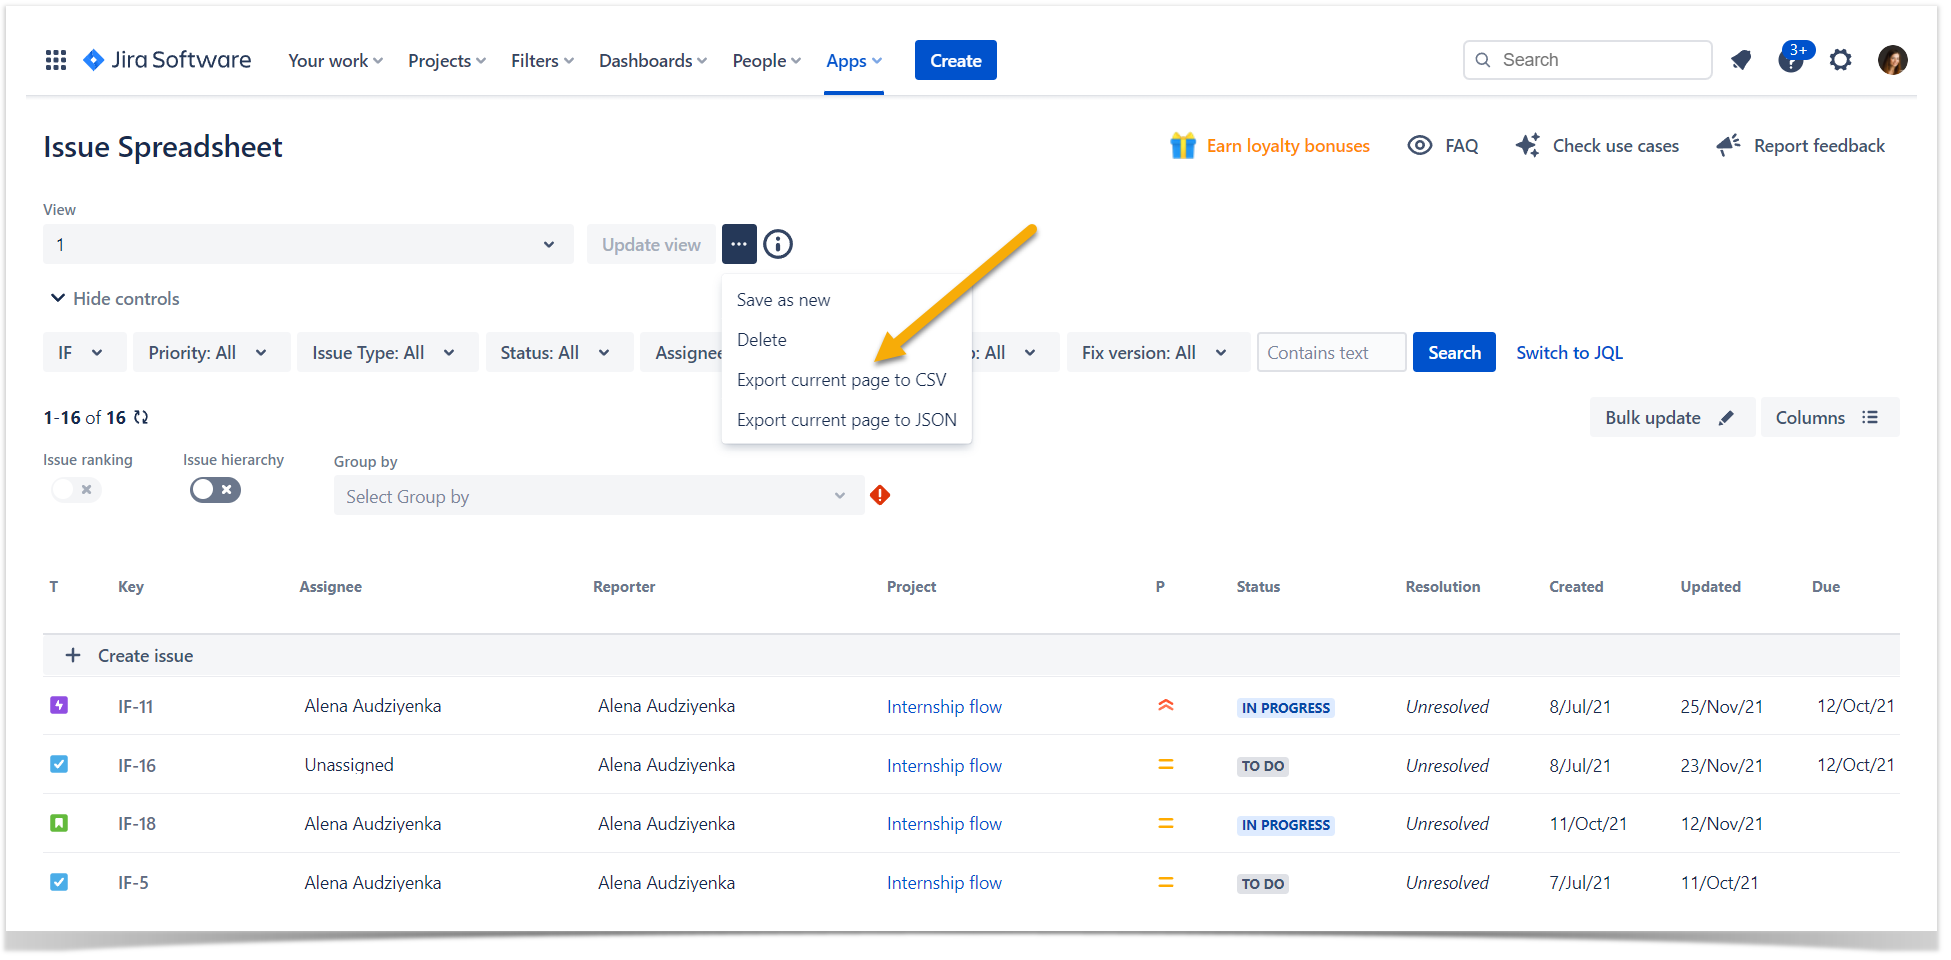
You can export the current page of Issue Spreadsheet. Some of the fields can't be exported due to technical limitations. If you have any requests regarding this function, please, contact us.
- Open Issue Spreadsheet.
- Locate the View section.
- Click the menu button.
- Choose the required option
- Export current page to CSV
- Export current page to JSON
- A file in the chosen format will be downloaded.
Note that at the moment you can export only one current page of the spreadsheet at a time. If you need to export more than one page, you'll need to open the necessary page and download it manually. Please, contact us, if you have any suggestions.
Known issues of the Issue Spreadsheet export
- Some fields are not exported due to technical limitations. At the moment, these fields can't be exported:
- Comment (html)
- Description (html)
- Environment (html)
- Approver groups
- Backout plan
- Implementation plan
- Major incident
- Responders
- Root cause (html)
- Severity
- Test plan
- Story Points
- Workaround (html)
- If you apply the Issue hierarchy function, only epics will be visible in the exported file.
- Jira fields without any values, like Unresolved or Unassigned, will be empty in an exported file.
Change the Jira issues from Issue Spreadsheet
You can edit multiple fields right from Issue Spreadsheet without switching to a Jira issue itself. Some of the fields can't be edited due to technical limitations. If you have any requests regarding this function, please, contact us.
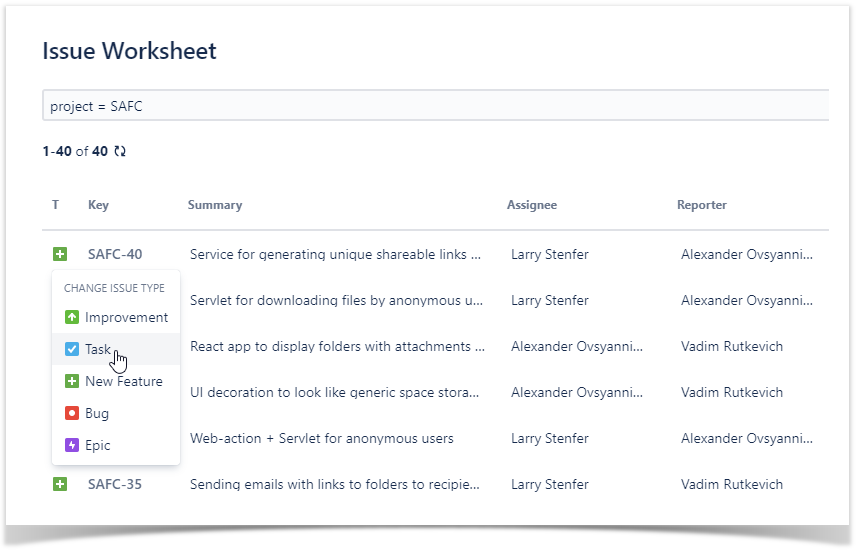
Change task type
- On the list with Jira issues, locate the one which type you want to change.
- Hover over the task type icon and click it.
- Select the task type you want.
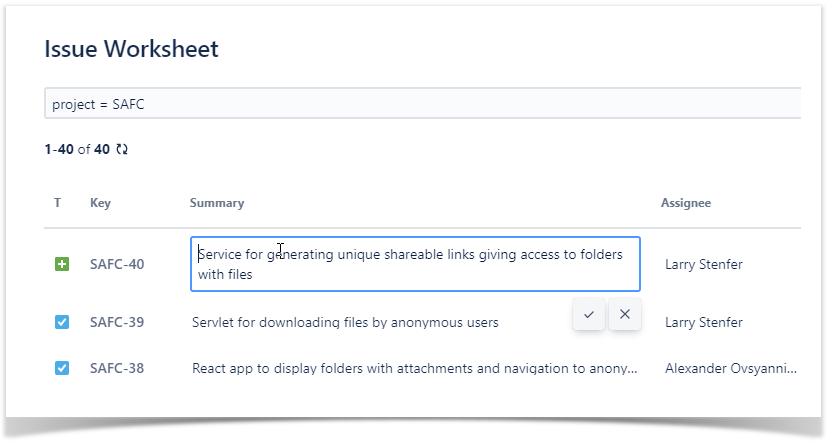
Change summary
- On the list with Jira issues, locate the one in which you want to change summary.
- Hover over the task summary and click it.
- Update the task summary.
- Click the
 button to save the new summary.
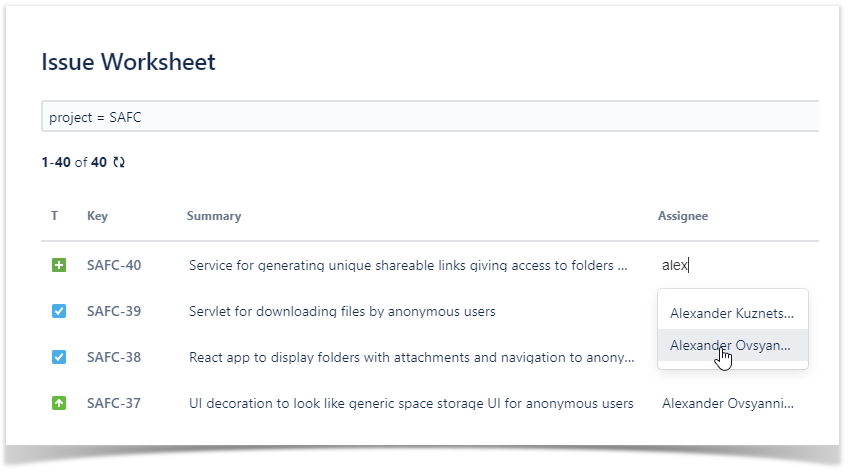
Change assignee/reporter
- On the list with Jira issues, locate the one in which you want to change an assignee or a reporter.
- Hover over the assignee or reporter and click it.
- Start entering the user name.
- Select the appropriate user from the prompted results.
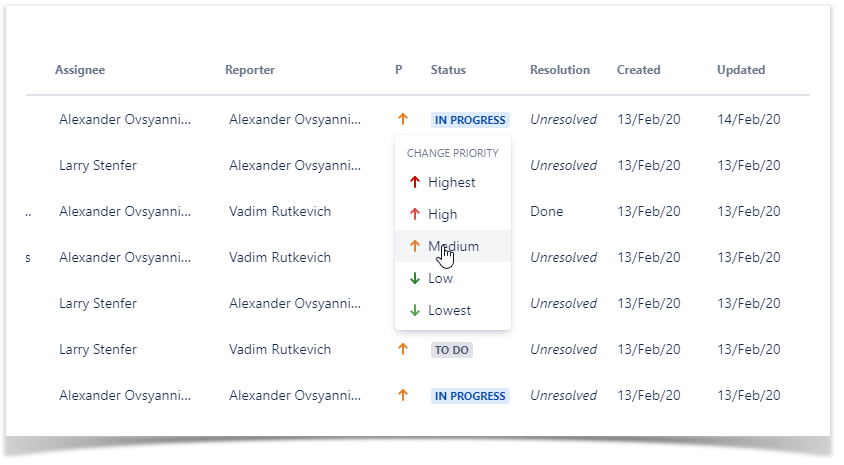
Change the priority
- On the list with Jira issues, locate the one which priority you want to change.
- Hover over the priority icon and click it.
- Select the priority you want.
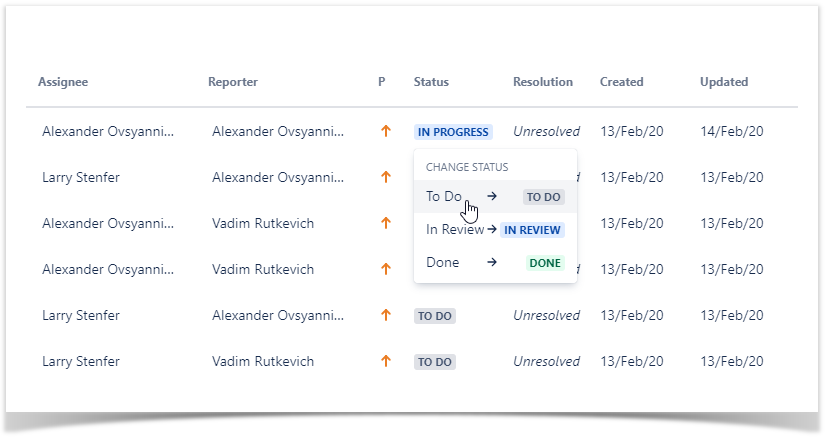
Change the status
- On the list with Jira issues, locate the one in which you want to change the status.
- Hover over the status and click it.
- Select the status you want.
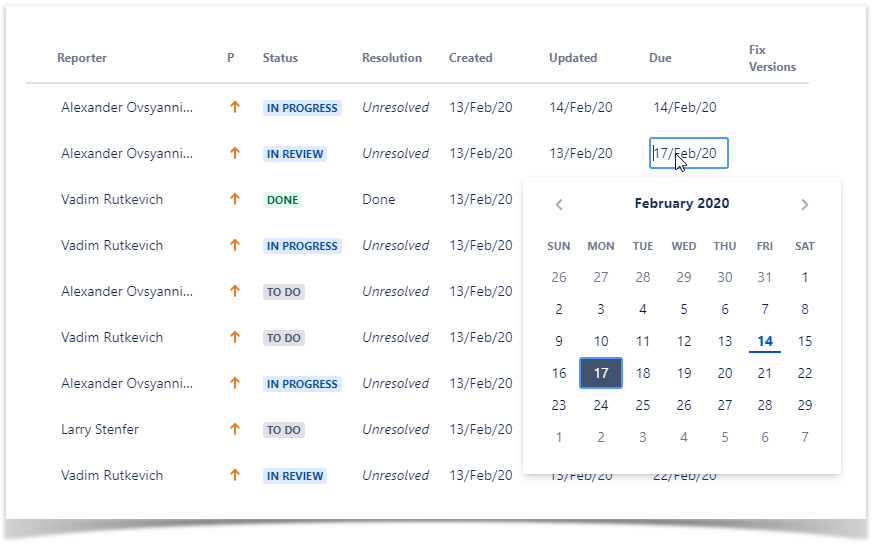
Change the date
- On the list with Jira issues, locate the one in which you want to change the date field.
- Hover over the field placeholder and click it.
- Select the date you want.