Smart Attachments is a document management app for Confluence. It allows you to create a space storage for storing important project documents in one place. You manage and organize documents within folders, you can quickly browse through folders and locate files at once.
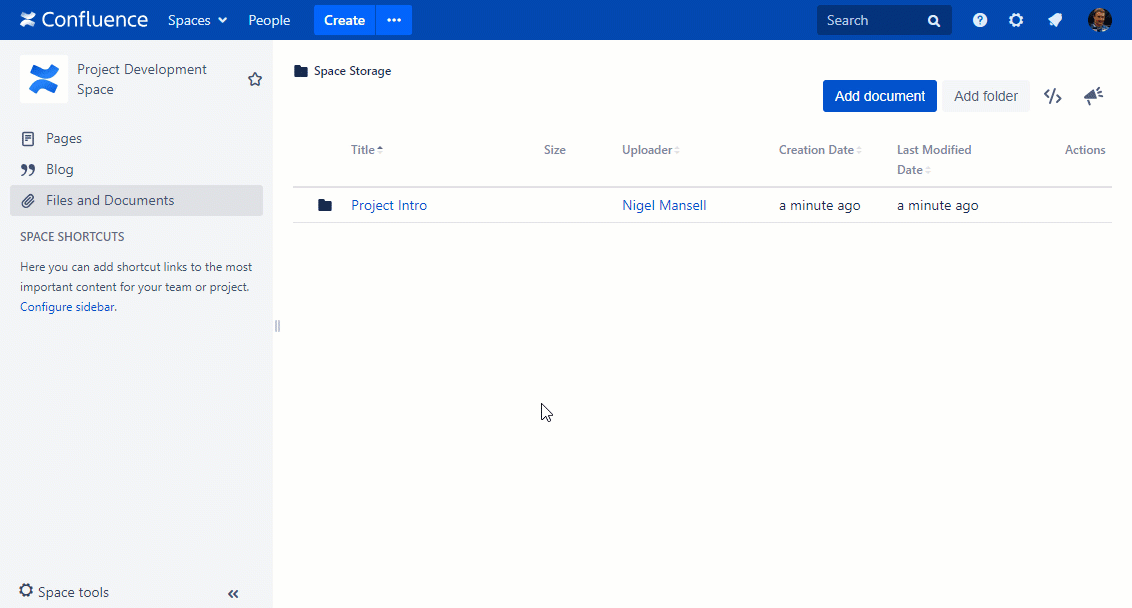
Accessing the space storage
- Open the space.
- On the navigational sidebar, select Files and Documents.
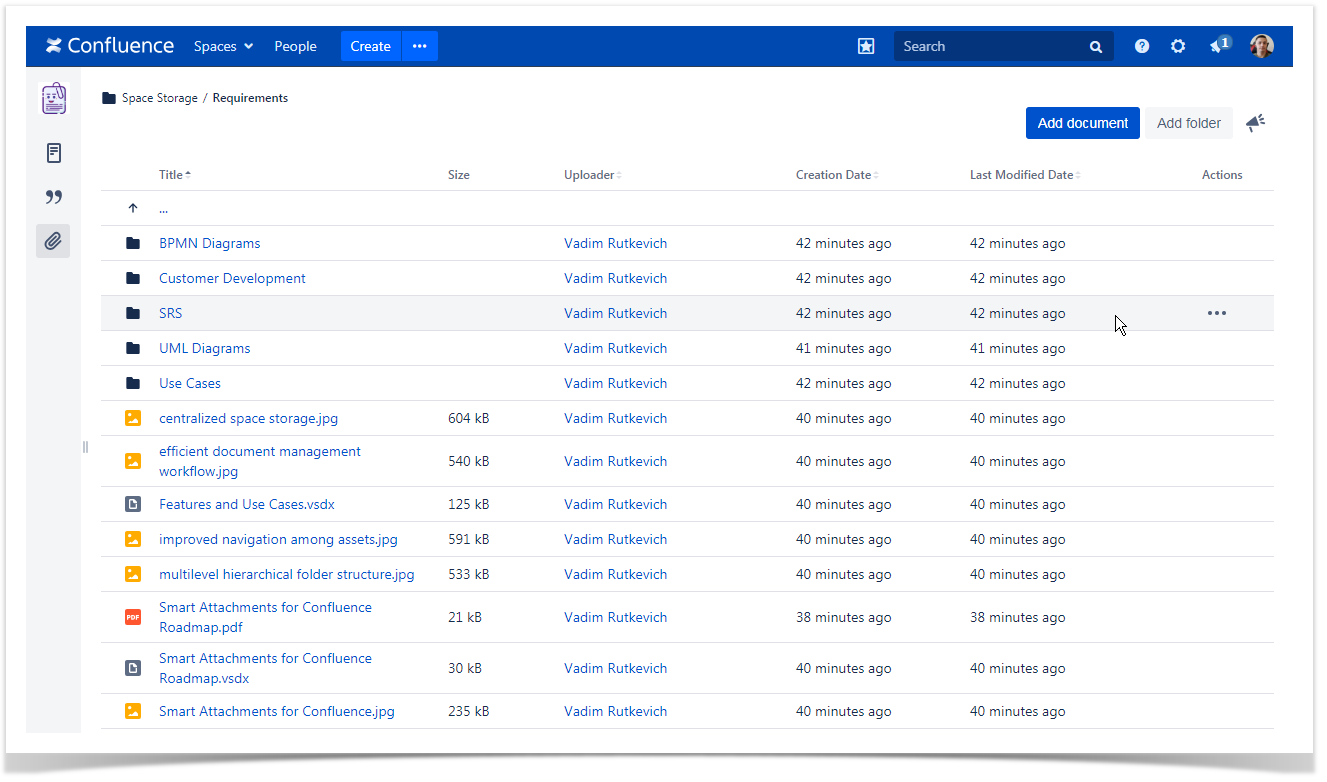
- Once you open the space storage, you will see folders and documents.
Navigating across folders
- Open the space storage.
- Locate the folder you want to open.
- Click the folder name.
- To return back to the previous folder, click ... .
You can use the breadcrumbs to return to multiple levels back.
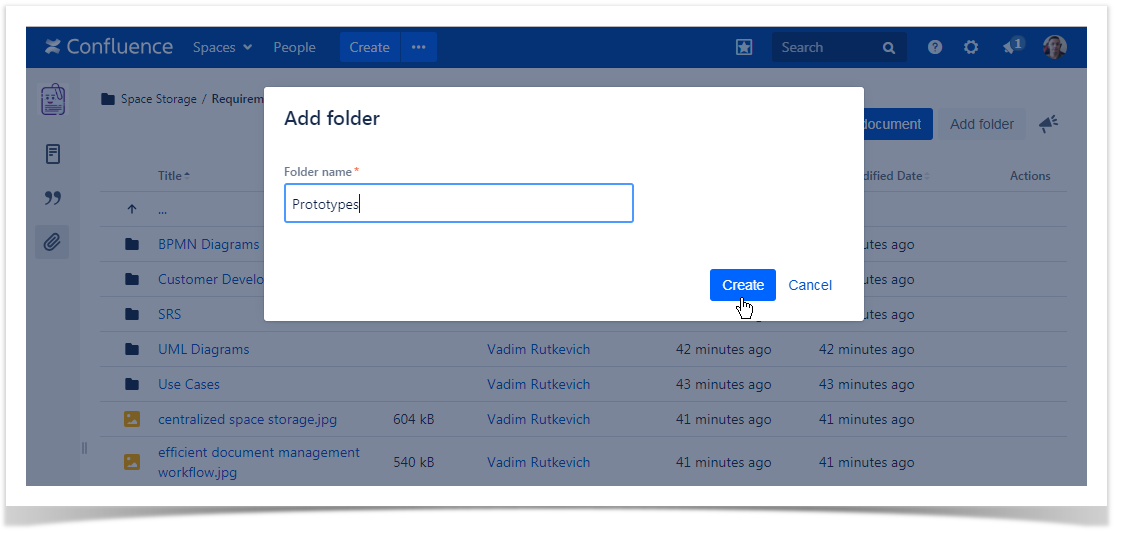
Adding new folders
- In the space storage, click Add folder.
- In the Add folder form, enter the name of a new folder.
- Click Create.
Uploading folders with documents
- Open the space storage.
- Select one or multiple folders on your local computer.
- Drop these folders into the space storage.
The app will automatically create folders and upload documents into them preserving the initial structure on your local computer.
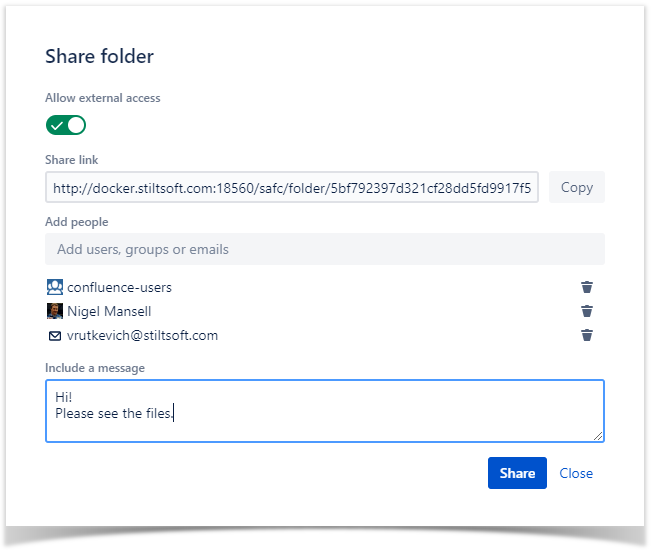
Sharing the folder
You can share the folder with Confluence users and with people outside of your organization (people having no account in Confluence).
- On the list with folders, locate the folder you want to share.
- Hover over the folder.
- Click the [...] button.
- Select Share.
- In the Share folder form, specify the following information:
- Allow external access - move the toggle right to enable public access to the folder. In this case, non-Confluence users will be able to view the contents of the shared folder and its sub-folders.
- Share link - click Copy to copy the sharing link.
- Add people - add user, user groups or individual emails who you want to share the folder with. An email will be sent. This field may not be available if the mail server is not configured in your Confluence.
- Include a message - add the message for the sharing link.
- Click Share.
You can move the toggle left to revoke the public access to the folder. In this case, people outside of your organization will be no longer available to access the folder contents. When you re-enable the external access, the sharing link will change and you will have to share the updated link again.
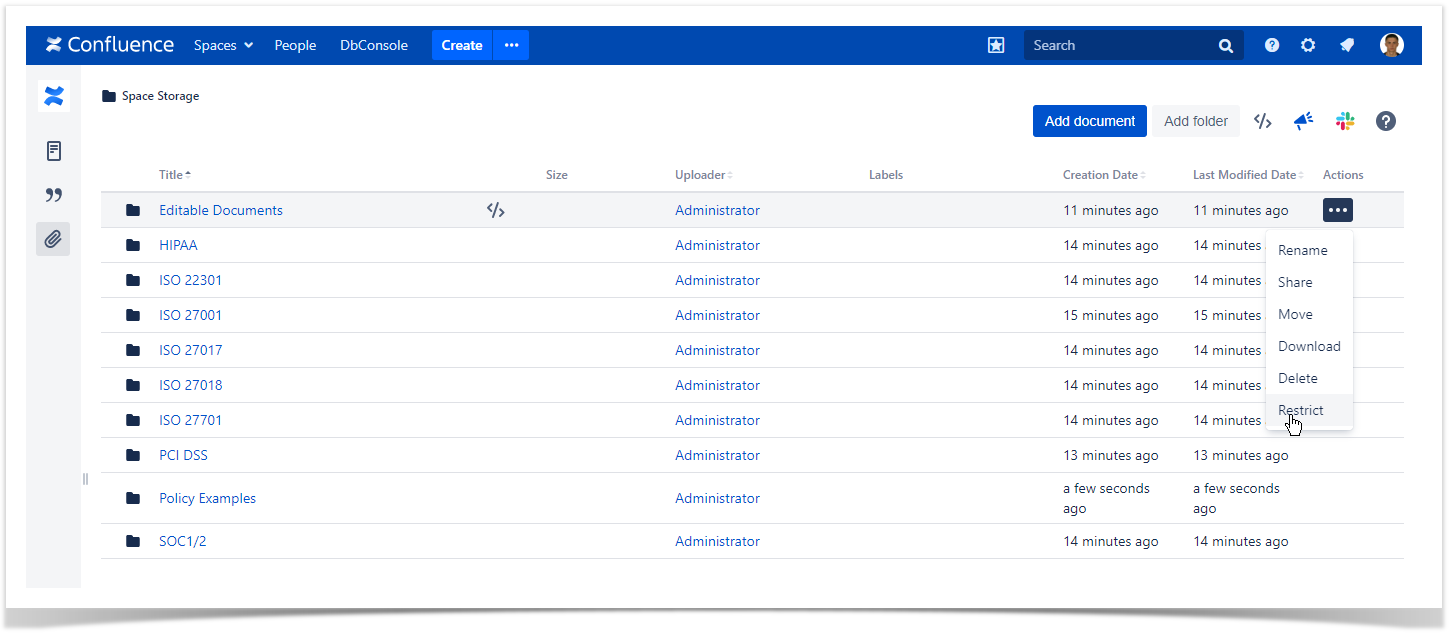
Setting access restrictions
- On the list with folders, locate the folder you want to set access restrictions for.
- Hover over the folder.
- Click the [...] button.
- Select Restrict.
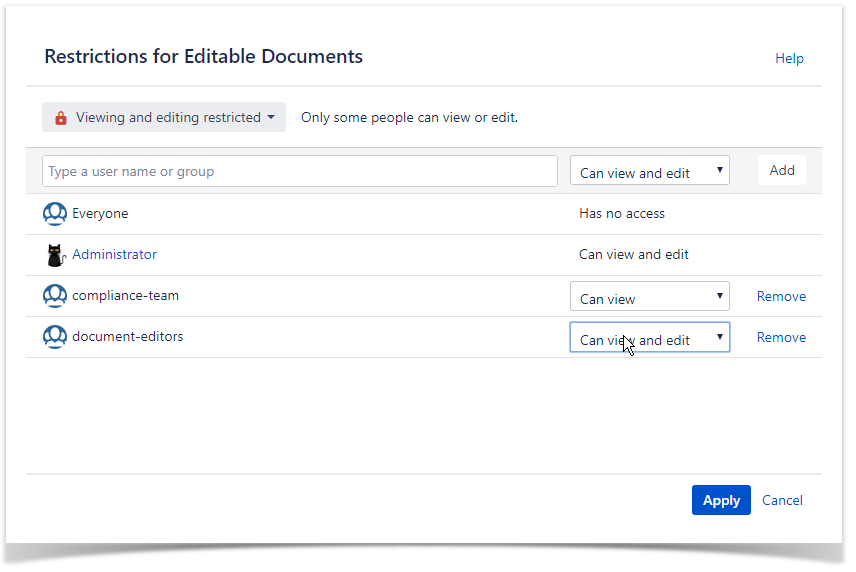
- In the Restrictions for Folder form, set the view or view and edit restrictions for specific users or user groups.
- Click Apply.
Access restrictions for folders work the same way as restrictions for pages and blog posts. For the details on access restrictions, please check this page.
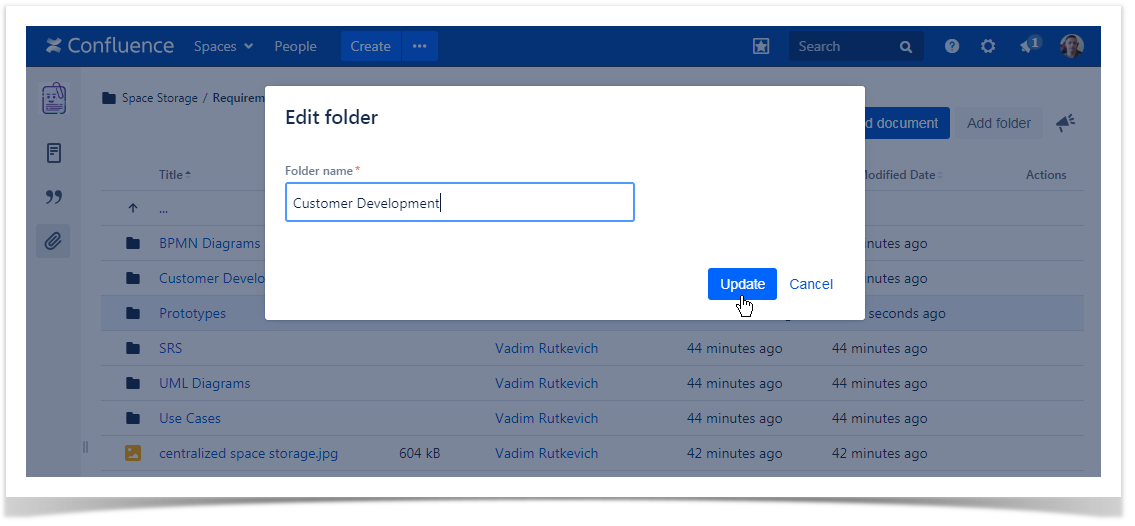
Renaming the folder
- On the list with folders, locate the folder you want to rename.
- Hover over the folder.
- Click the [...] button.
- Select Rename.
- In the Edit folder form, update the folder name.
- Click Update.
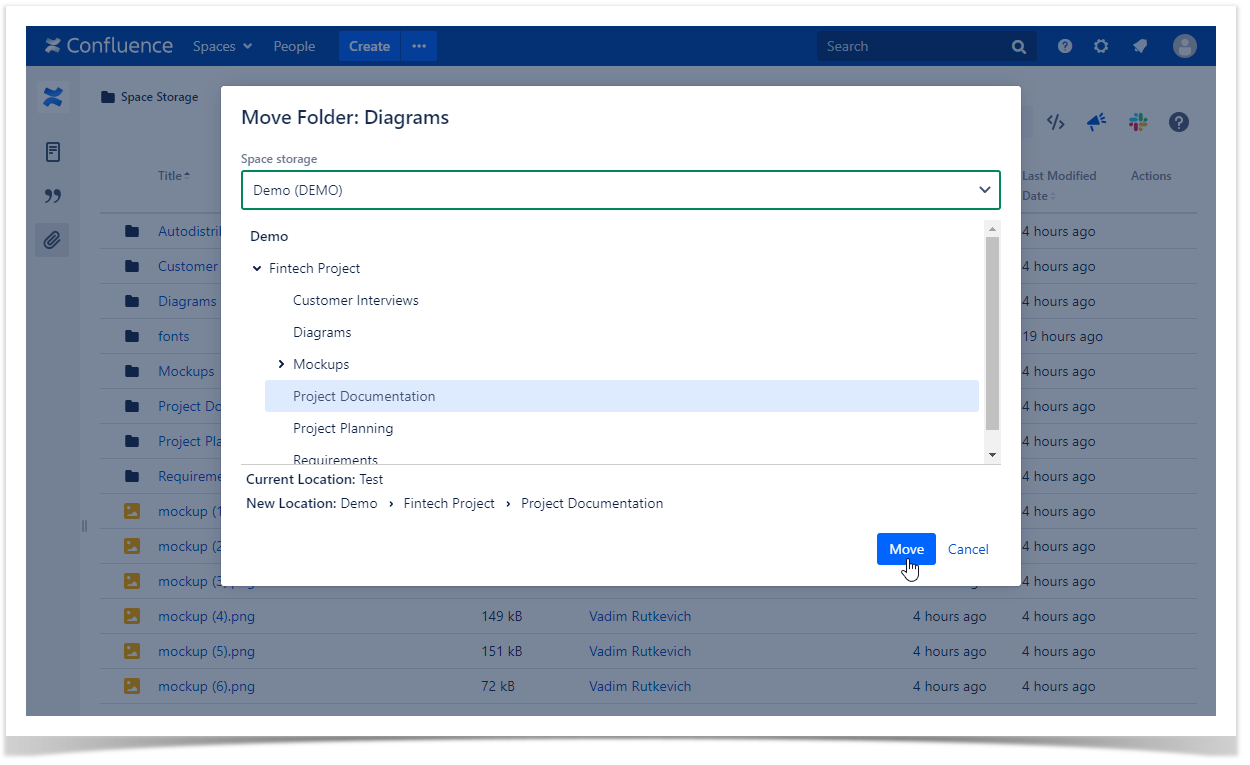
Moving the folder
- On the list with folders, locate the folder you want to move.
- Hover over the folder.
- Click the [...] button.
- Select Move.
- In the Move Folder form, select the space storage and folder which you want to move the folder to.
- Click Move.
You will automatically transition to the new location of the folder.
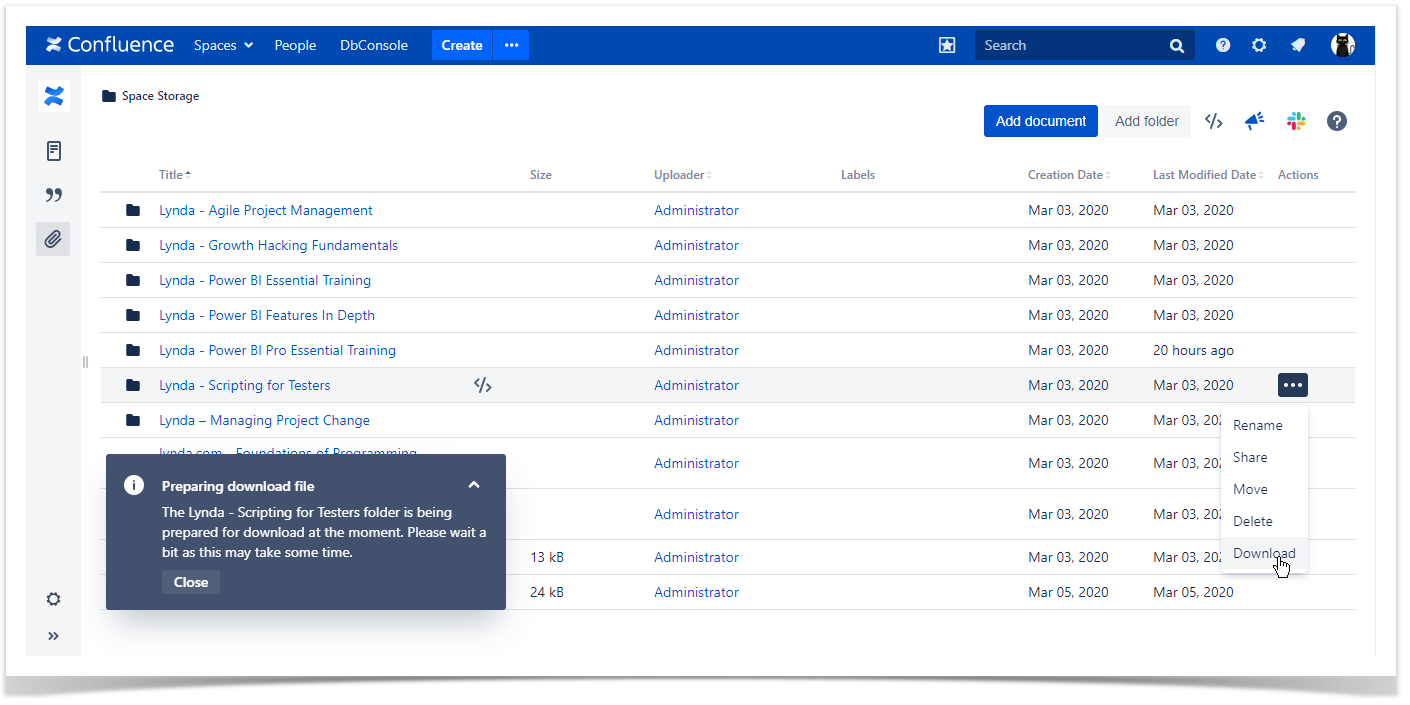
Downloading the folder
On the list with folders, locate the folder you want to download.
- Hover over the folder.
- Click the [...] button.
- Select Download.
The app will prepare the download file, this process may take a while. The file download starts automatically.
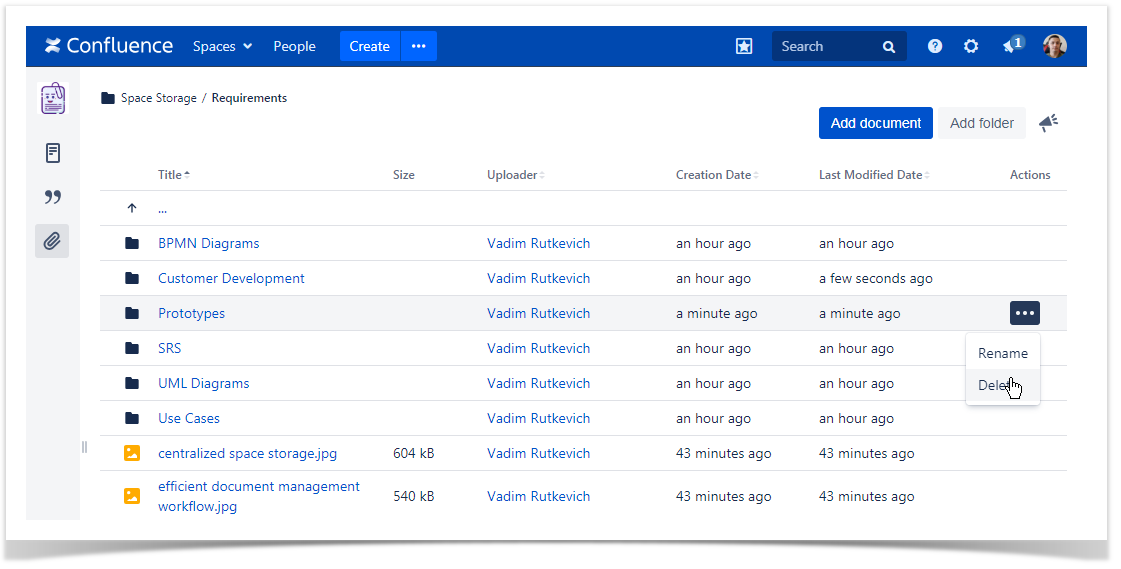
Deleting the folder
On the list with folders, locate the folder you want to delete.
- Hover over the folder.
- Click the [...] button.
- Select Delete.
Confirm the removal of the folder.
All the folders and attachments stored within this folder will be removed too.