It is possible to assign categories to courses to organize them for participants on Learning page.
Manage Course Categories
Only users with Learning Administrator permission can create and manage course categories. Learn more about permissions.
Create a new course category
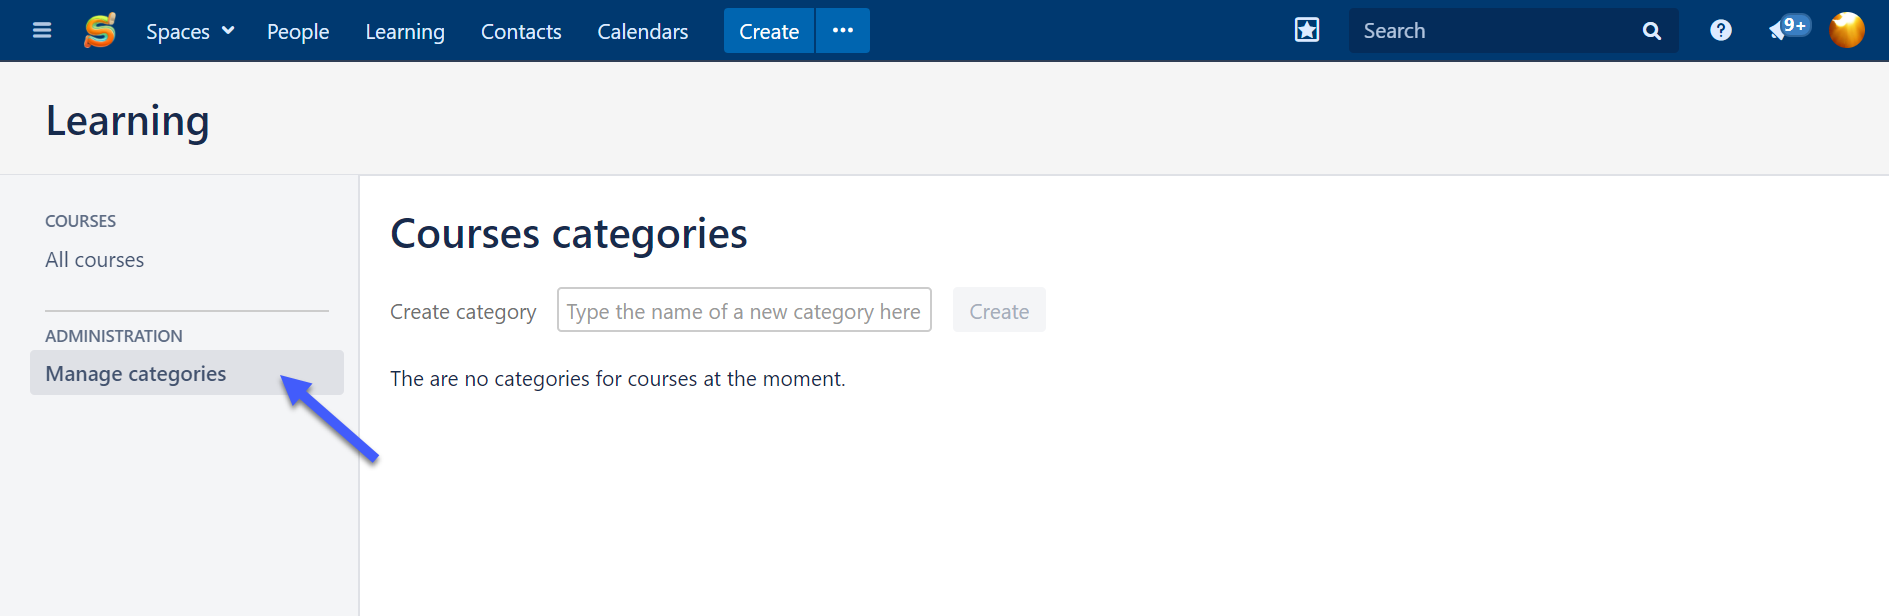
Click Learning in a Confluence header.
Select Manage categories in the left-hand panel.
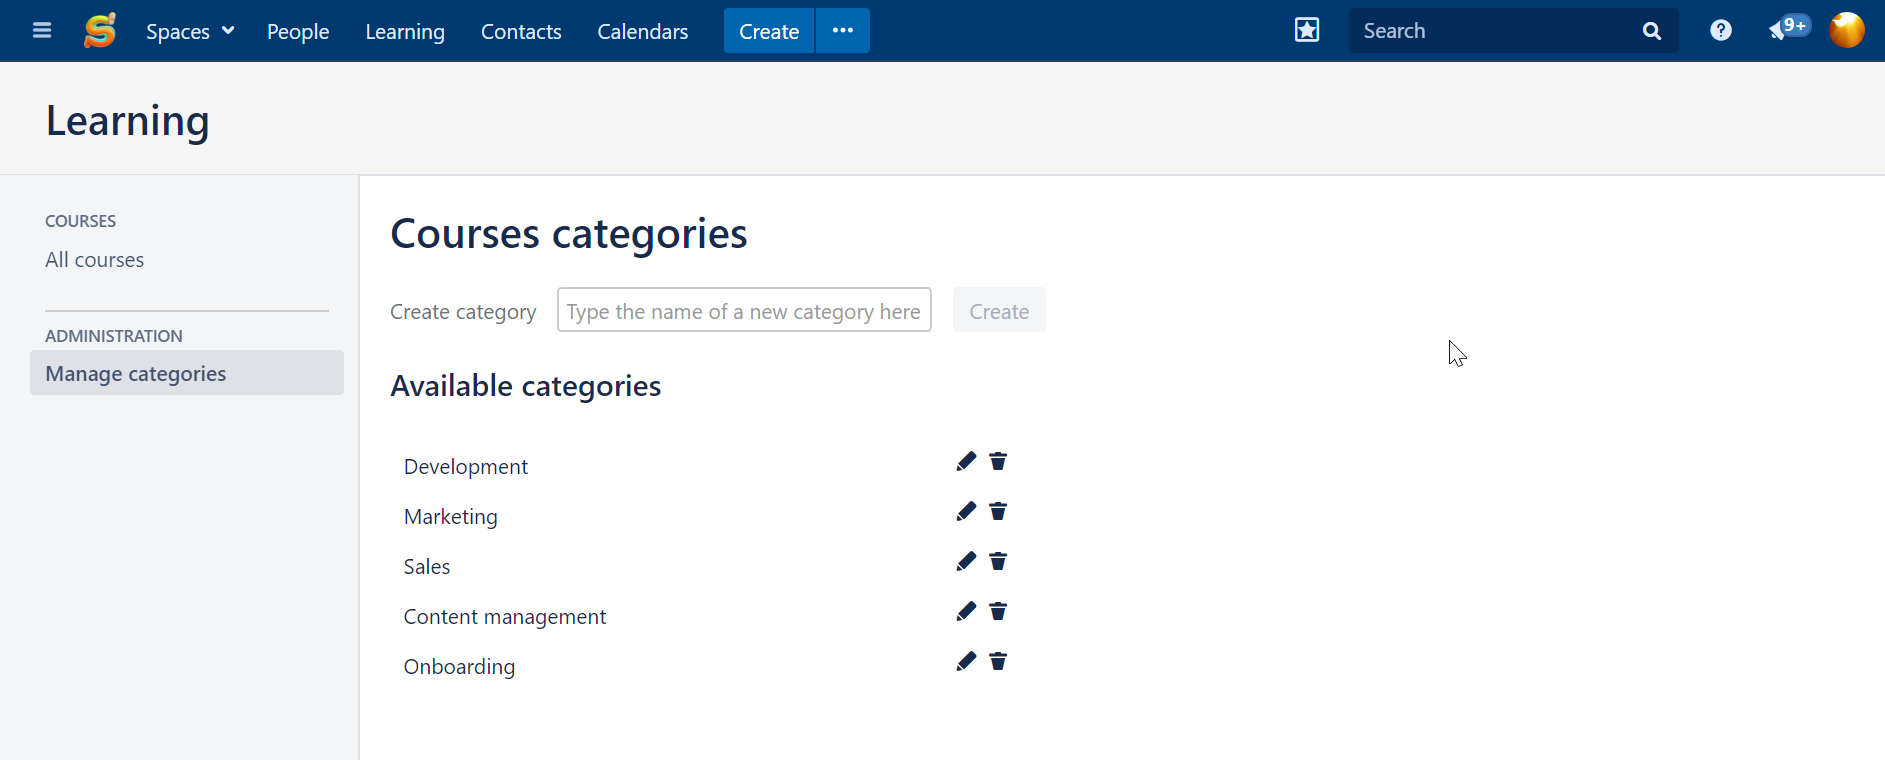
Type the name of a new category in the Create category box and click Create.
You will see added categories below the box.
Edit an existing course category
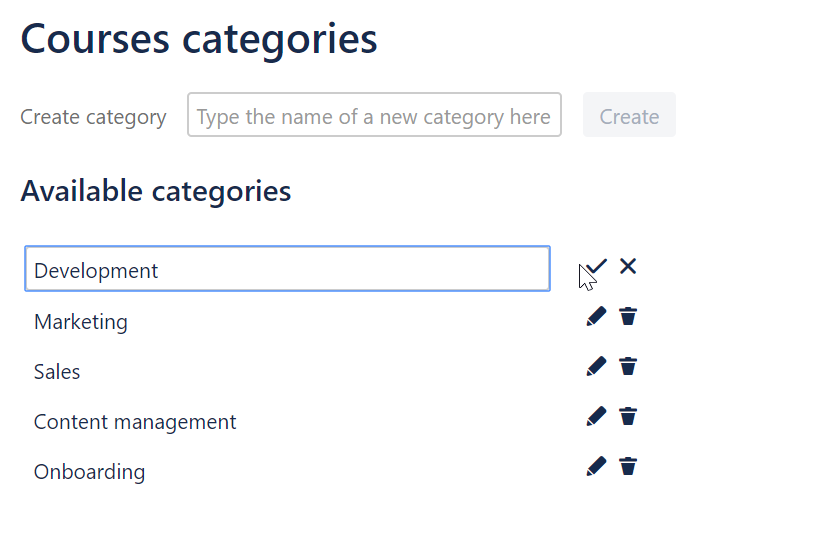
Click the pencil icon next to the category.
Make changes and save.
Delete a course category
To remove a course category from a list of available categories, click the trash icon next to the category you want to delete.
If a category you want to delete is used in courses, you will be notified and will need to confirm deletion. After deleting a category it will be removed from course settings.
Add Course to Category
To add a course to a category:
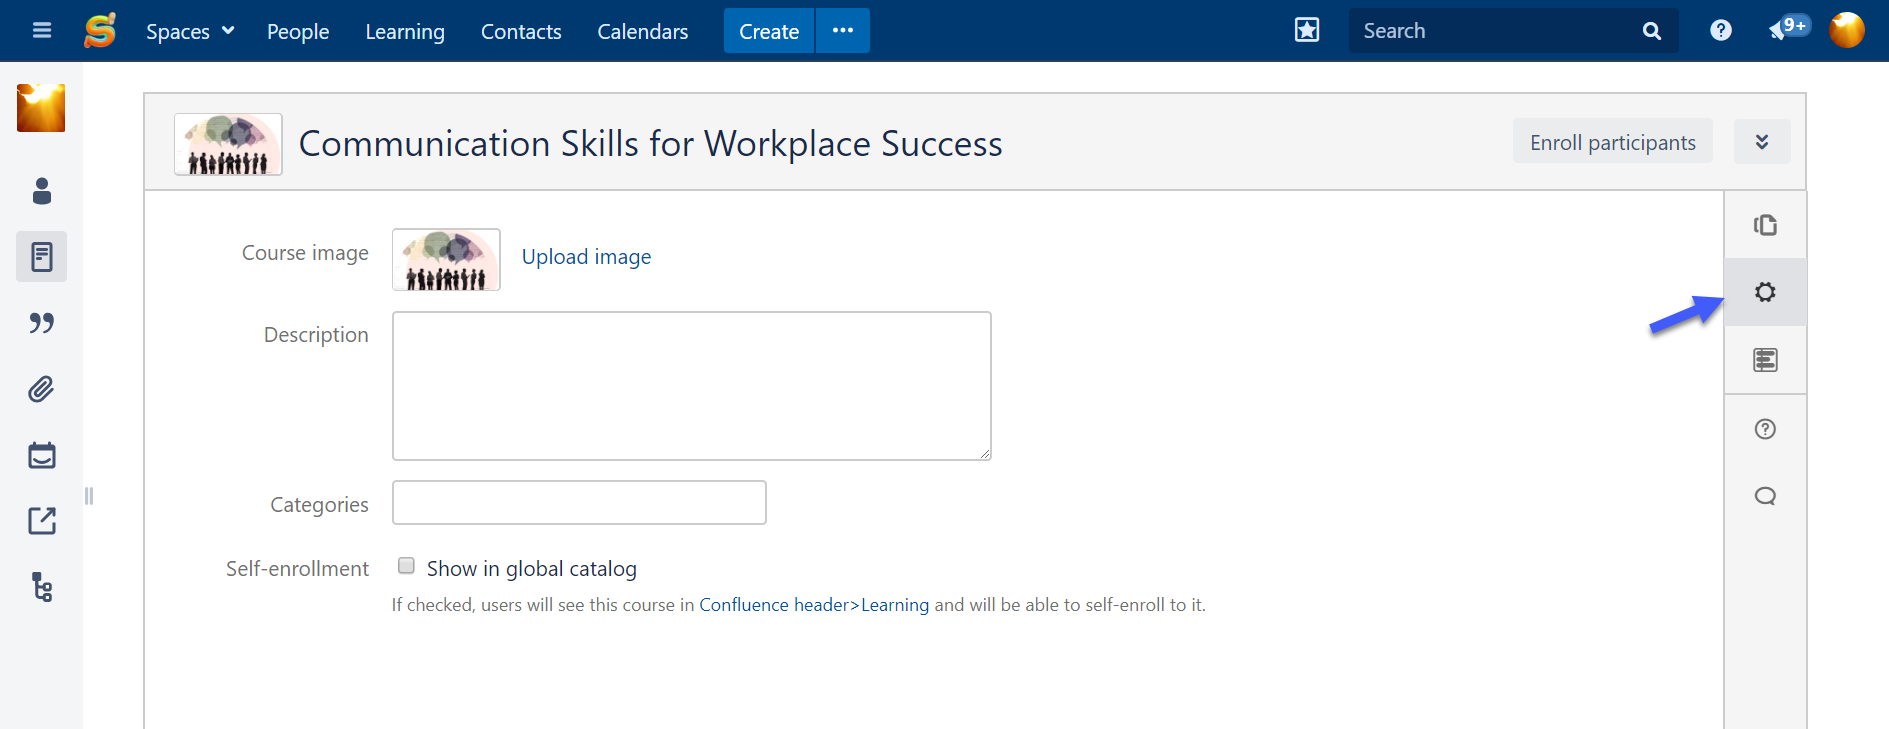
Open a course administration page.
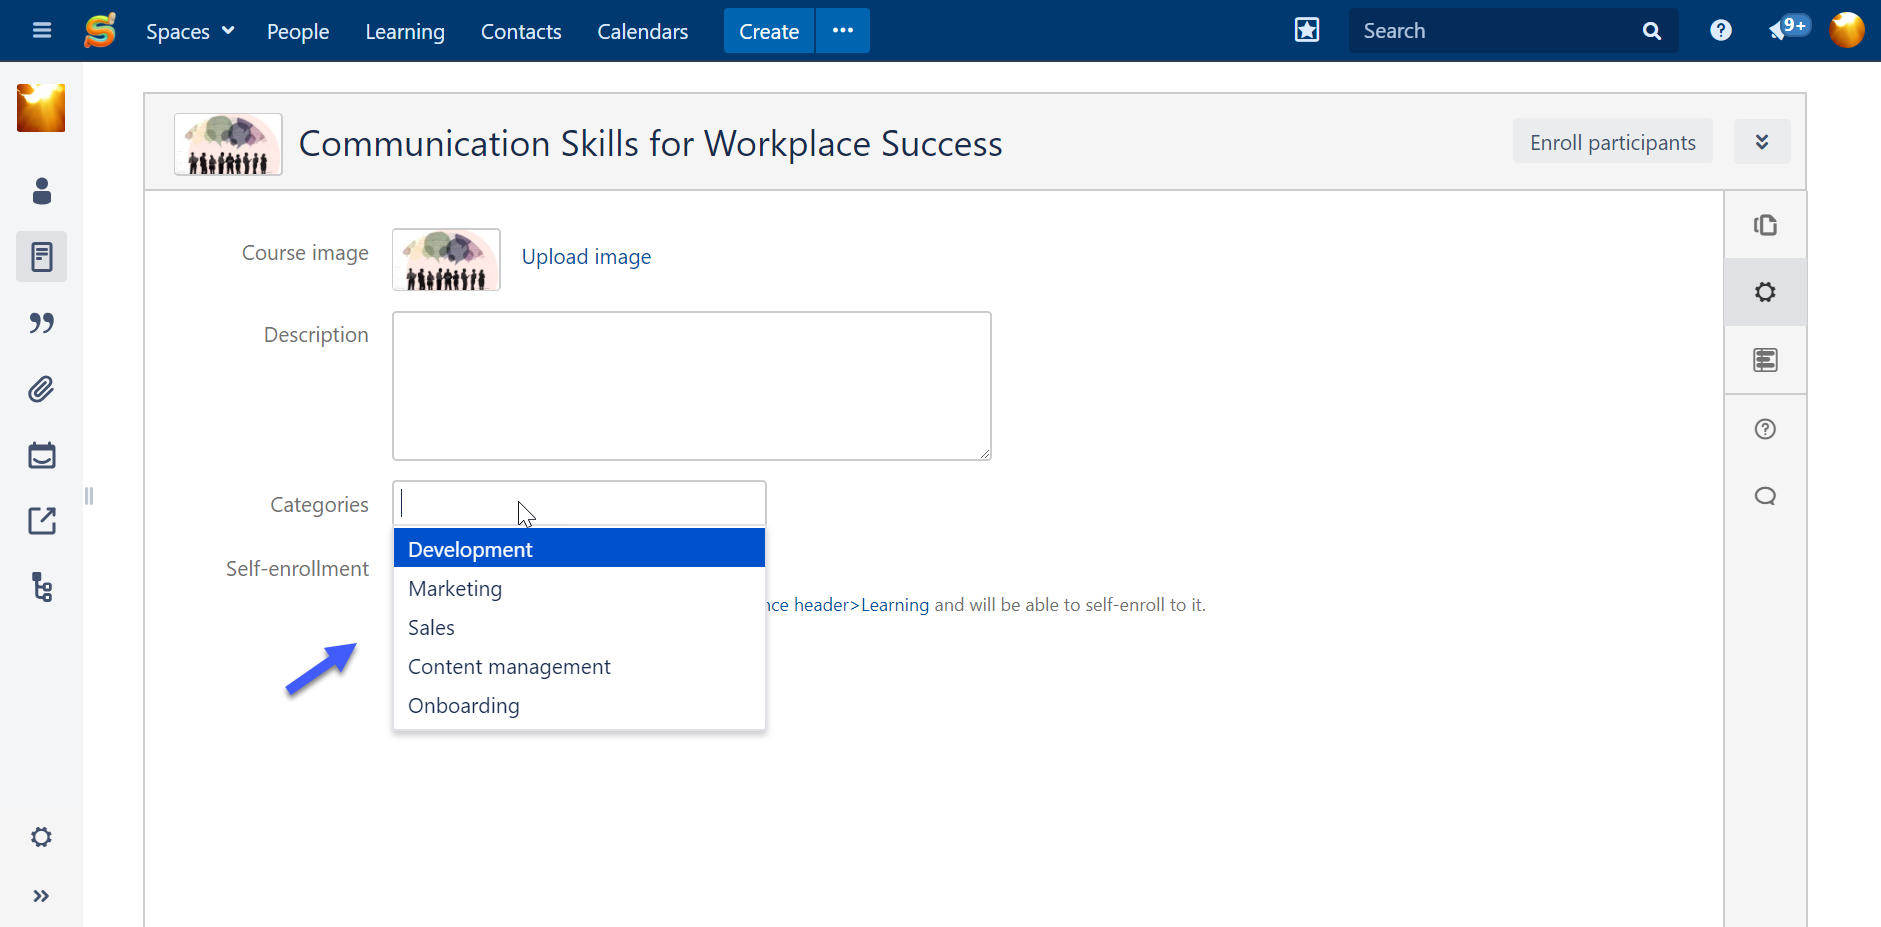
Select in the right-hand sidebar.
Choose a category in the Categories field. If you don't see a needed category in the list, create a new category.
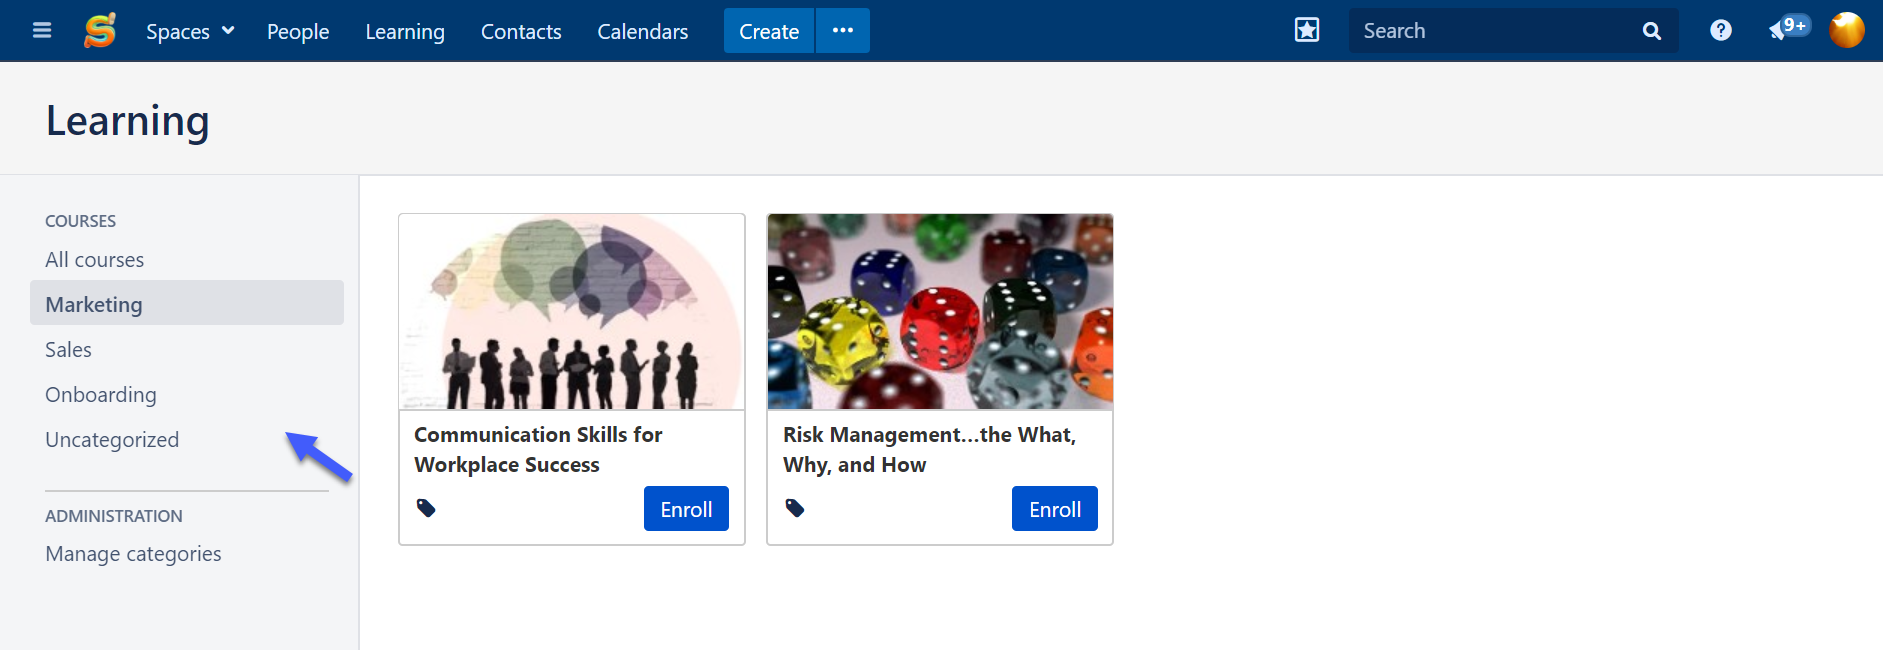
Categories that have at least one associated course will be shown on the left-hand panel on Learning page. Course participants can click a category to filter courses and see only those from a given category.
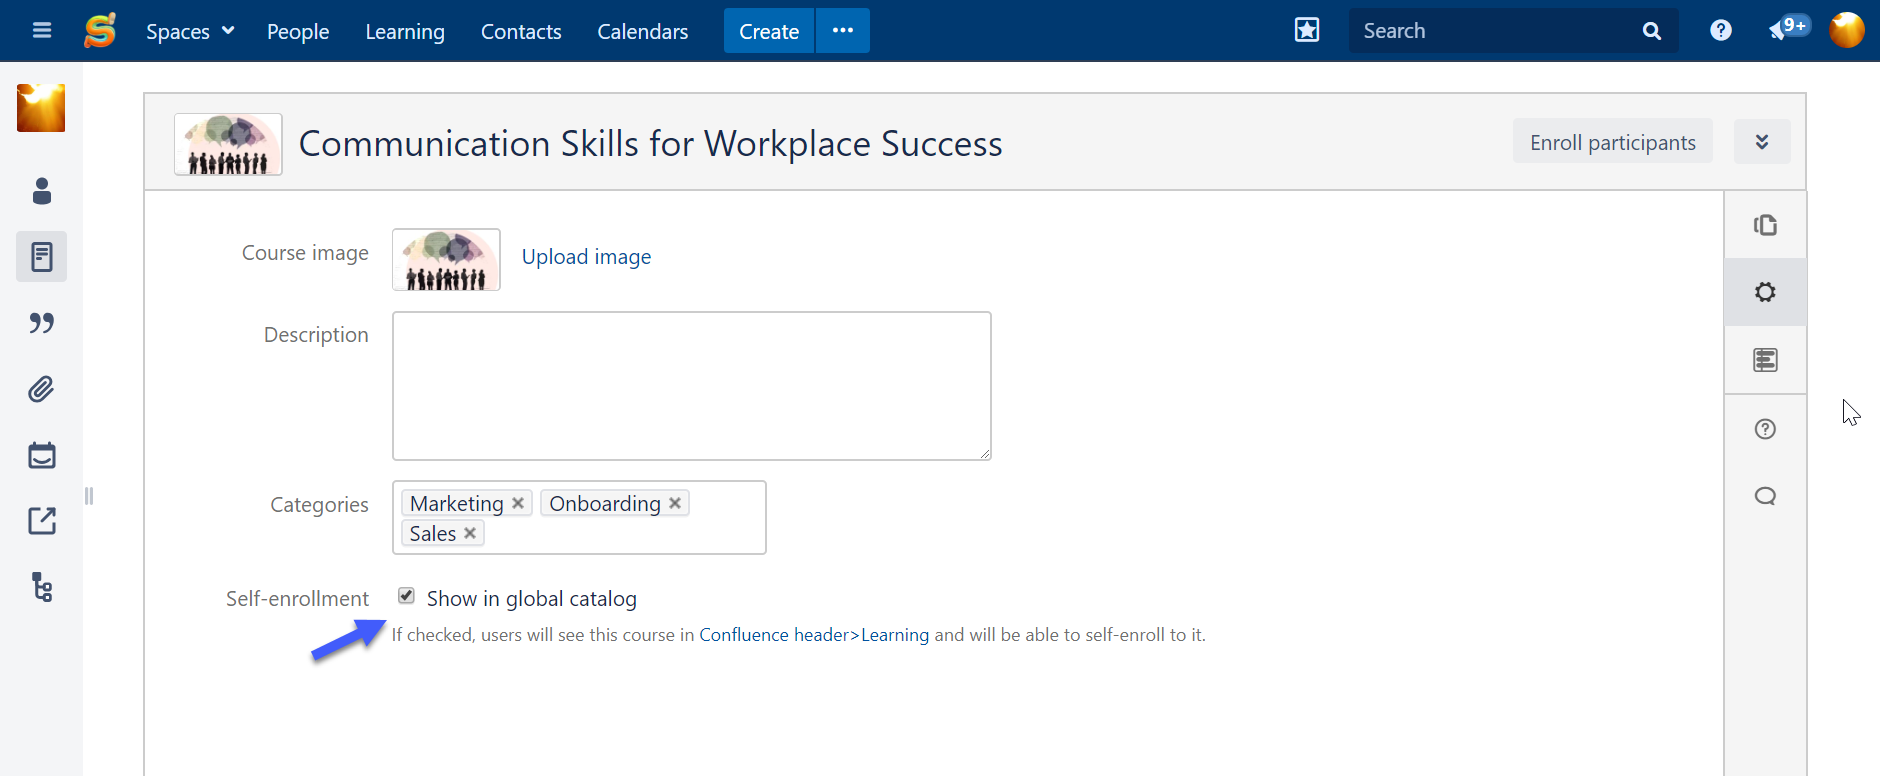
Make sure you check Show in global catalog if you want a course to be available for self-enrollment in Learning.
Cookie Notice
This website uses cookies for analytics, personalization and advertising. By continuing to browse, you agree to our use of cookies. Learn more