Set the default sorting
- Switch the page to the edit mode.
- Select the macro and click Edit.
- Switch to the Options tab.
- Locate the Default Sorting boxbox.
- Click it and select the column with the appropriate sorting order.
- Save the macro and the page.
| Info |
|---|
Default sorting is available only in the pivot tables with one column selected as row labels. |

Set the cell value delimiter
- Switch the page to the edit mode.
- Select the macro and click Edit.
- Switch to the Options tab.
Locate the Cell value delimiter box.
Enter the character (multiple characters) used to separate values in cells.
Save the macro and the page.
| Info |
|---|
If the call value delimiter is not a regular character, but a space, use the Unicode character \u0020. |
| Handy Carousel | ||
|---|---|---|
| ||
|


Set the decimal separator
- Switch the page to the edit mode.
- Select the macro and click Edit.
- Switch to the Options tab.
- Locate the Decimal separator box.
- Select the correct decimal separator from the list, as follows:
- Point
- Comma
- Save the macro and the page.
| Info |
|---|
The incorrectly specified decimal separator may cause the incorrect calculation of numerical values. |

Set the thousands separator
- Switch the page to the edit mode.
- Select the macro and click Edit.
- Switch to the Options tab.
- Locate the Thousands separator box.
- Select the correct decimal separator from the list, as follows:
- Space
- Point
- Comma
- Save the macro and the page.
| Info |
|---|
Selection of the thousands separator is optional as it only improves Options of numerical values without affecting the original values in the source table. |

Set the number of decimal places
- Switch the page to the edit mode.
- Select the macro and click Edit.
- Switch to the Options tab.
- Locate the Decimal places box.
- Enter the number of decimal places to display.
Save the macro and the page.
| Info |
|---|
You may need to limit the decimal places when using the Average operation type. |

Set the date format
| Excerpt |
|---|
|
| Info |
|---|
For the details on specifying date formats, read this article. |
| Table Excerpt | ||
|---|---|---|
| ||
|

Set the worklog settings
The Pivot Table macro supports summarization of worklogs and time intervals.
| Info |
|---|
Please ensure that the worklog parameters set in the macro are identical to parameters configured in Atlassian JIRA. |
- Switch the page to edit mode.
- Select the macro and click Edit.
- Switch to the Options tab.
- Click the Set worklog settings button.
- In the opened form, define the worklog parameters, as follows:
- Days in week - enter the number of business days in a week.
- Hours in day - enter the number of working hours in one business day.
- Time format - select the used time format in worklog values.
- Week shortening - enter the shortening for the week time unit if you use any language different from English.
- Day shortening - enter the shortening for the day time unit if you use any language different from English.
- Hour shortening - enter the shortening for the hour time unit if you use any language different from English.
- Minute shortening - enter the shortening for the minute time unit if you use any language different from English.
- Click Save.
- Save the macro and the page.
| Info |
|---|
Worklog time units in different languages are denoted with different shortenings. Please adjust them according to your JIRA localization settings. |
| Handy Carousel | ||
|---|---|---|
| ||
| ||
|


Shorten title
This option removes the operation type name from the header.
Enable the cumulative count- Switch the page to the edit mode.
- Select the macro and click Edit.
- Switch to the Options tab.
- Locate and enable the Cumulative countShorten title option.
- Save the macro and the page.

Show data values
- Switch the page to the edit mode.
- Select the macro and click Edit.
- Switch to the Options tab.
- Locate the Show data values option and select the appropriate option, as follows:
- Number
- Percentage
- Number (Percentage)
- Percentage (Number)
- Save the macro and the page.

| Info |
|---|
The Shorten title option works only for simple one-dimensional pivot tables. But please note that you can always rename pivot columns with the help of the Table Transformer macro. |
| Handy Carousel | ||
|---|---|---|
| ||
|
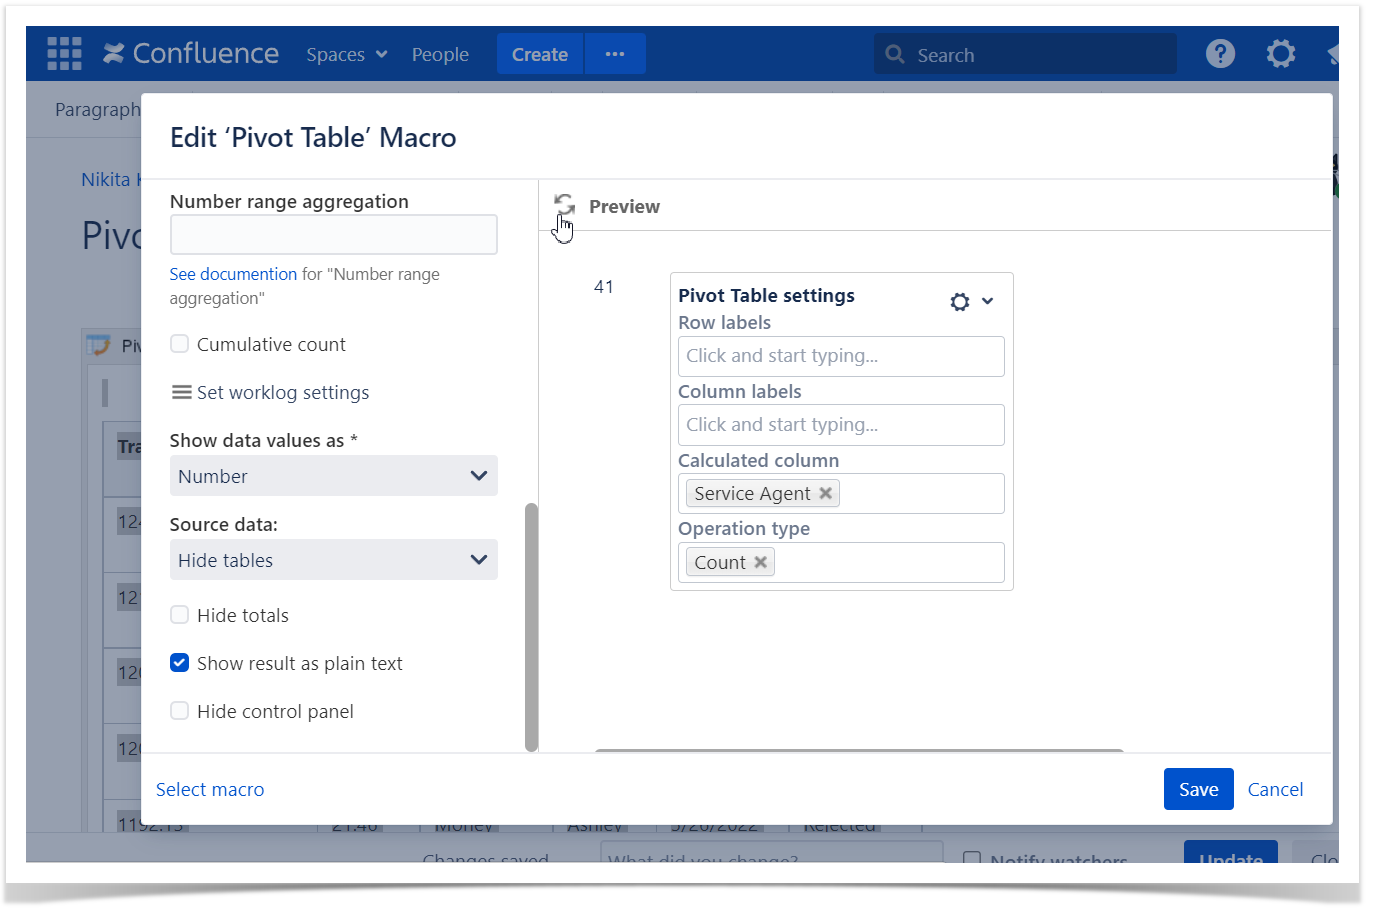
Show result as plain text
| Note |
|---|
This option can be enabled only if the calculation result is displayed as a table with a single cell. |
- Switch the page to the edit mode.
- Select the macro and click Edit .
- Switch to the Options tab.
- Locate and enable the Hide totals option.
- Save the macro and the page.

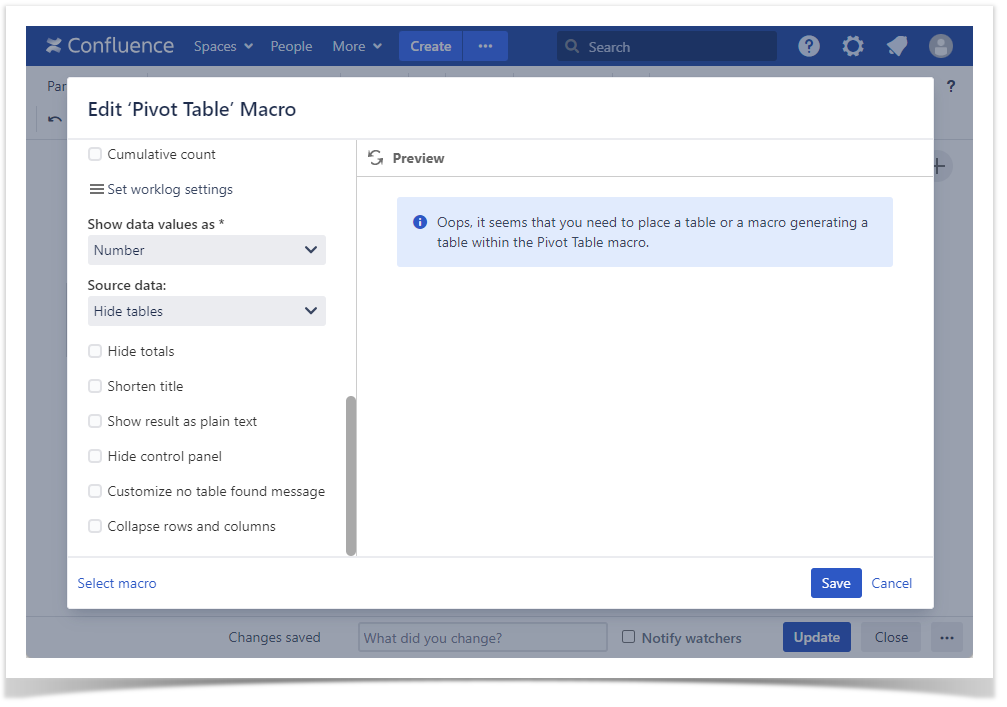
Show/Hide the source table
- Switch the page to the edit mode.
- Select the macro and click Edit.
- Switch to the Options tab.
- Locate the Source data option and select the appropriate option, as follows:
- Show all content
- Hide tables
- Hide all content
- Save the macro and the page.
| Info |
|---|
To show/hide the source table in the page view mode:
|
- Show result as plain text option.
| Handy Carousel | ||
|---|---|---|
| ||
|


Hide control panel
- Switch the page to the edit mode.
- Select the macro and click Edit .
- Switch to the Options tab.
- Locate and enable the Hide control panel option.
Save the macro and the page.
| Info |
|---|
To hide the control panel in the page view mode:
To show the control panel hove over the pivot table and click the cogwheel icon on the right of the table. |
| Handy Carousel | ||
|---|---|---|
| ||
|


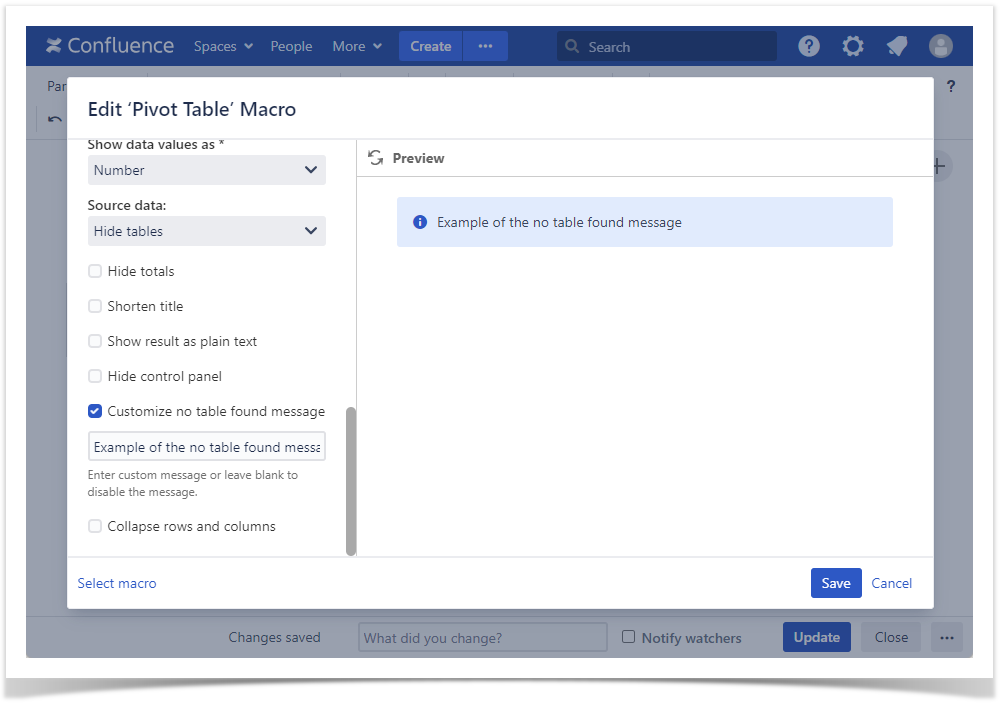
Customize no table found message
This option allows editing the default no table found message.
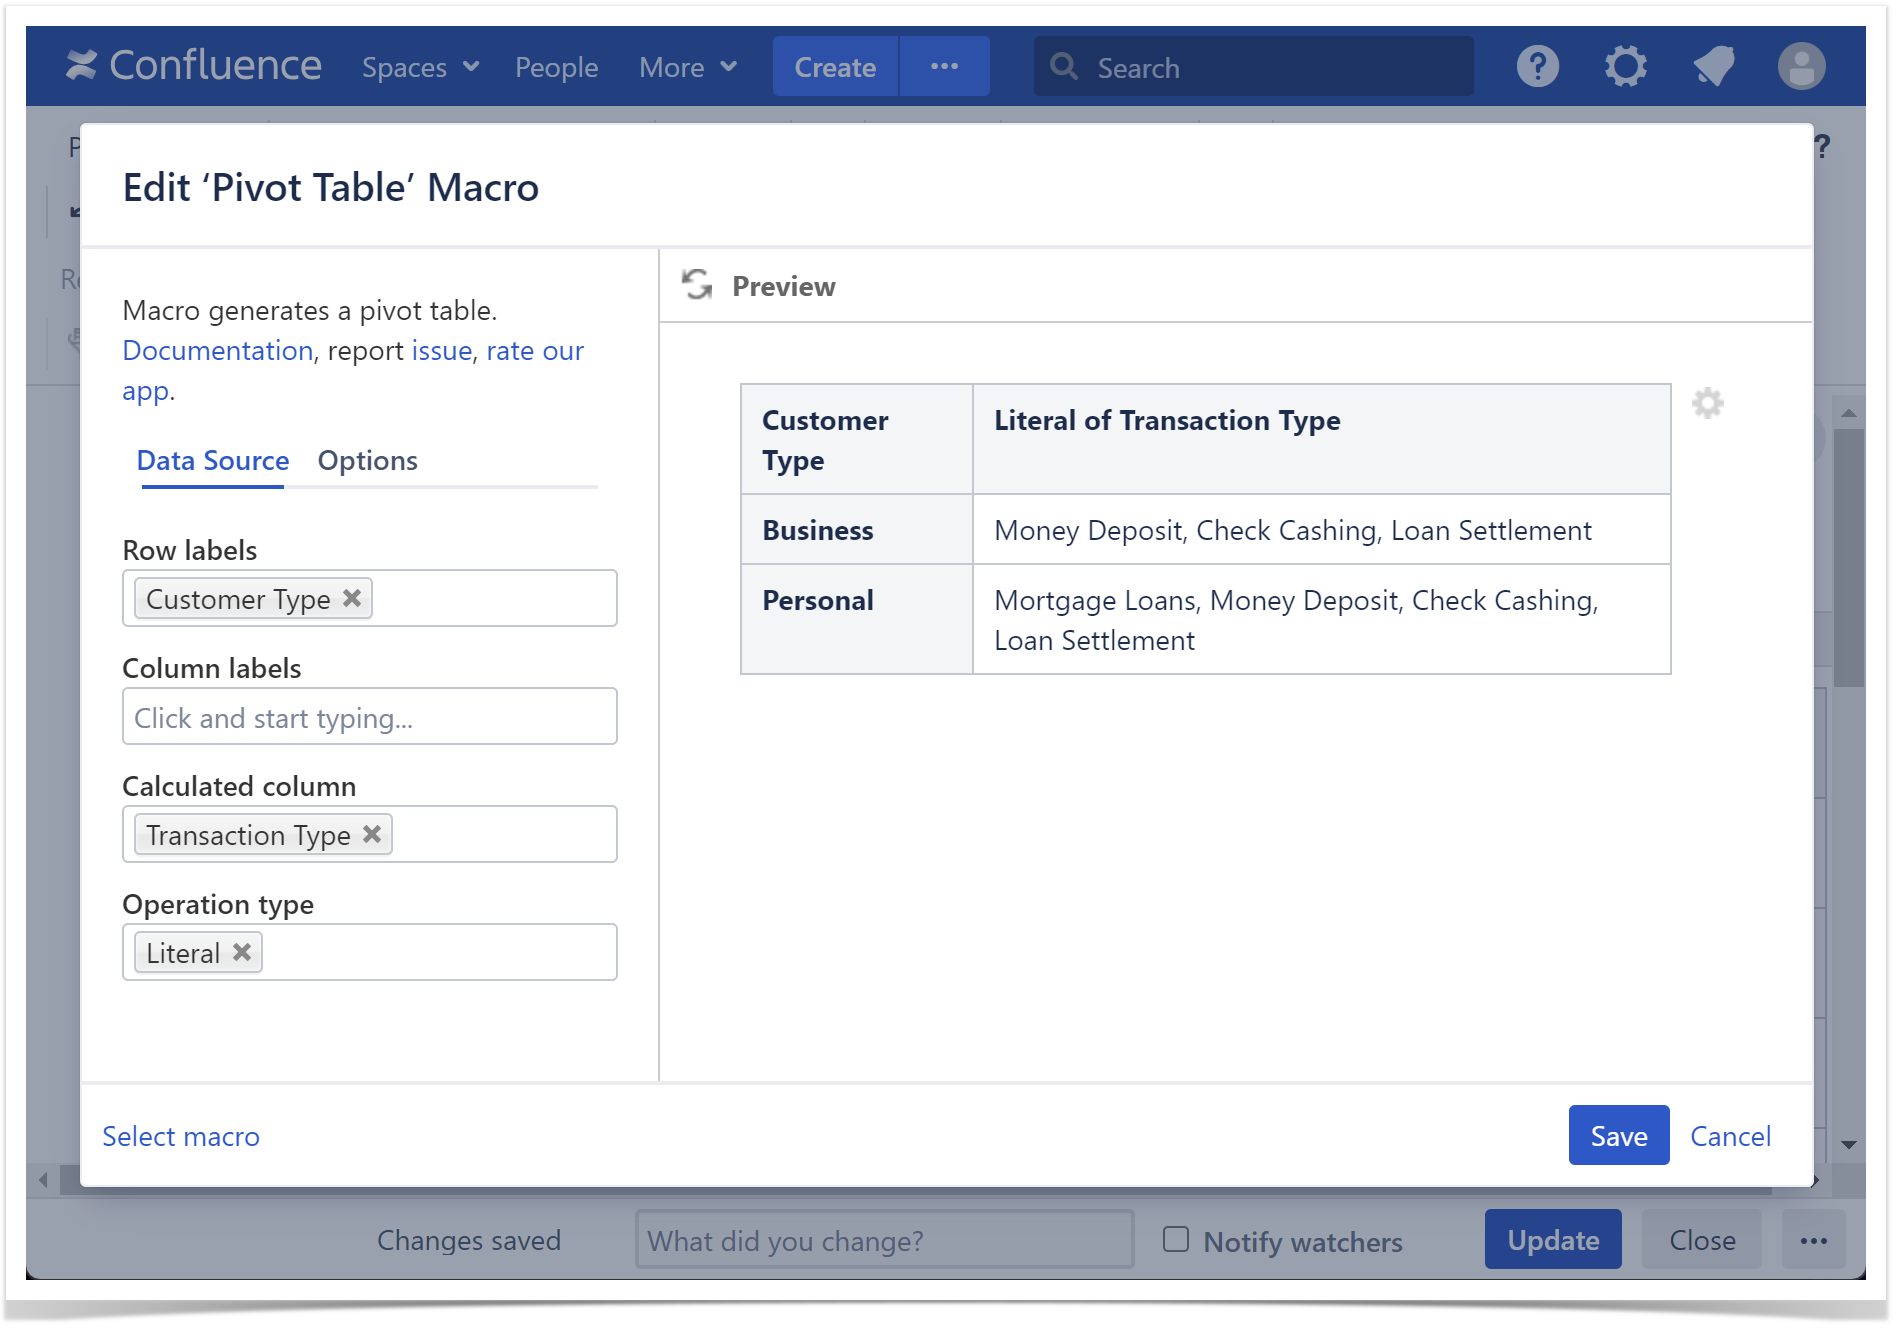
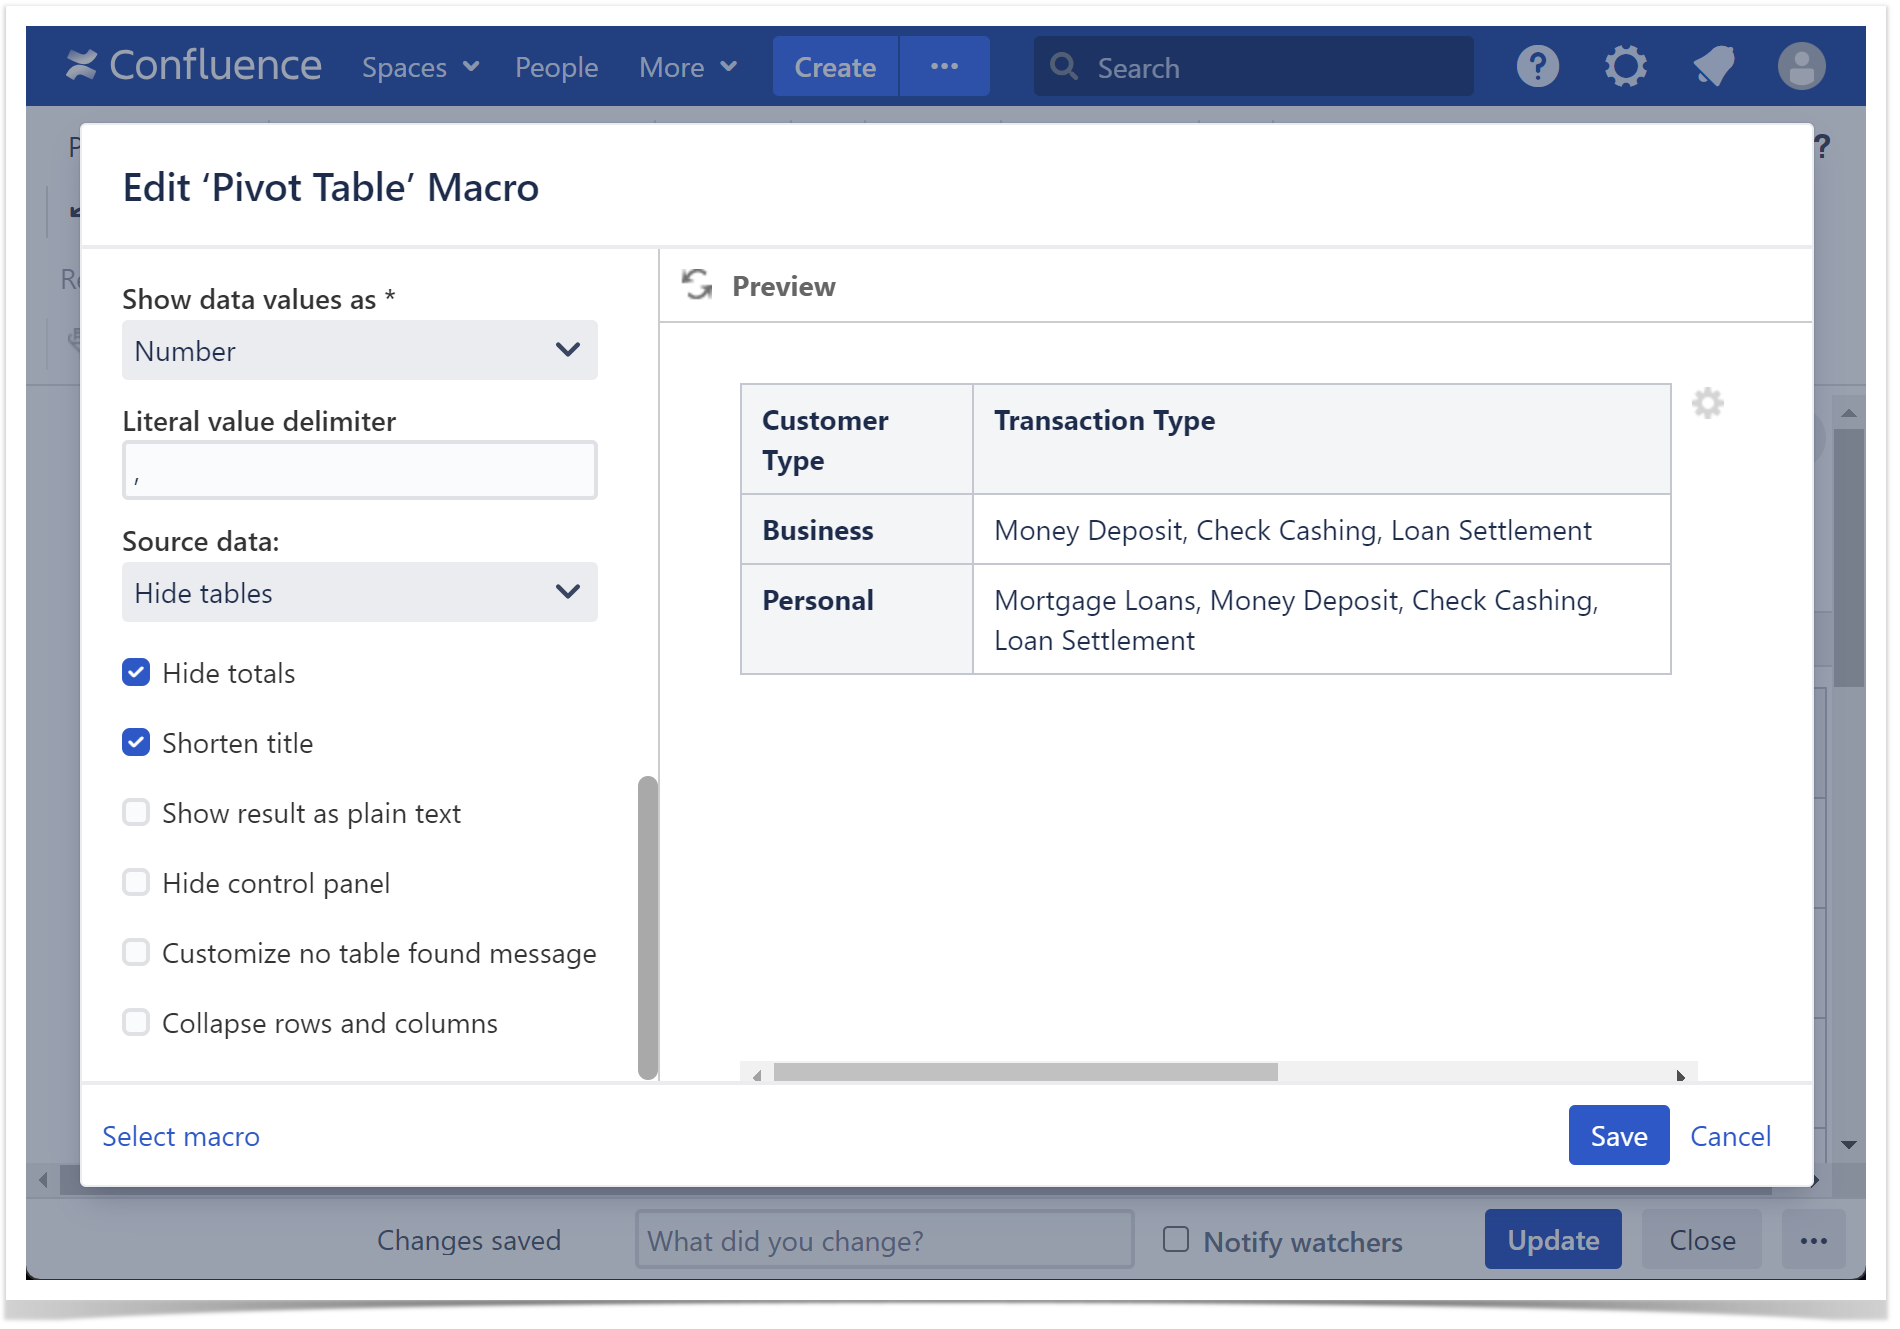
Set the literal value delimiter
When selecting the Literal operation type the Literal value delimiter option becomes available:
- Switch the page to the edit mode.
- Select the macro and click Edit.
- Switch to the Options tab.
- Locate the Literal value delimiter option and select the appropriate option, as follows:
- None (default)
- Comma
- Semicolon
- Space
- Line break
- Bullet list
- Numbered list
- Any custom character
- and enable the Customize no table found message option.
- Enter your custom message that you want to be displayed instead of the standard one.
- Save the macro and the page.

| Handy Carousel | ||
|---|---|---|
| ||
|
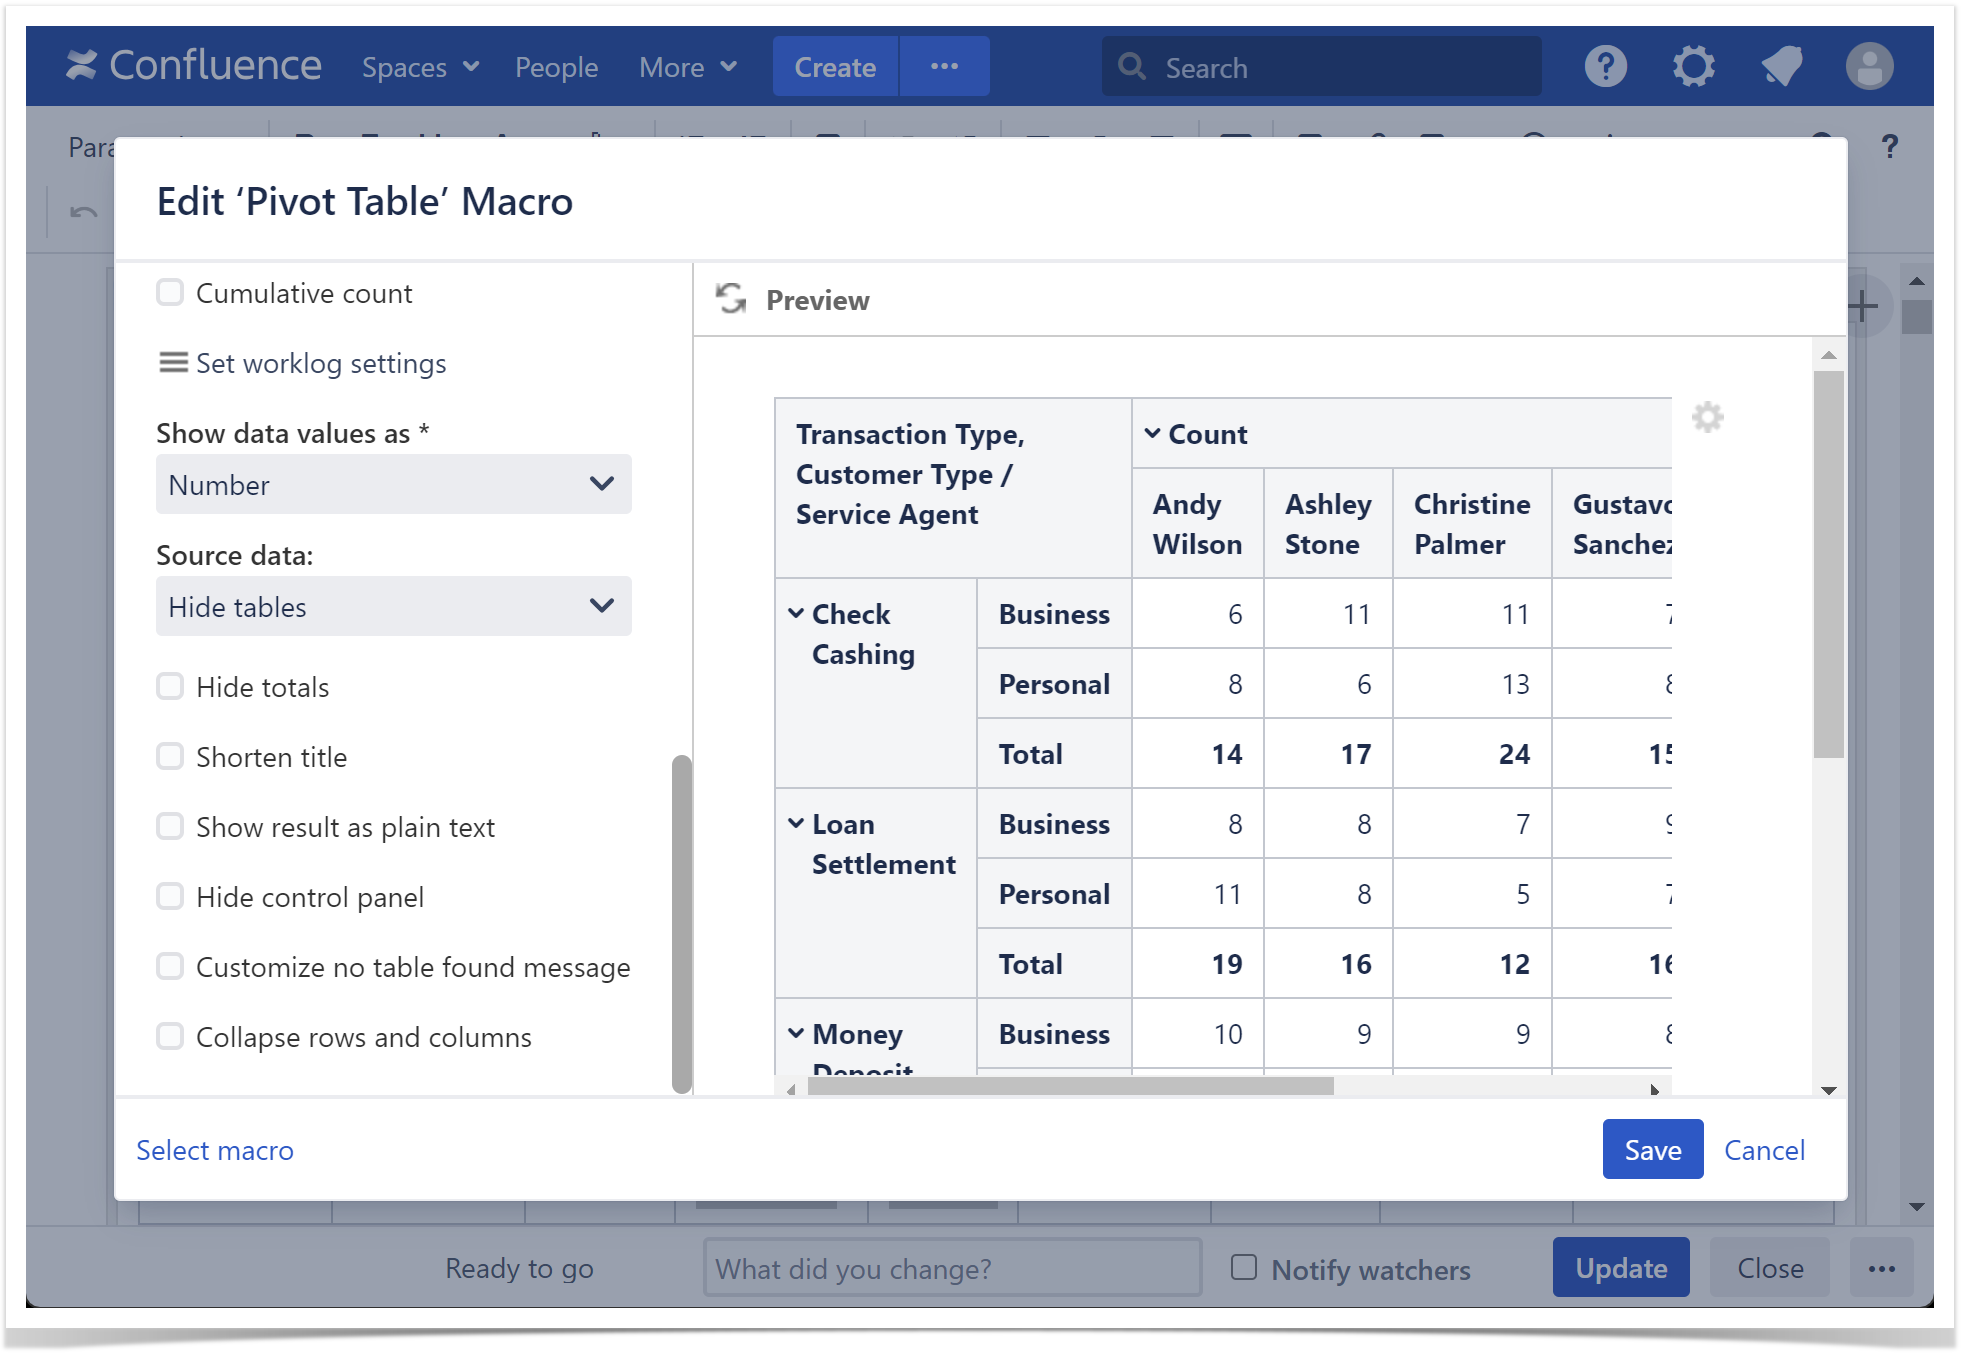
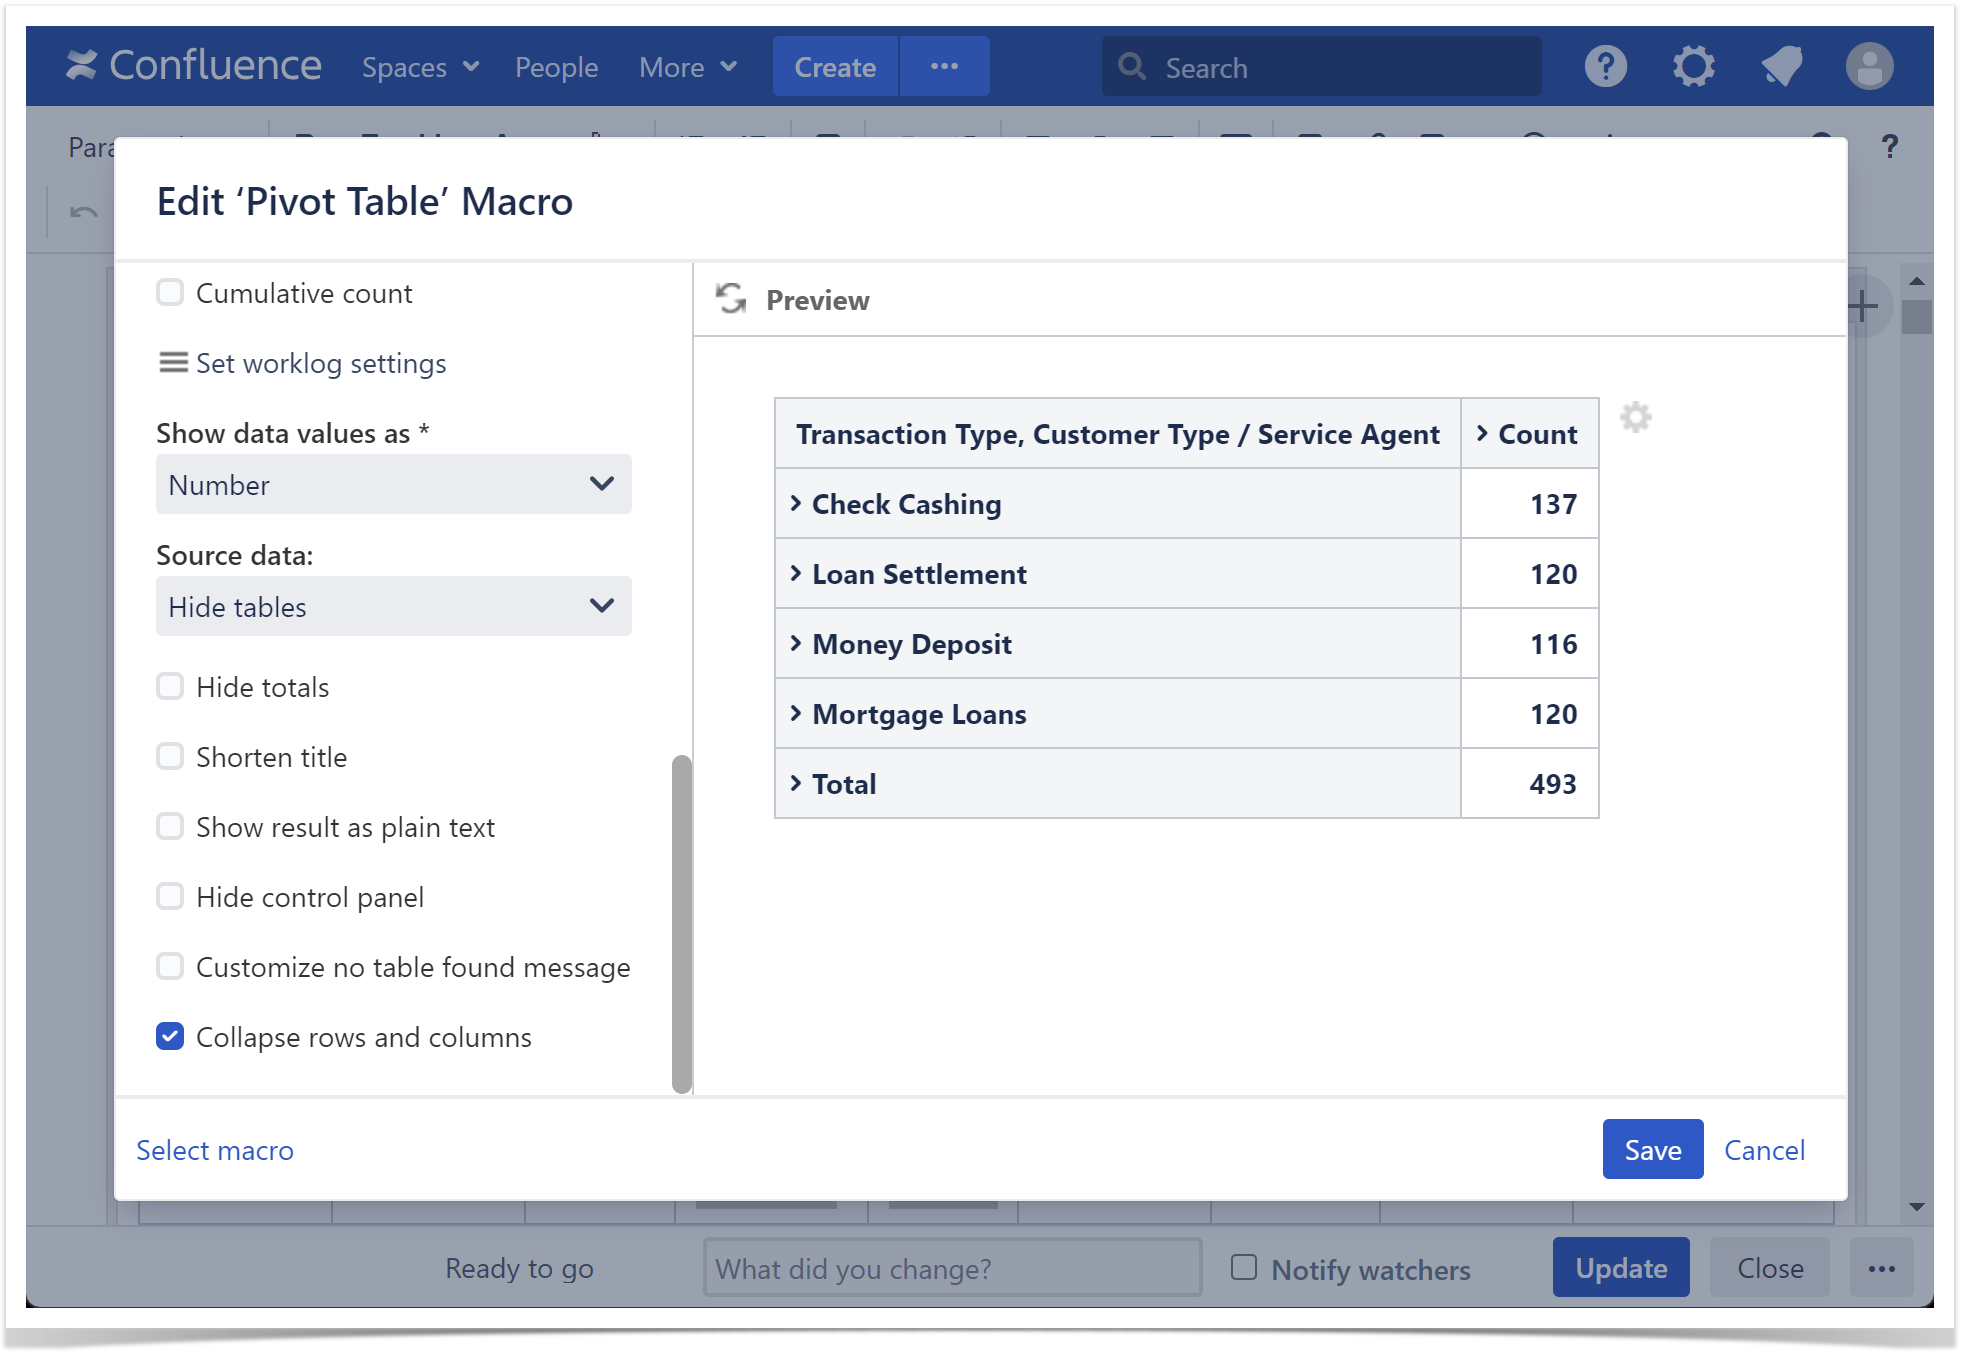
Collapse rows and columns
This option keeps the rows and columns of the multilevel pivot table collapsed by default
Show result as plain text
.
- Switch the page to the edit mode.
- Select the macro and click Edit.
- Switch to the Options tab.
- Locate and enable the Show result as plain text Collapse rows and columns option.
- Save the macro and the page option.
| Handy Carousel | ||
|---|---|---|
| ||
|