Set the default sorting
- Switch the page to the edit mode.
- Select the macro and click Edit.
- Switch to the Options tab.
- Locate the Default Sorting box.
- Click it and select the column with the appropriate sorting order.
- Save the macro and the page.
| Info |
|---|
Default sorting is available only in the pivot tables with one column selected as row labels. |

Set the cell value delimiter
- Switch the page to the edit mode.
- Select the macro and click Edit.
- Switch to the Options tab.
Locate the Cell value delimiter box.
Enter the character (multiple characters) used to separate values in cells.
Save the macro and the page.
| Info |
|---|
If the call value delimiter is not a regular character, but a space, use the Unicode character \u0020. |
| Handy Carousel | ||
|---|---|---|
| ||
|


Set the decimal separator
- Switch the page to the edit mode.
- Select the macro and click Edit.
- Switch to the Options tab.
- Locate the Decimal separator boxbox.
- Select the correct decimal separator from the list, as follows:
- Point
- Comma
- Save the macro and the page.
| Info |
|---|
The incorrectly specified decimal separator may cause the incorrect calculation of numerical values. |

Set the thousands separator
- Switch the page to the edit mode.
- Select the macro and click Edit.
- Switch to the Options tab.
- Locate the Thousands separator box.
- Select the correct decimal separator from the list, as follows:
- Space
- Point
- Comma
- Save the macro and the page.
| Info |
|---|
Selection of the thousands separator is optional as it only improves Options of numerical values without affecting the original values in the source table. |

Set the number of decimal places
- Switch the page to the edit mode.
- Select the macro and click Edit.
- Switch to the Options tab.
- Locate the Decimal places box.
- Enter the number of decimal places to display.
Save the macro and the page.
| Info |
|---|
You may need to limit the decimal places when using the Average operation type. |

Set the date format
| Excerpt |
|---|
|
| Info |
|---|
For the details on specifying date formats, read this article. |
| Table Excerpt | ||
|---|---|---|
| ||
|

Set the worklog settings
The Pivot Table macro supports summarization of worklogs and time intervals.
| Info |
|---|
Please ensure that the worklog parameters set in the macro are identical to parameters configured in Atlassian JIRA. |
- Switch the page to edit mode.
- Select the macro and click Edit.
- Switch to the Options tab.
- Click the Set worklog settings button.
- In the opened form, define the worklog parameters, as follows:
- Days in week - enter the number of business days in a week.
- Hours in day - enter the number of working hours in one business day.
- Time format - select the used time format in worklog values.
- Week shortening - enter the shortening for the week time unit if you use any language different from English.
- Day shortening - enter the shortening for the day time unit if you use any language different from English.
- Hour shortening - enter the shortening for the hour time unit if you use any language different from English.
- Minute shortening - enter the shortening for the minute time unit if you use any language different from English.
- Click Save.
- Save the macro and the page.
| Info |
|---|
Worklog time units in different languages are denoted with different shortenings. Please adjust them according to your JIRA localization settings. |
| Handy Carousel | ||
|---|---|---|
| ||
|


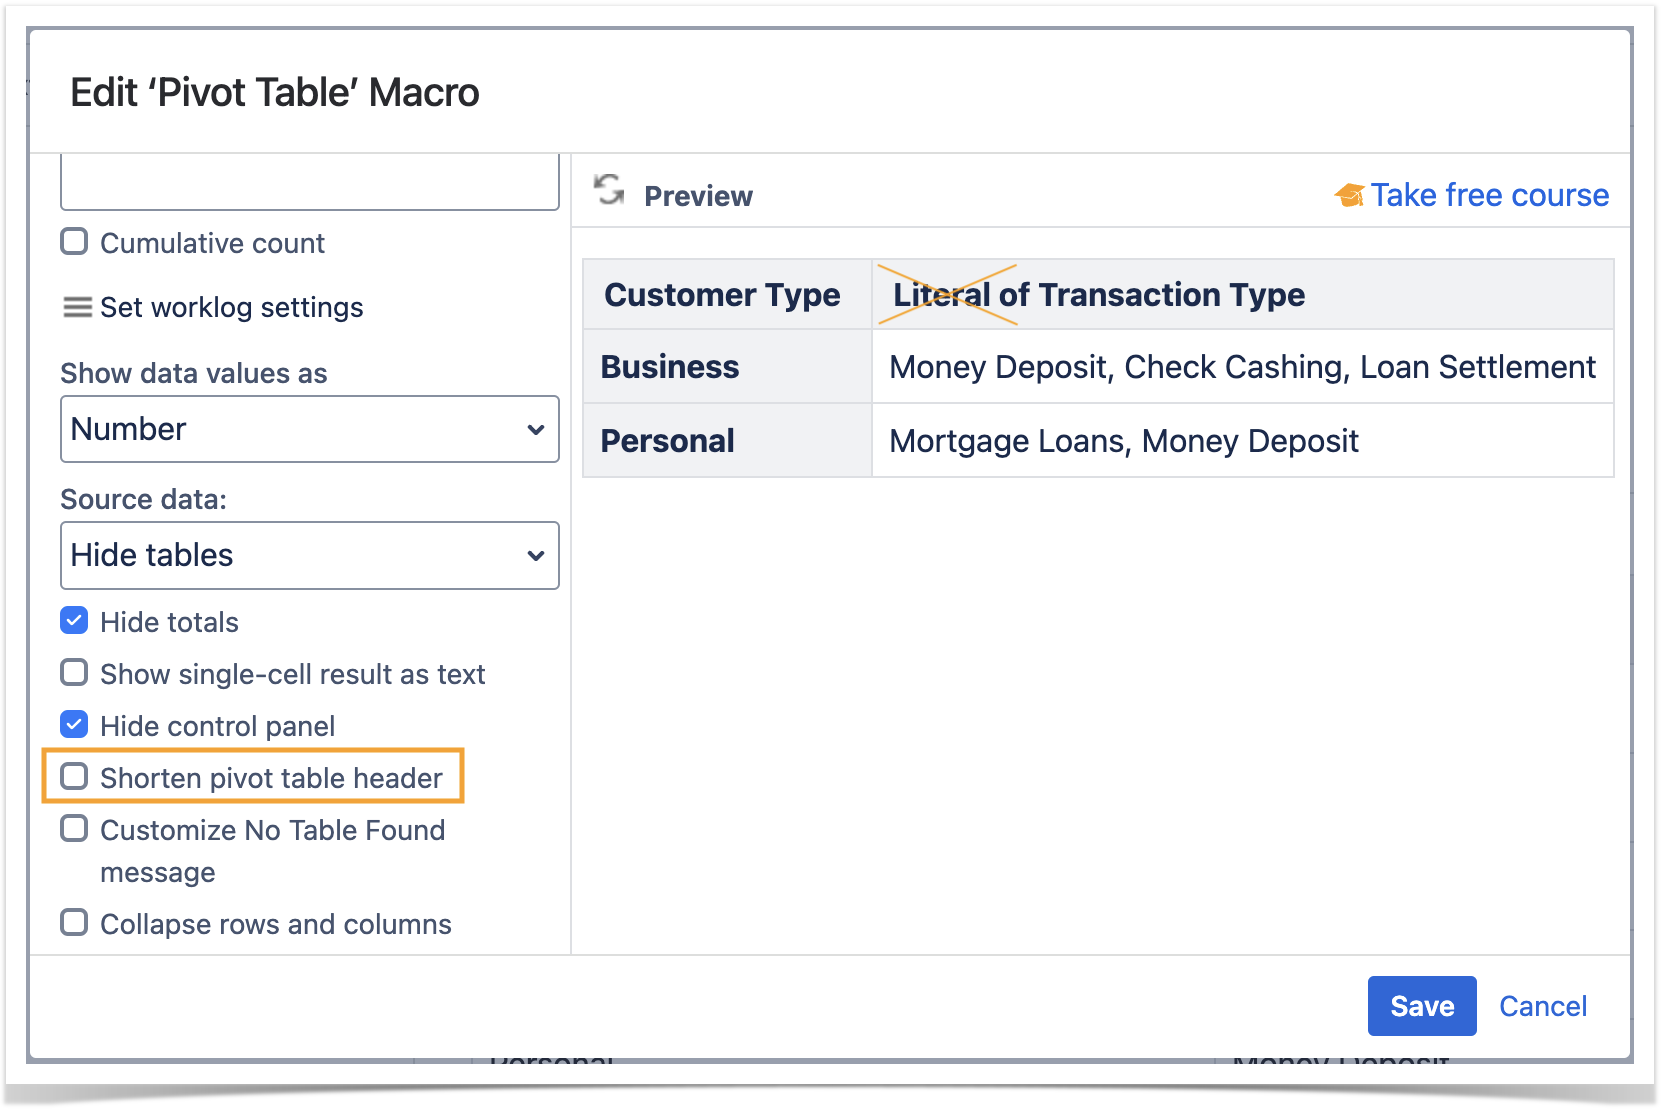
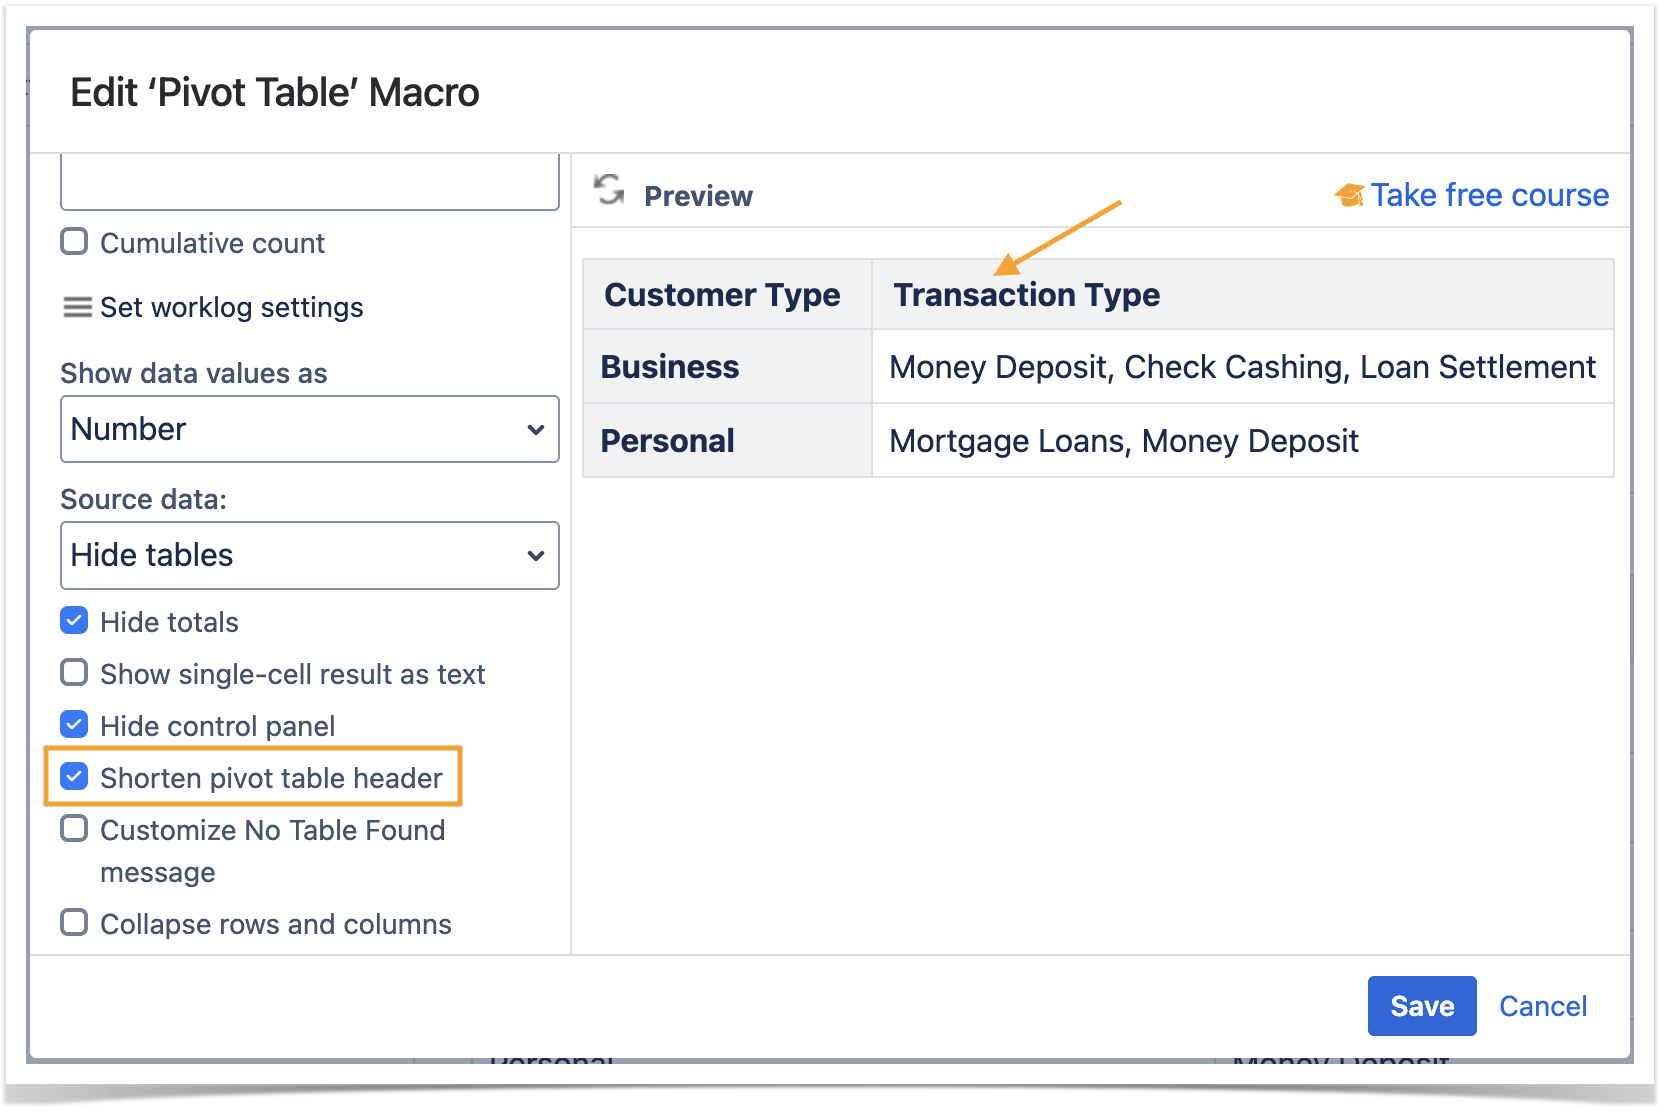
Shorten
titlepivot table header
This option removes the operation type name from the pivot table header.
- Switch the page to the edit mode.
- Select the macro and click Edit.
- Switch to the Options tab.
- Locate and enable the Shorten titlepivot table header option.
| Info |
|---|
The Shorten title pivot table header option works only for simple one-dimensional pivot tables. But please note that you can always rename pivot columns with the help of the Table Transformer macro. |
Before the 13.0.1 version of the app, this option was called Shorten title.
| Handy Carousel | ||
|---|---|---|
| ||
|


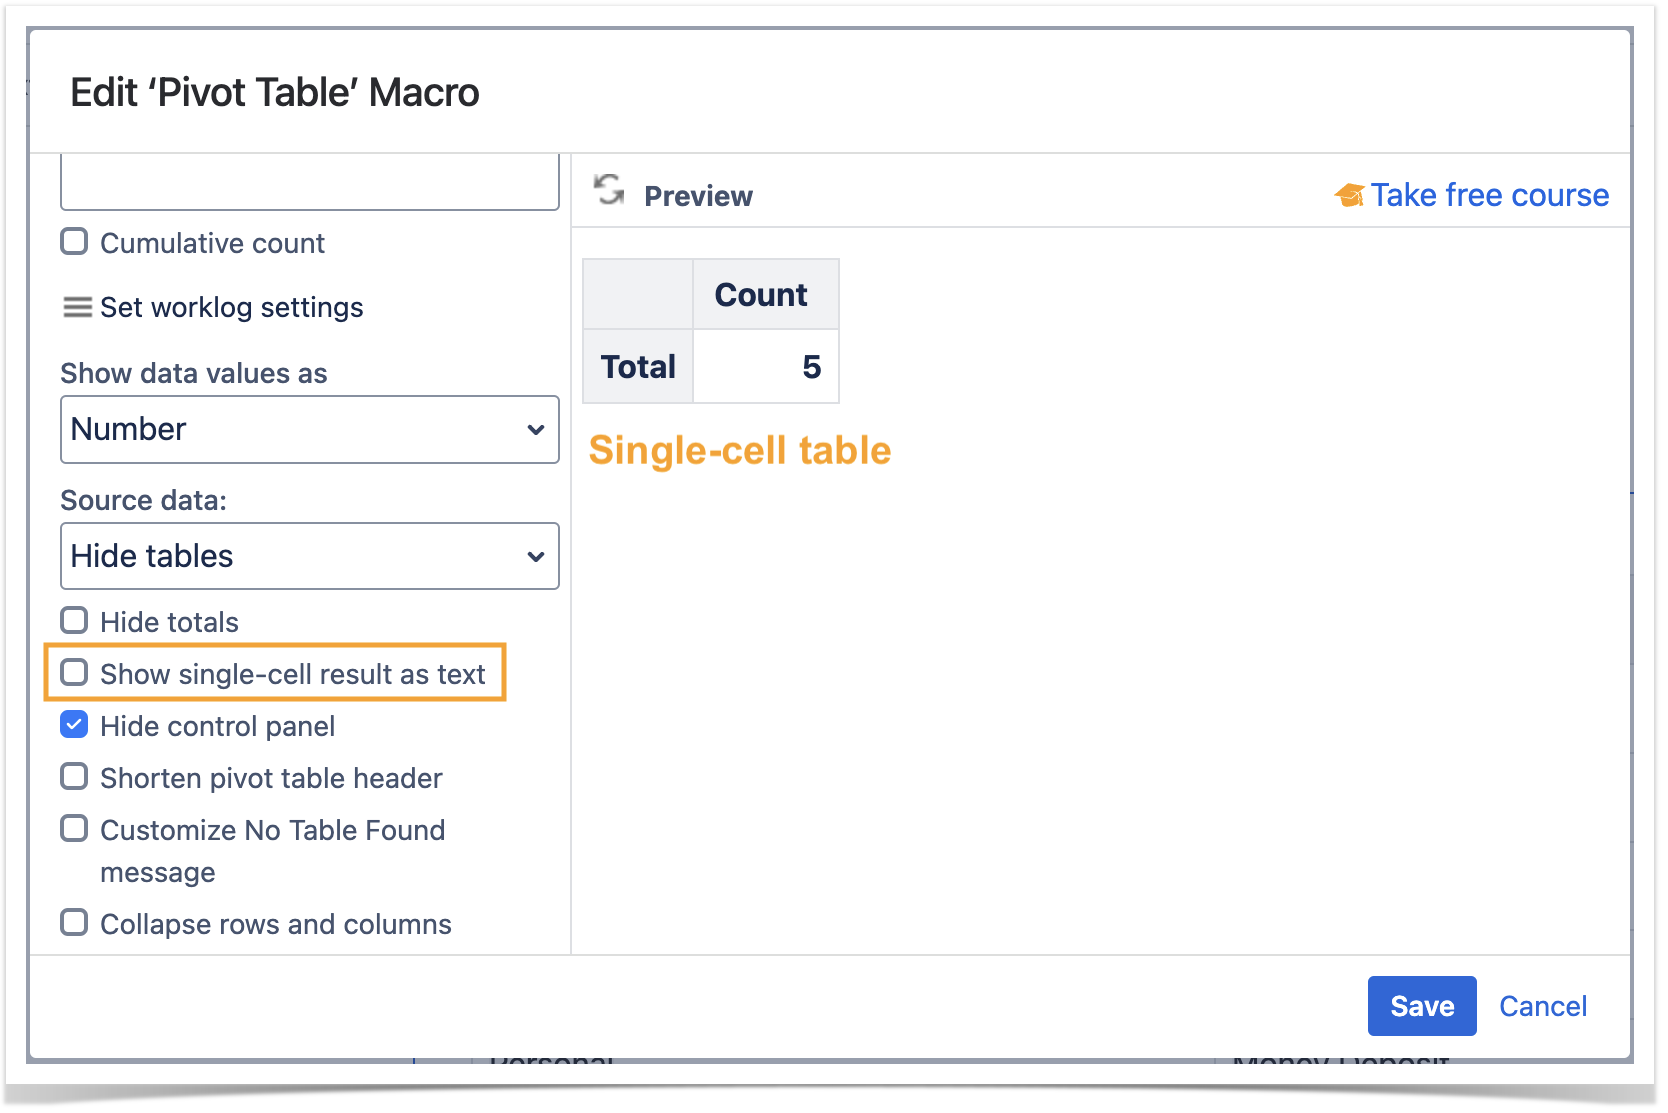
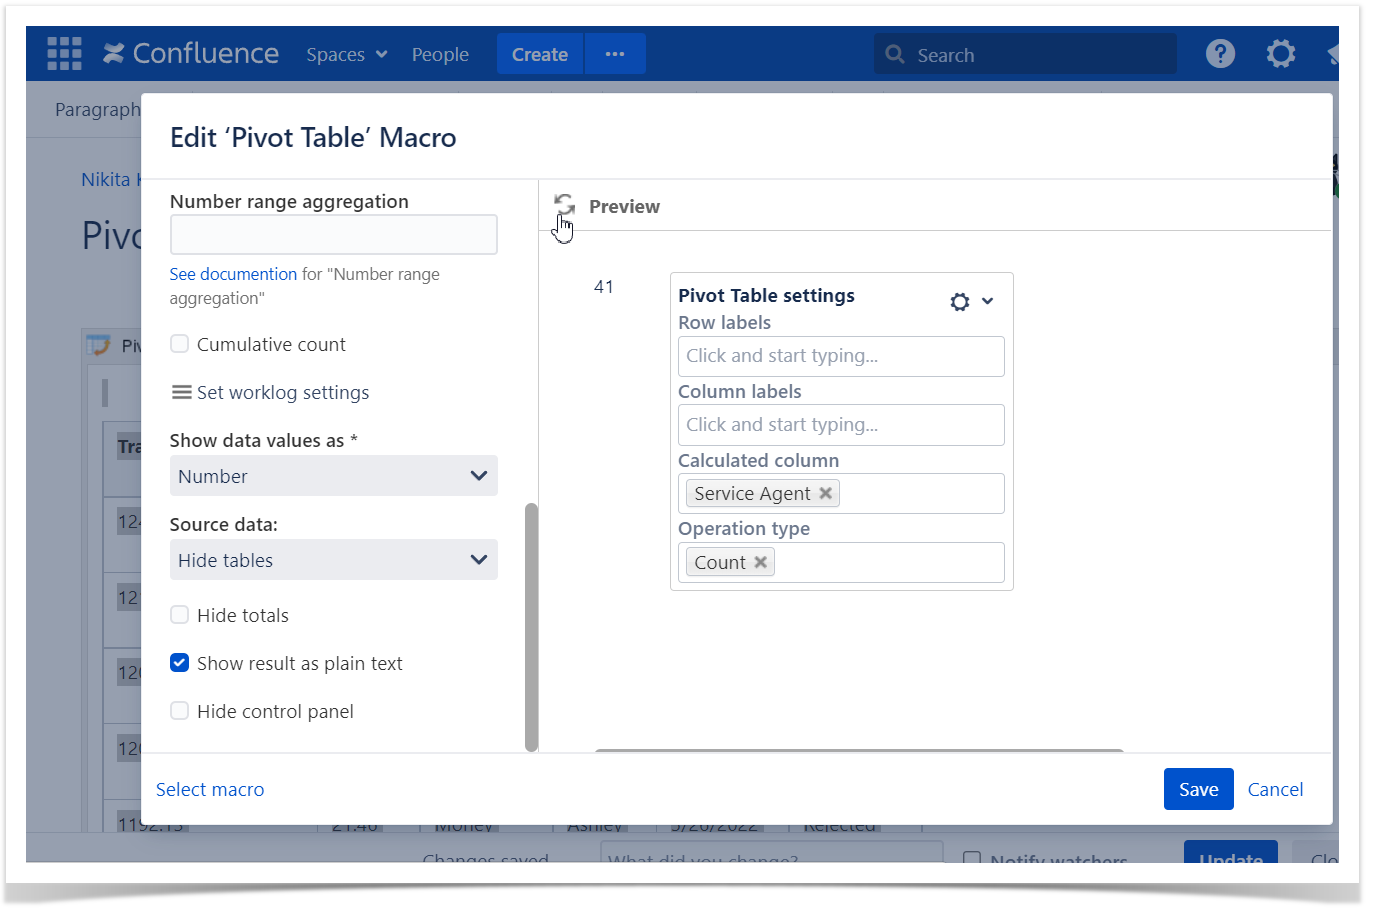
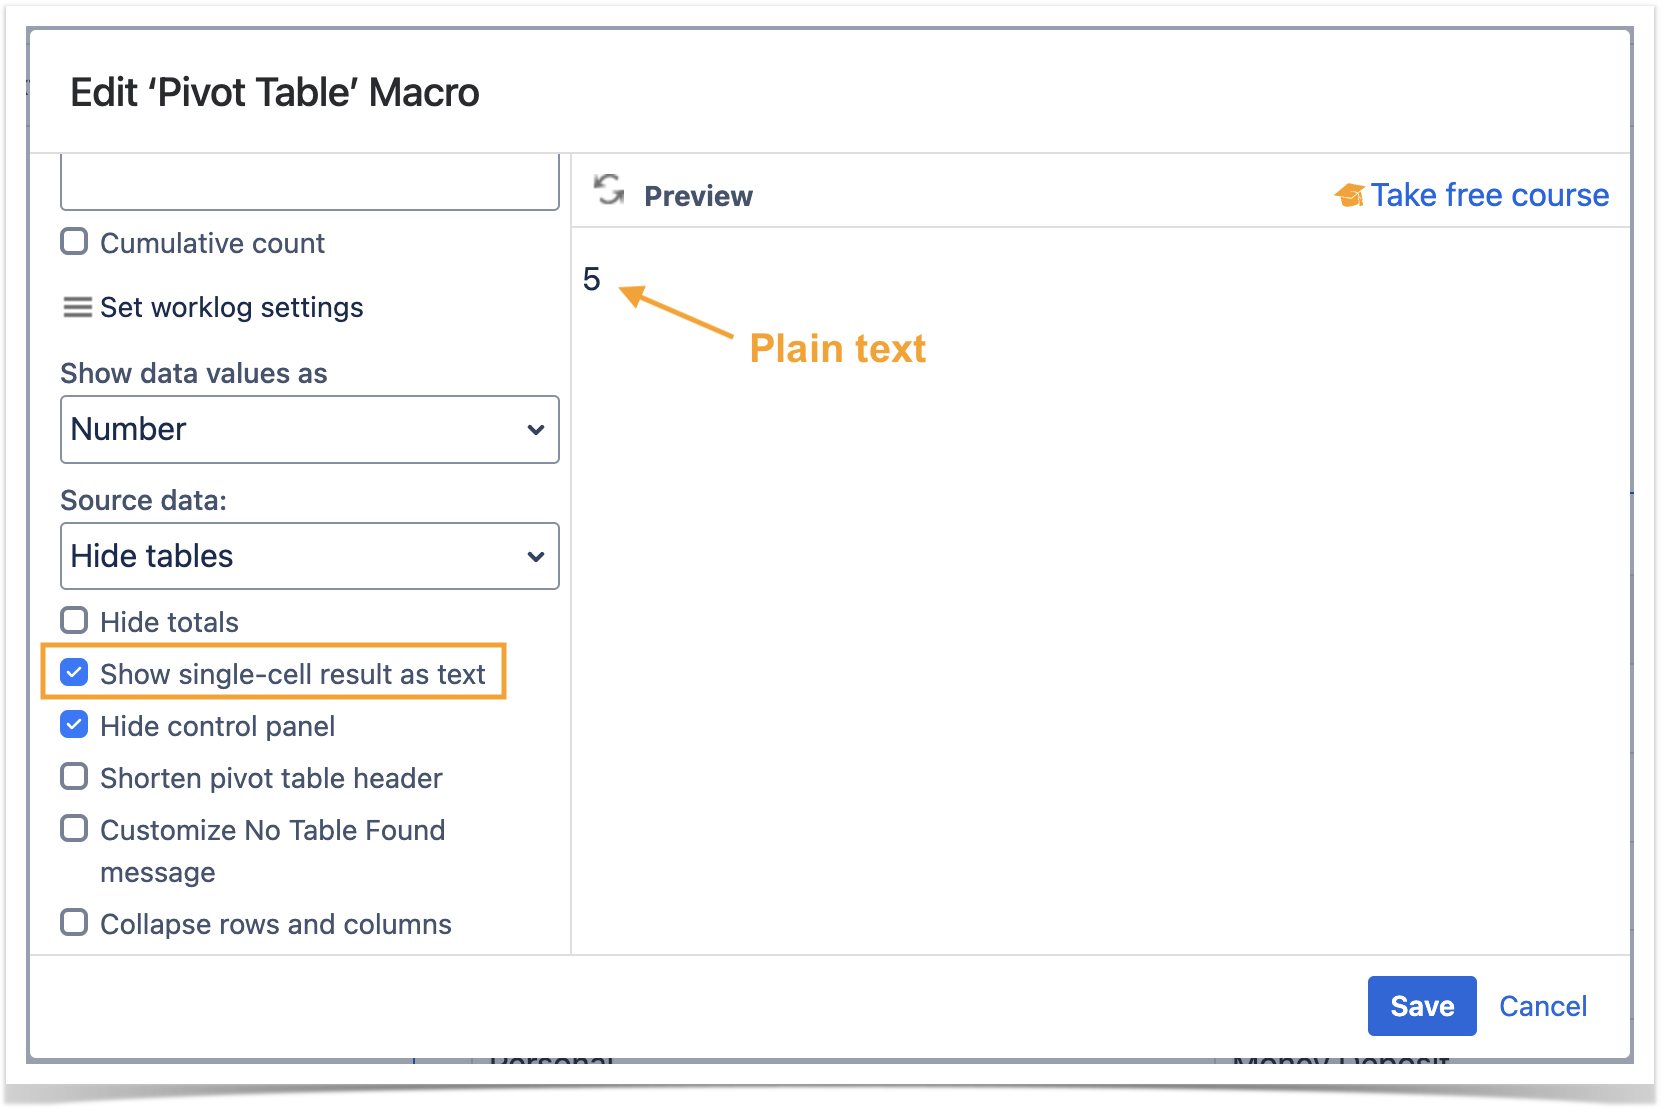
Show single-cell result as
plaintext
| Note |
|---|
This option can be enabled only if the calculation result is displayed as a table with a single cell. |
- Switch the page to the edit mode.
- Select the macro and click Edit.
- Switch to the Options tabtab.
- Locate and enable the Show single-cell result as text option.
Before the 13.0.1 version of the app, this option was called Show result as plain text
option.
| Handy Carousel | ||
|---|---|---|
| ||
|

Hide control panel
- Switch the page to the edit mode.
- Select the macro and click Edit .
- Switch to the Options tab.
- Locate and enable the Hide control panel option.
Save the macro and the page.
| Info |
|---|
To hide the control panel in the page view mode:
To show the control panel hove over the pivot table and click the cogwheel icon on the right of the table. |
| Handy Carousel | ||
|---|---|---|
| ||
|


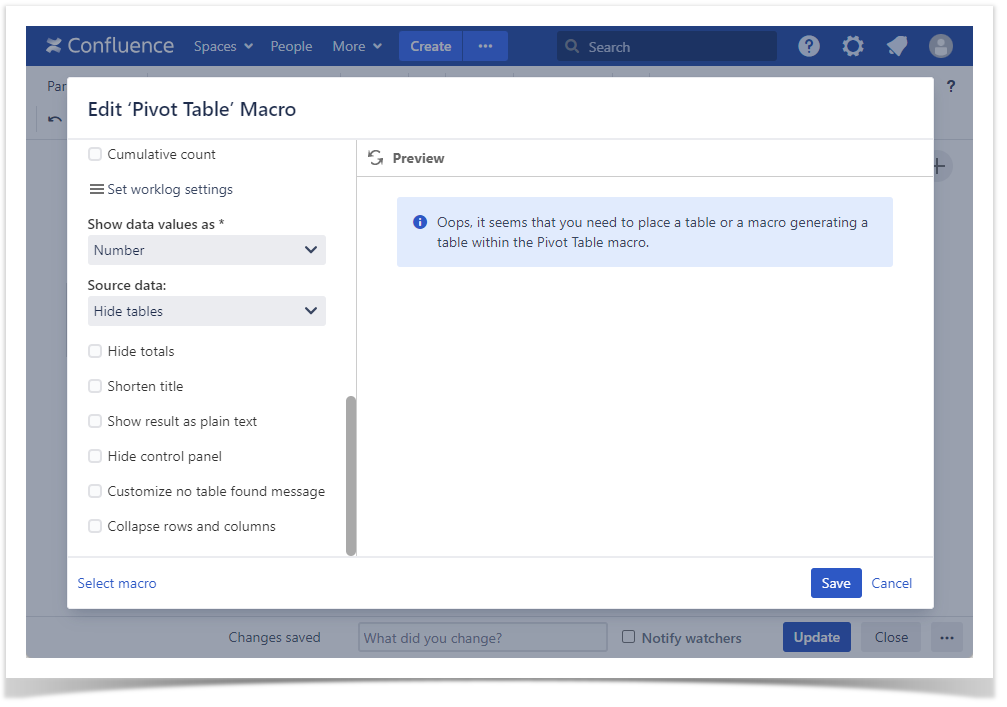
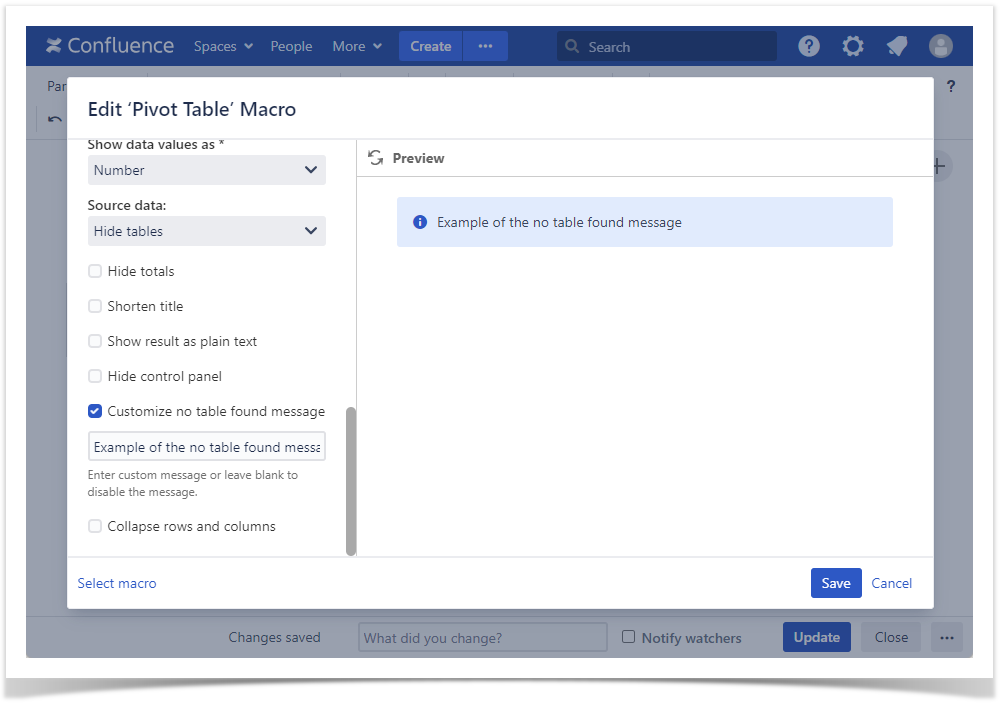
Customize no table found message
This option allows editing the default no table found message.
- Switch the page to the edit mode.
- Select the macro and click Edit.
- Switch to the Options tab.
- Locate and enable the Customize no table found message option.
- Enter your custom message that you want to be displayed instead of the standard one.
- Save the macro and the page.
| Handy Carousel | ||
|---|---|---|
| ||
|
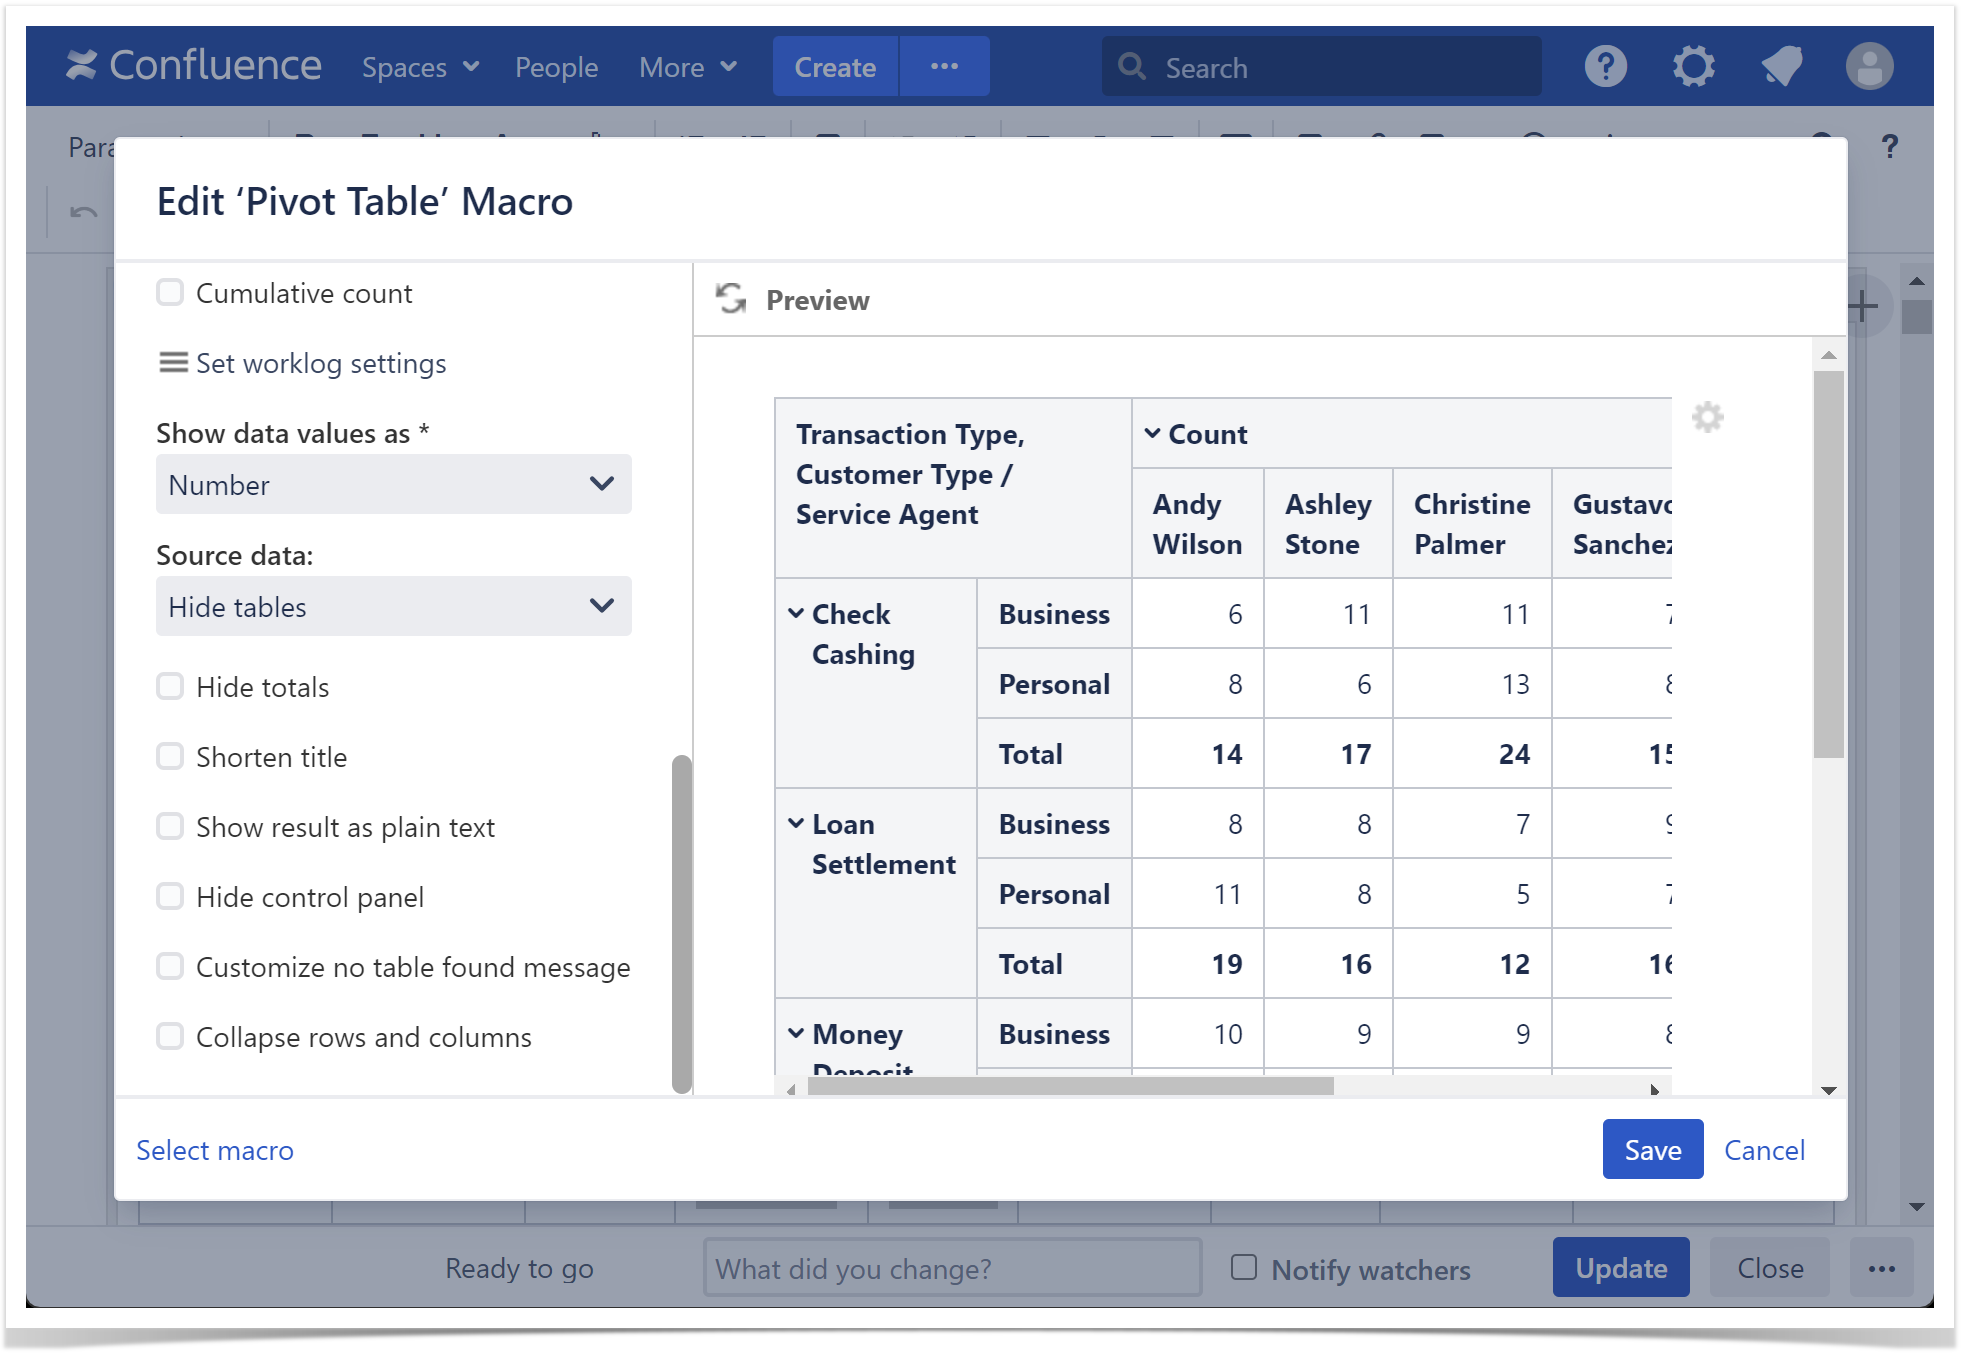
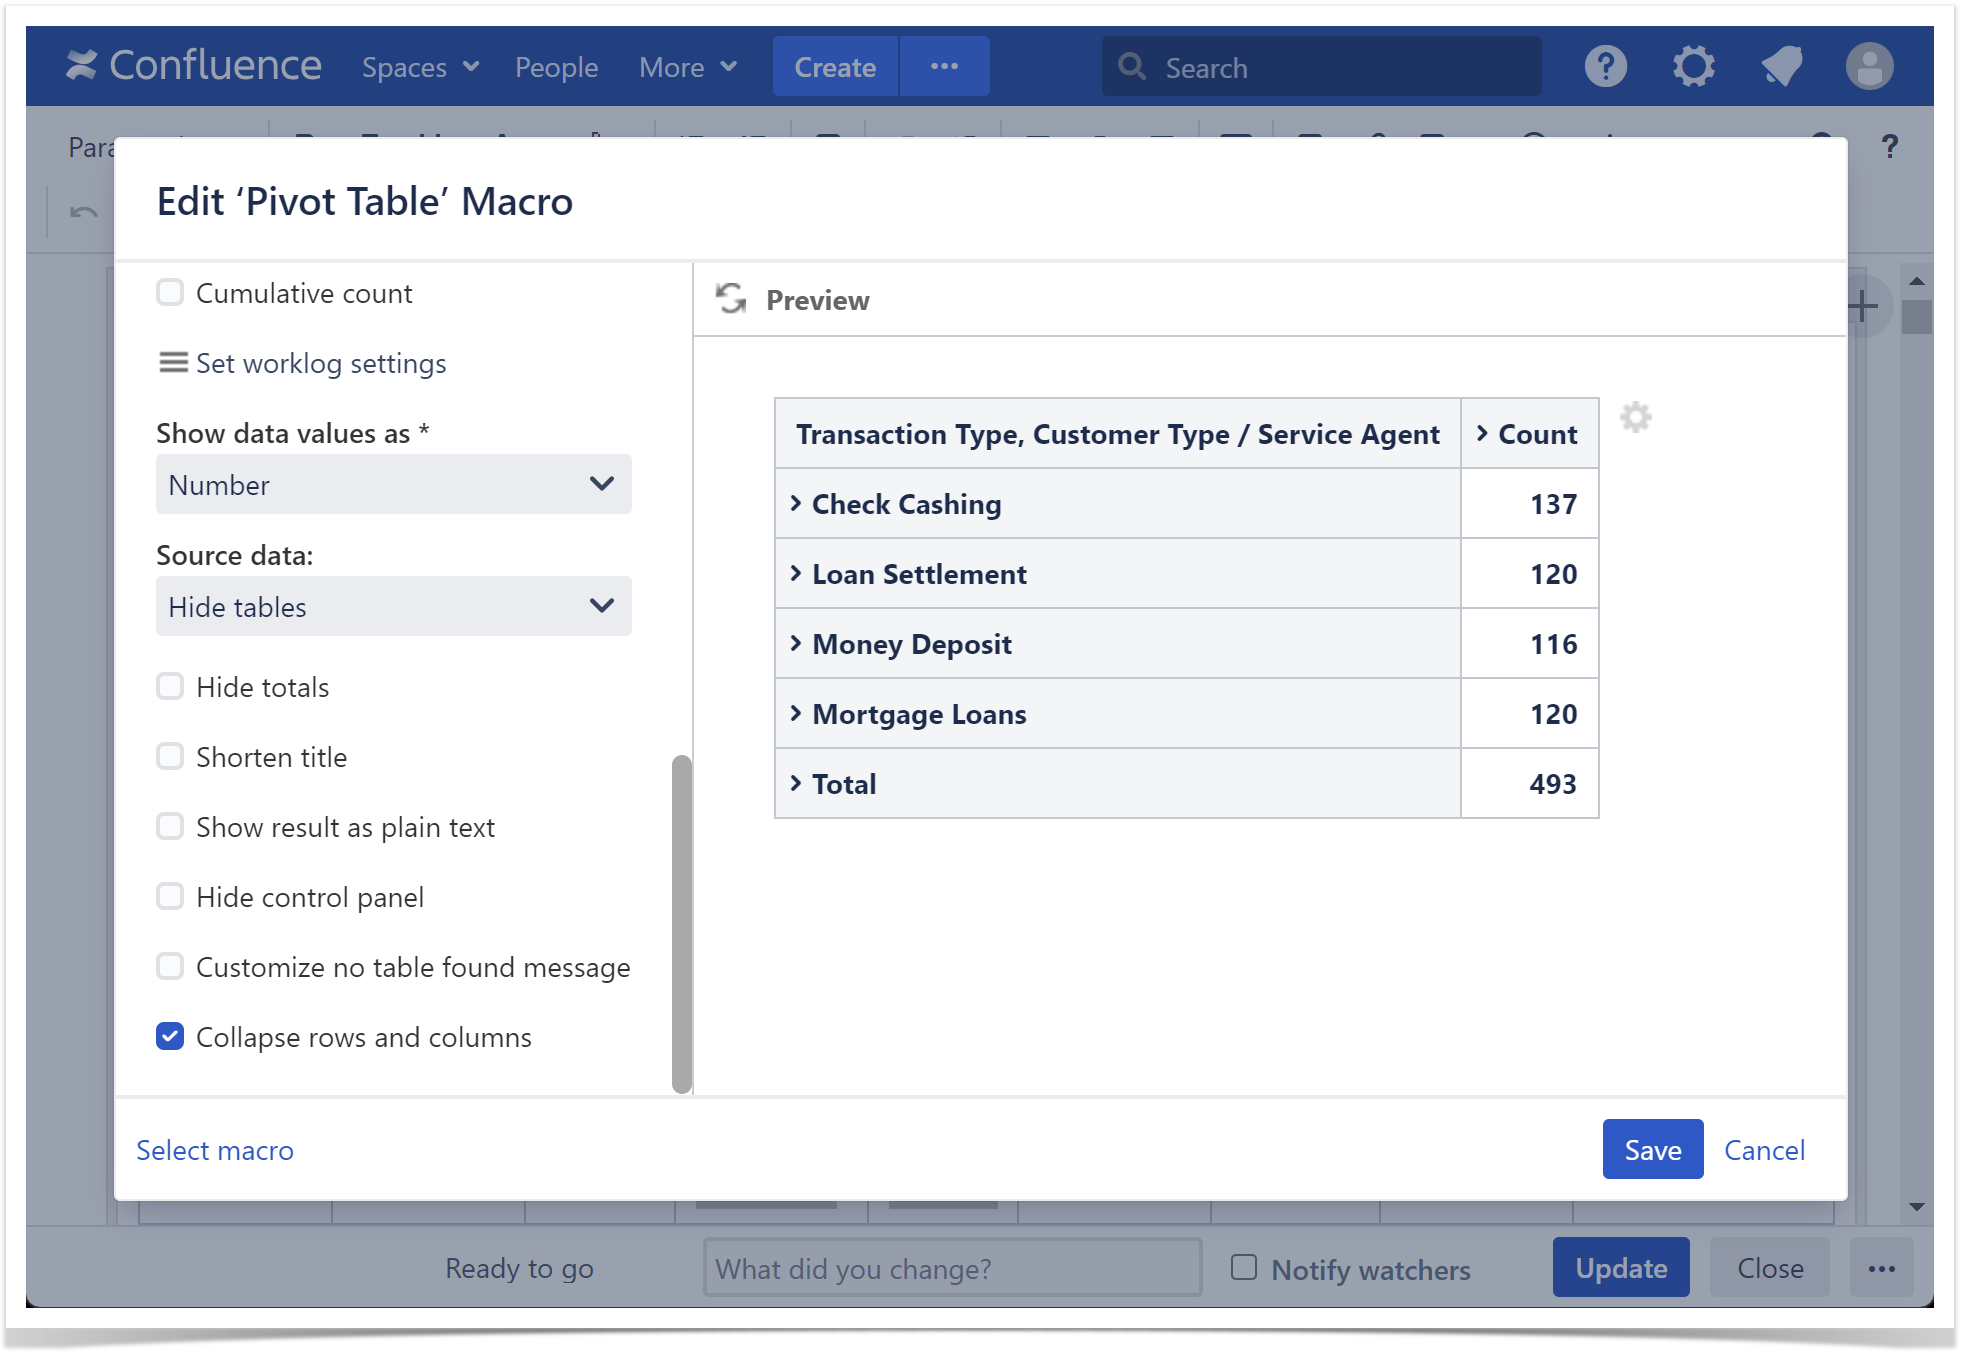
Collapse rows and columns
This option keeps the rows and columns of the multilevel pivot table collapsed by default.
- Switch the page to the edit mode.
- Select the macro and click Edit.
- Switch to the Options tab.
- Locate and enable the Collapse rows and columns option.
- Save the macro and the page.
| Handy Carousel | ||
|---|---|---|
| ||
|