| Mybanner |
|---|
This version of the app's documentation is outdated. Please find the information you're looking for here: |
| Panel | ||||||
|---|---|---|---|---|---|---|
| ||||||
Table Filter and Charts for Confluence add-on allows you to manage filtration parameters and adjust them to your actual needs. |
| Table of Contents |
|---|
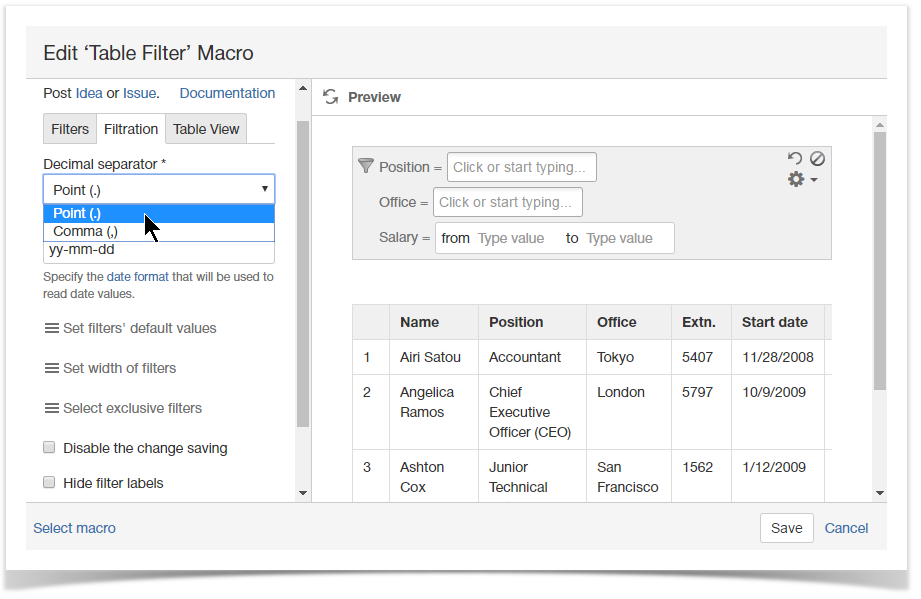
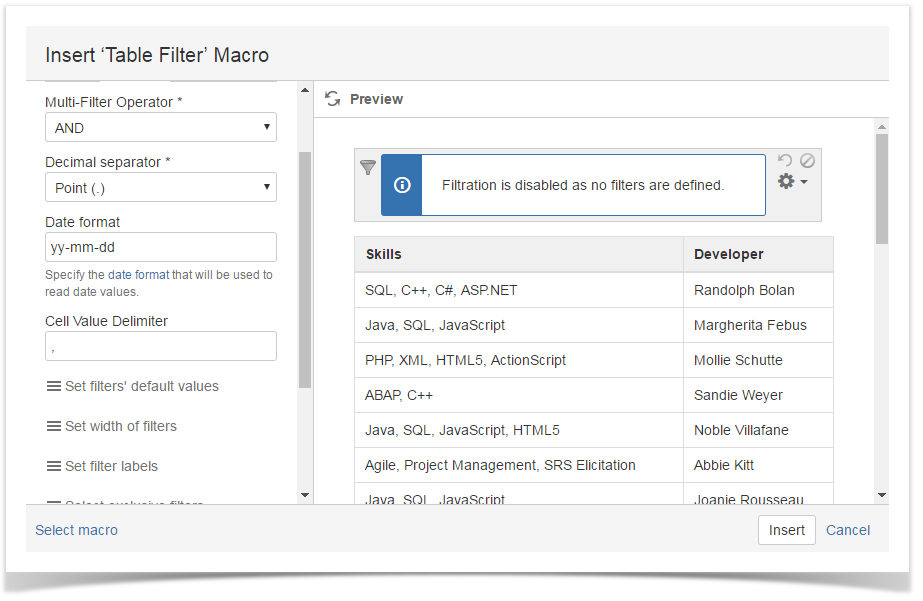
Setting the Decimal Separator
You may need to set the correct decimal separator when using the number range filters or enabling sparkline charts if your table contains decimal numbers.
To set the decimal separator:
- Switch the page to edit mode.
- Select the macro and click Edit.
- Switch to the Filtration tab.
- Locate the Decimal separator box.
- Select the correct decimal separator from the list, as follows:
- Point
- Comma
- Save the macro and the page.
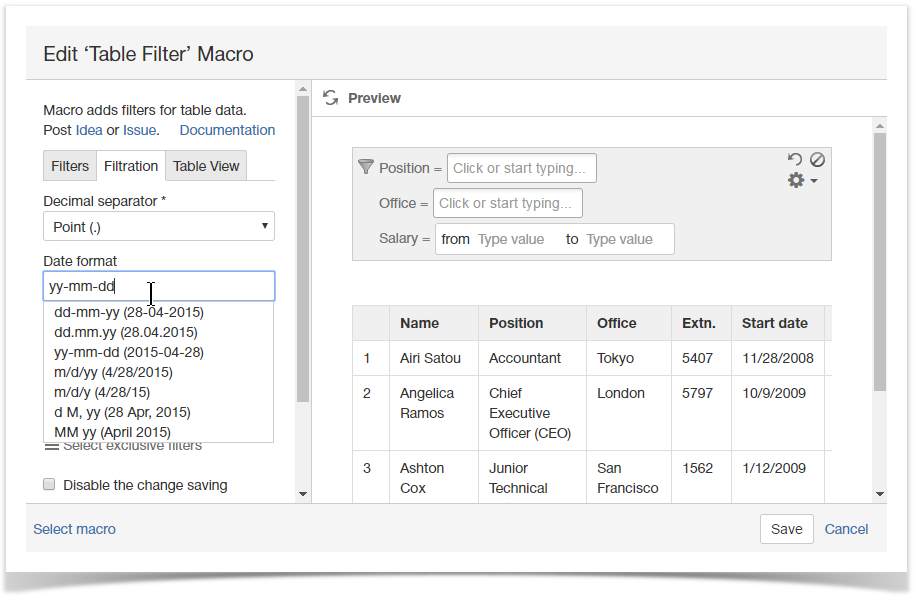
Setting the Date Format
You may need to set the correct date format when using the date range filters. Filtration of dates may work incorrectly if the incorrect date format is specified.
To set the date format:
- Switch the page to edit mode.
- Select the macro and click Edit.
- Switch to the Filtration tab.
- Locate the Date format box.
- Select the correct date format from the list or manually specify the needed format.
- Save the macro and the page.
You can also define the date format in the page view mode.
| Info |
|---|
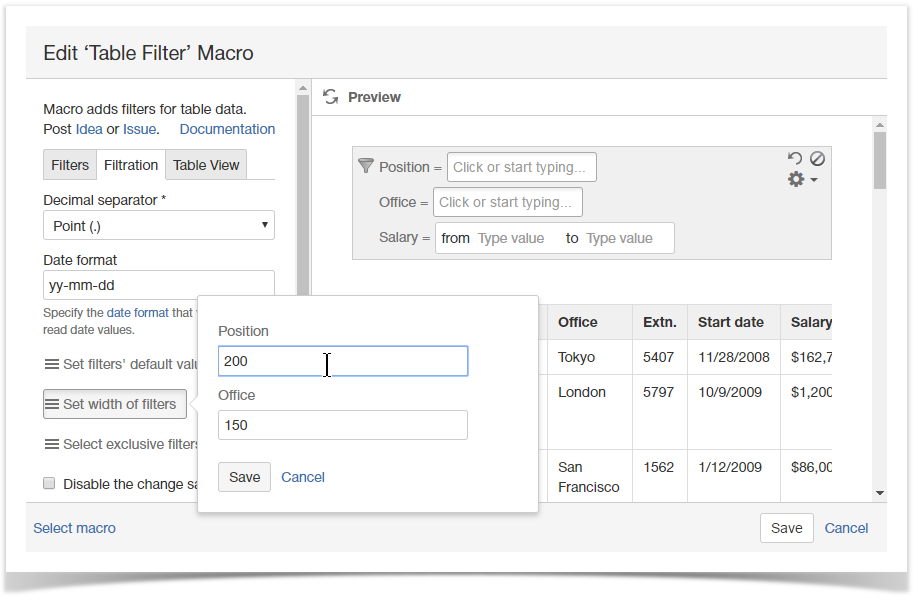
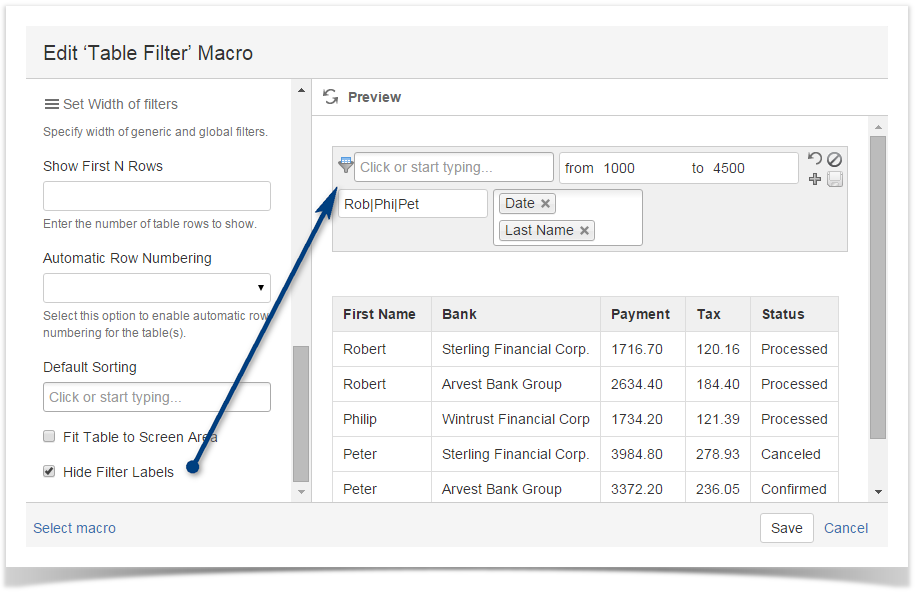
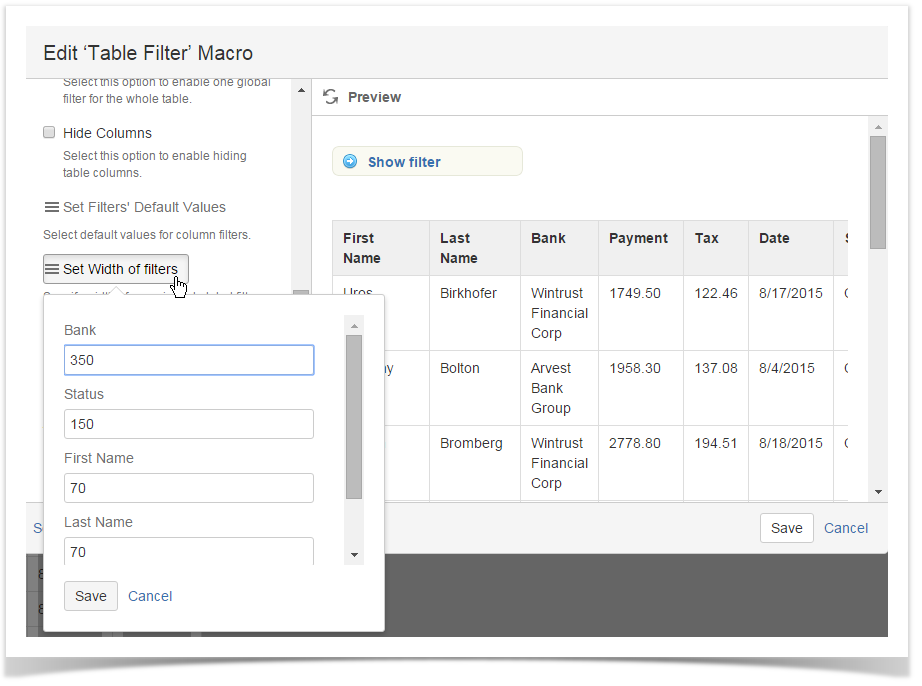
Setting default width for filter boxes
You may need to increase or decrease of filter boxes shown on the filtration pane.
To set width for filter boxes:
- Switch the page to edit mode.
- Select the macro and click Edit.
- Switch to the Filtration tab.
- Click Set width of filters.
- Enter the appropriate width in pixels for available filters.
- Save the macro and the page.
For the details on how set width of filter boxes in the page view mode, see this.
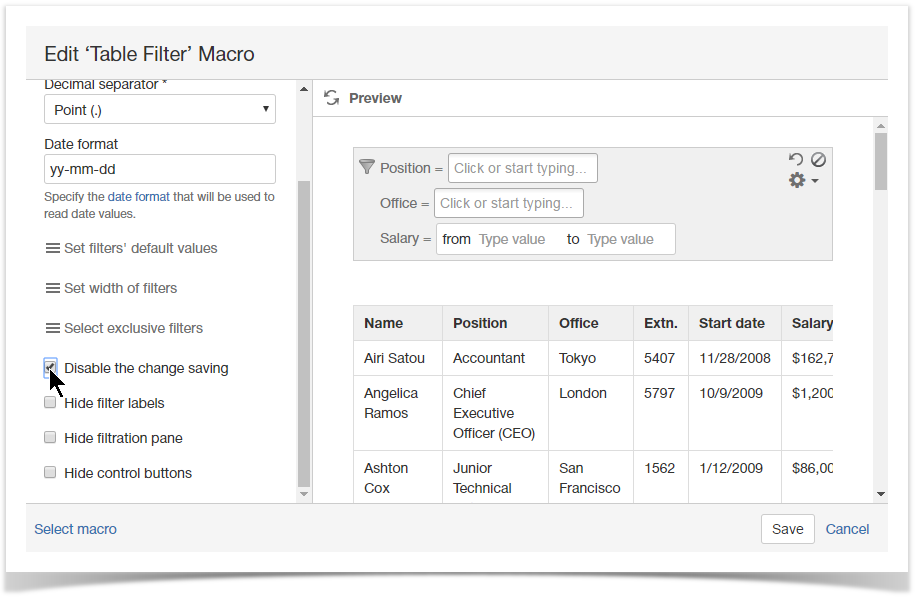
Disabling the Change Saving
You may need to disable the saving changes after filtration. This can be useful when you share some table with other people and set the default values for filtration, and do not want them to be overwritten.
To disable the change saving:
- Switch the page to edit mode.
- Select the macro and click Edit.
- Switch to the Filtration tab.
- Locate and select the Disable the change saving option.
- Save the macro and the page.
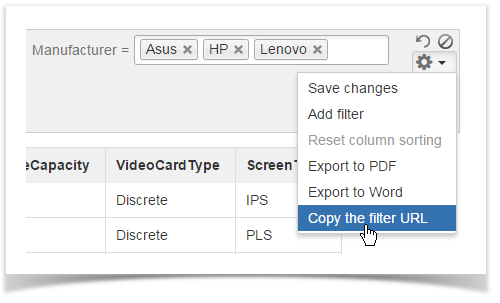
Sharing the Filtered Results via Link
You can copy the link to the currently used filters and applied values and further share it with your colleagues, so they can quickly open the filtered data series even when the initial filtration has been changed since then.
- On the filtration pane, click the cogwheel button.
- Select Copy the filter URL.
The link to the current filtered data series will be copied to the buffer.
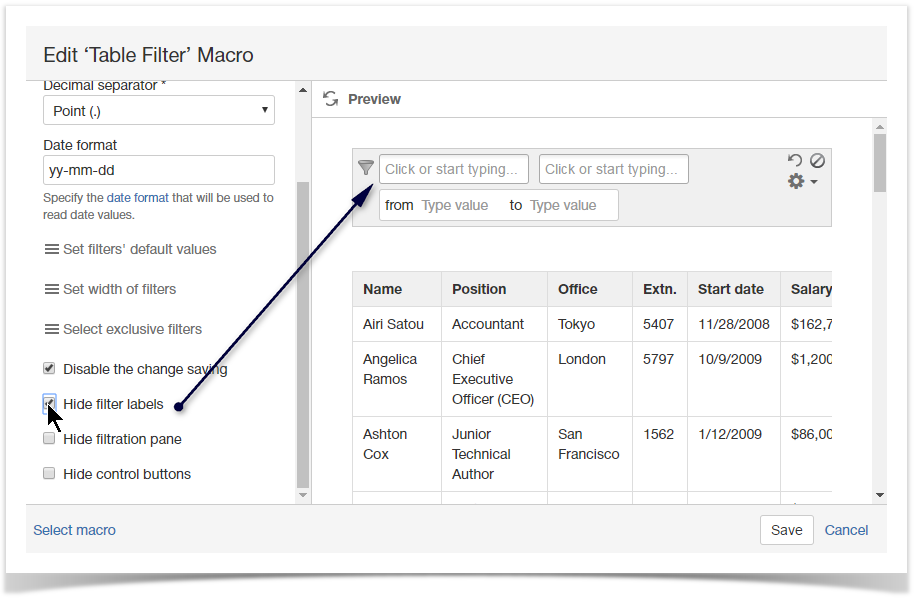
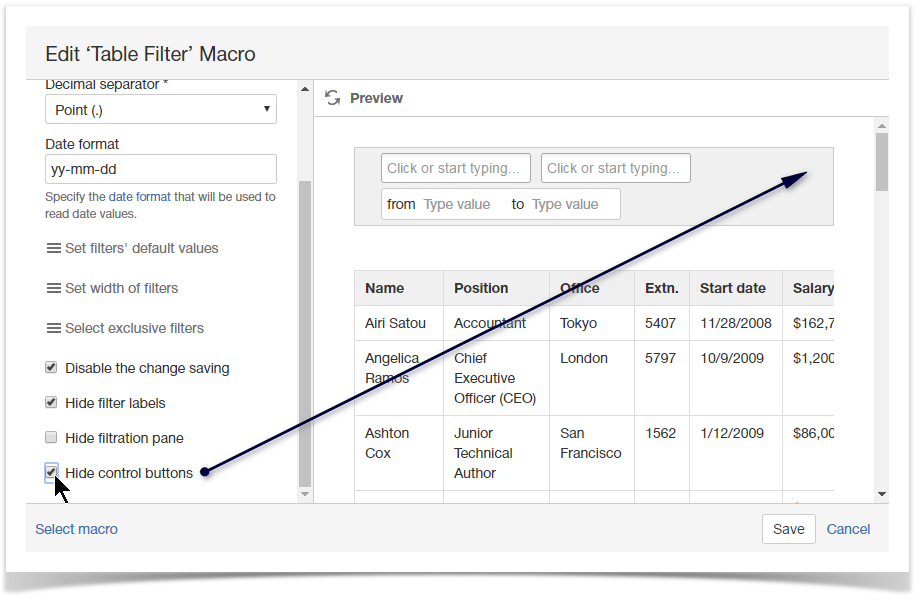
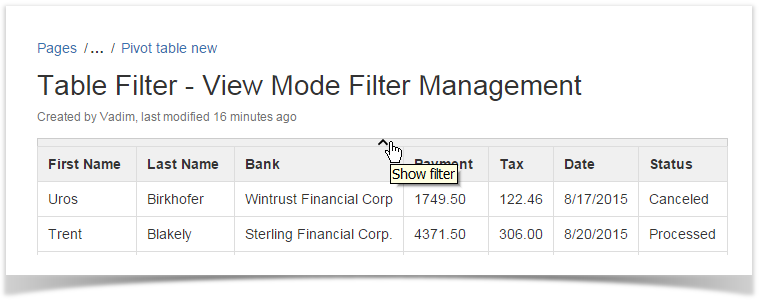
Hiding Filter Labels
- Switch the page to edit mode.
- Select the macro and click Edit.
- Switch to the Filtration tab.
- Locate and select the Hide Filter Labels option.
- Save the macro and the page.
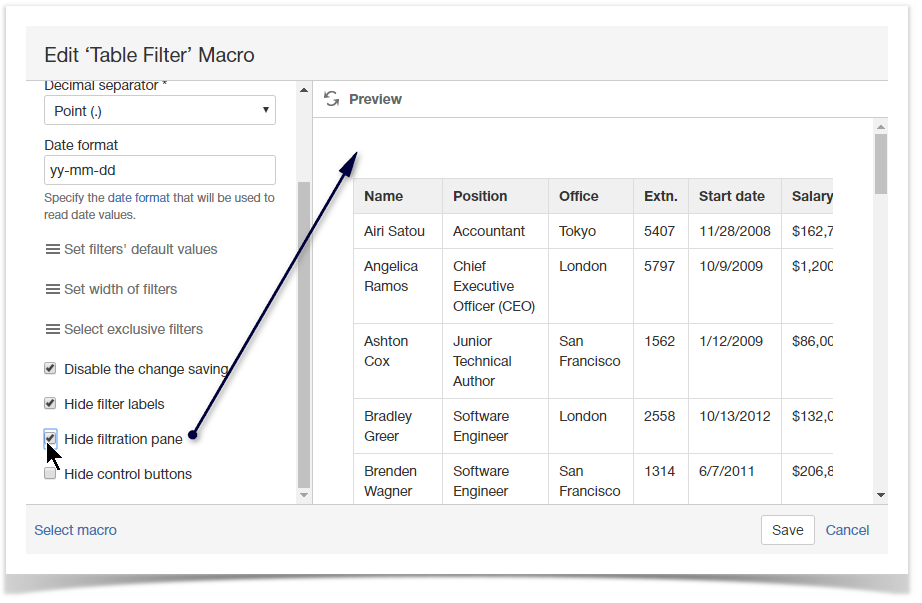
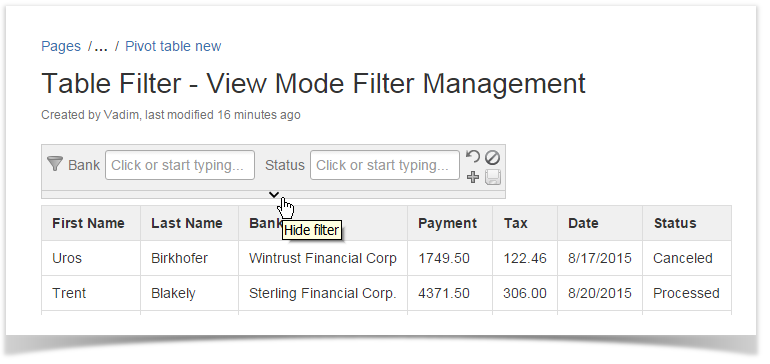
Hiding the Filtration Pane
Table Filter and Charts add-on allows you to hide the filtration pane in the page view mode. This may be useful when you have applied the required filters and do not want to allow other users filter the table.
To hide the filtration pane:
- Switch the page to edit mode.
- Select the macro and click Edit.
- Switch to the Filtration tab.
- Locate and select the Hide filtration pane option.
- Save the macro and the page.
To restore the filtration pane, reset selection for the Hide filtration pane option.
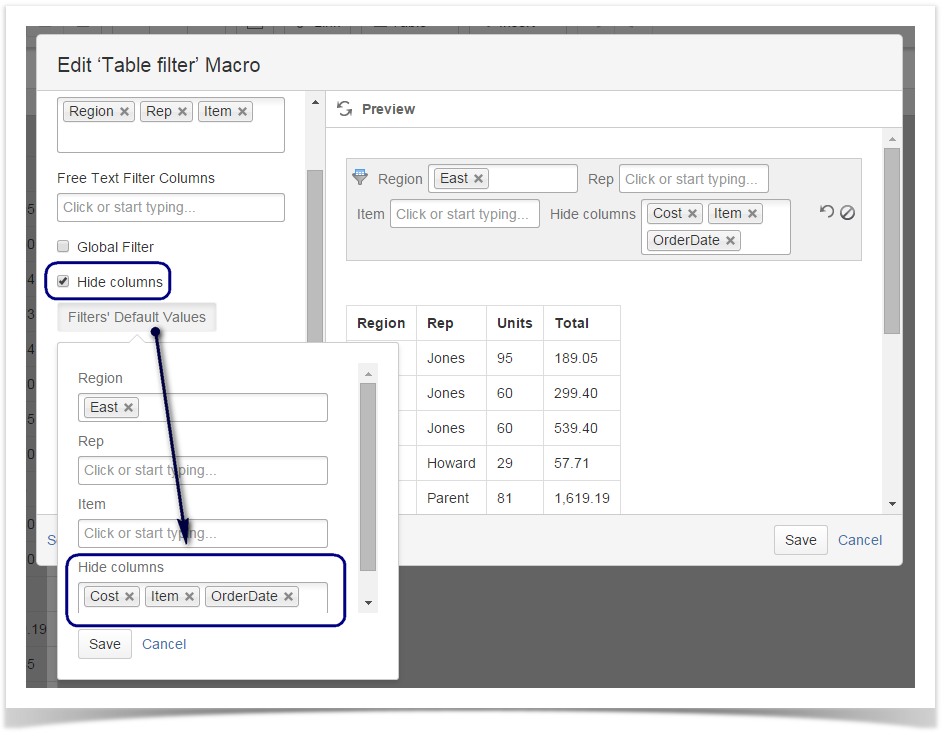
Hiding the control buttons
Table Filter and Charts add-on allows you to hide the control buttons shown when you click the Cogwheel button on the filtration pane. This may be useful when you want to disable export of table date or its sharing.
To hide the control button on the filtration pane:
- Switch the page to edit mode.
- Select the macro and click Edit.
- Switch to the Filtration tab.
- Locate and select the Hide control buttons option
- .
- Save the macro and the page.
To restore the filtration pane, reset selection for the Hide control buttons option.
Changing order of filters
While editing the macro you can change order of filters of the same type. Order of filters of different types
can be modified in the page view mode.
- Switch the page to edit mode.
- Select the macro and click Edit.
- Locate the filter type in which you want to change order of filtered columns
- Drag the column label to the appropriate place in the filter box.
- Save the macro and the page.


Setting the Data Operator
- Switch the page to edit mode.
- Select the macro and click Edit.
- Switch to the Filtration tab.
- Locate the Multi-Filter Operator box.
- Select the appropriate operator - AND or OR.
- Save the macro and the page.
Collapsing / expanding the filtration pane
- Open the page with Table Filter macro.
- Point to the bottom of the filtration pane.
- Click the collapse bar.
- Point to the header of the table.
- Click the expand bar.
Disabling / Enabling filters
- Open the page with Table Filter macro.
- On the filtration pane, locate and click the Disable all filters
 icon.
icon.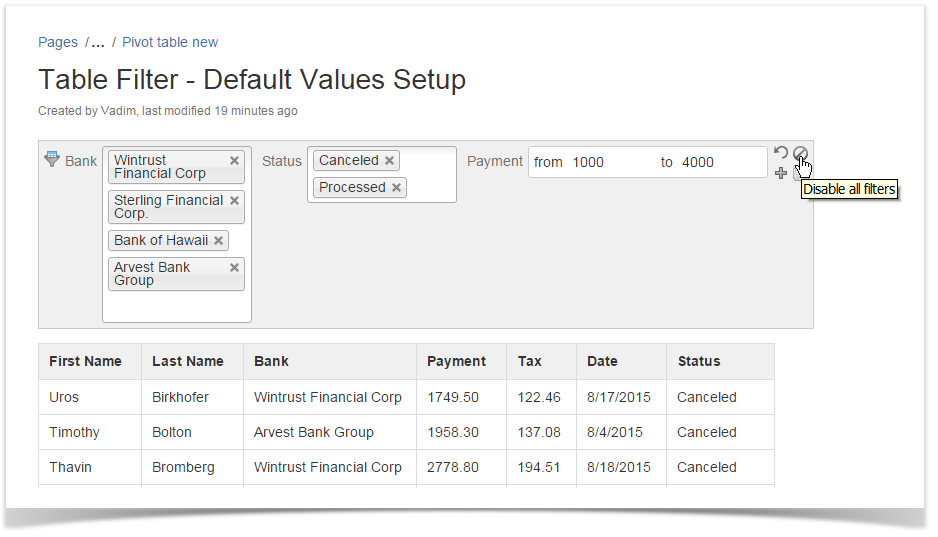
- On the filtration pane, locate and click the Enable all filters
 icon.
icon.
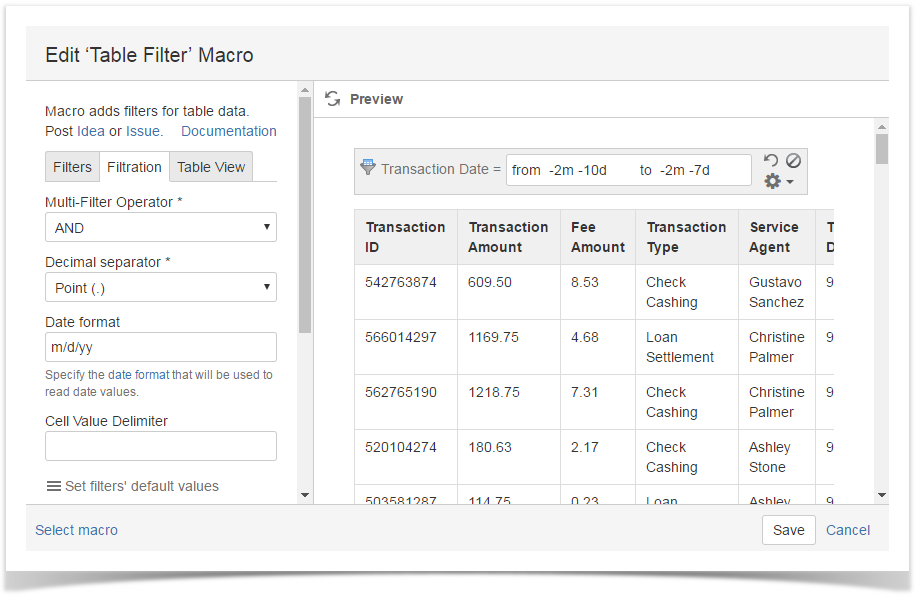
Setting the Cell Value Delimiter
The cell value delimiter is used for treating multiple delimited values in table cells as separate values in the dropdown filter.
- Switch the page to edit mode.
- Select the macro and click Edit.
- Switch to the Filtration tab.
- Locate the Cell Value Delimiter box.
- Enter the character (multiple characters) used to separate values in cells.
- Save the macro and the page.
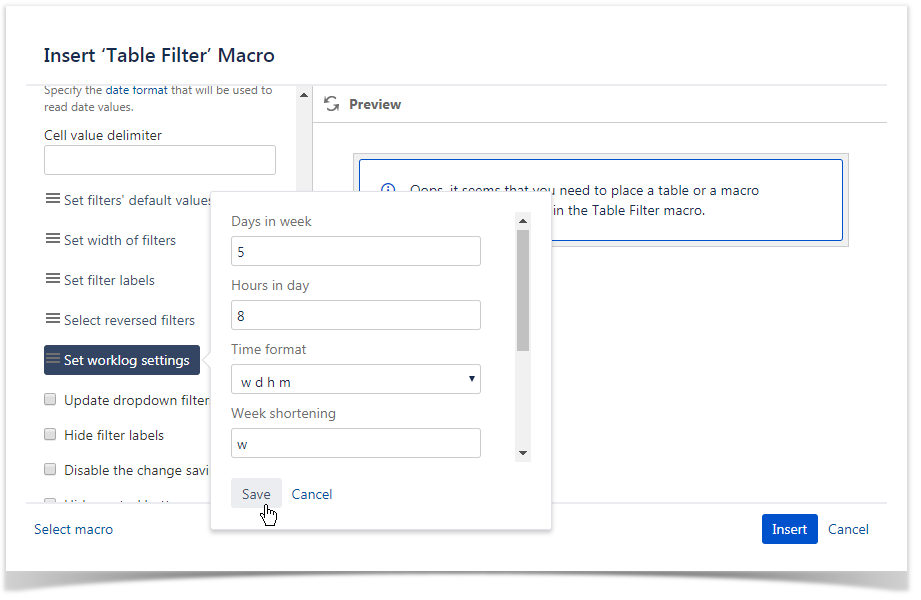
Setting worklog settings
| Excerpt | ||||
|---|---|---|---|---|
|