| Mybanner |
|---|
This version of the app's documentation is outdated. Please find the information you're looking for here: |
| Panel | ||||||
|---|---|---|---|---|---|---|
| ||||||
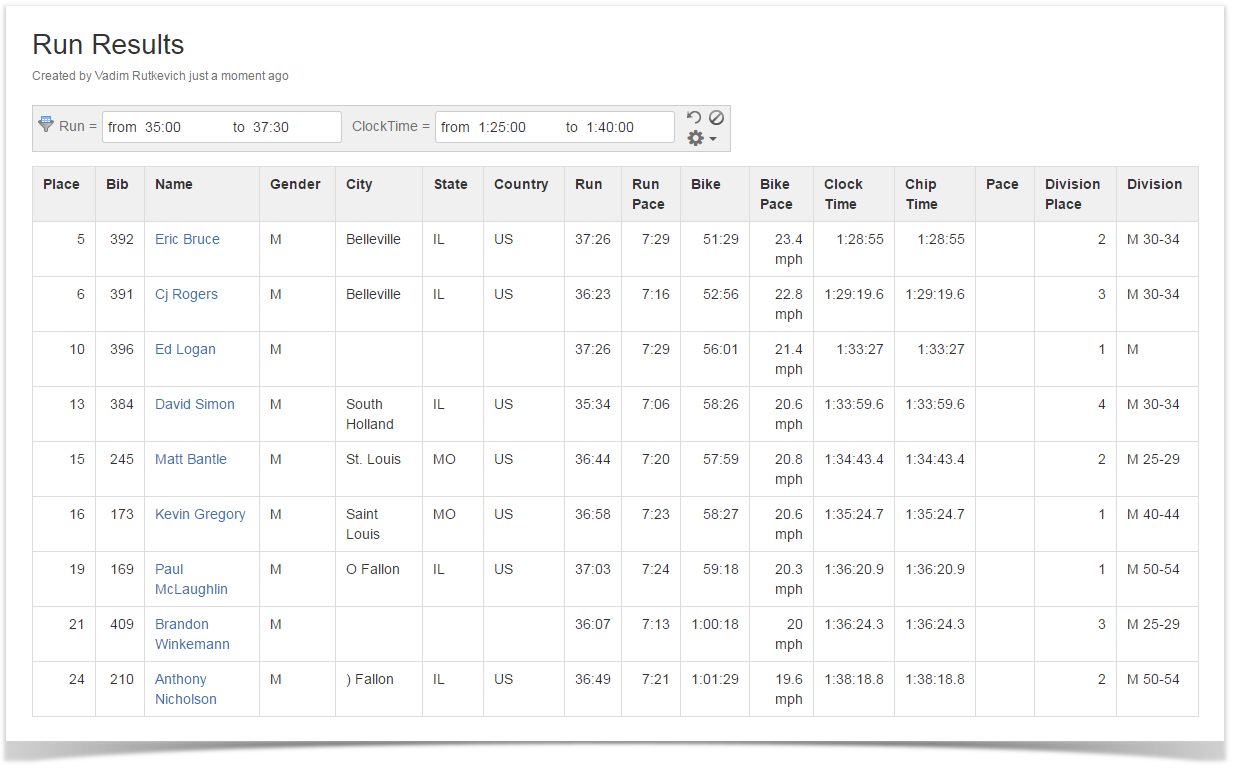
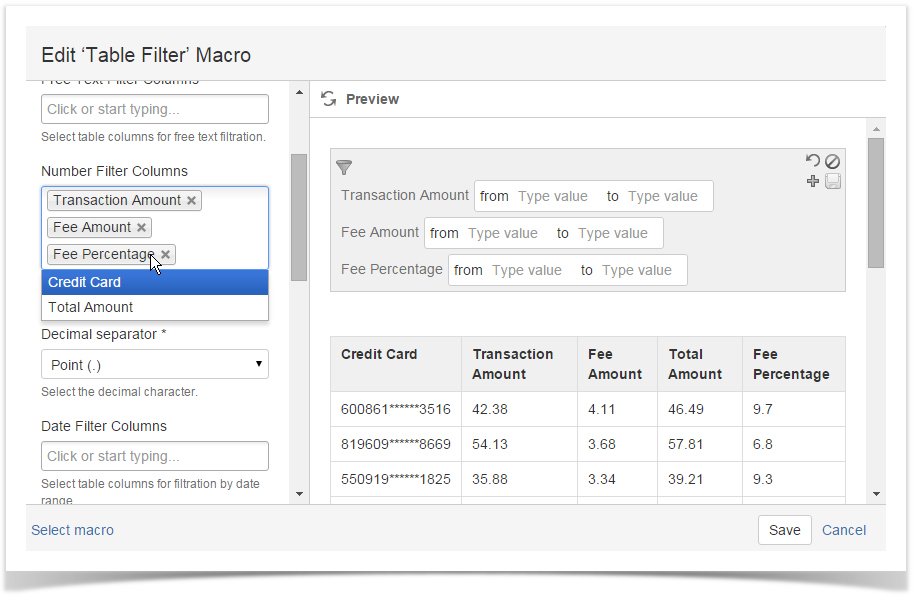
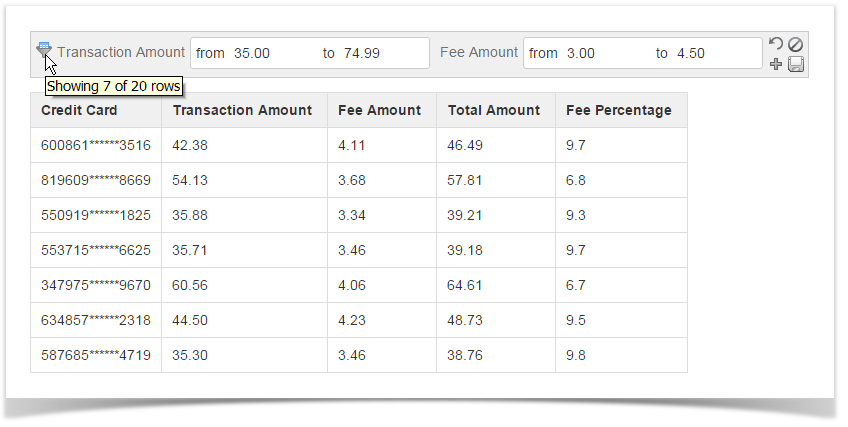
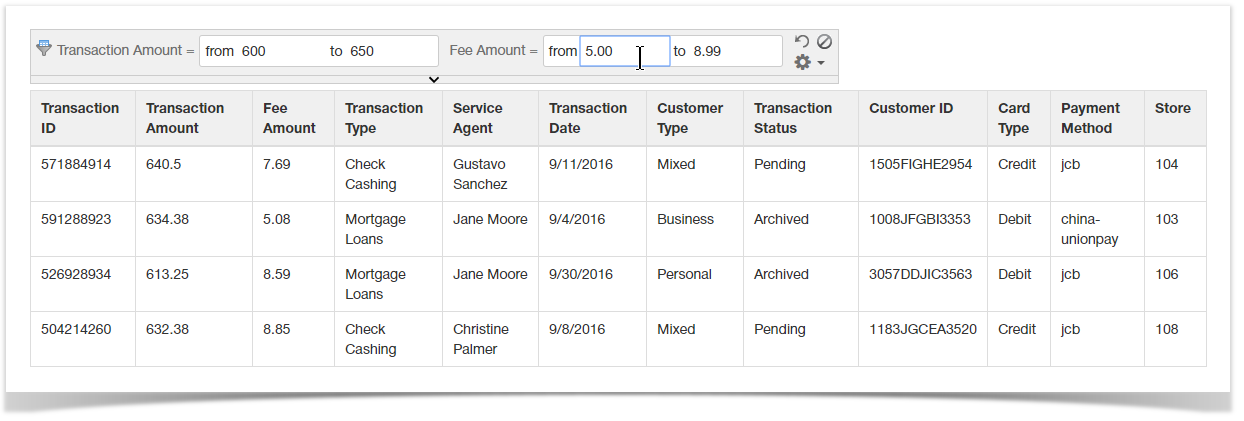
Table Filter and Charts for Confluence add-on is equipped with the number range filter. You can add this filter type for any column of your table containing numbers or decimal numbers. It allows you to specify the number range for showing data in the table. Alternatively, you can set the start or end value instead of the number range. Both cardinals and decimals are supported. |
| Widget Connector | ||||||
|---|---|---|---|---|---|---|
|
Adding the Number Range Filter
- Edit the pageSwitch the page to edit mode.
- Insert the Table Filter macro either by entering {Table Filter} or by selecting it from other macros.Copy and and paste the table into within the macro body.
- Select the macro and click Edit.
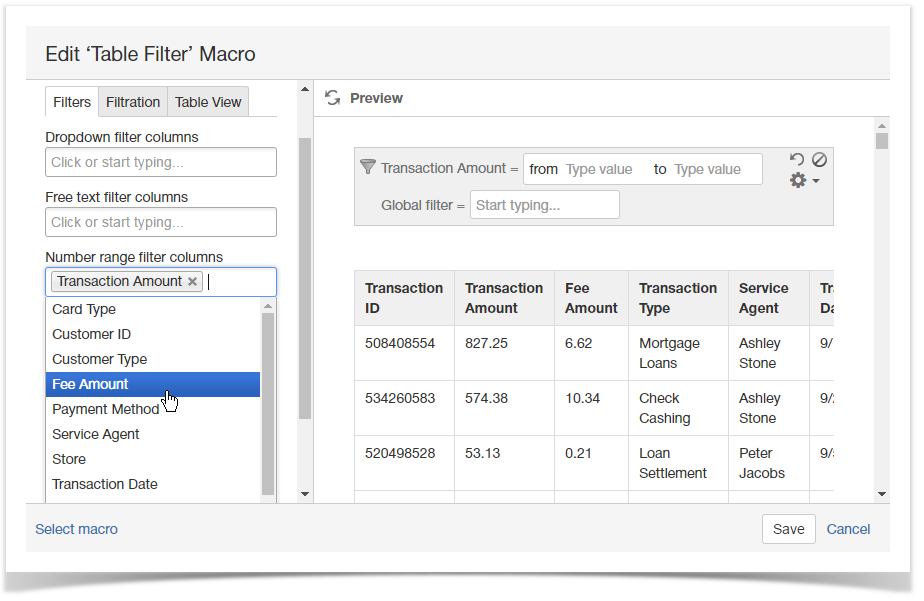
- In the the Number Filter Columnsrange filter columns box, select the columns for filtration with number range filters.
- Select Switch to the Filtration tab and set the correct decimal separator for number values (if needed).
- Save the macro.
- Save the page.
Filtering the table with number range filters
- Open the page with the table for filtration.
- On the filtration pane, enter locate the number range filters and position the mouse pointer within the appropriate one.
- Enter the appropriate number range (including a capability to enter decimal values).
 or start/end values for filtration.
Filtering the table with JIRA worklogs or time intervals
You can filter tables containing JIRA worklogs or time intervals.
- Open the page with the table for filtration.
- On the filtration pane, locate the number range filters and position the mouse pointer within the appropriate one.
- Enter the appropriate worklog duration or time interval.
Use the correct format for entering worklogs:
- Xw - for weeks (for example, '2w').
- Xd - for days (for example, '3d').
- Xh - for hours (for example, '5h').
- Xm - for minutes (for example, '45m').
You can combine multiple values into a single string.
Use the correct time format ('hh:mm:ss') for setting time intervals.
| Info |
|---|
You can define the worklog parameters, for the details see this page. |