Join our Product Advisory program to get free access to our new Cloud apps and start contributing to solutions that will be used worldwide.
View terms and conditions
About
The Issue Worksheet app is a solution that allows you to quickly update issues during planning, backlog grooming, or prioritization session. It provides you with the following capabilities:
With Issue Worksheet for Jira Cloud you can update the list of Jira issues without opening each task one by one. Add updates and change values of fields inline and on the fly.
With the app you can do the following:
- backlog prioritization
- task distribution and assignment
- sprint or version planning
- backlog grooming
- project scope review
- requirement management
The app supports the editing of the following field types:
- text fields
- multi-line text fields
- user single pickers
- date pickers
- single and multiple select fields
- labels
- components
- sprint
- fix version
- linked issues
Viewing the list of issues
- Open your Jira Cloud.
- On the navigational sidebar, select Issue Worksheet.
- The app loads the list of all issues stored in your Jira Cloud.
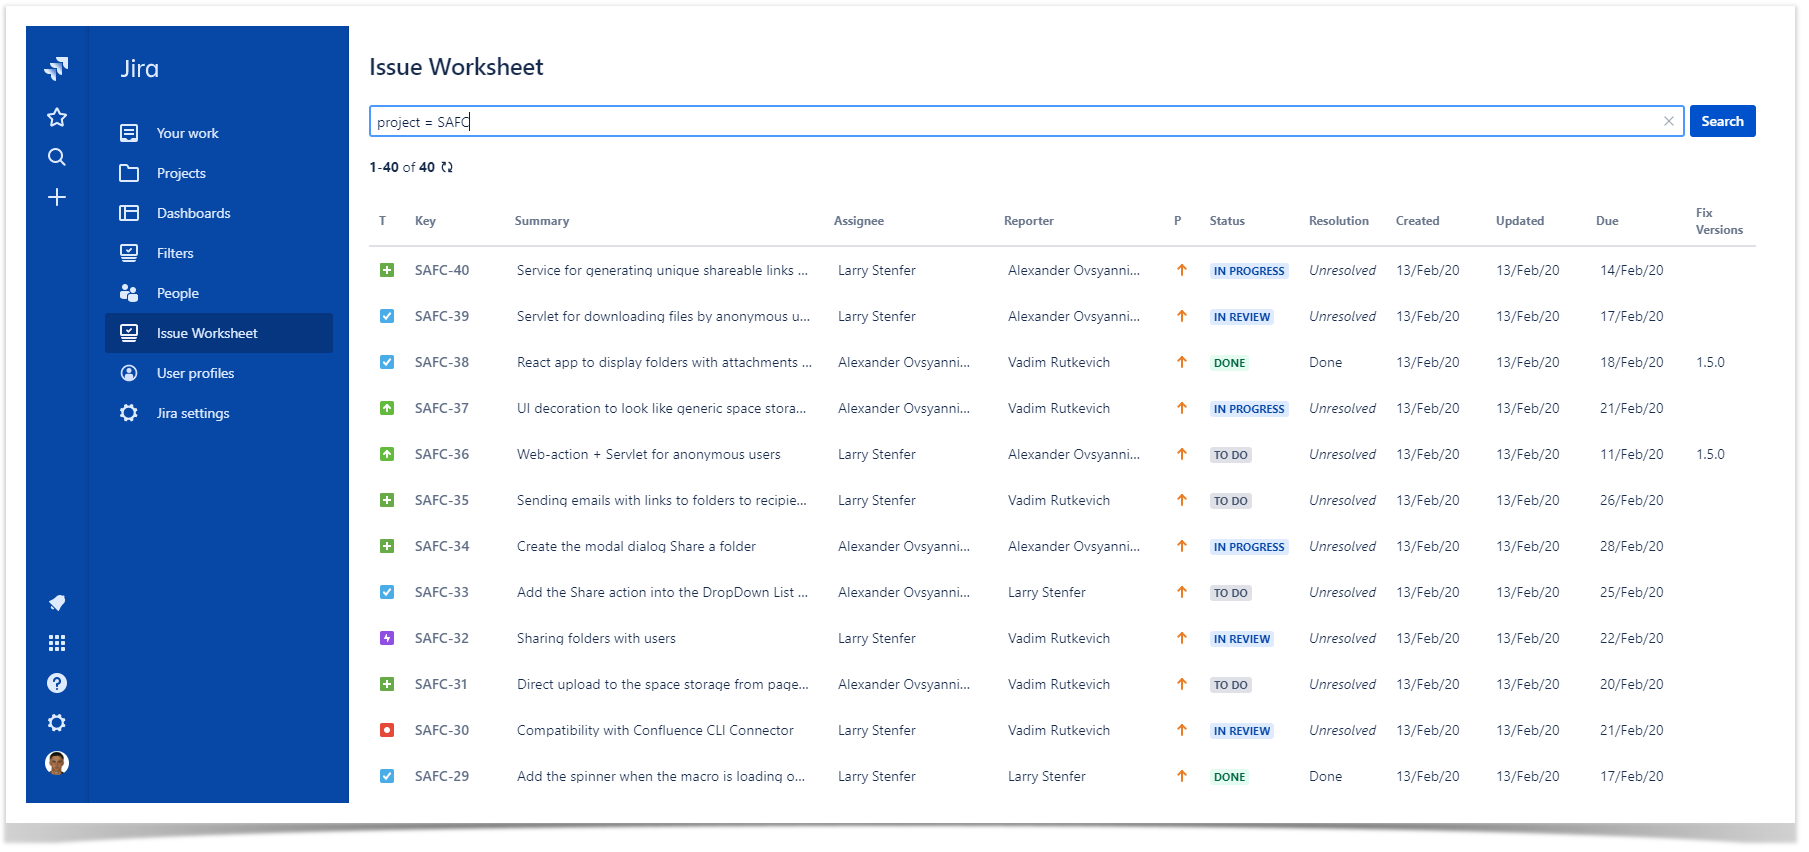
Searching for specific issues with JQL
- Open Issue Worksheet.
- In the JQL query box, enter the JQL query.
- Press Enter or click Search.
The app shows the list of Jira issues matching your JQL query.
For the details on writing JQL queries, please check this resource.
Managing views
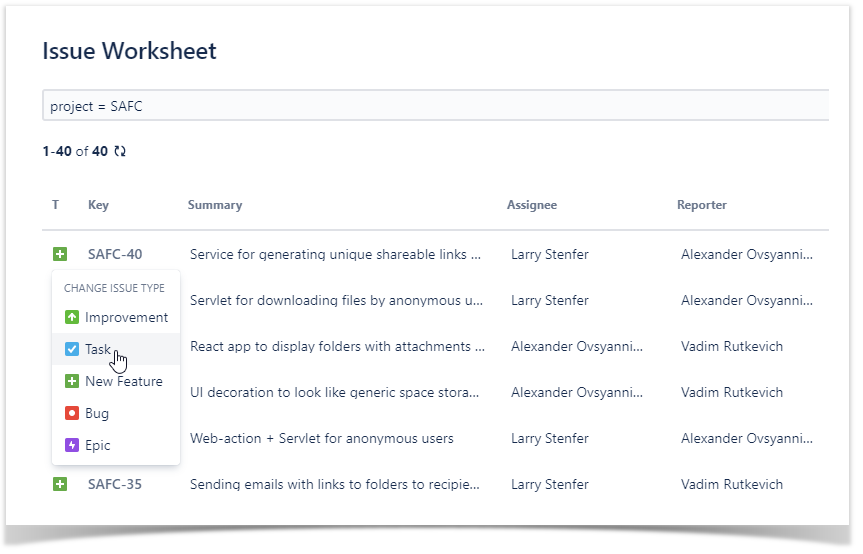
Changing the task type
- On the list with Jira issues, locate the one which type you want to change.
- Hover over the task type icon and click it.
- Select the task type you want.
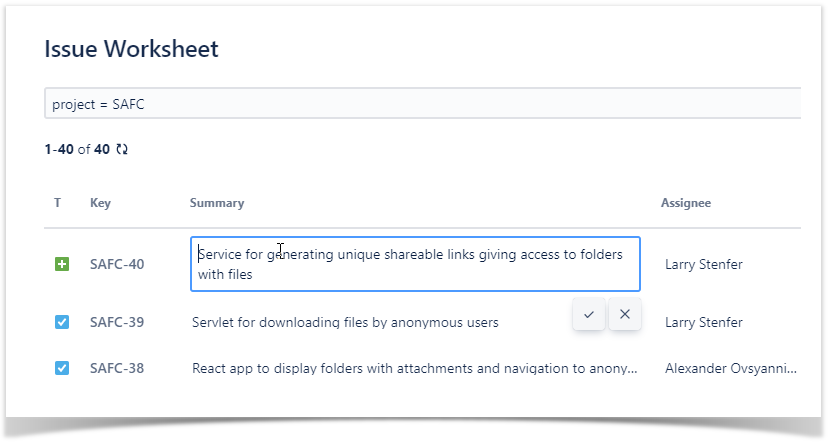
Changing the summary
- On the list with Jira issues, locate the one which summary you want to change.
- Hover over the task summary and click it.
- Update the task summary.
- Click the
 button to save the new summary.
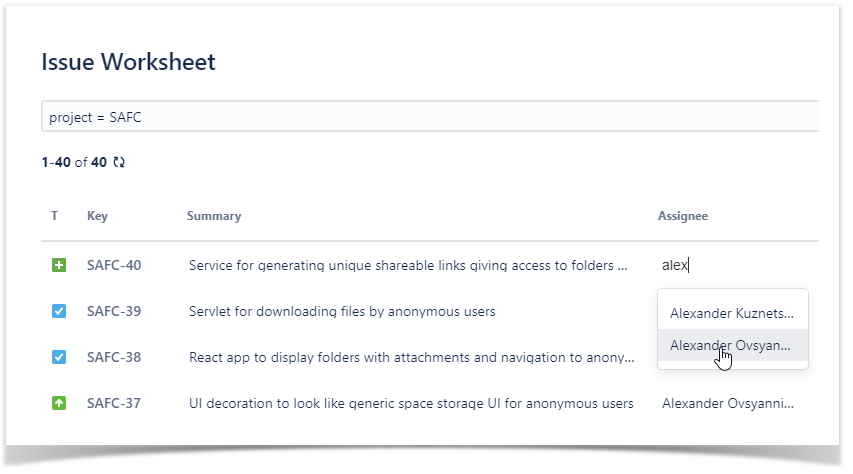
Changing the assignee / reporter
- On the list with Jira issues, locate the one which assignee or reporter you want to change.
- Hover over the assignee or reporter and click it.
- Start entering the user name.
- Select the appropriate user from the prompted results.
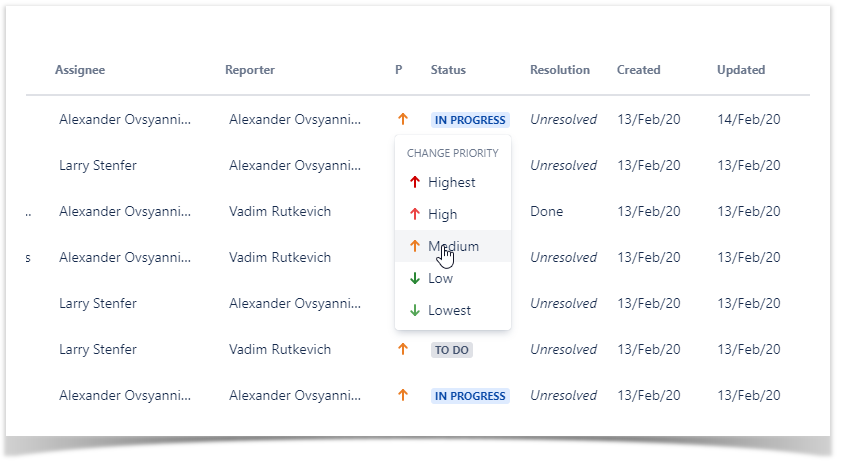
Changing the priority
- On the list with Jira issues, locate the one which priority you want to change.
- Hover over the priority icon and click it.
- Select the priority you want.
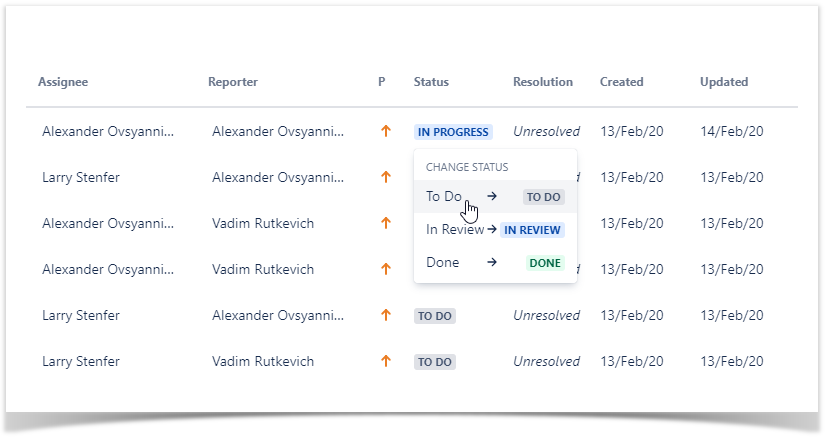
Changing the status
- On the list with Jira issues, locate the one which status you want to change.
- Hover over the status and click it.
- Select the status you want.
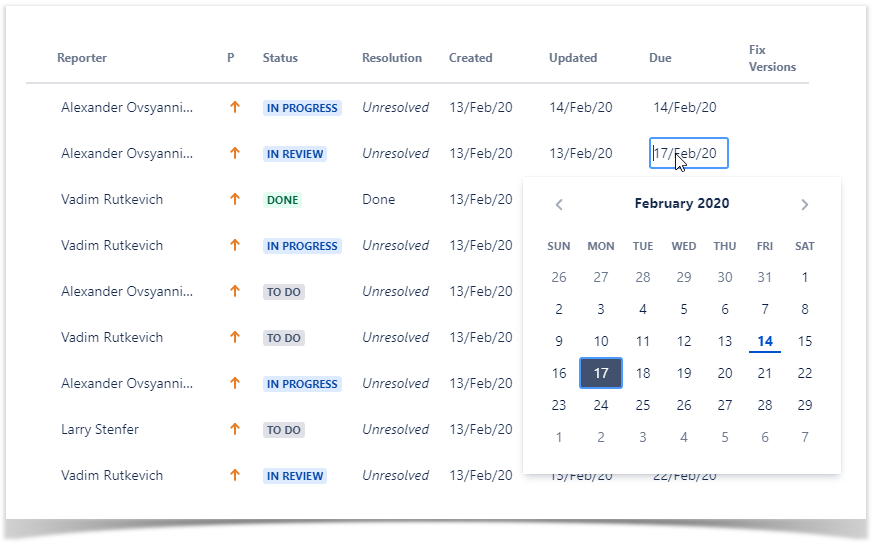
Changing the status
- On the list with Jira issues, locate the one which due date you want to change.
- Hover over the field placeholder and click it.
- Select the due date you want.