TeamCity Integration for Bitbucket gives a capability to trigger the builds remotely in TeamCity from your Bitbucket instance. To get access to all the features offered by the app, you'll need to authorize your Bitbucket in TeamCity server using the access tokens.
Where to start?
After installation of the app, every user of Bitbucket can add TeamCity access tokens to their account. To get to the token management page, you need to click on your avatar in the header and choose Manage account.
![]()
Then you'll need to click on the TeamCity tab in the navigation bar to the left. After that, you'll get to the token management page, which will look like this when you first visit it:
![]()
How to get an access token in TeamCity?
First, you need to go to your TeamCity server, click on your username at the header, then go to My Profile.
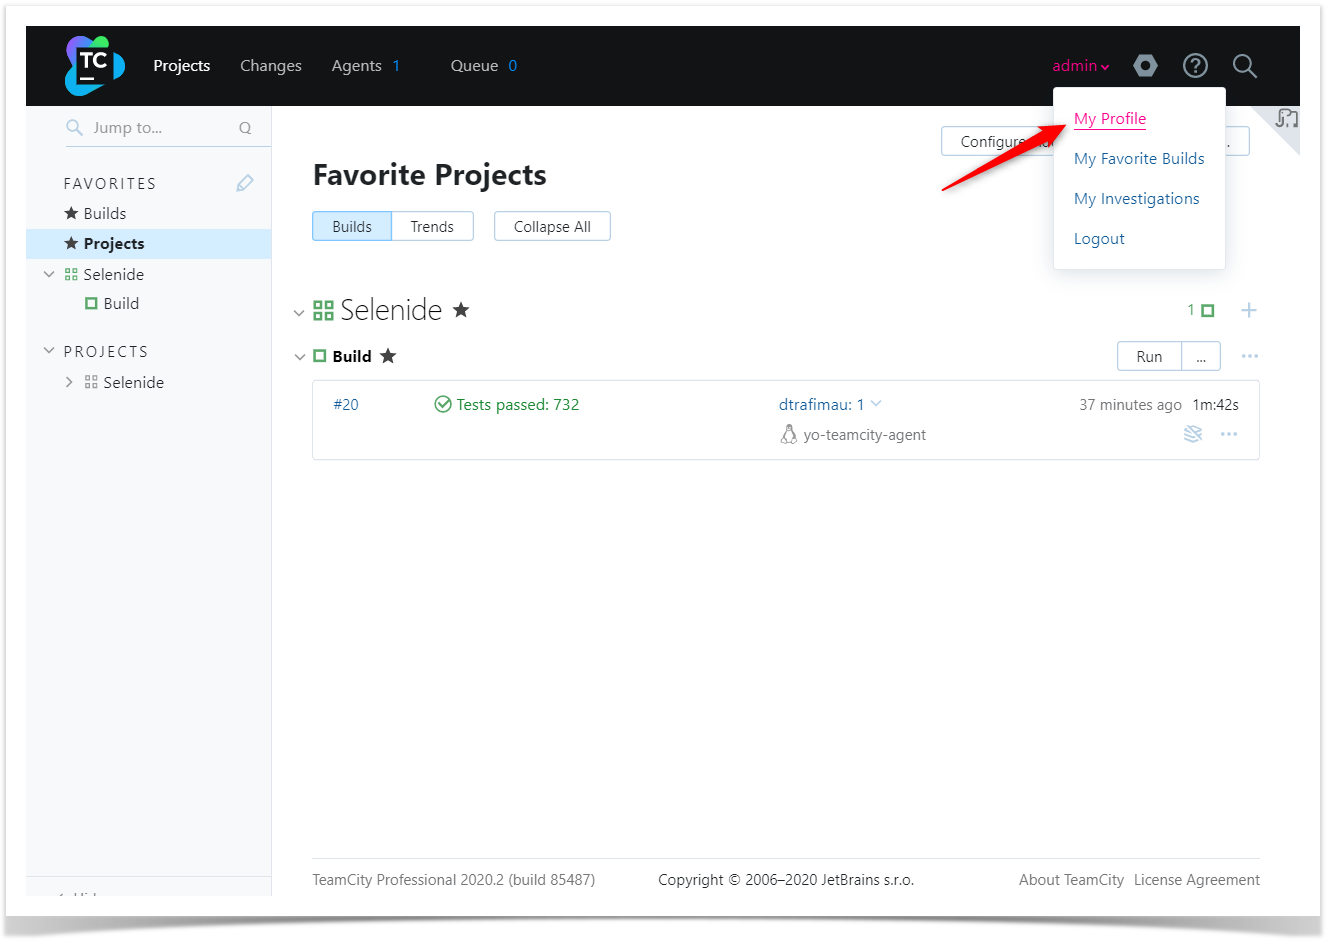
Here you click on the Access Tokens in the navigation bar and go to the page where you can create an access token.
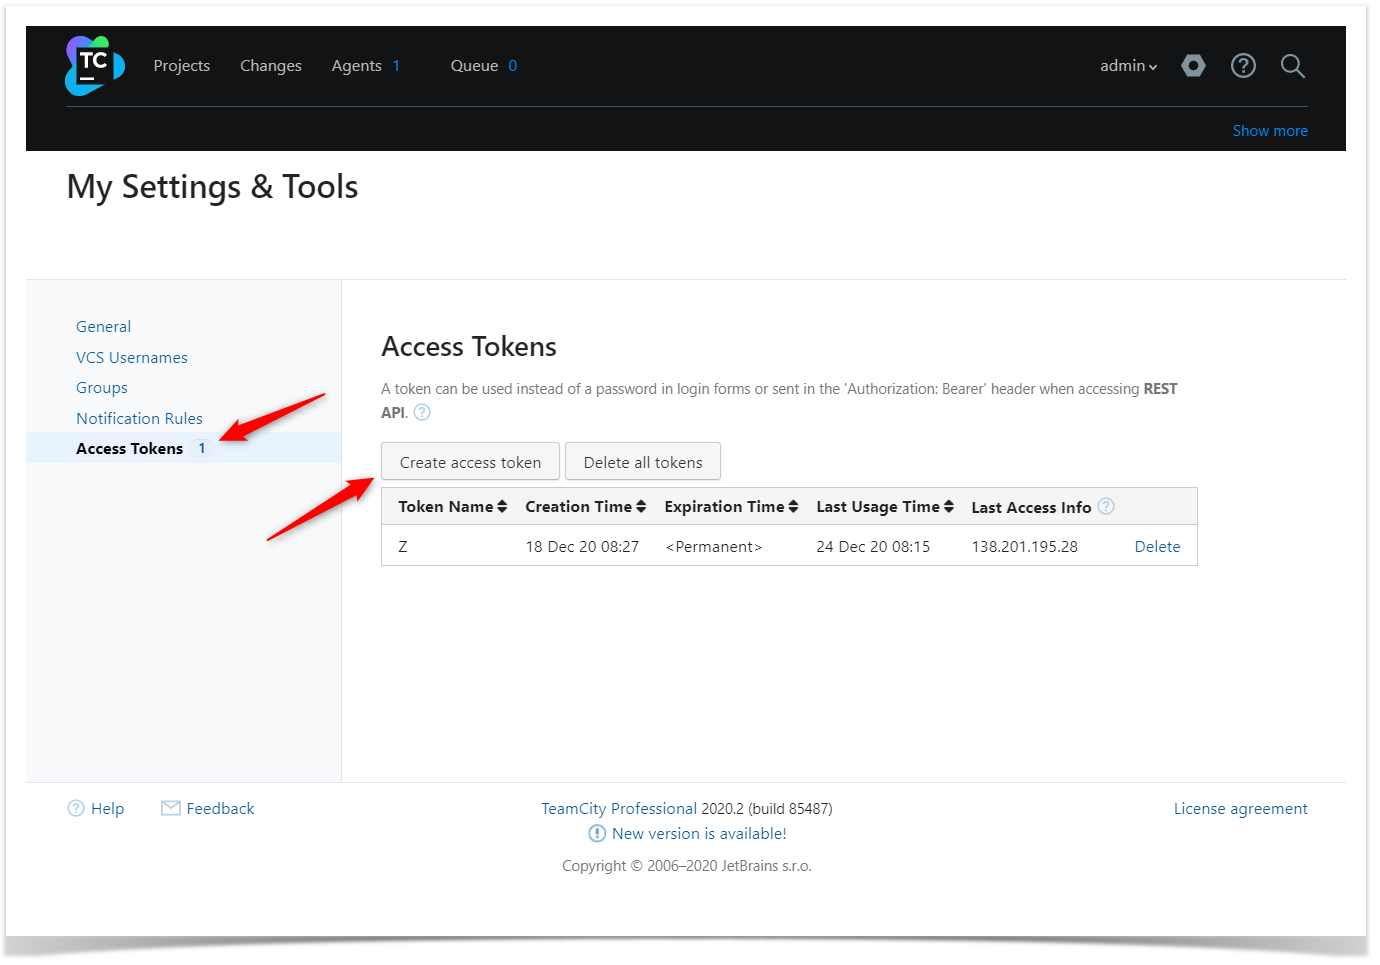
Then you state the token name and its expiration date or leave it blank if you don't want it to expire.

How to add an access token in Bitbucket?
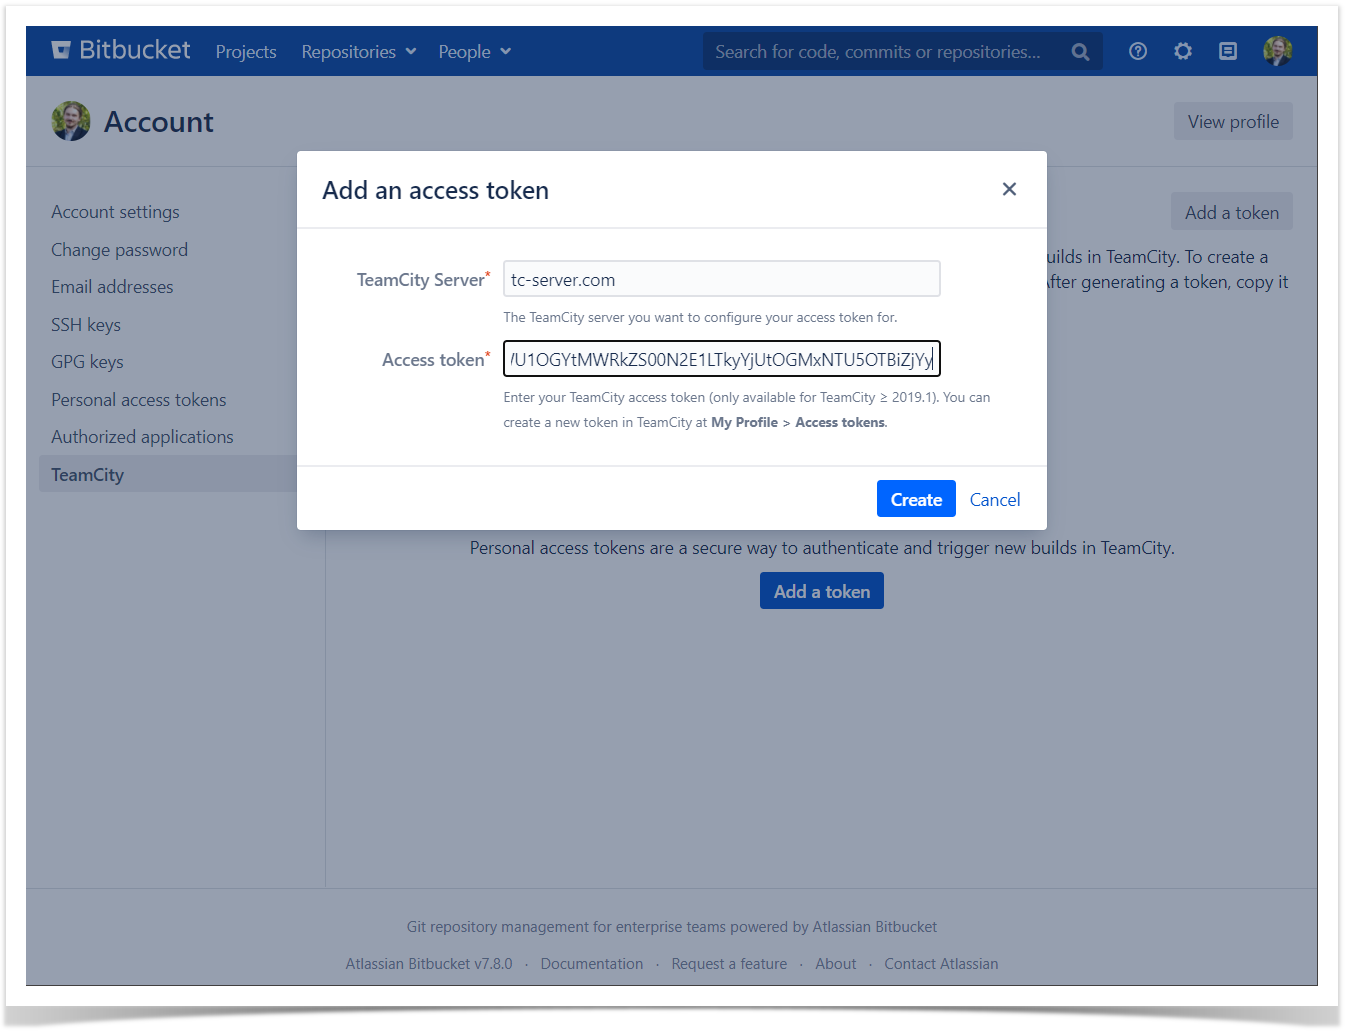
Once you've generated an access token in TeamCity, you can get back to the token management page to add the token and connect your TeamCity server to Bitbucket.
Click on either Add a token button, state your TeamCity server, paste the access token you copied in the previous step, and click Create.
After you've added a token, you'll be able to see it with its details among the others in the list. From here, you can also delete a token if needed, but note that it will only be deleted from Bitbucket but will remain in TeamCity.
