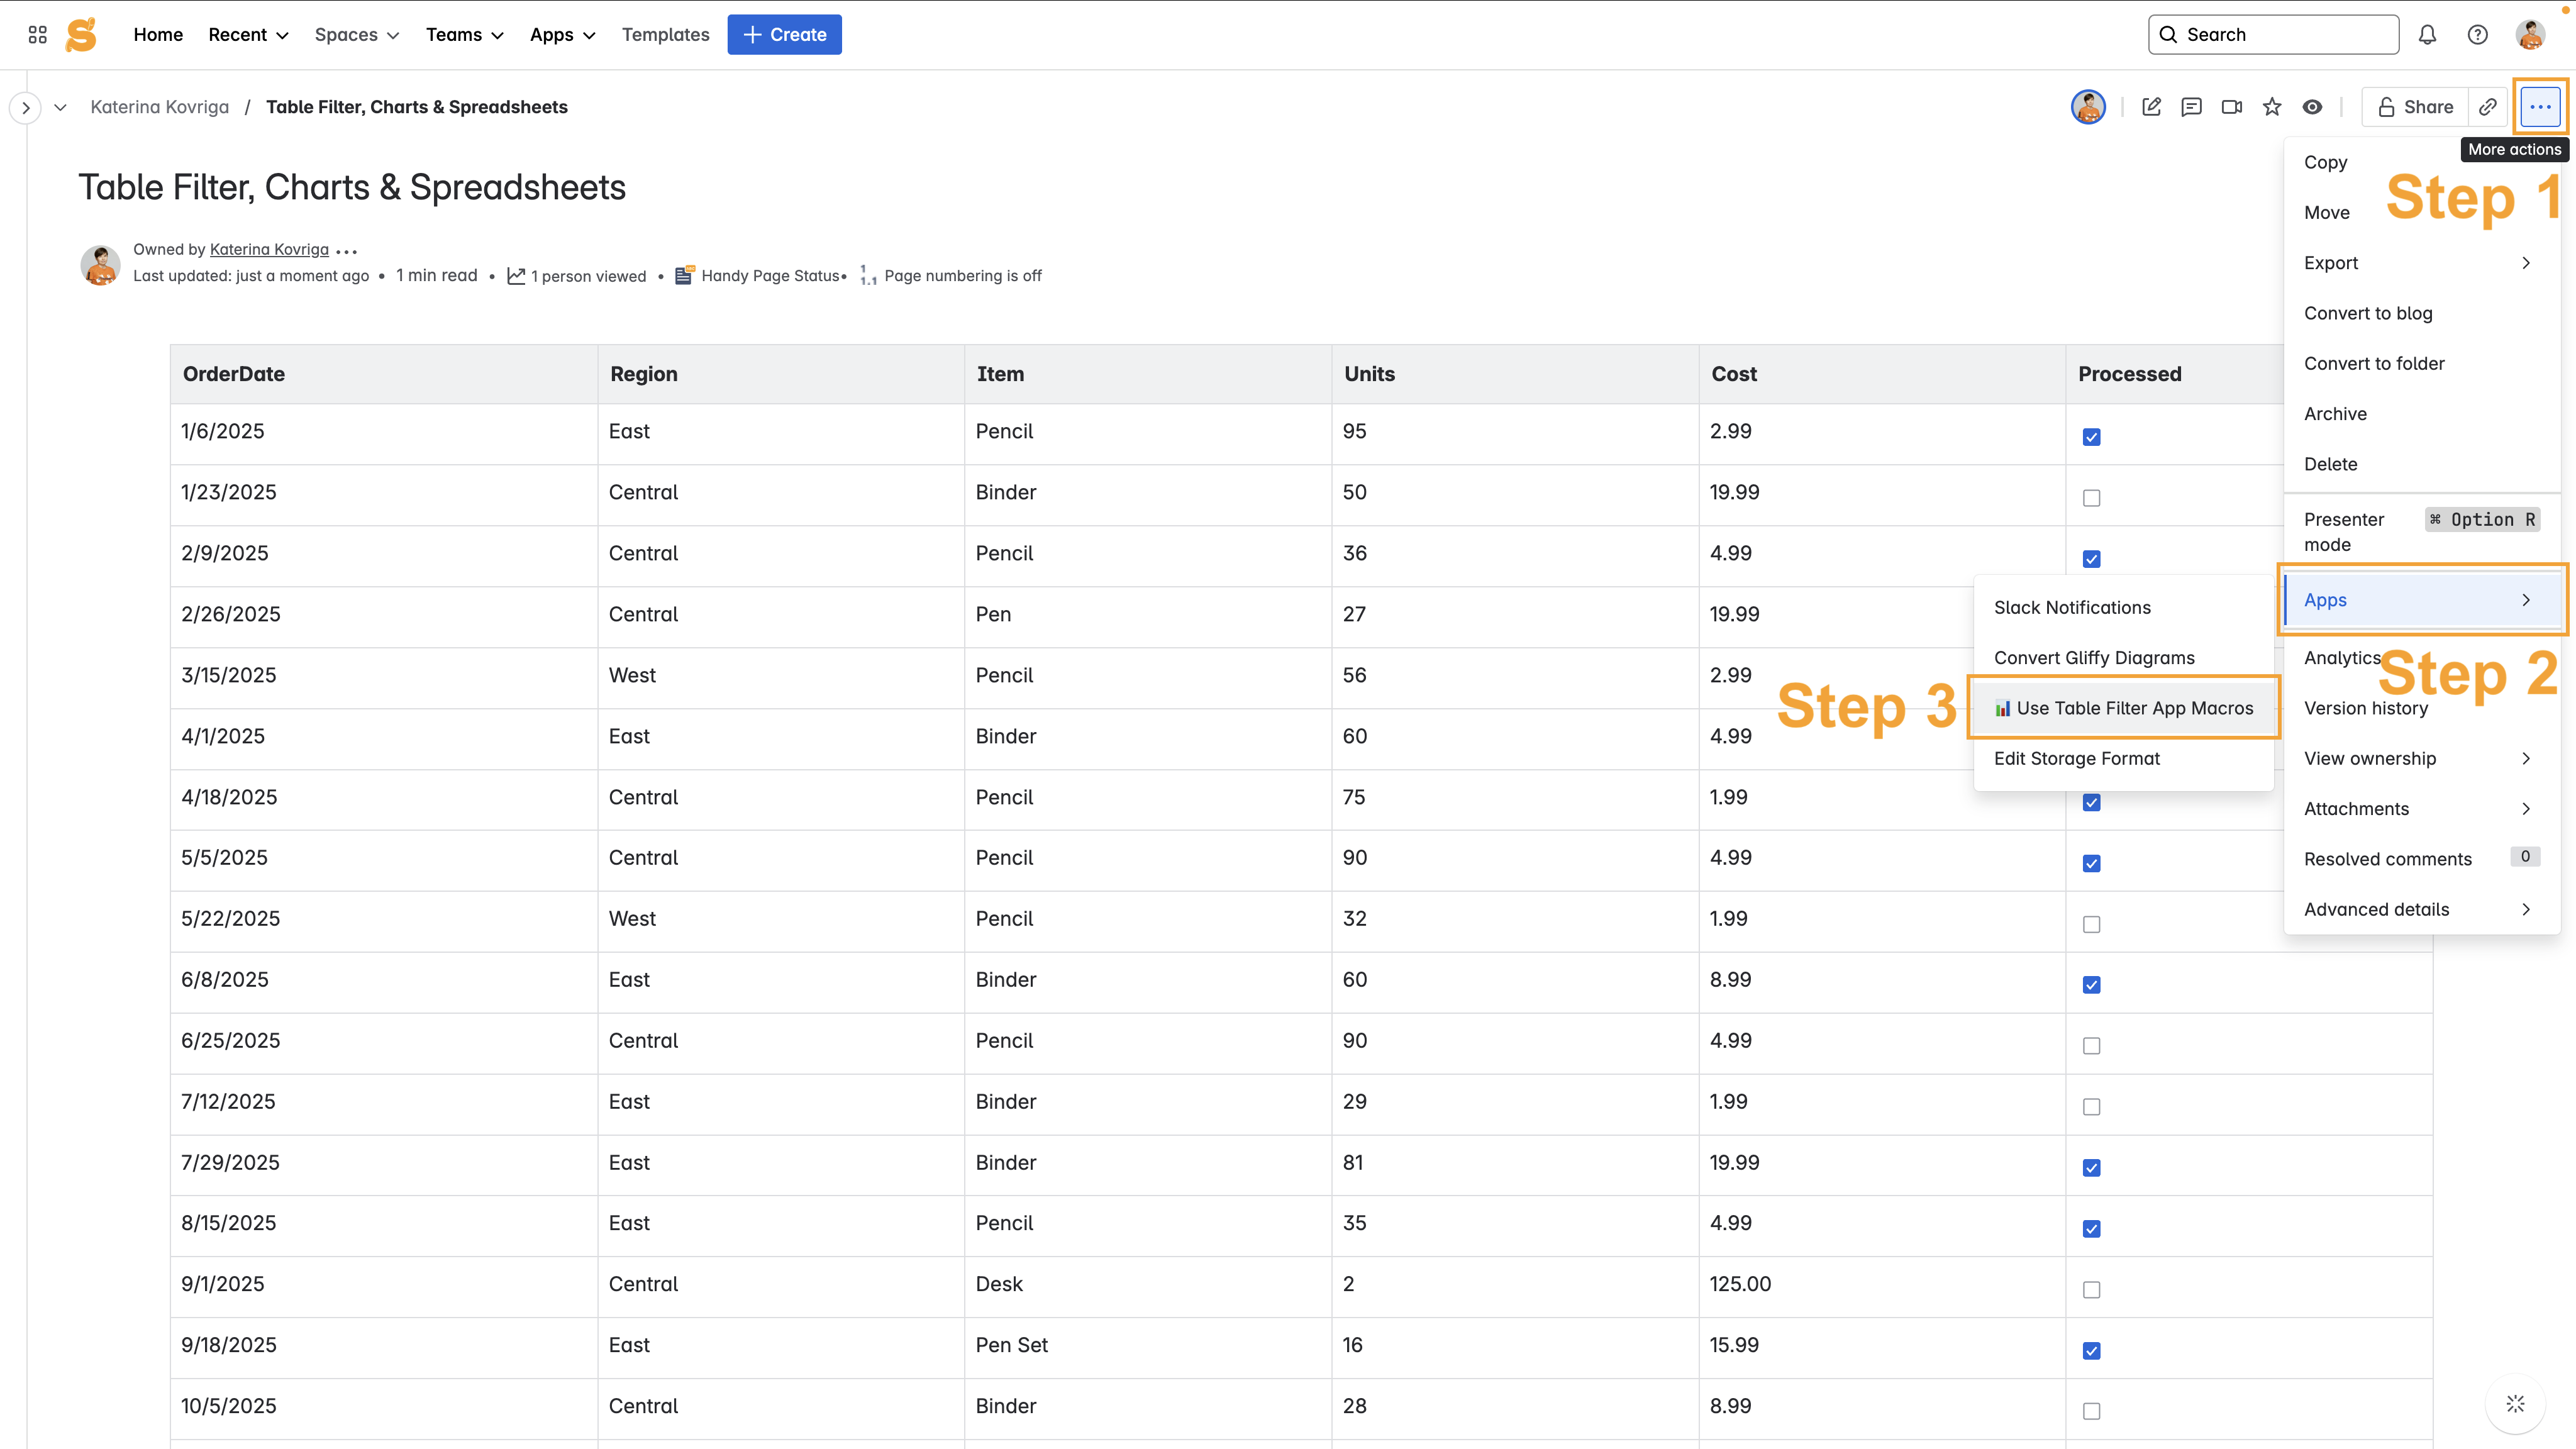
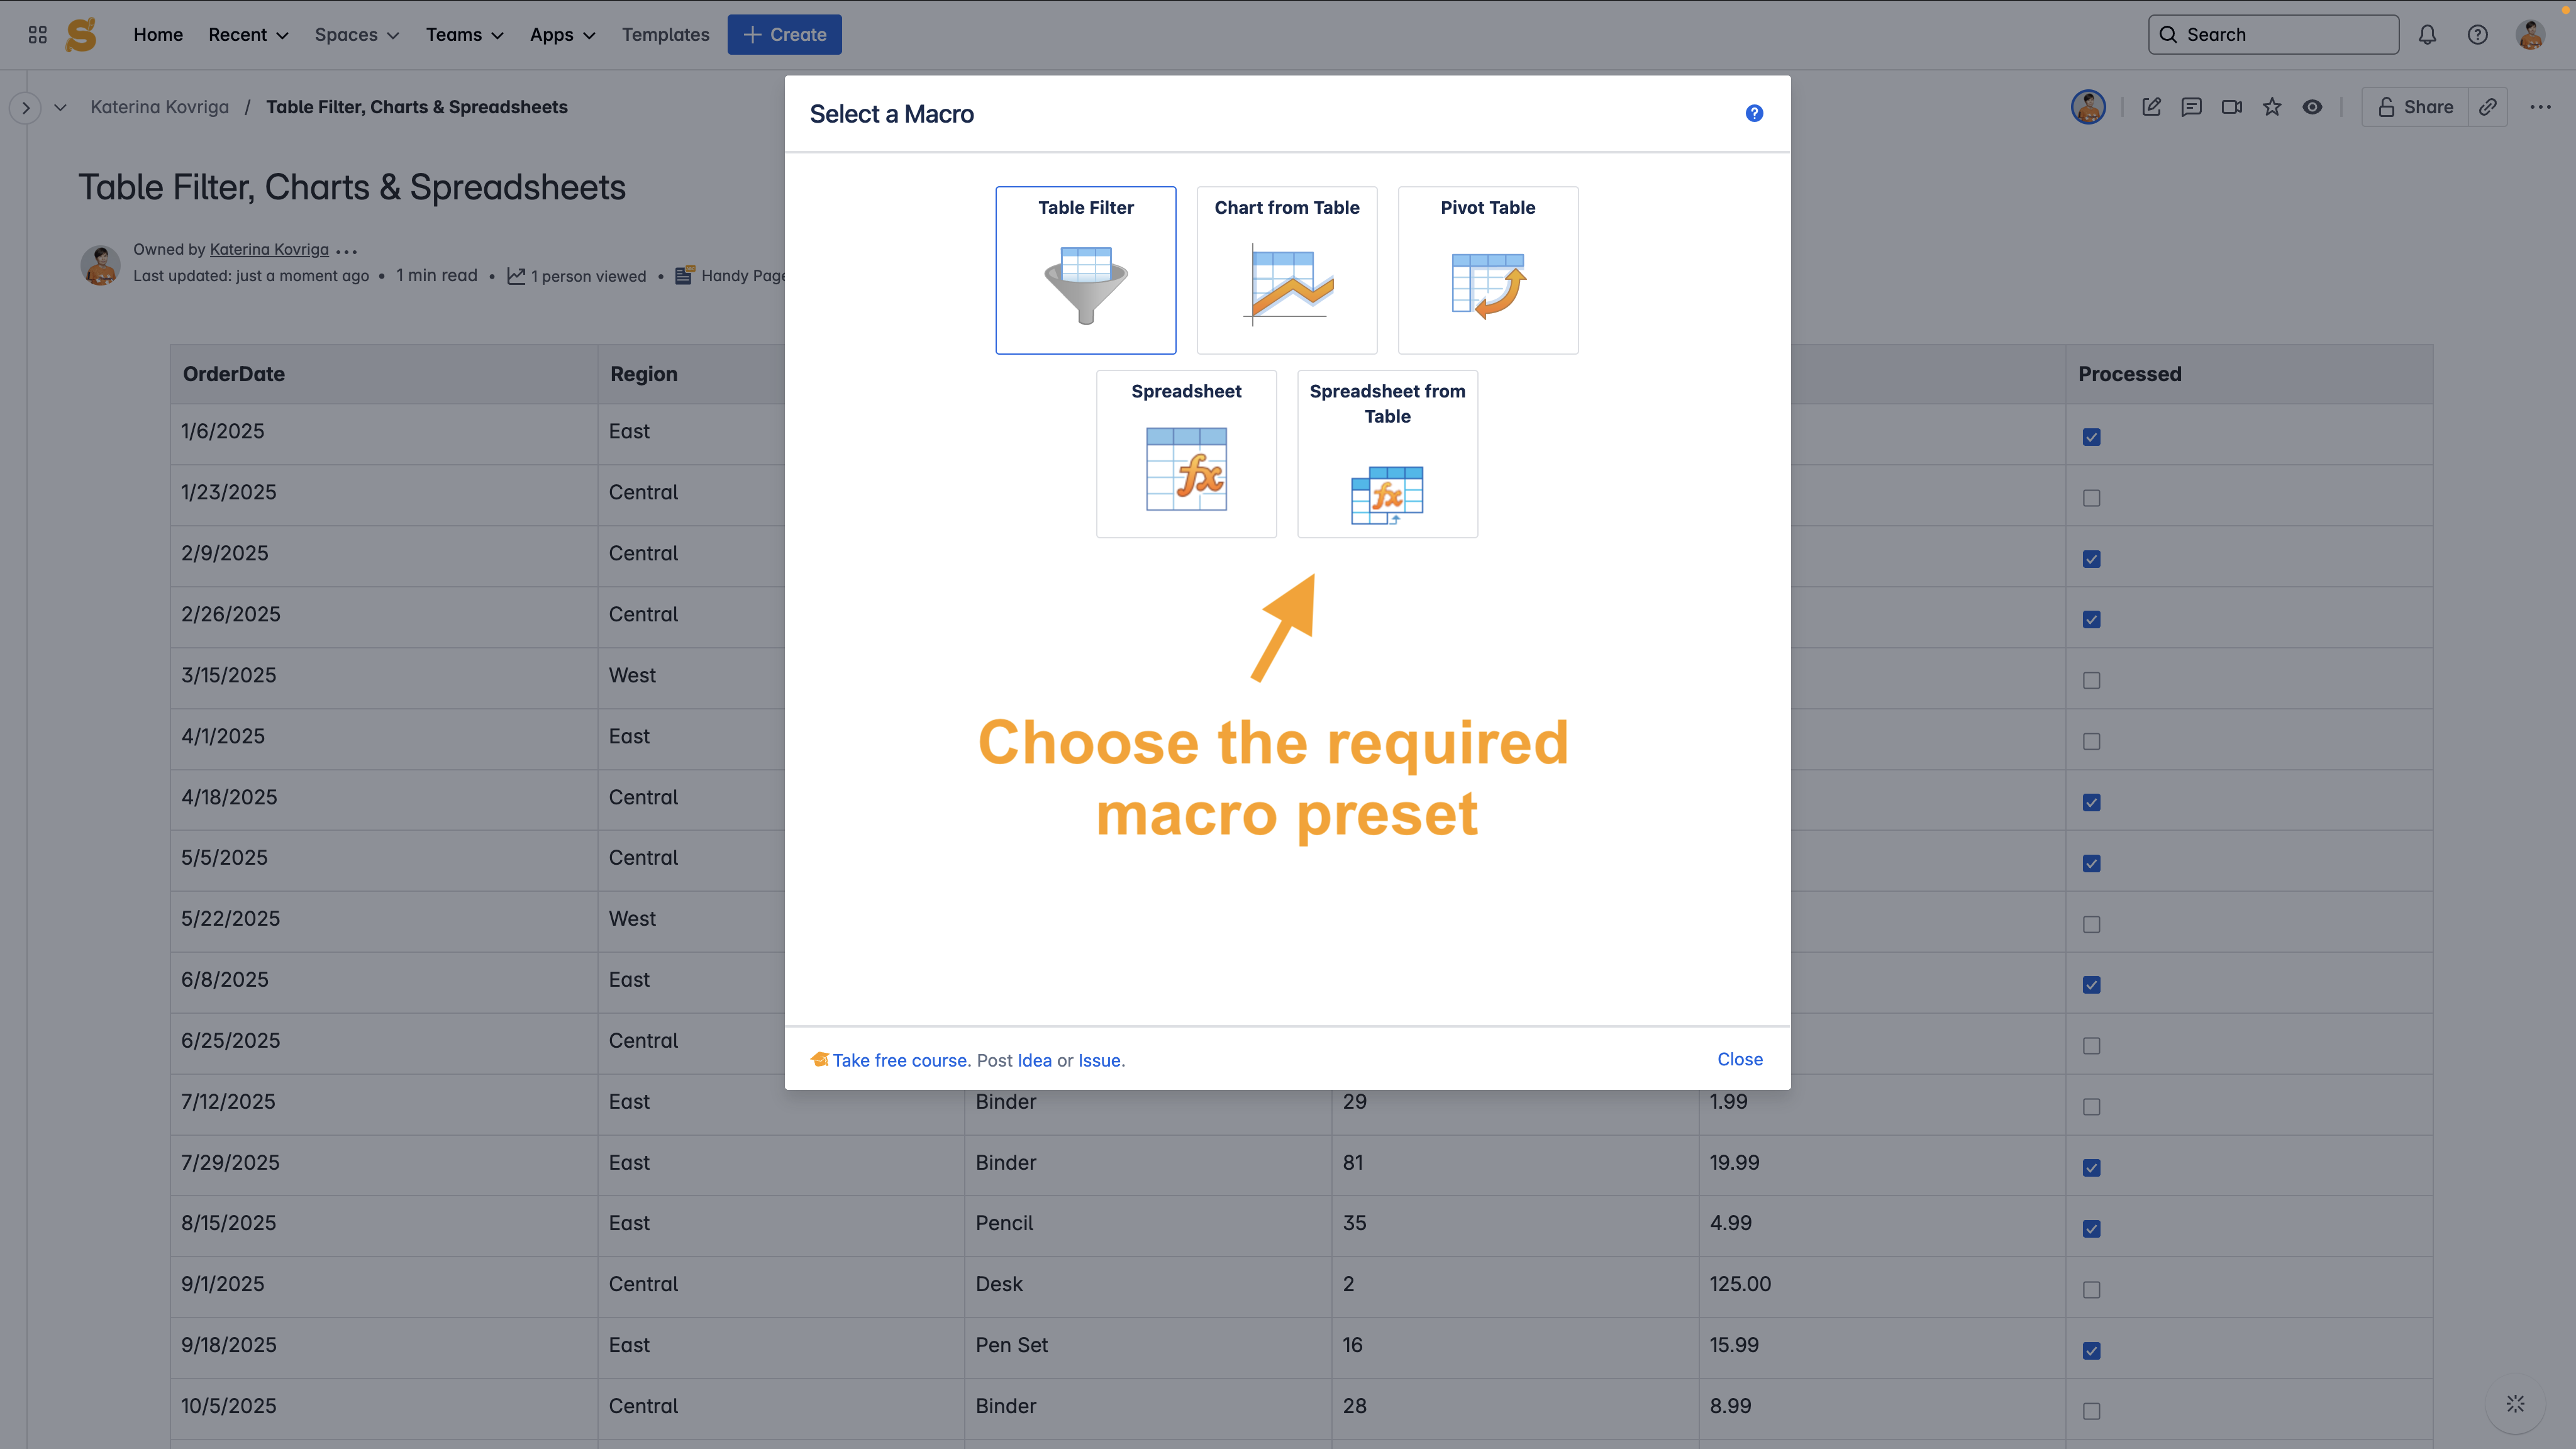
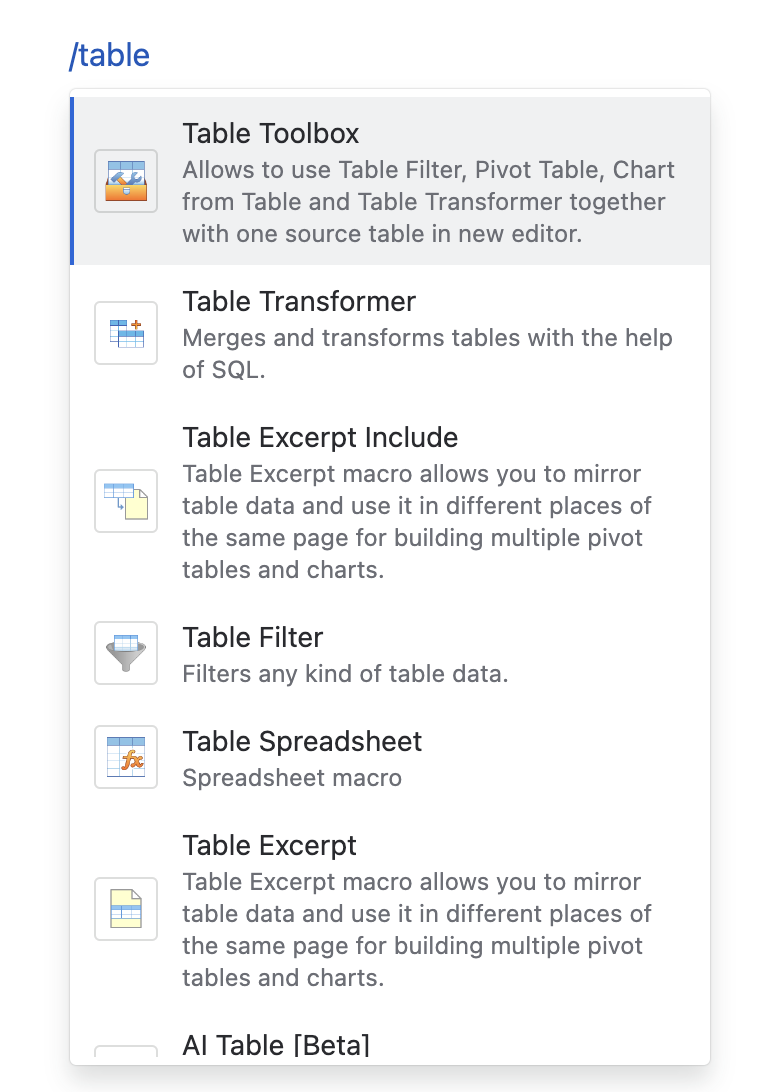
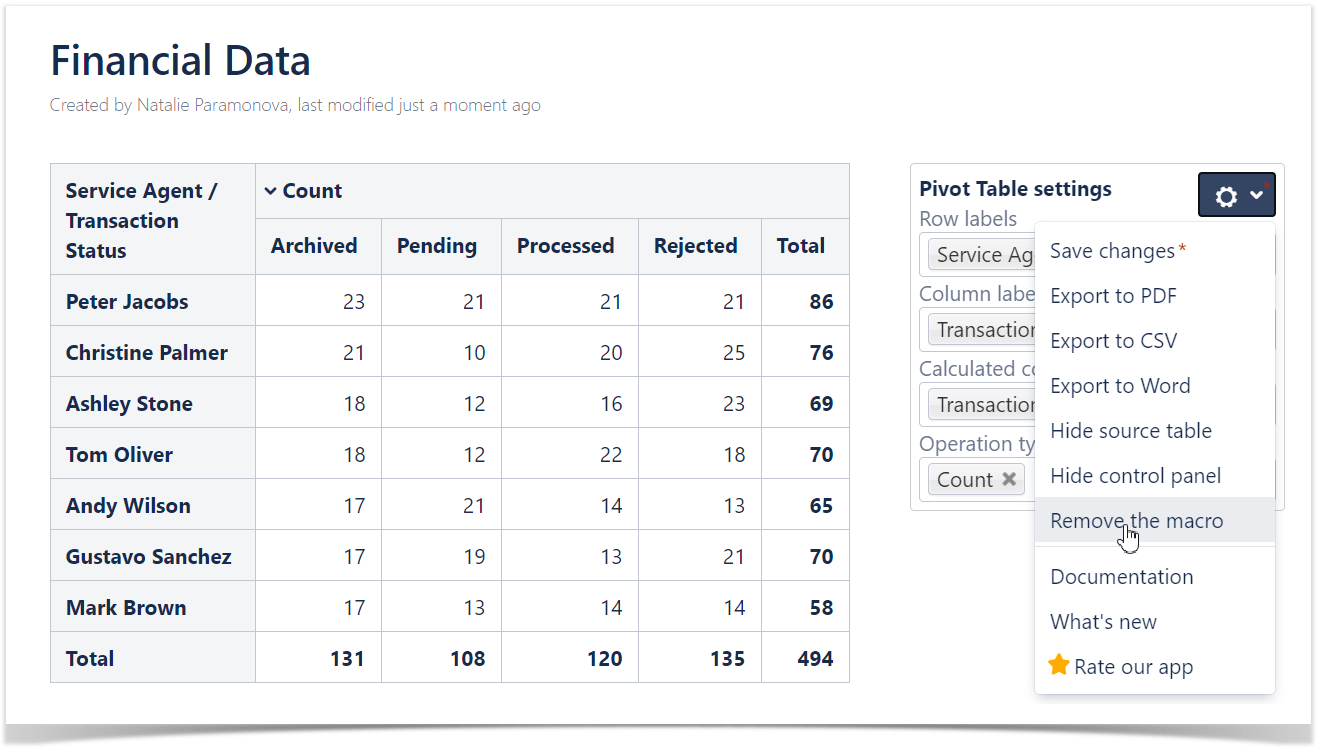
Table Filter, Charts & Spreadsheets for Confluence User guide Current: How to insert and remove macros PDF Download PDF Download page How to insert and remove macros. Current page All pages How to insert and remove macros Read more: How to use the Table Filter macroHow to use the Chart from Table macroHow to use the Pivot Table macroHow to use the Table Transformer macroHow to use the Table from CSV macro Inserting the macros In the page view mode To add macros live (i.e. in view mode):Click the More actions (⋯) menu in the top-right corner of the page.Go to Apps → Use Table Filter App Macros.Choose the required preset and follow the dialog.For example, choose the Table Filter macro and start filtering data in table headers. <div class="handy-tip-dialog wiki-content"> <p><strong>Learn more <a href="/tfac/cloud/table-filtration-42239755.html#Tablefiltration-Quickinlinefiltrationinthepageviewmode">on this page</a> </strong> <strong>.</strong></p><p><span class="confluence-embedded-file-wrapper confluence-embedded-manual-size conf-macro output-inline" data-hasbody="false" data-macro-name="sp-image"><img width="400" class="confluence-embedded-image" src="/tfac/files/cloud/42239631/188615643/1/1725537570258/2020-10-27_09h27_57.png"/></span></p> </div> Utilize the benefits of Excel-like spreadsheets right on your Confluence pages. Try spreadsheets for Confluence now! Manual enteringSwitch Confluence page to the edit mode.Click on the line where you want to insert the macro.Start entering /Table Filter, /Pivot Table, /Chart from Table, /Table Transformer, /Table Toolbox, etc. (for the new editor on Cloud){Table Filter}, {Pivot Table}, {Chart from Table}, {Table Transformer}, {Table Toolbox}, etc. (for the legacy editor on Cloud )From the prompted list of macro choices, select the macro.Place the table within the macro. Selecting in the Select macro formSwitch Confluence page to the edit mode.Click on the line where you want to insert the macro.On the editor pane, click Insert more content -> Other macros.In the Select Macro form, find the macro and insert it on the page.Place the table within the macro. Removing the macros from tablesIn the page view mode (Table Filter, Pivot Table, Chart from Table)Click the cogwheel icon on the filtration panel or on the pivot table or chart control panel.Select the Remove the macro option.Click Remove in the dialog. In the page edit mode (all the macros)Switch Confluence page to the edit mode.Copy the table and paste it outside the macro body.Select the macro and click Remove. ×