Managing Ideas and Tickets in Customer Case
Agents deal with ideas and tickets while working in Customer Case. Here they can browse the available forums, view and comment on the submitted ideas or tickets.
See the next sections for details:
Logging in to Forums
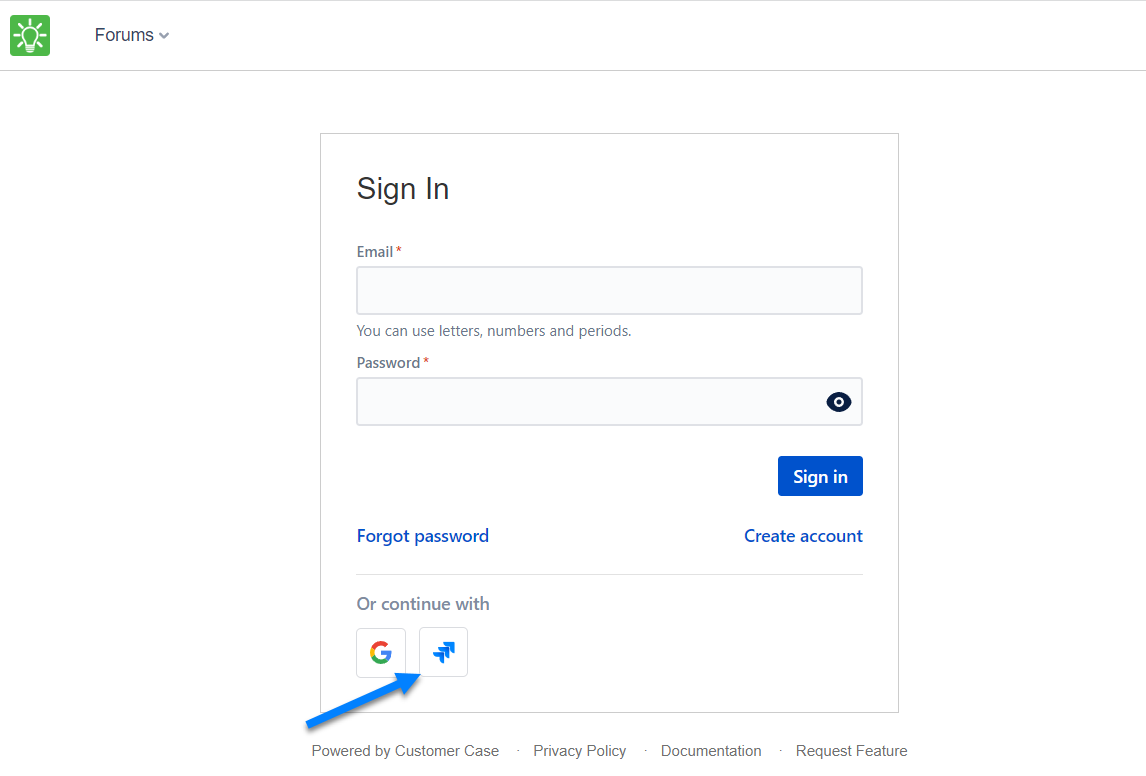
Jira agents can log in to feedback forums with their Jira account.
If you use different authentication options to log in to Customer Case, please consider the following:
- Customer Case will automatically assign the Employee status to you, once you log in to the customer portal of your company with your Jira account. You can also get the Employee status if you sign in to Customer Case with your personal or social account prior to the first authorization with your Jira credentials. This can occur only when your Jira and social accounts share the same email address.
- Nothing will happen if your Jira account and your social accounts are mapped to different email addresses. Depending on the authentication option, you will be treated by Customer Case as different users.
Managing Requests in Customer Case
Viewing and Commenting on Requests
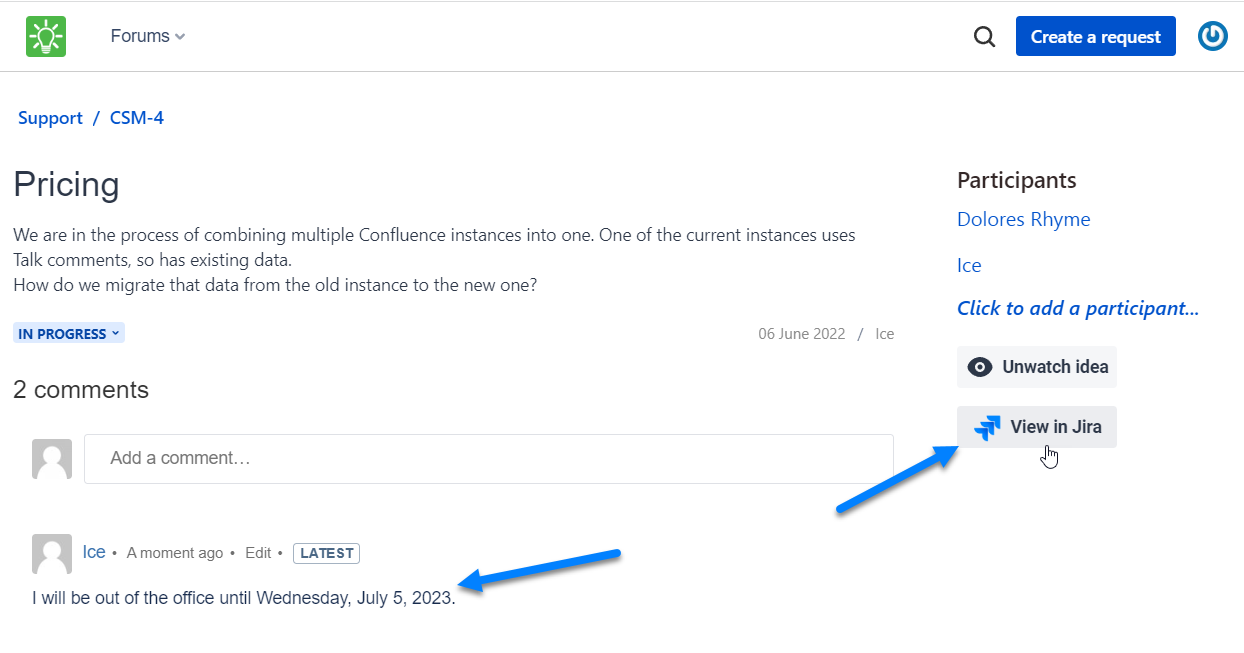
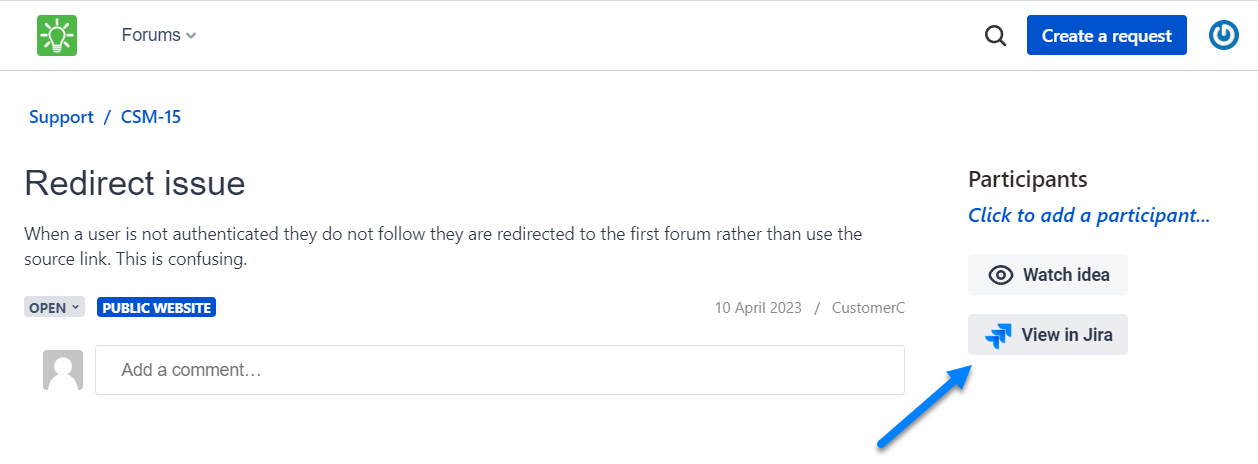
Jira agents can instantly proceed to Jira when viewing a particular request on the forum.
- Open a feedback or support forum.
- Locate and open the request you want to comment on.
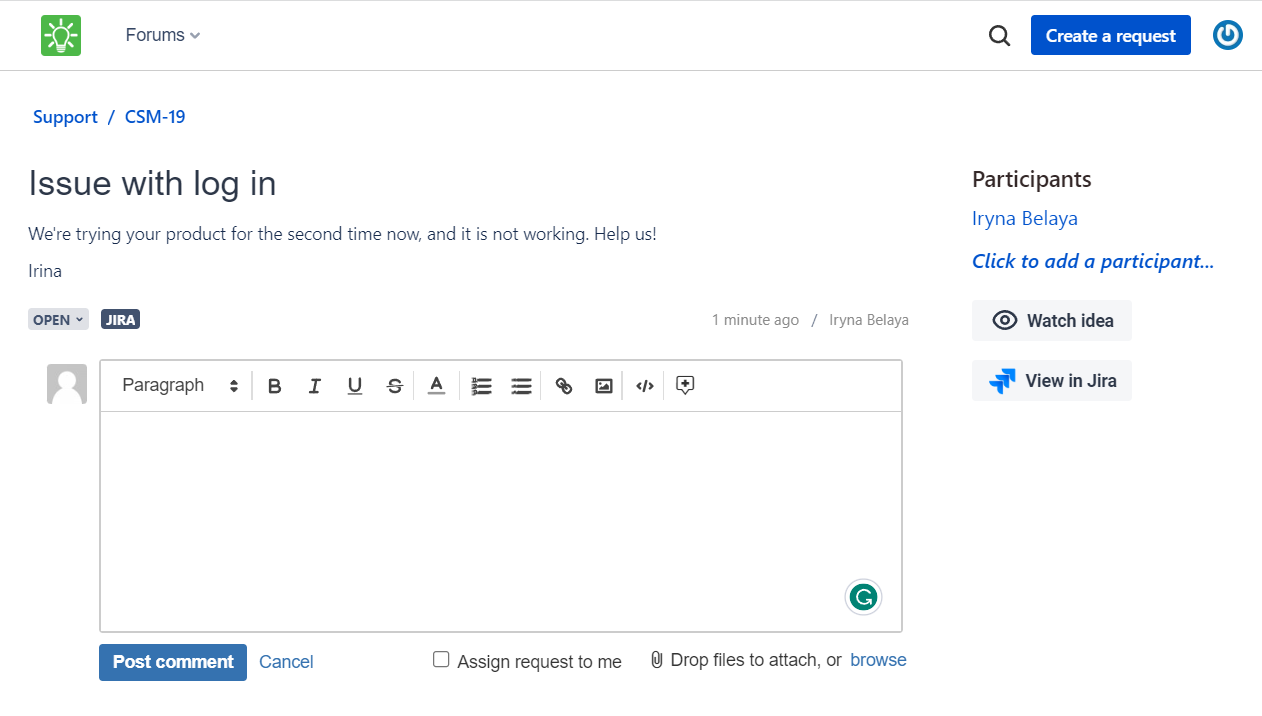
- To comment on a request, enter your comment into the dedicated text area and click Post comment.
- To attach one or multiple files to your comment, click the browse link and select files or drag files to the page. You can also insert images into comments by pasting them from the clipboard.
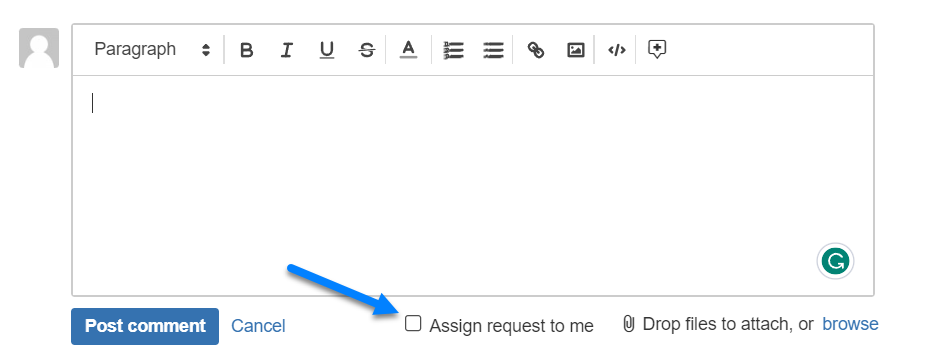
When you open requests that are assigned to other agents and add a reply, you can assign the request to yourself by checking the corresponding option:
Viewing Requests in Jira
- Open the request in Customer Case.
- Click the View in Jira button . You will instantly transition to Jira.
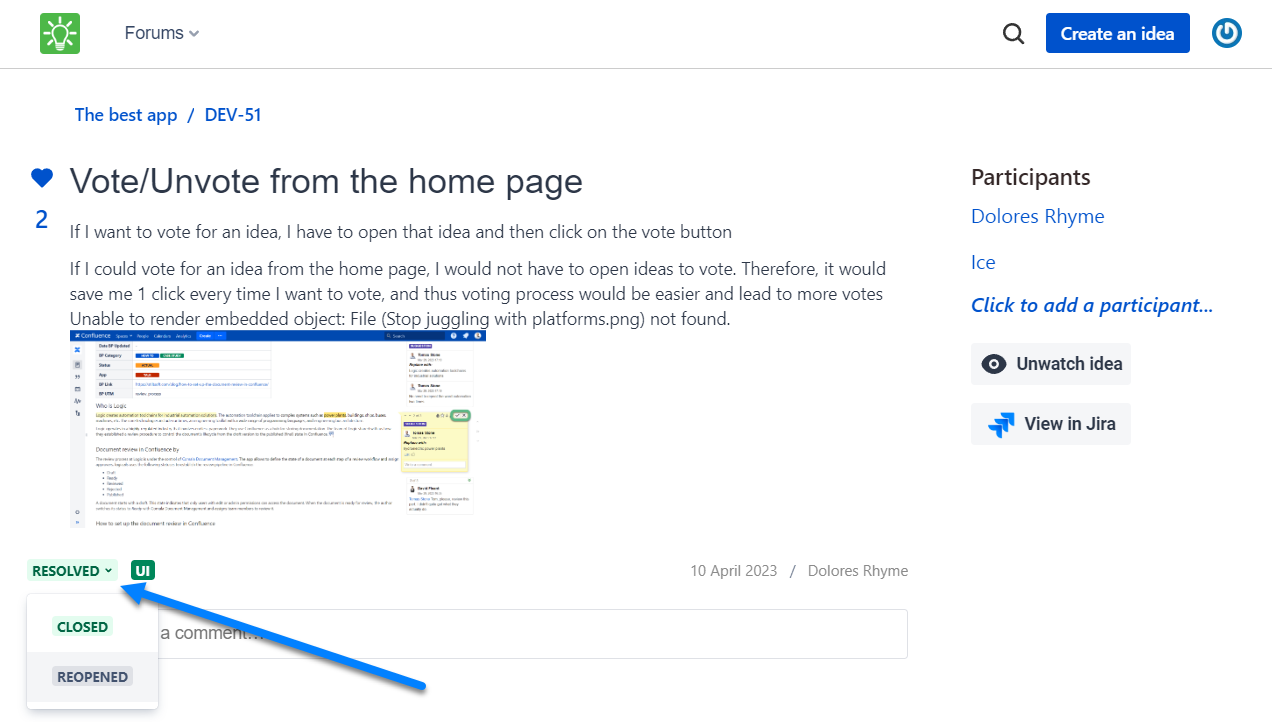
Changing the Status of Requests
You can change the status of issues in projects that do not have transition screens with the required fields. If the issue transition requires the definition of values in required fields, please perform this transition in Jira directly.
Adding Participants
Customer Case allows you to add participants for the submitted feature and support requests. On support forums, both the author of the request and support agents can add participants to the existing requests, on feedback forums only support agents can do this.
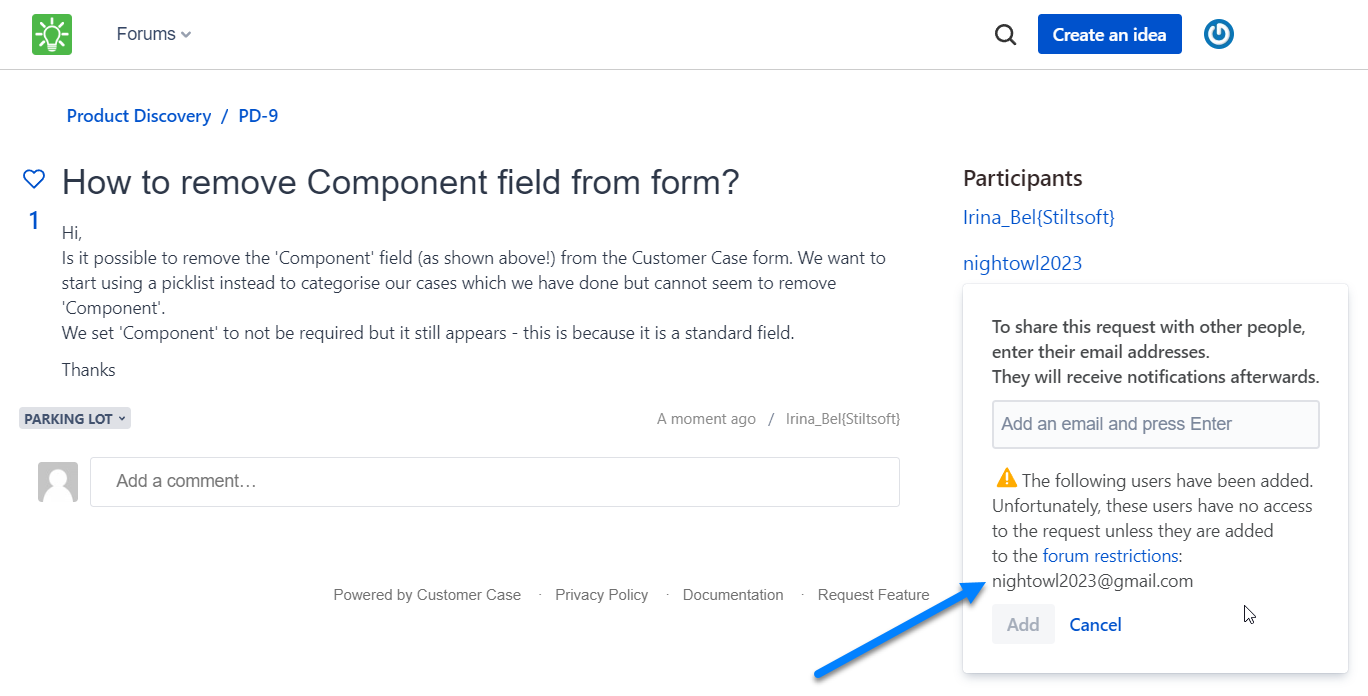
All the added participants receive a notification with the information about the person who added them as participants and the request information. If the person does not have an account in Customer Case, he or she will be prompted to sign up for the service. When adding participants on forums with access restrictions, Customer Case validates whether the email of the participant satisfies the defined access restrictions of the forum or not. If not, the notification is sent to the specified email address but the corresponded warning is displayed to the person who adds participants.
Now the users can view all the support requests that they submitted and the requests which they were added as participants into.
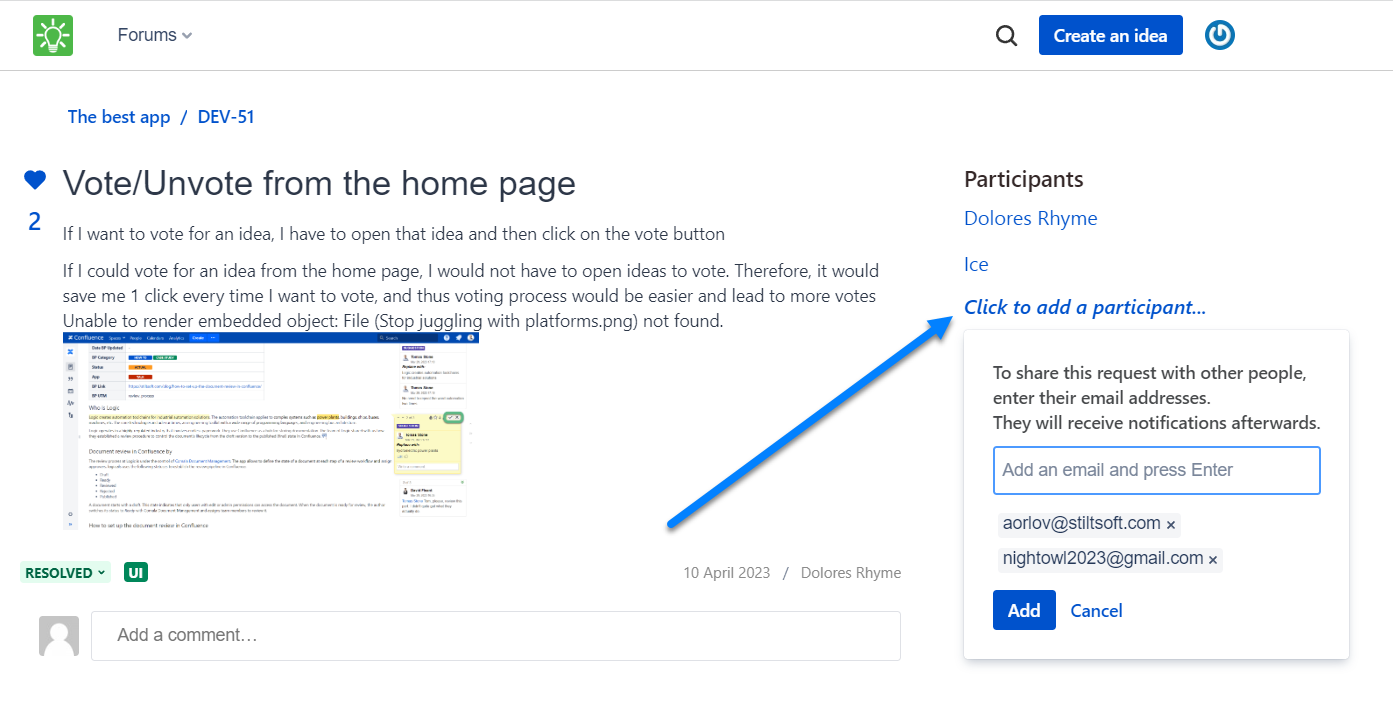
- In the right part of the screen, locate the Click to add a participant link and click it.
- Enter the email address of a person you want to add as a participant and press Enter.
- Click Add once complete.
When adding participants on forums with access restrictions, Customer Case validates whether the email of the participant satisfies the defined access restrictions of the forum or not. If not, the notification is sent to the specified email address but the corresponded warning is displayed to the person who adds participants.
Deleting Participants
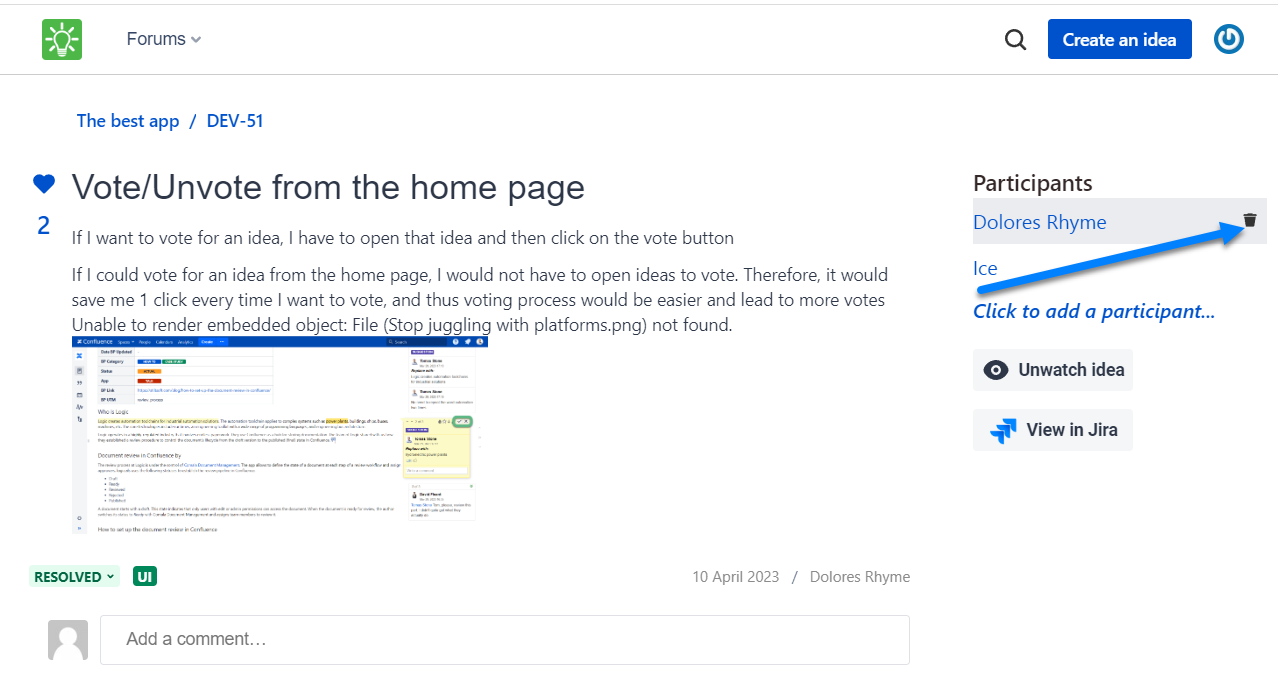
- Hover over a participant you want to delete in the Participants section.
- Locate the bucket icon and press it.
Pinning a Comment to the Top
This functionality is only available for feedback forums.
Sometimes you may find it necessary to pin some comment to the top of the comment list, so everyone who opens this idea can view the comment with actual information about it. It may be an official response from your team or a description of the solution or workaround that may help.
You can pin only one comment to the top of the list. If there is a comment already pinned to the top, you can either unpin it or pin another comment that will replace the current one. You can pin the comments of Jira agents and customers.
- Open the idea.
- Locate the comment you want to pin to the top of the list.
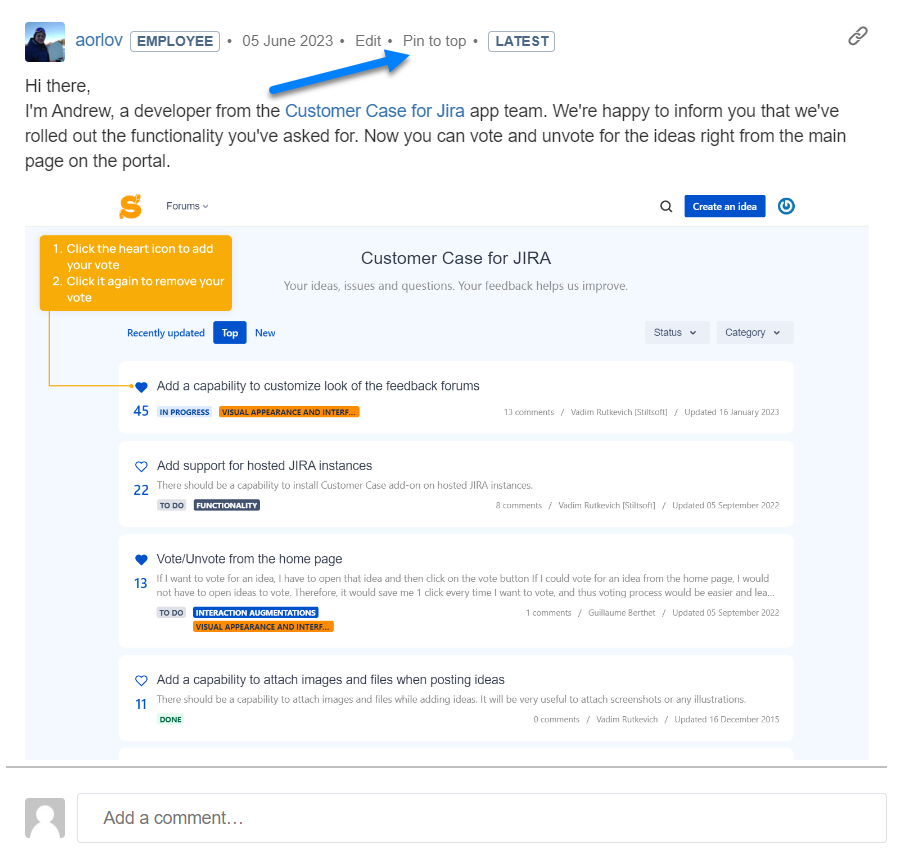
- Click Pin to top.
- Confirm the action.
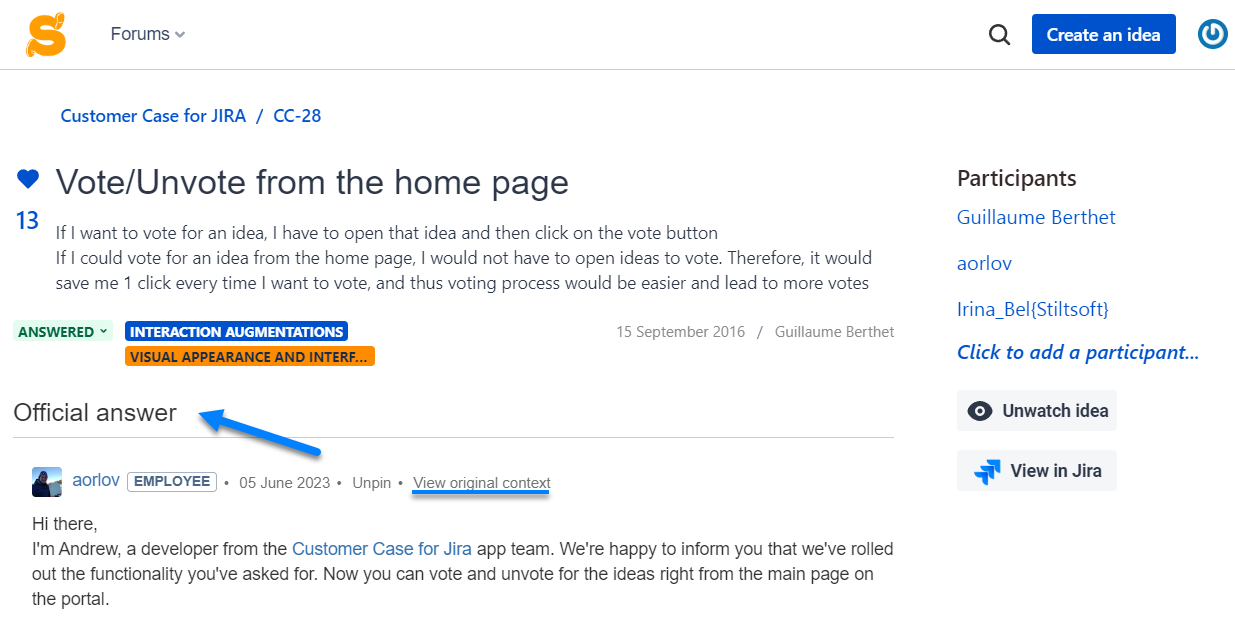
- The Official answer section with the comment appears.
- To unpin the comment, click Unpin.
If the thread of comments is too long, but you need to locate where the pinned comment was posted you can view the comment in its original context. Click View original context.
Inserting the Automatic Signature
You can add the automatic signature which will be inserted into your replies in Customer Case. You can use text, links, and images in your automatic signature.
- Expand the text area to write a reply to a customer.
- Enter the text snippet which you want to use as an automatic signature.
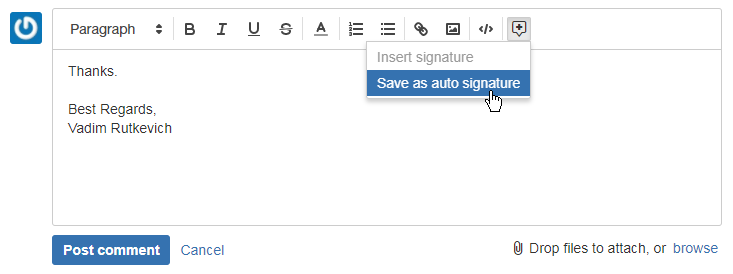
- Click the Canned responses icon.
- From the contextual menu, select Save as auto signature.
Customer Case will automatically insert this signature into all replies you write to customers on support and feedback forums.
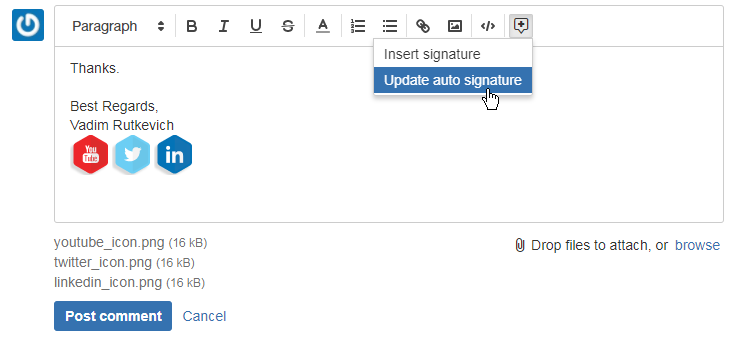
If you want to modify the saved signature, enter a new text snippet. Then click the Canned responses icon and select Update auto signature.
Customer Case will update your automatic signature with the new variant.
Editing Ideas and Comments in Customer Case
Agents with Jira accounts can edit descriptions of all posted ideas, tickets, and comments.
To edit a request's description, you need:
- Open a request, hover over its description, and click it.
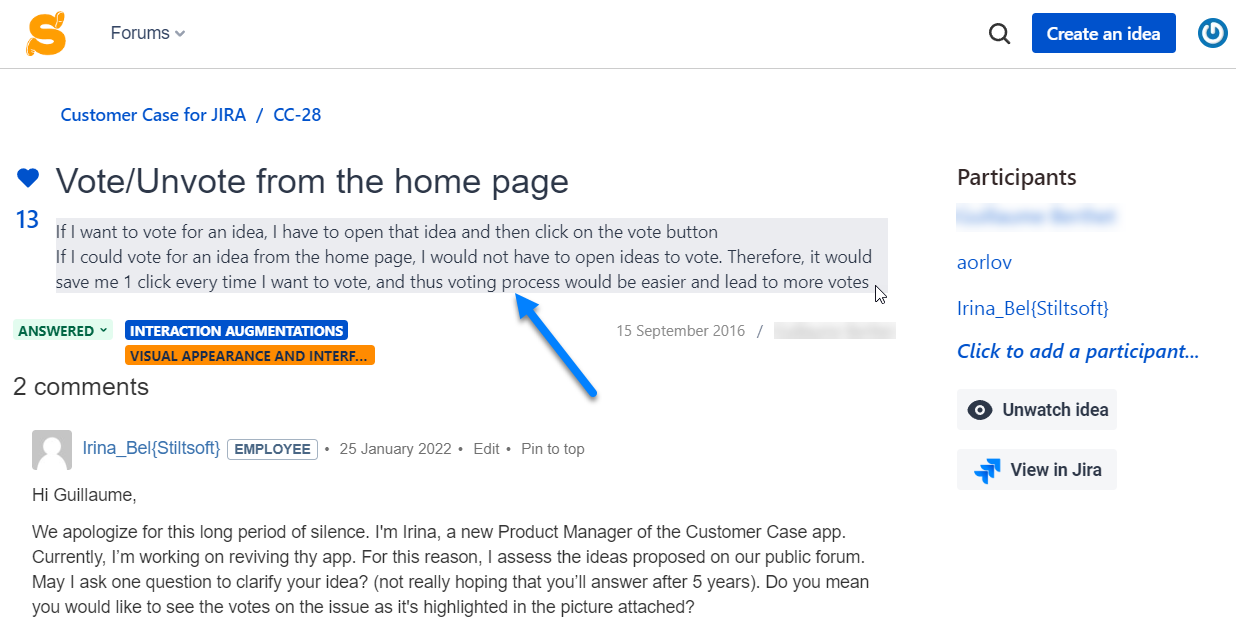
- Update the idea or ticket description or comment.
- Click Save.
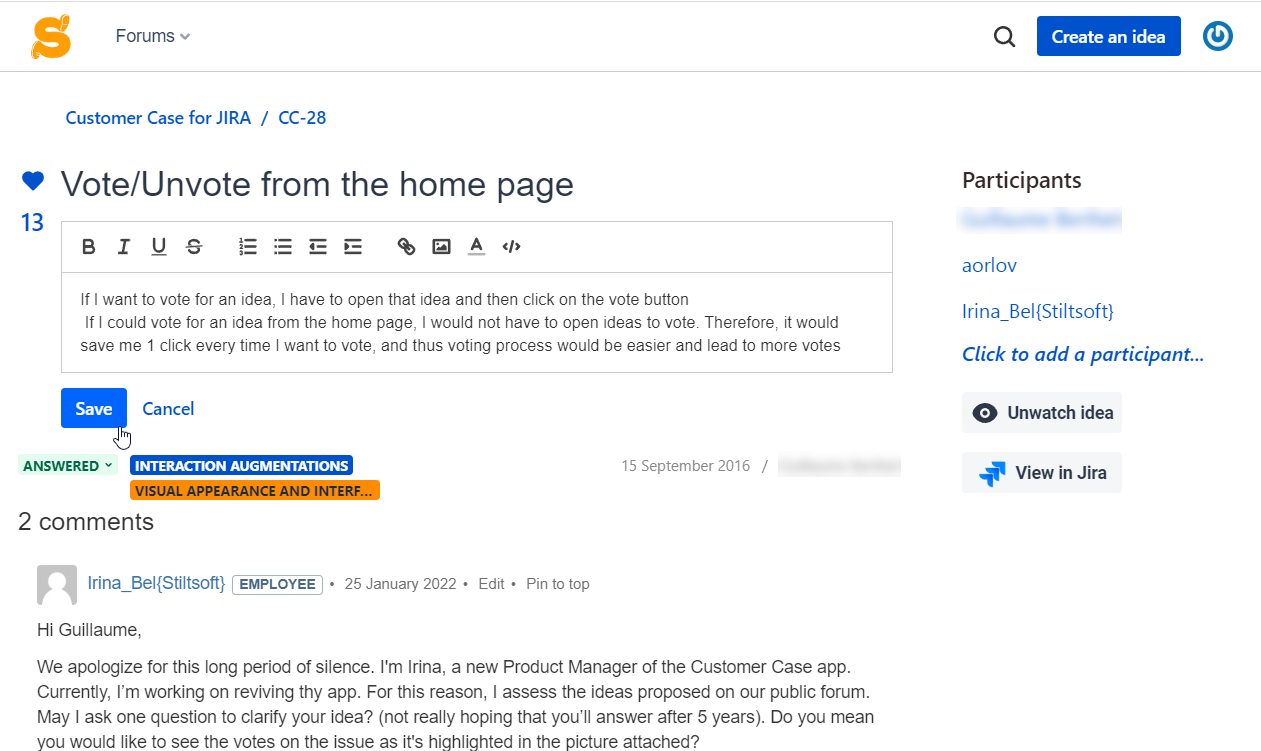
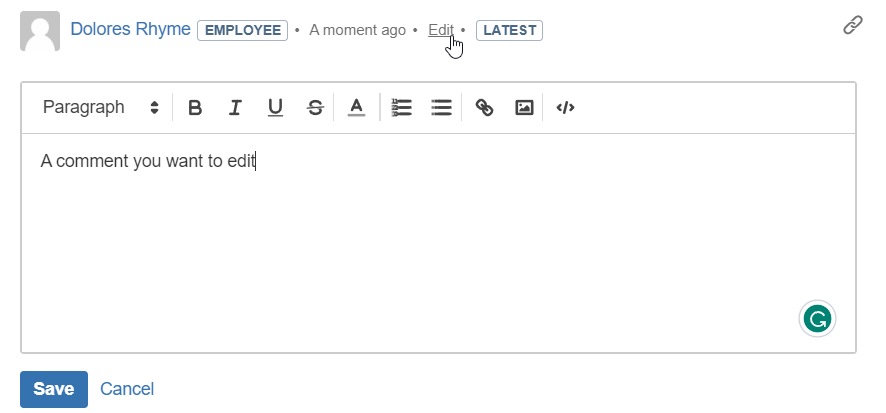
To edit your comment, you need:
Agents can also edit comments and a description of ideas and tickets while viewing them on Jira side.
Deleting Comments and Issues
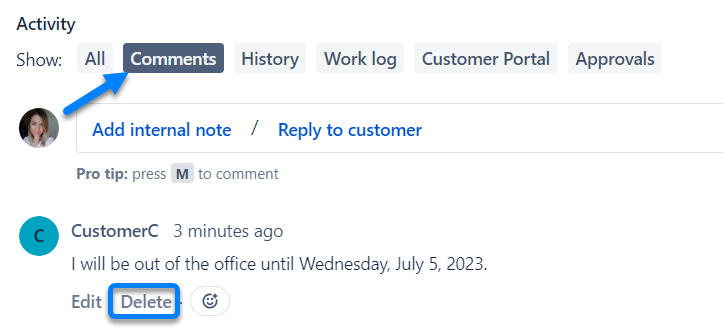
To delete a comment on a portal, you need:
Check with your Jira admin if you have the Delete All Comments permission in the relevant Jira project to perform this operation.
To delete an issue you need to
- Open a request in Jira
- Open the Issues list
- Find the issue you want to delete
- Find the dropdown menu on the issue
- Select the Delete option
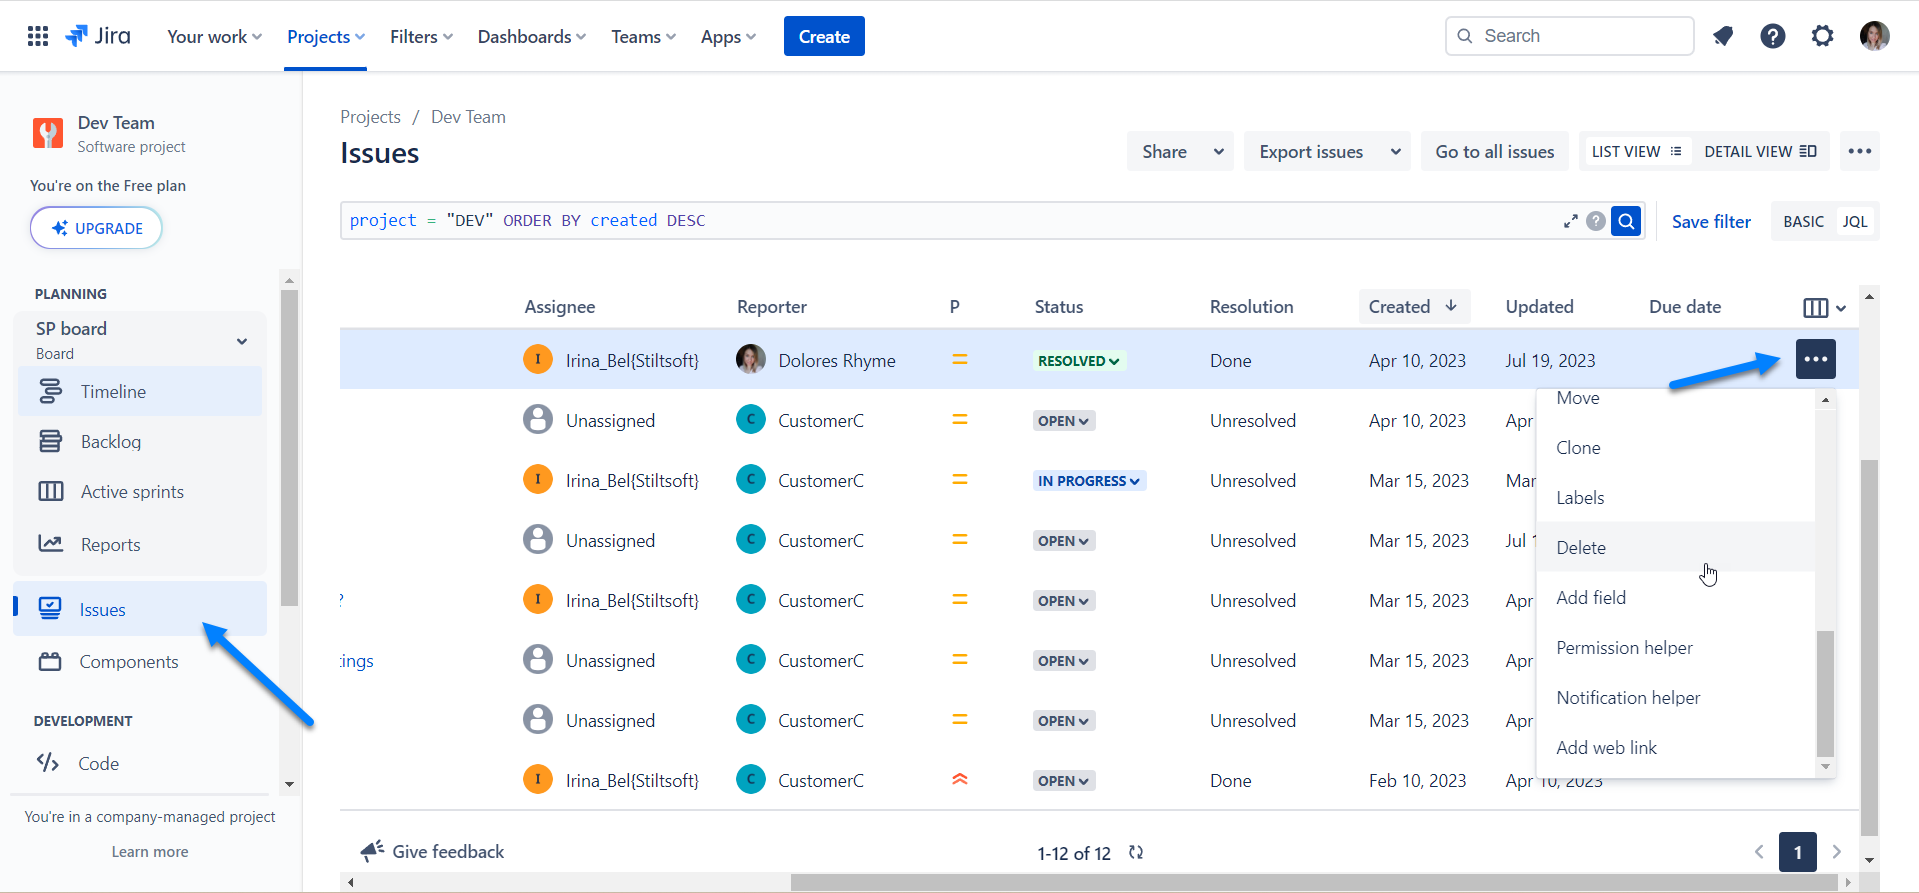
Check with your Jira admin if you have the Delete Issues permission in the relevant Jira project to perform this operation.
